
Build Your First Bot
# Build Your First Bot
— This article helps you understand the recommended path for building a usable bot from scratch: prepare knowledge first, then build the bot, and finally verify and publish.
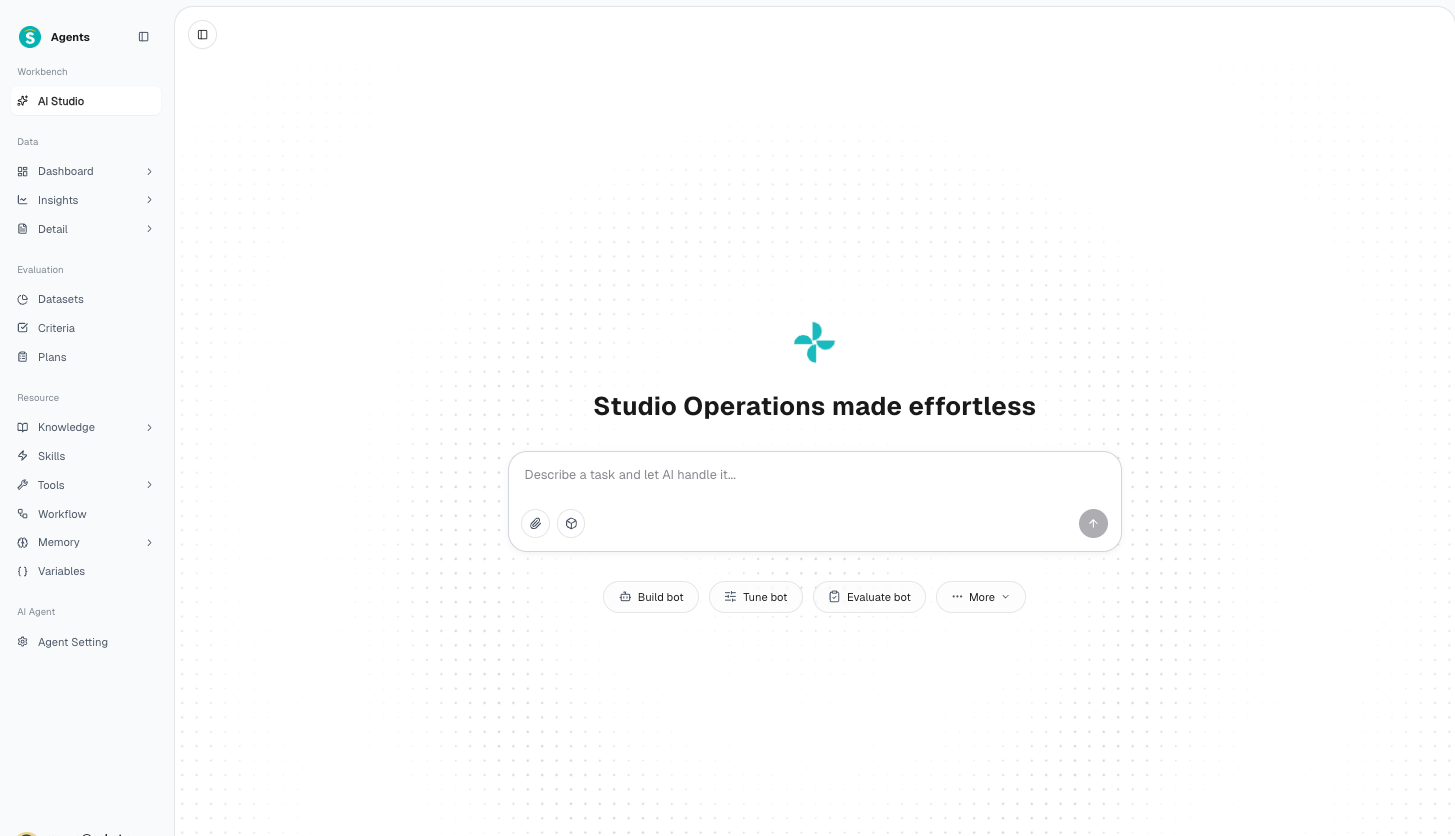
# 1. What Quick Build Does
Before you build your first bot, we recommend understanding the suggested onboarding order:
- Use case: You've just onboarded the product and want to quickly get a bot running that can serve customers.
- Purpose: Complete "prepare knowledge → build the bot → verify and publish" via the shortest path, avoiding the feeling of not knowing where to start.
# 2. Recommended Build Path
# 1. Step 1: Upload knowledge to the Knowledge Base first
A bot's answers rely on knowledge, so we recommend preparing knowledge in the Library first:
- Go to "Library › Knowledge › Knowledge Base" and create a knowledge base.
- Upload business knowledge using QA questions, articles, files, web pages, tables, and more.
- See Knowledge Base for details.
# 2. Step 2: Build the bot (choose either method)
- Build in AI Studio: Best for wanting AI to help you build and lower the barrier. Go to "AI Studio › Run AI Studio," click "Build a Bot" or describe your needs; after AI parses them, it generates the configuration as recommendation cards for you to confirm item by item.
- Build manually in Agent Management: Best for wanting to configure everything yourself. Go to "Agent Management › Agent Setting," click "Create Agent," and manually fill in information, prompts, bind knowledge, and so on.
Both methods build the same bot and can be mixed: use the AI Studio to build the skeleton first, then go to Agent Setting for fine-tuning.
# 3. Step 3: Verify, then publish
- Run a few test chats in the AI Studio, or click "Debug" on the Agent Setting page to verify.
- Once confirmed, click "Publish"; the system automatically runs a configuration check.
- After publishing succeeds, you can deploy the bot to reception channels to serve customers (see the next section).
# 3. Deploy
After a bot is published, it does not automatically start serving customers—you must also select it in the reception settings of the corresponding channel. A bot can be deployed to three types of channels—Online Service, Call Center, and Ticket Center—and you only need to configure the channels you have actually enabled.
# 3.1 Online Service
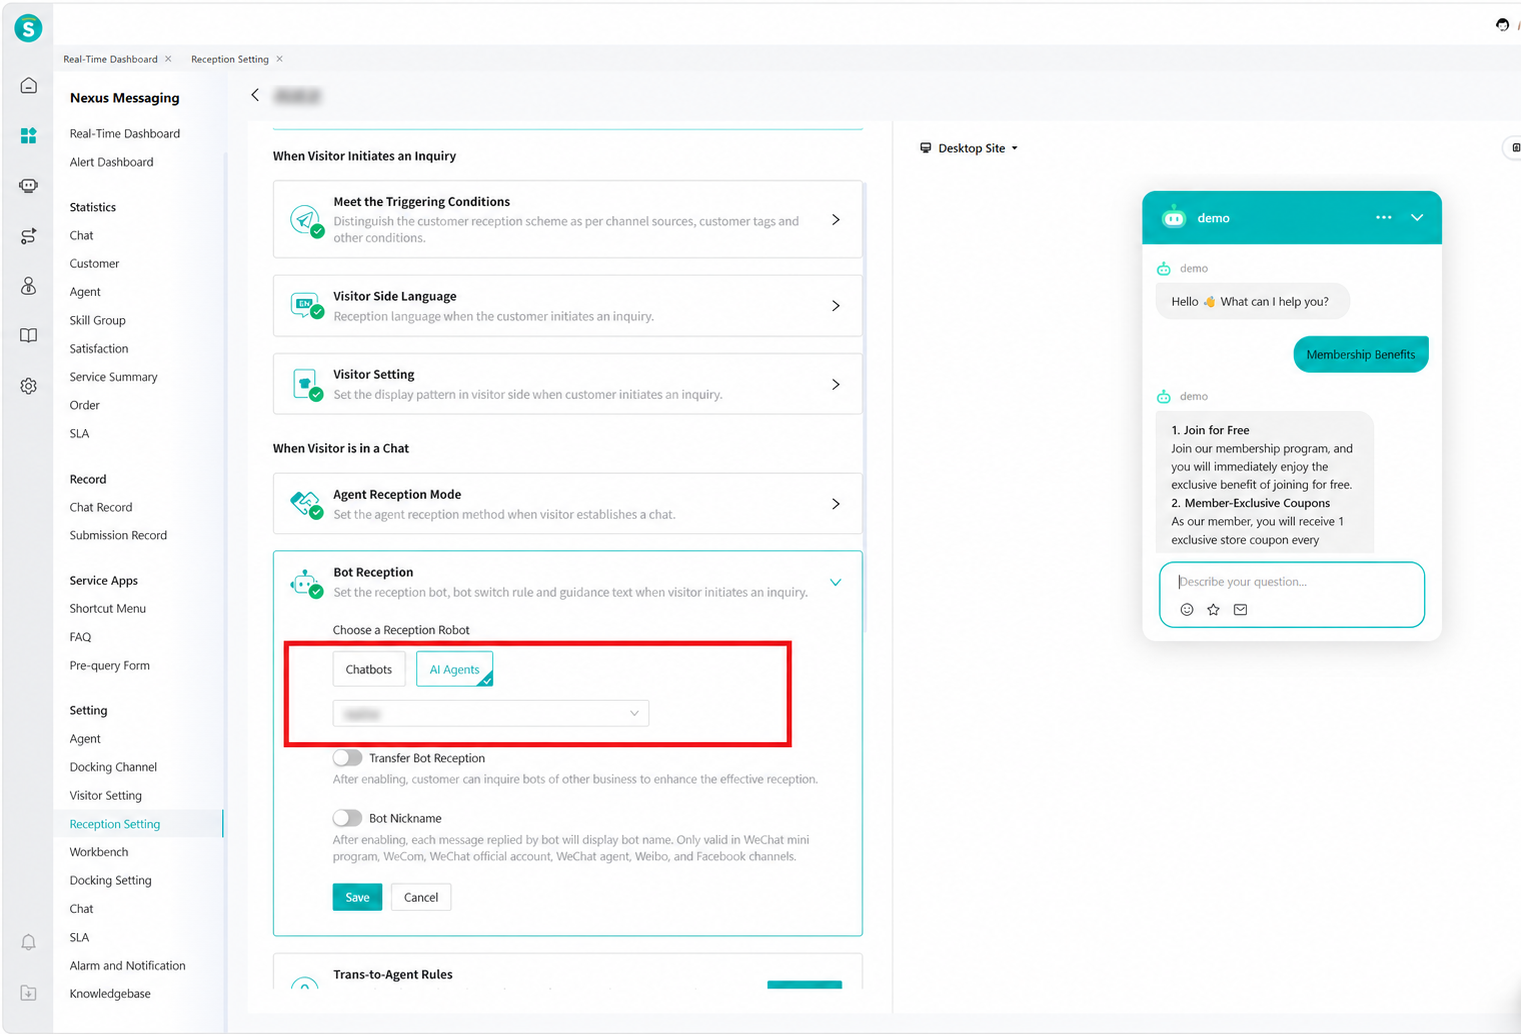
- In "Online Service › Settings › Reception Plan Settings › Bot Reception," select your published bot as the reception bot.
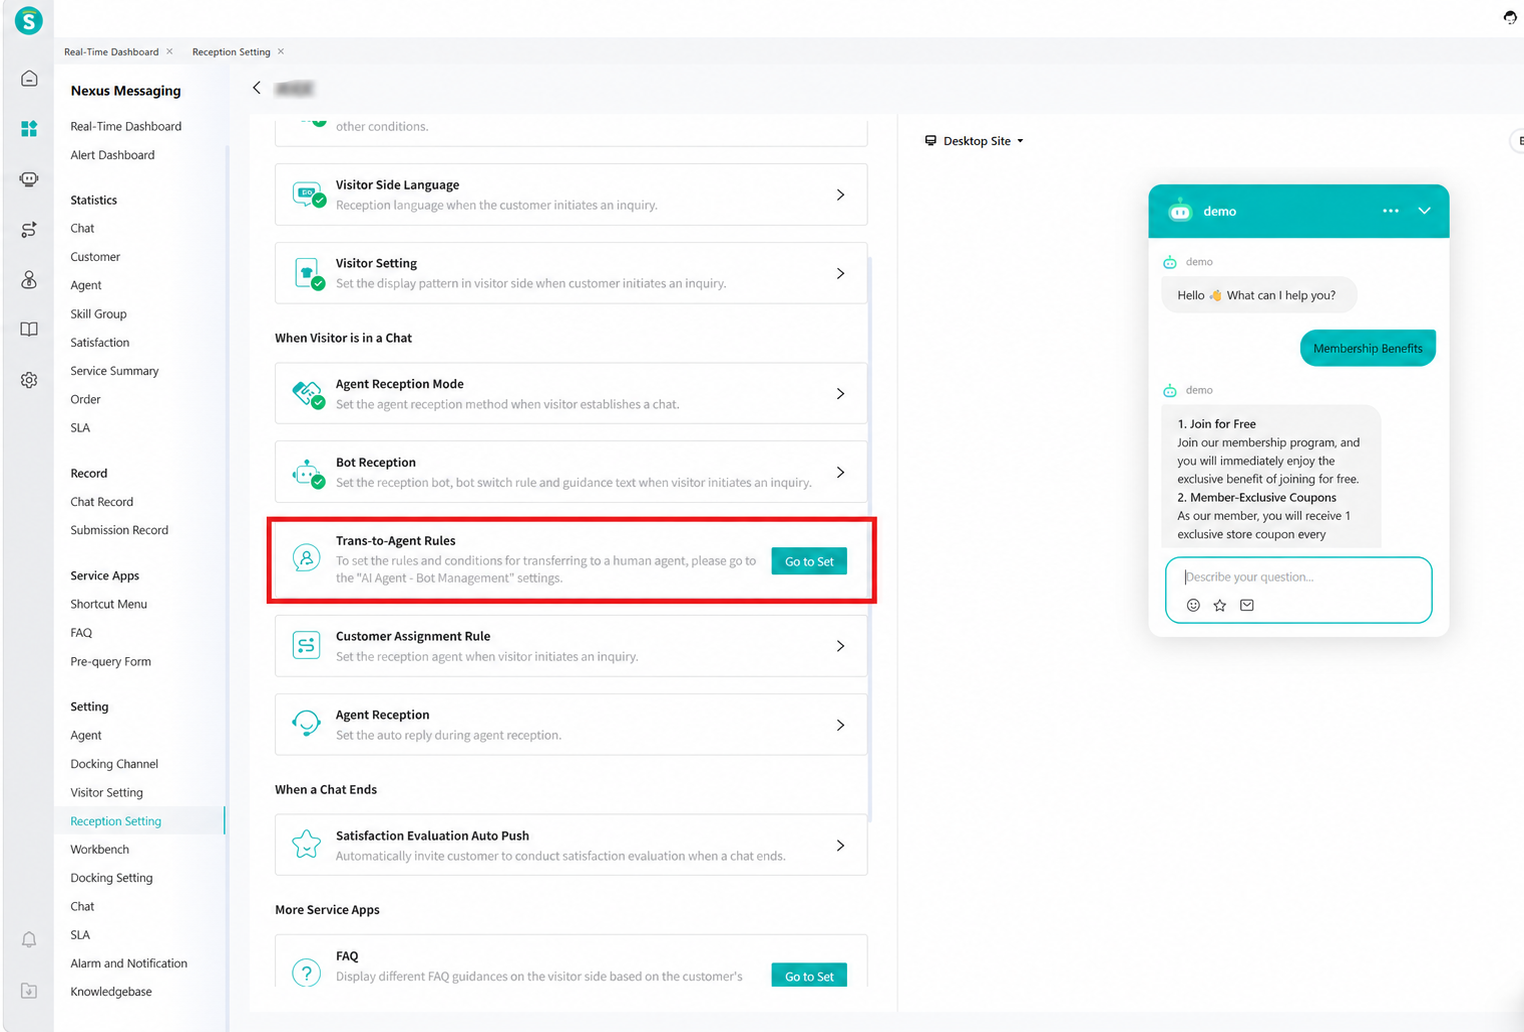
- In "Online Service › Settings › Reception Plan Settings › Transfer-to-Human Rules," set the trigger rules for the bot to transfer to a human agent.
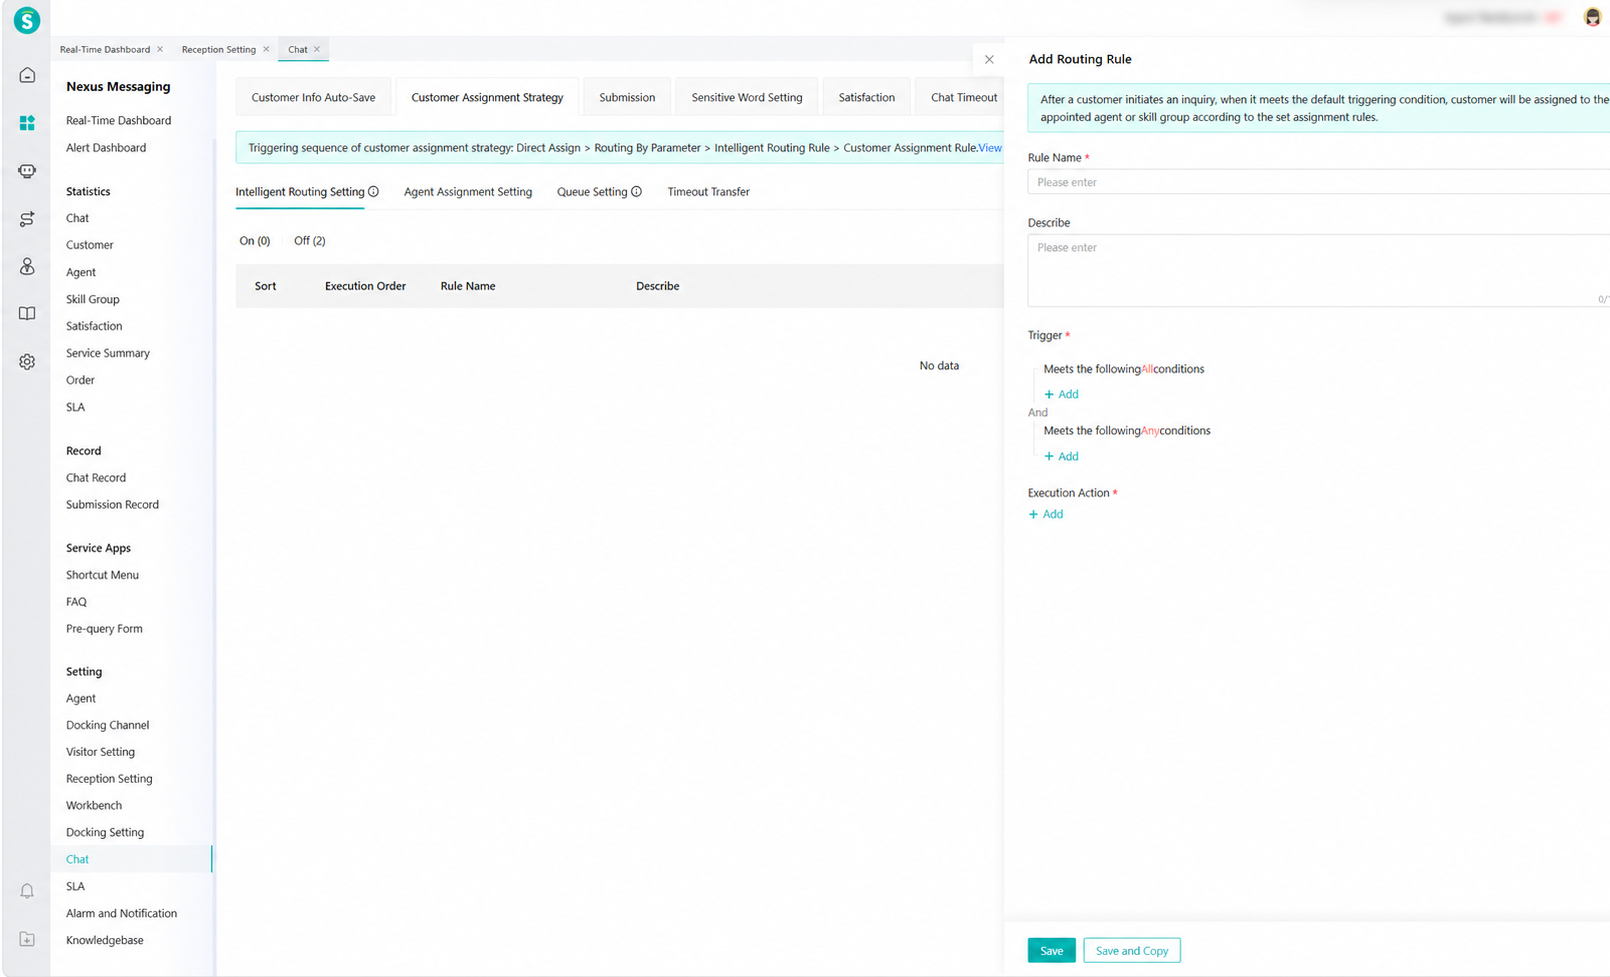
- In "Online Service › Settings › Conversation Settings › Customer Assignment Strategy," set the agents for routing: when a customer initiates an inquiry and meets the preset trigger conditions, the customer is assigned to a designated agent or skill group according to the assignment rules.
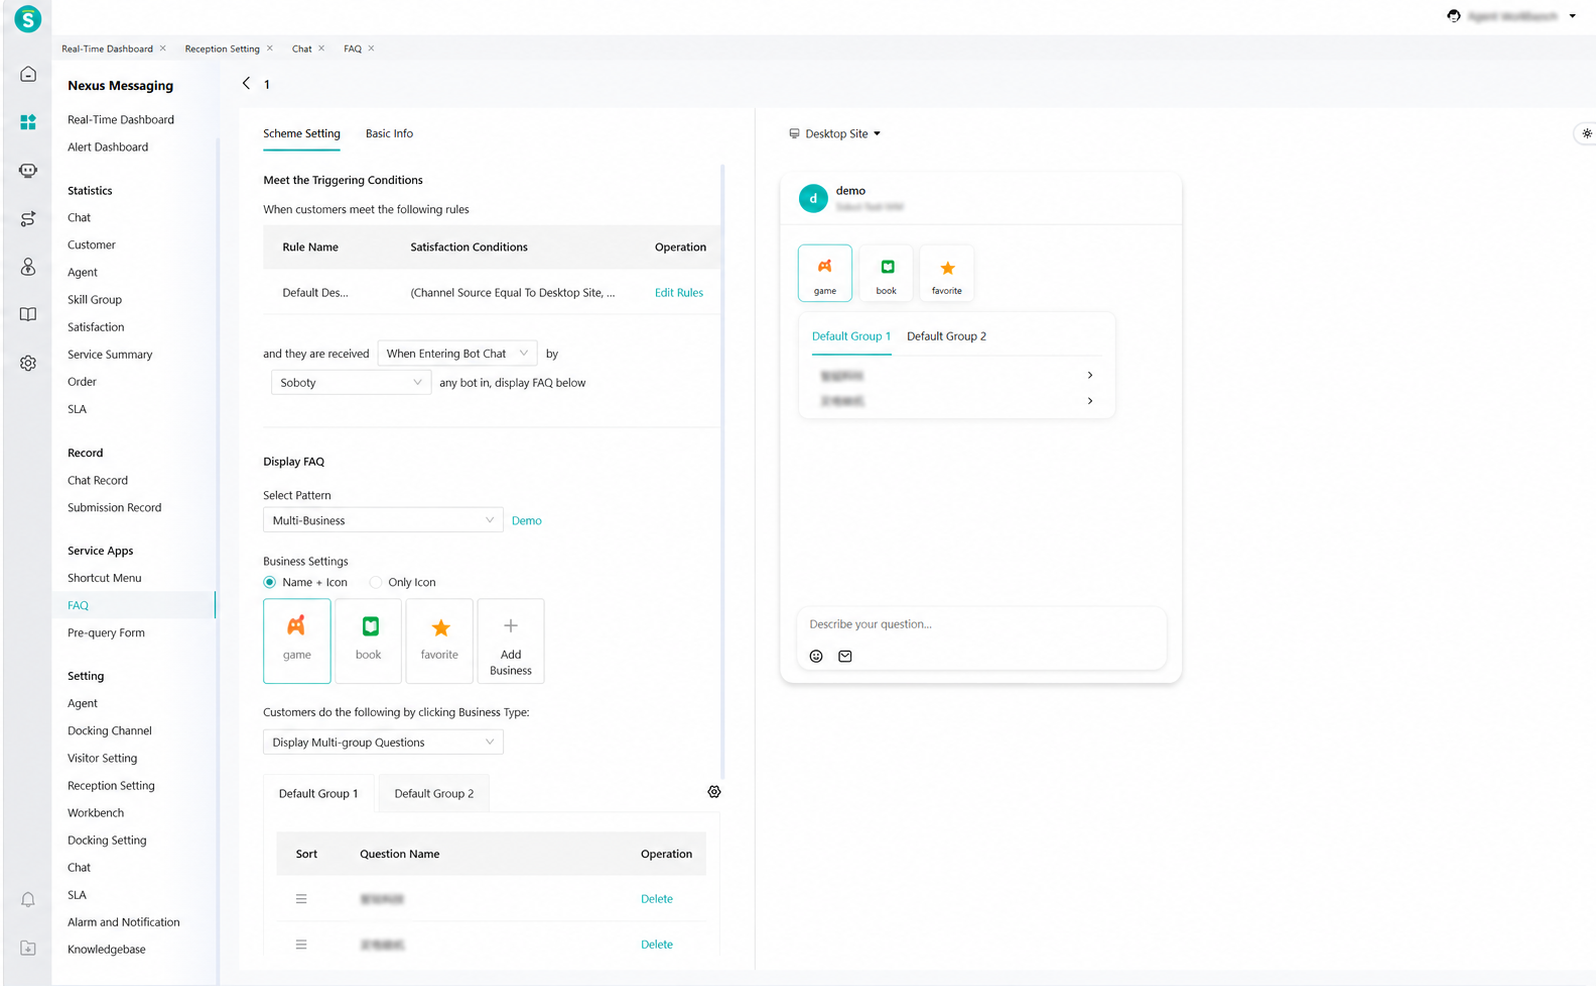
- In "Online Service › Service Apps › FAQ › FAQ Plan," configure personalized FAQs: provide tailored FAQ guidance based on the customer's identity and their stage in the conversation.
# 3.2 Call Center
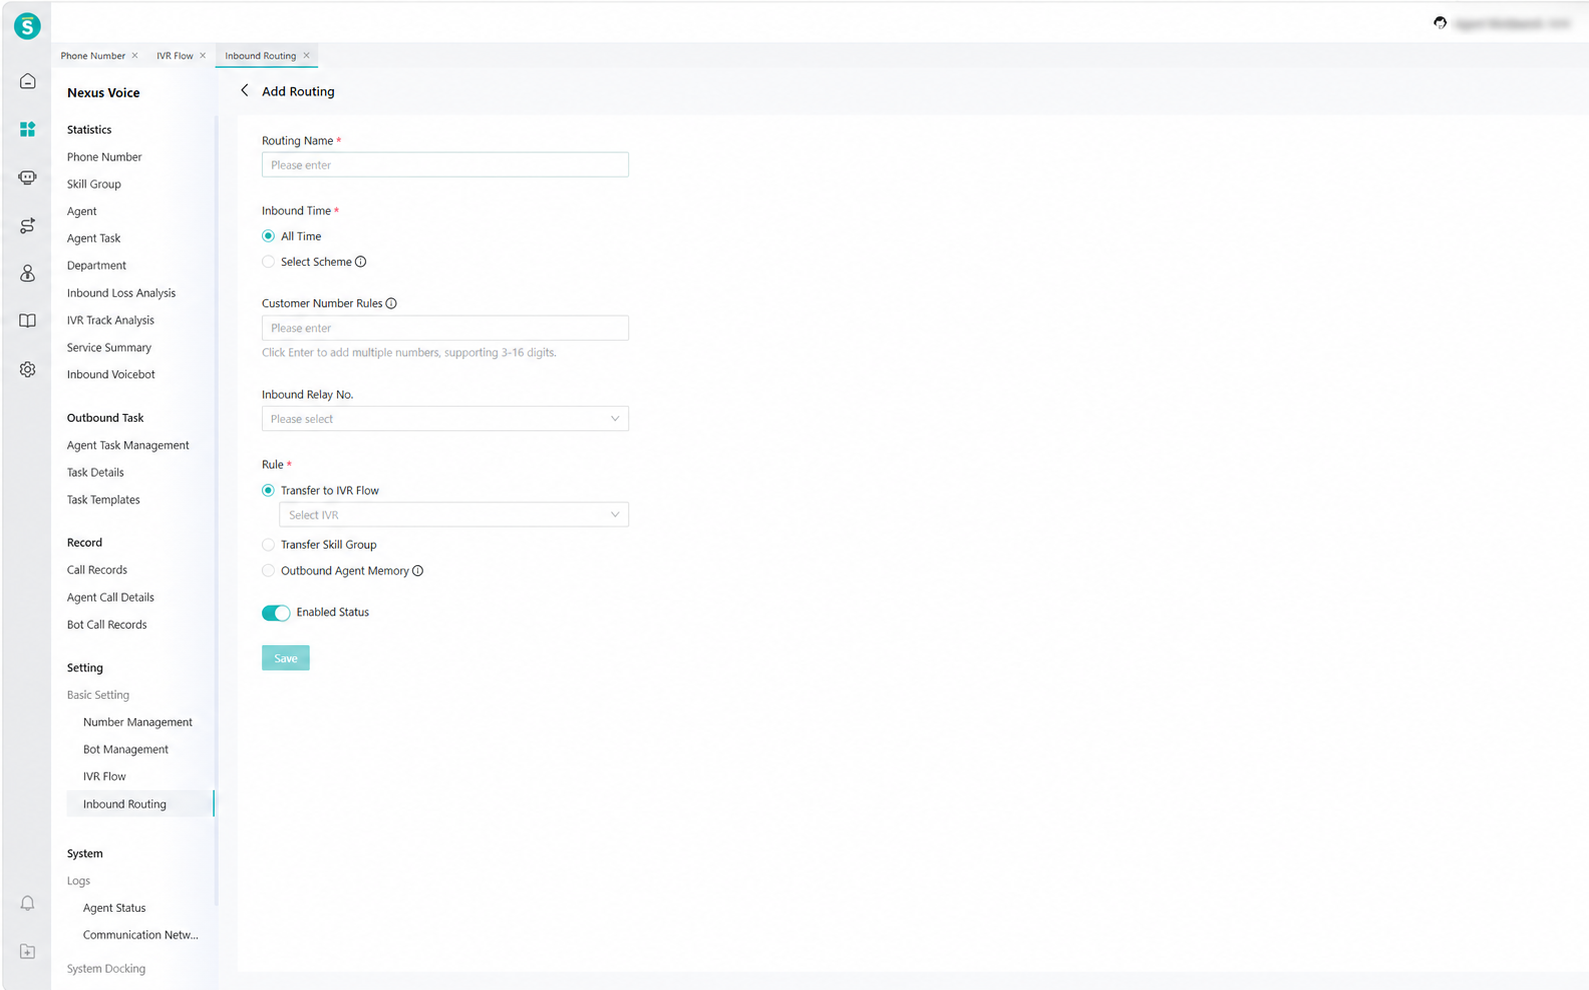
- In "Call Center › Settings › Inbound Routing," configure routing for customers; when a trunk number is specified, assign the customer to an IVR flow.
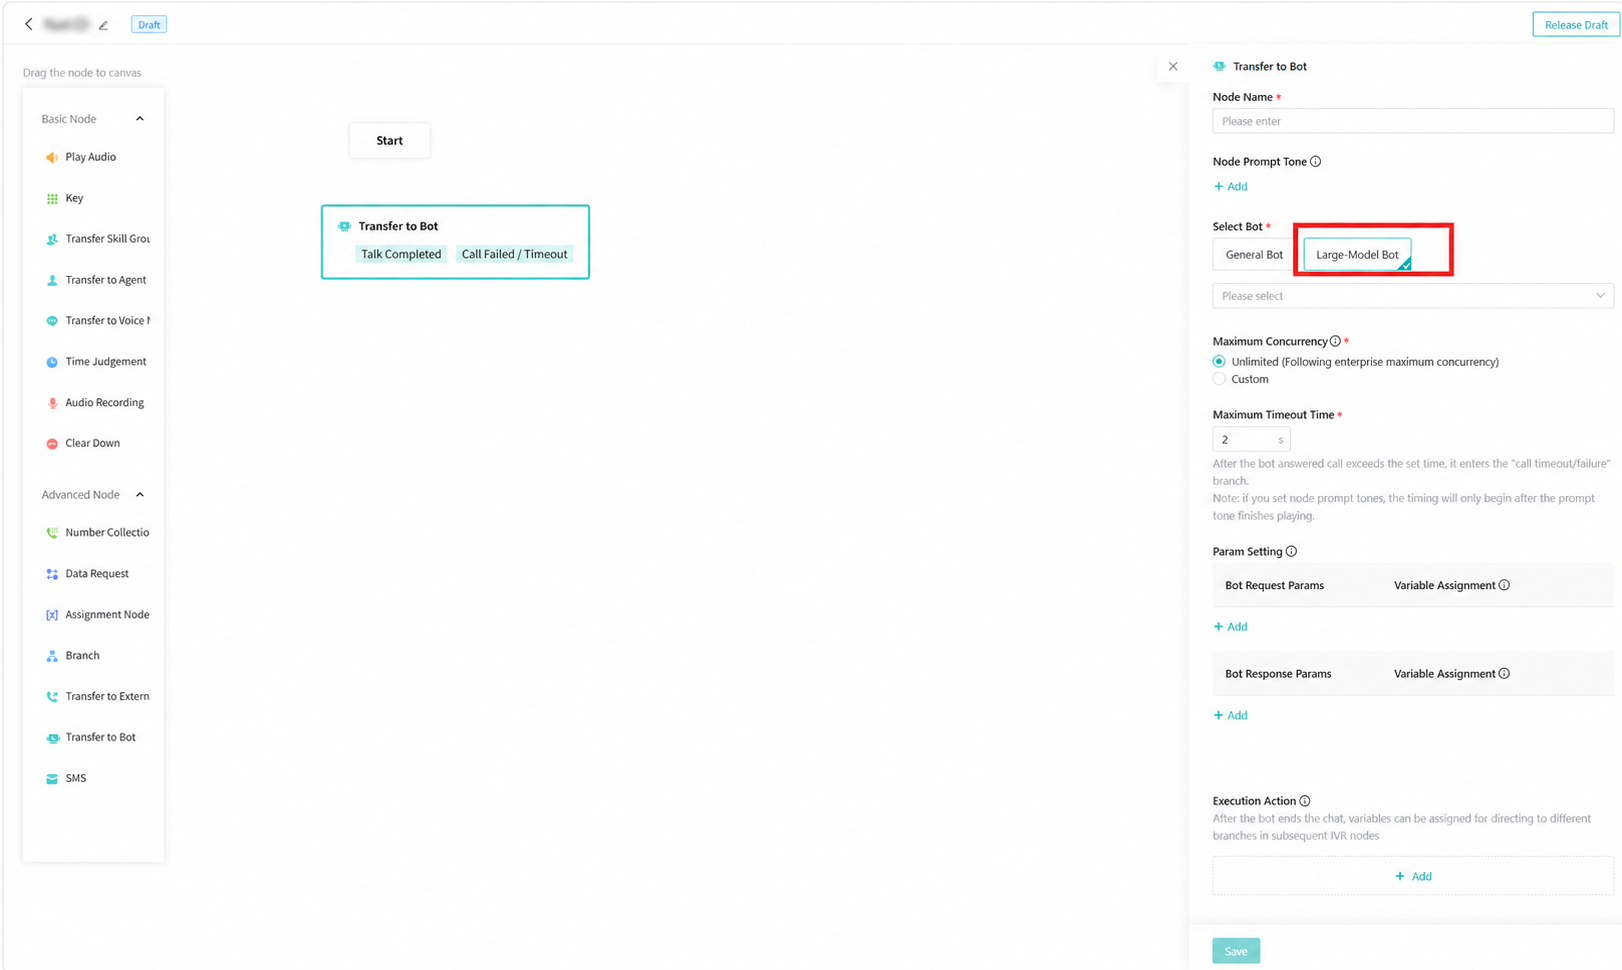
- At the transfer-to-bot node in "Call Center › IVR Flow," select your published bot.
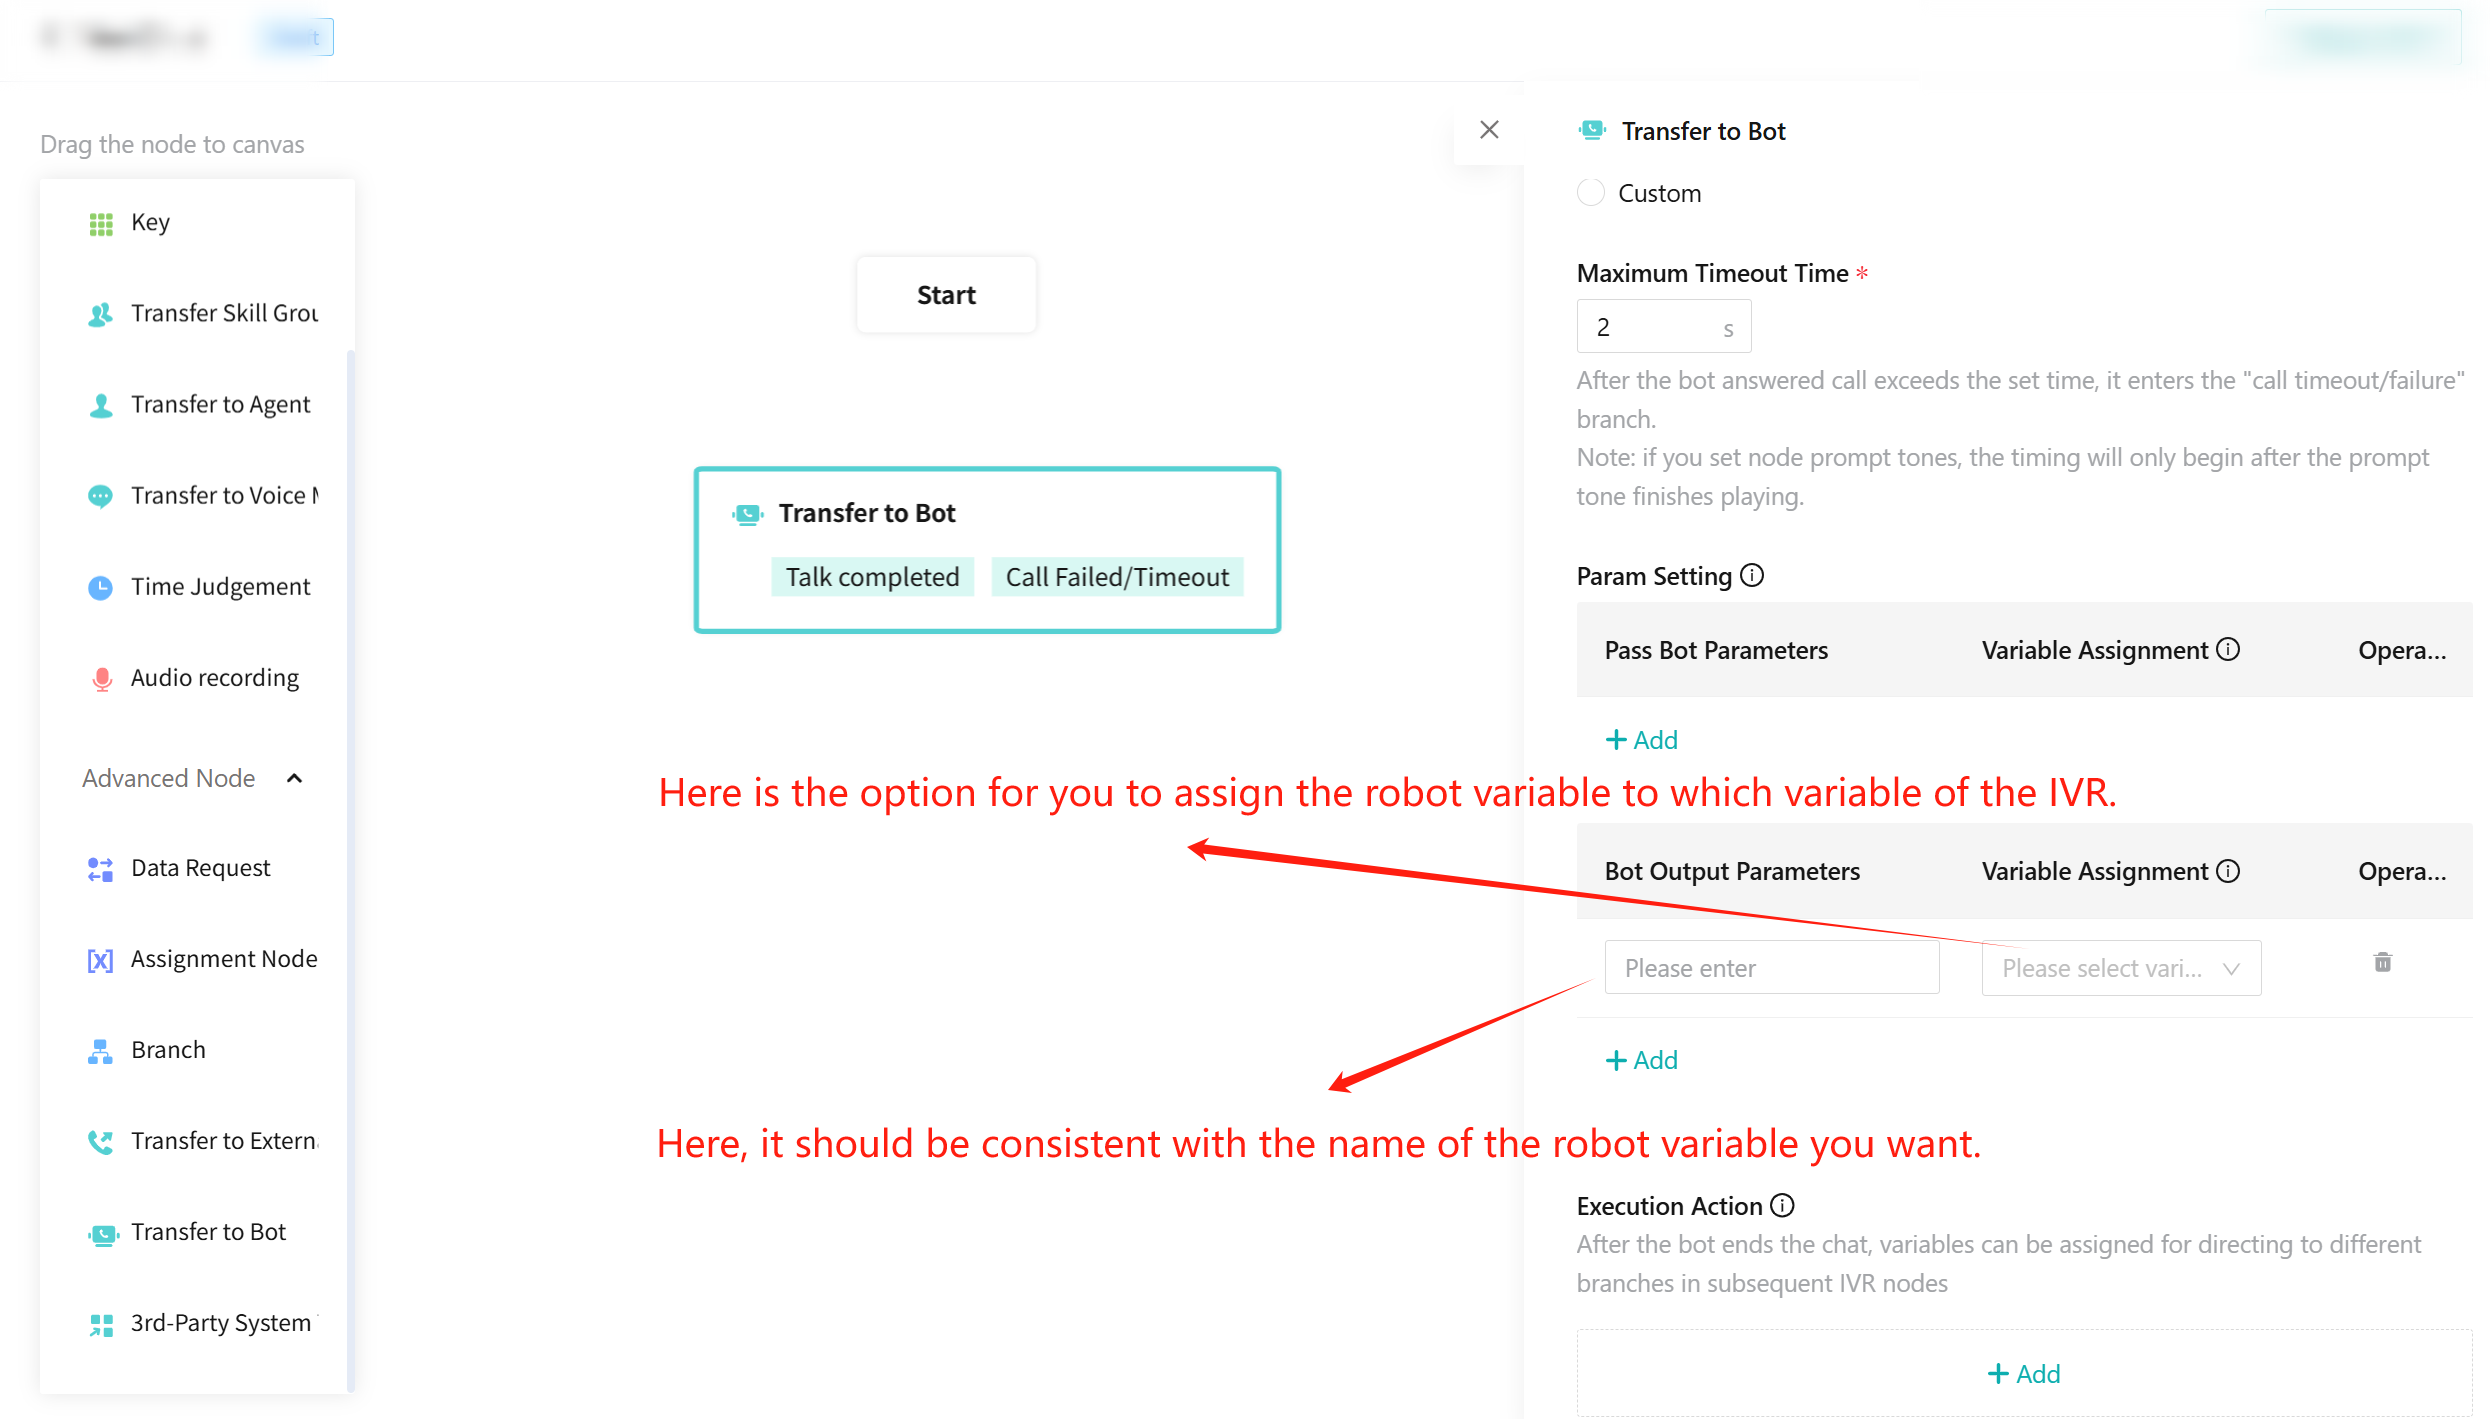
- After the bot conversation ends, fill in the bot variable name in the bot's outbound parameters to assign the bot variable to an IVR variable.
# 3.3 Ticket Center
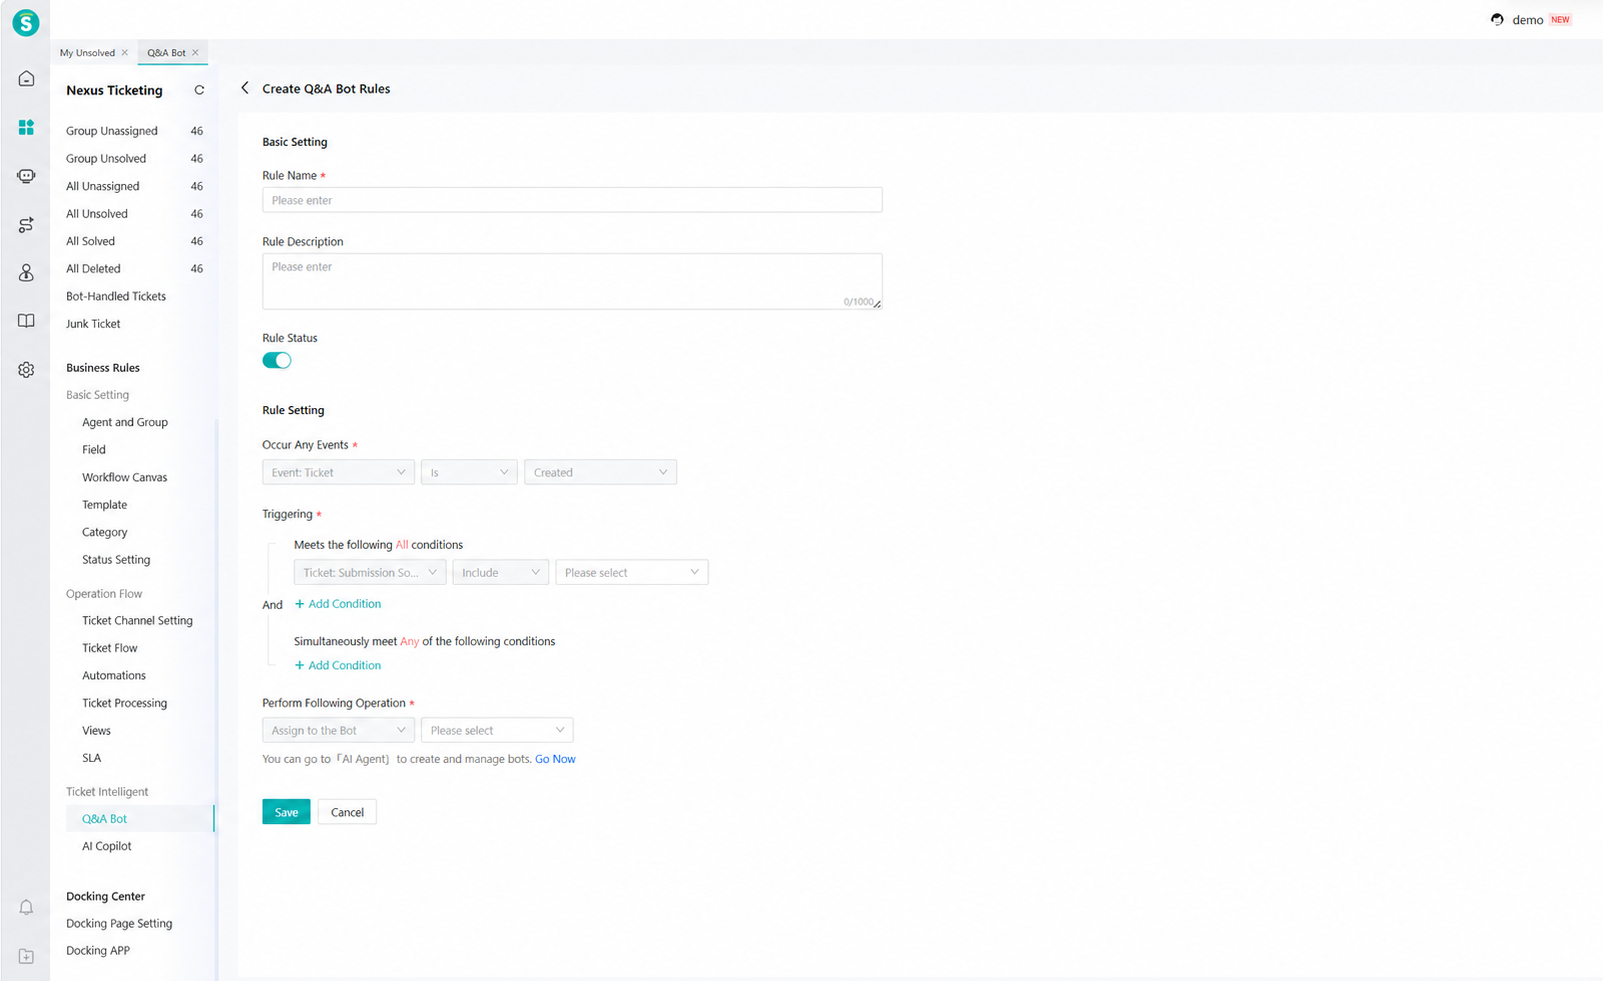
- In "Ticket Center › Ticket Intelligence › Q&A Bot Settings › Q&A Bot Rules," configure the tickets that can be handled by the bot.
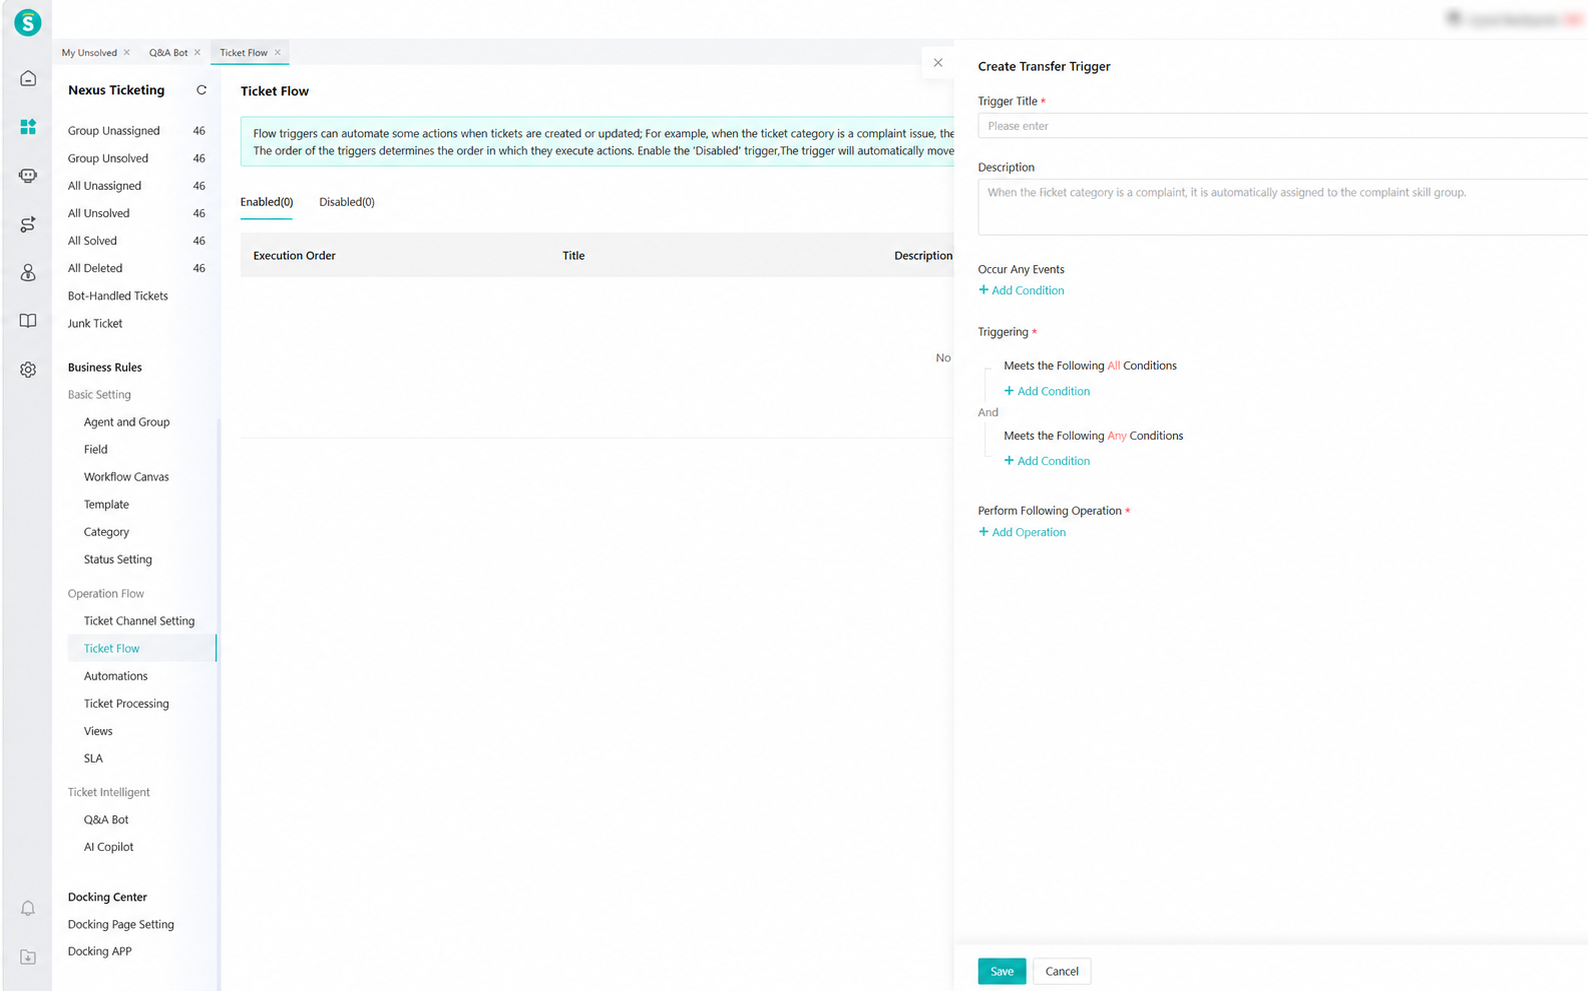
- In "Ticket Center › Business Process › Ticket Routing Settings," set the skill group or agent that handles the ticket after the bot transfers to a human agent.
# 4. What You Can Do Next
- Want AI to help you build → AI Studio.
- Want to configure it yourself → Agent Setting.
- Answers are wrong and you want to fix them → AI Studio.
Tip: Changes made through building and tuning take effect only after they are confirmed and published; you can test chat freely before publishing.