
Agent Setting
# Agent Setting
——This article explains Agent Setting and how to use the bot list, Bot Info, Q&A Capability, Conversation Experience, Voice Settings, debugging and publishing, and Permission Settings.
Entry: From the left navigation, go to Agent Setting › Agent Setting.
# Agent Setting Overview
Before configuring a bot, familiarize yourself with the use case and purpose of Agent Setting:
- Use case: Manually create and manage bots, configure their information, prompts, capabilities, and customer-facing experience, then debug and publish them.
- Purpose: Manage the complete bot configuration lifecycle while complementing conversational building in AI Studio. Use AI Studio to create the initial framework and Agent Setting for detailed configuration.
# Bot List
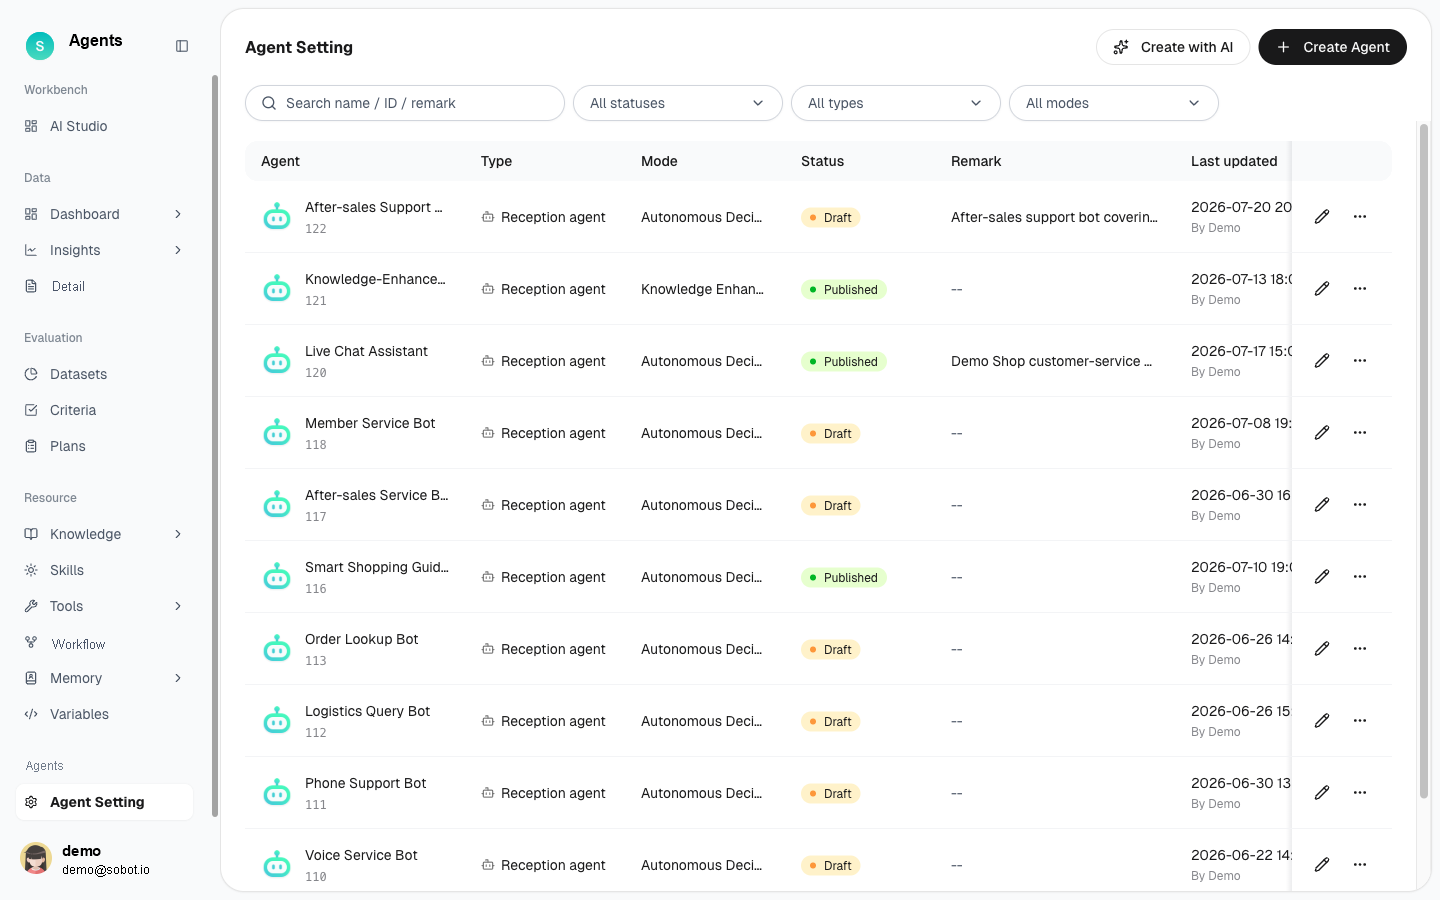
Figure 1: Agent Setting list
The list displays all bots. Search by name, ID, or notes, and filter by status, type, or mode. Each bot displays the following:
- Type: Customer-facing Agent or Agents Assist.
- Mode: Autonomous Decision, Knowledge-Augmented, or Third-Party Bot.
- Status: Draft or Published.
Create a bot: Click Create with AI in the upper-right corner to build a bot conversationally in AI Studio, which is recommended for new users. Click Create Agent to create one manually. To open a bot's configuration details, click Configure in the list.
# Configuration Detail Page Structure
The configuration details page contains version and action controls at the top, with configuration content organized into tabs below.
- Version switcher: Switch between Draft and Published. Draft is the version currently being edited. Its changes are saved automatically without affecting the live bot. Published is the version currently in use.
- Top actions: Debug, AI Optimization, Publish, and More.
- Configuration tabs: Bot Info, Q&A Capability, Conversation Experience, Voice Settings, and Permission Settings.
# Bot Info
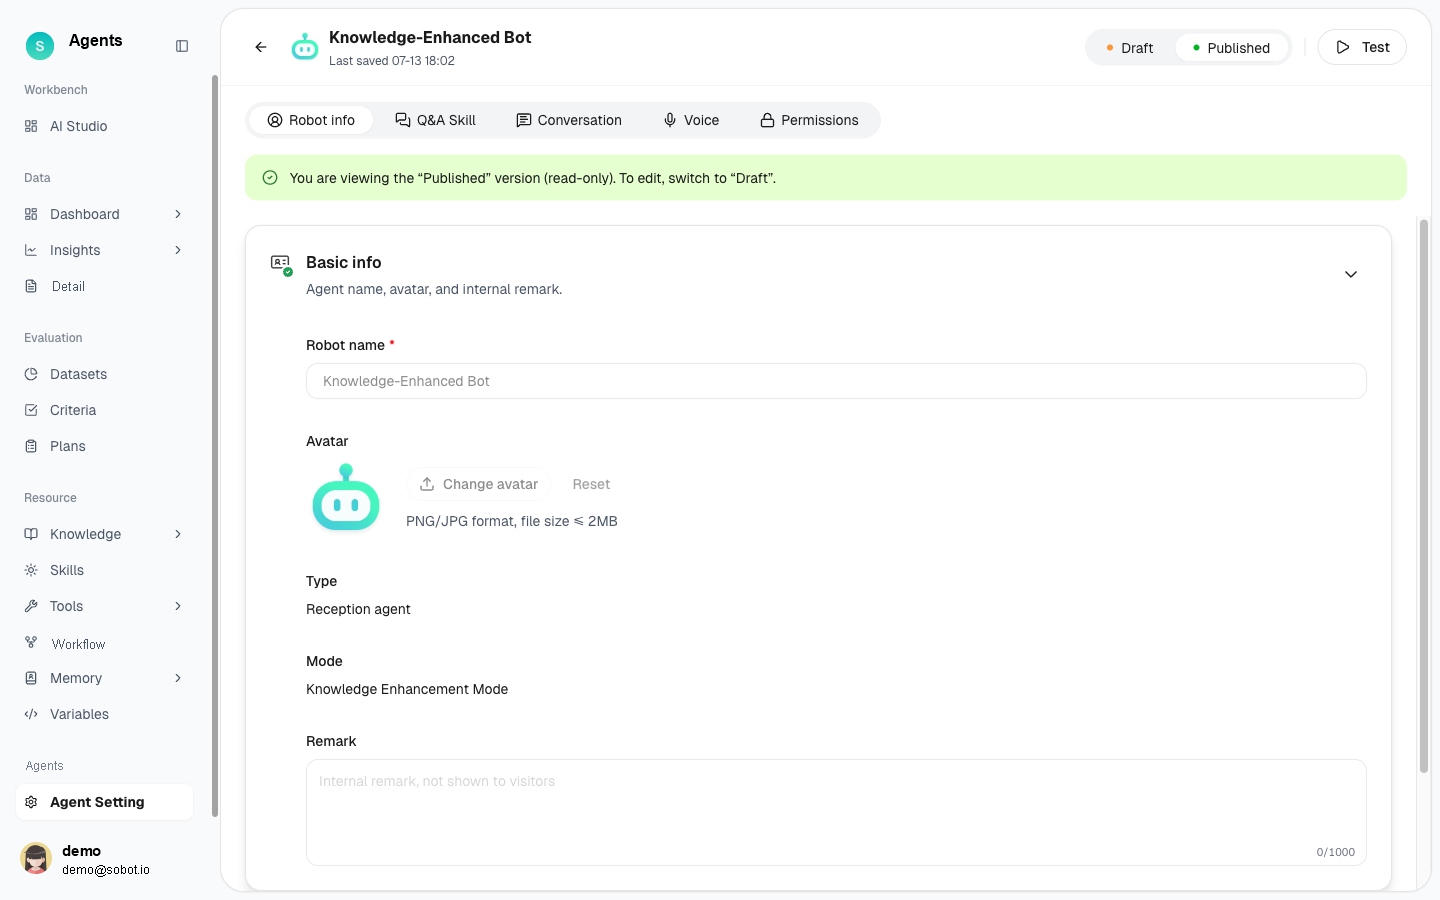
Figure 2: Bot Info
Configure the bot's basic identity:
- Name and avatar: Enter an internal bot name of up to 50 characters and upload an avatar.
- Type: View whether the bot is a Customer-facing Agent or Agents Assist. The type is selected during creation and cannot be changed later.
- Mode: View whether the bot uses Autonomous Decision, Knowledge-Augmented, or Third-Party Bot mode. The mode determines how the bot makes decisions.
- Notes: Enter internal notes of up to 1,000 characters. Notes are visible only to operators and are not shown to visitors.
Type determines who the bot serves—customers or human agents—while mode determines how it makes decisions, such as autonomous orchestration or knowledge-focused Q&A.
# Q&A Capability
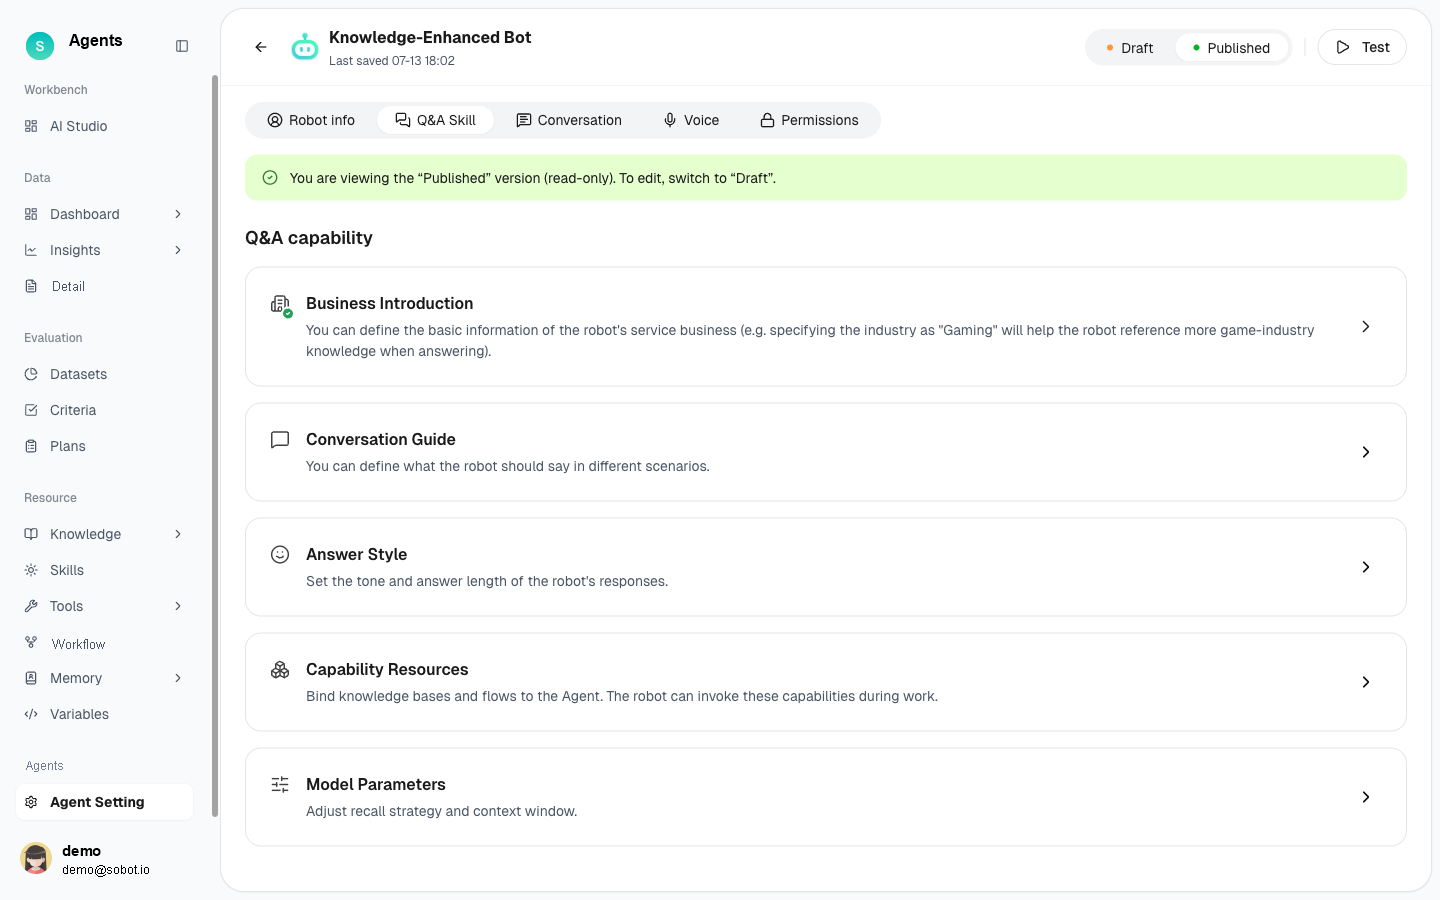
Figure 3: Q&A Capability — prompt and capability resources
Q&A Capability consists of two parts: prompts and capability resources.
# • 1) Prompt
The prompt describes the Agent's role, goals, and behavioral guidelines.
- Direct input: Describe the Agent's role and handling guidelines in natural language.
- Quick resource references: Use
#to reference variables, Skills, transfer-to-human capabilities, and other resources. For example: "First ask whether the customer is a VIP and store the answer in #CustomVariable." - Reference Resources / Use Template: Reference existing resources or apply a prompt template.
- AI Optimization: Click AI Optimization to optimize the prompt conversationally in AI Studio.
- The lower-right corner of the editor displays the number of characters used. If a referenced resource contains an issue, the editor displays an error warning.
# • 2) Capability Resources
Bind knowledge bases, task flows, Skills, tools, and Memory to the Agent so that the bot can invoke them as needed. Click Bind on each resource card to select resources. Each card displays the number of bound resources, which you can view or unbind at any time.
Capability resources come from the Resource and are linked by reference. Updating a resource affects every bot that references it. Capabilities such as transfer to a human can be provided through Skills or buttons: reference the transfer-to-human capability in the prompt, or enable Button Messages under Conversation Experience.
# Conversation Experience
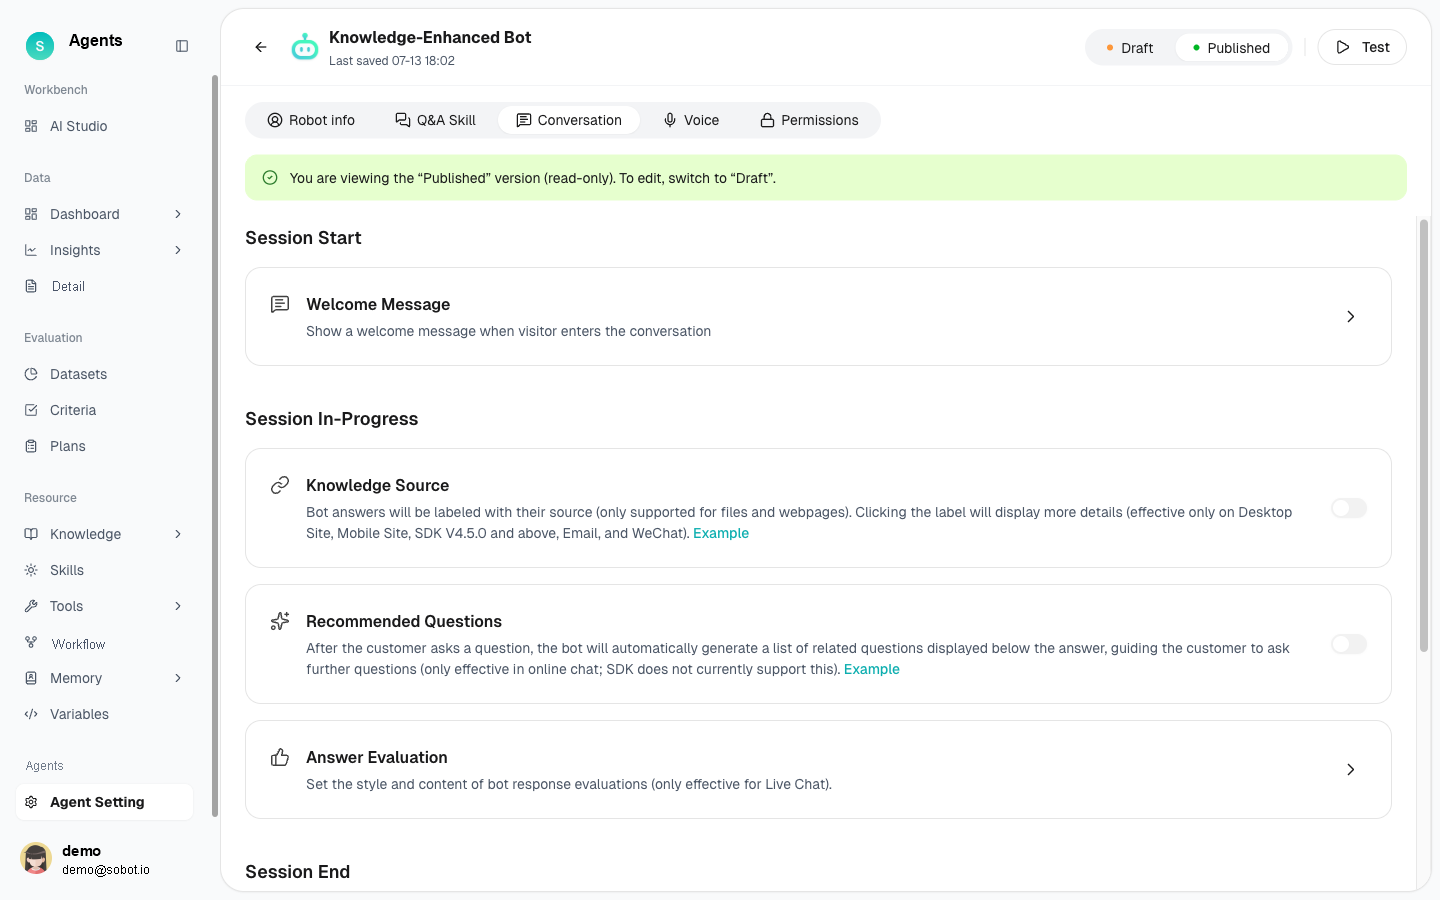
Figure 4: Conversation Experience
Configure the bot's customer-facing interactions for the start of a conversation and while a conversation is in progress.
At conversation start you can:
- Set a welcome message: set the first message shown when a visitor enters the conversation.
- Collect information: before the conversation starts, guide the user to provide key variables item by item per the list.
During the conversation you can:
- Enable Button Messages: Display hyperlinks, transfer-to-human options, choices, and other answer content as buttons. This feature is supported on desktop websites, mobile websites, SDK V4.5.0 and later, WhatsApp, and Facebook.
- Show Knowledge Sources: Identify the knowledge base used to generate an answer.
- Enable Recommended Questions: Automatically generate related questions and display them below the answer.
- Enable Answer Ratings: Allow visitors to like or dislike answers and configure the action performed after a dislike.
Answer dislikes are recorded in the Data and provide useful signals for identifying issues and initiating optimization.
# Voice Settings
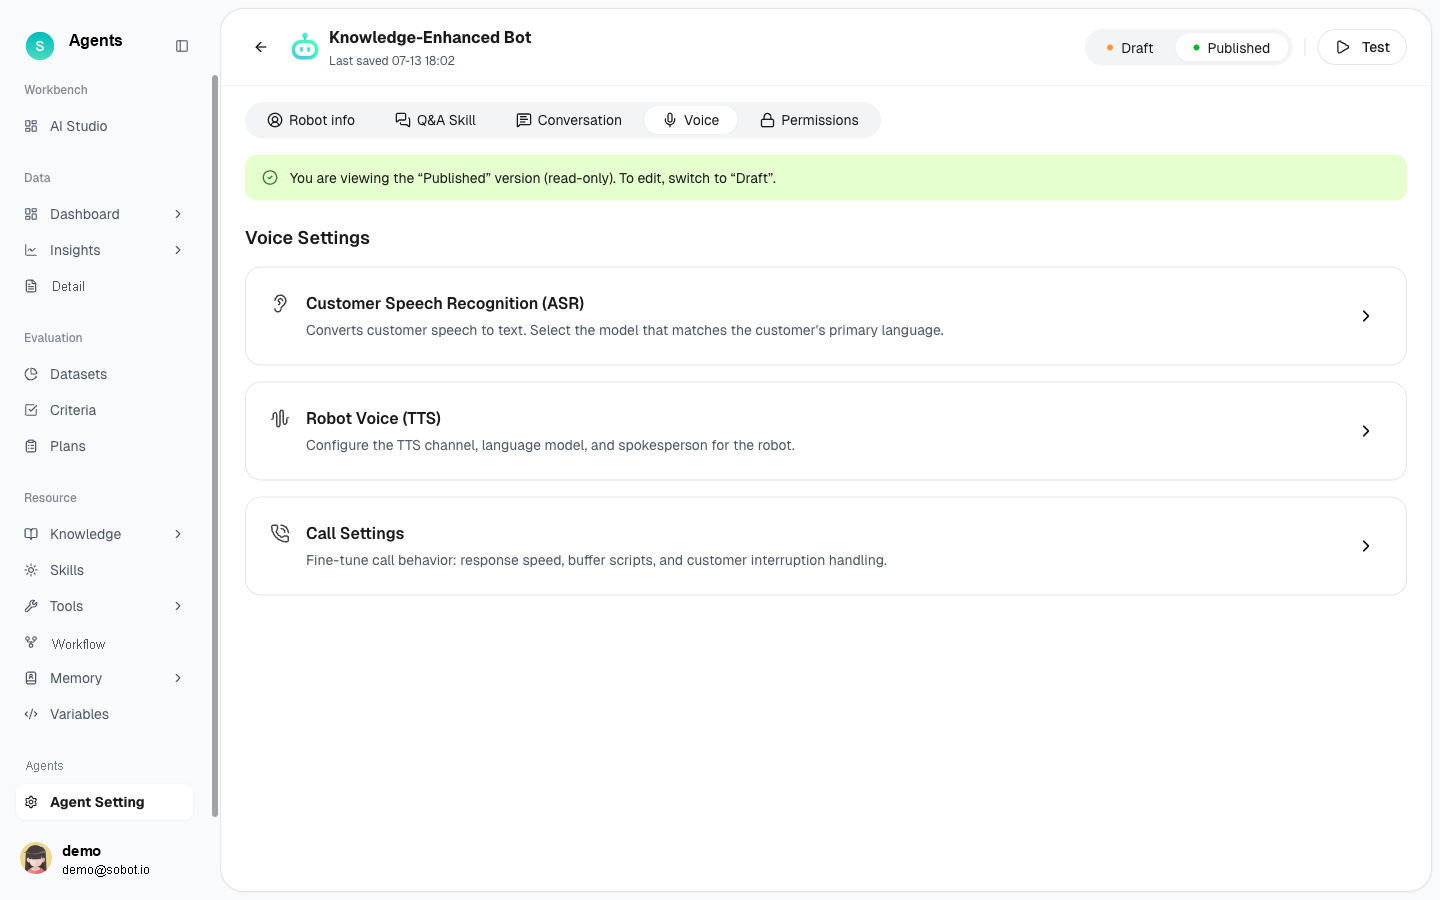
Figure 5: Voice Settings
Voice Settings is for voice / call center channels — it decides how the bot "hears" customers on a call and what voice it answers with. Here you can:
- Choose the customer speech recognition model (ASR): transcribe what the customer says into text in real time so the bot can understand.
- Pick the bot voice (TTS): set the voice used for spoken replies so the bot sounds on-brand.
- Adjust call settings: control the bot's behavior during a call.
Bots on online / ticket-only channels can ignore this tab.
# Debugging and Publishing
- Debug: Click Debug at the top to open the debugging window and test the bot with sample questions. Test mode does not affect live data.
- AI Optimization: Click AI Optimization to diagnose and optimize the bot conversationally in AI Studio.
- Publish: Click Publish. The system automatically validates the configuration. After validation succeeds, the draft becomes the new published version and takes effect in the live environment.
Recommended workflow: Edit the draft → Debug and test → Use AI Optimization if issues are found → Apply corrections → Publish. After publishing important changes, run a regression test in the Evaluation.
# Permission Settings
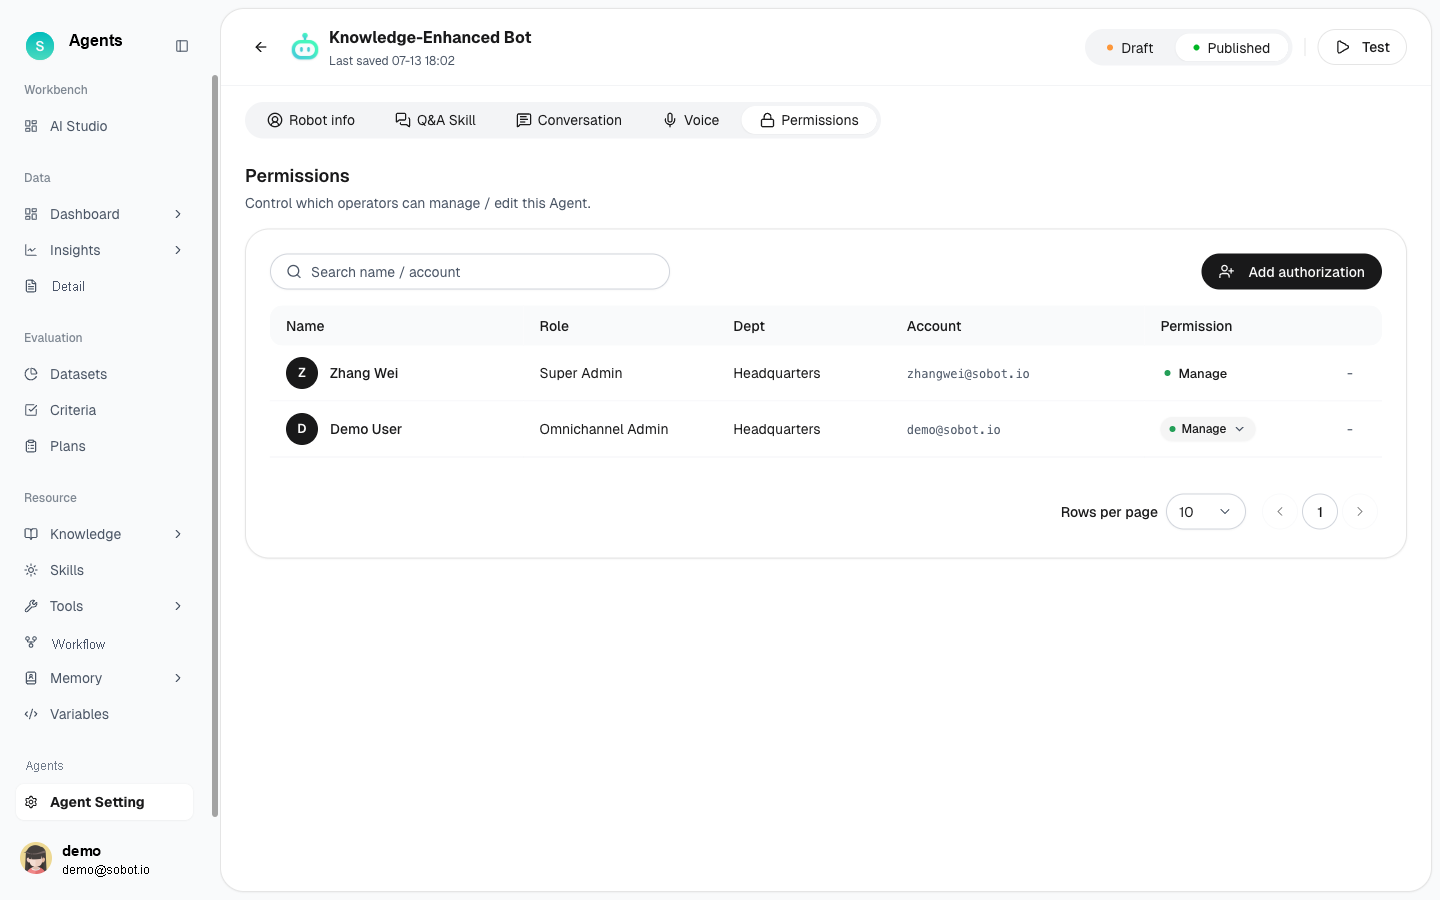
Figure 6: Permission Settings
Permission Settings determines which operators can manage and edit the bot. Review authorized users and their roles, departments, and permissions; click Add Authorization to add a colleague and assign permissions; or search by name or account.