Public Setting Guide
# Public Setting Guide
——Extract reusable public capabilities among different products and set them uniformly for reuse by multiple product lines.
# Role of Public Setting
Public setting is the configuration of product capabilities that need to be used by multiple product lines. Through this article, you can understand all the basic capabilities that can be reused in multiple product lines in the agent system, and know how to integrate these basic capabilities with the functions of each product line to maximize the value of the agent system and support your business needs.
# Preparation
● Understand the functions of custom fields and satisfaction evaluation templates and their application in product lines, and evaluate whether these product capabilities need to be set. ● Sort out the field contents and field types that need to be presented in the ticket and service summary in the actual business, and add custom fields according to the sorting results.
# Custom Field
Custom field is a user-defined field. You can use custom fields in multiple product lines such as call center, live chat, ticket system, etc. Through the selection and sorting of custom fields, multiple functions such as service summary, ticket template, ticket plug-in, and pre-query form settings can be formed.
# ● Field Content Management
- Add and edit field Click【Add Field】to add multiple types of custom fields through the Admin Center > Business Settings > Basic Settings > Custom Fields.
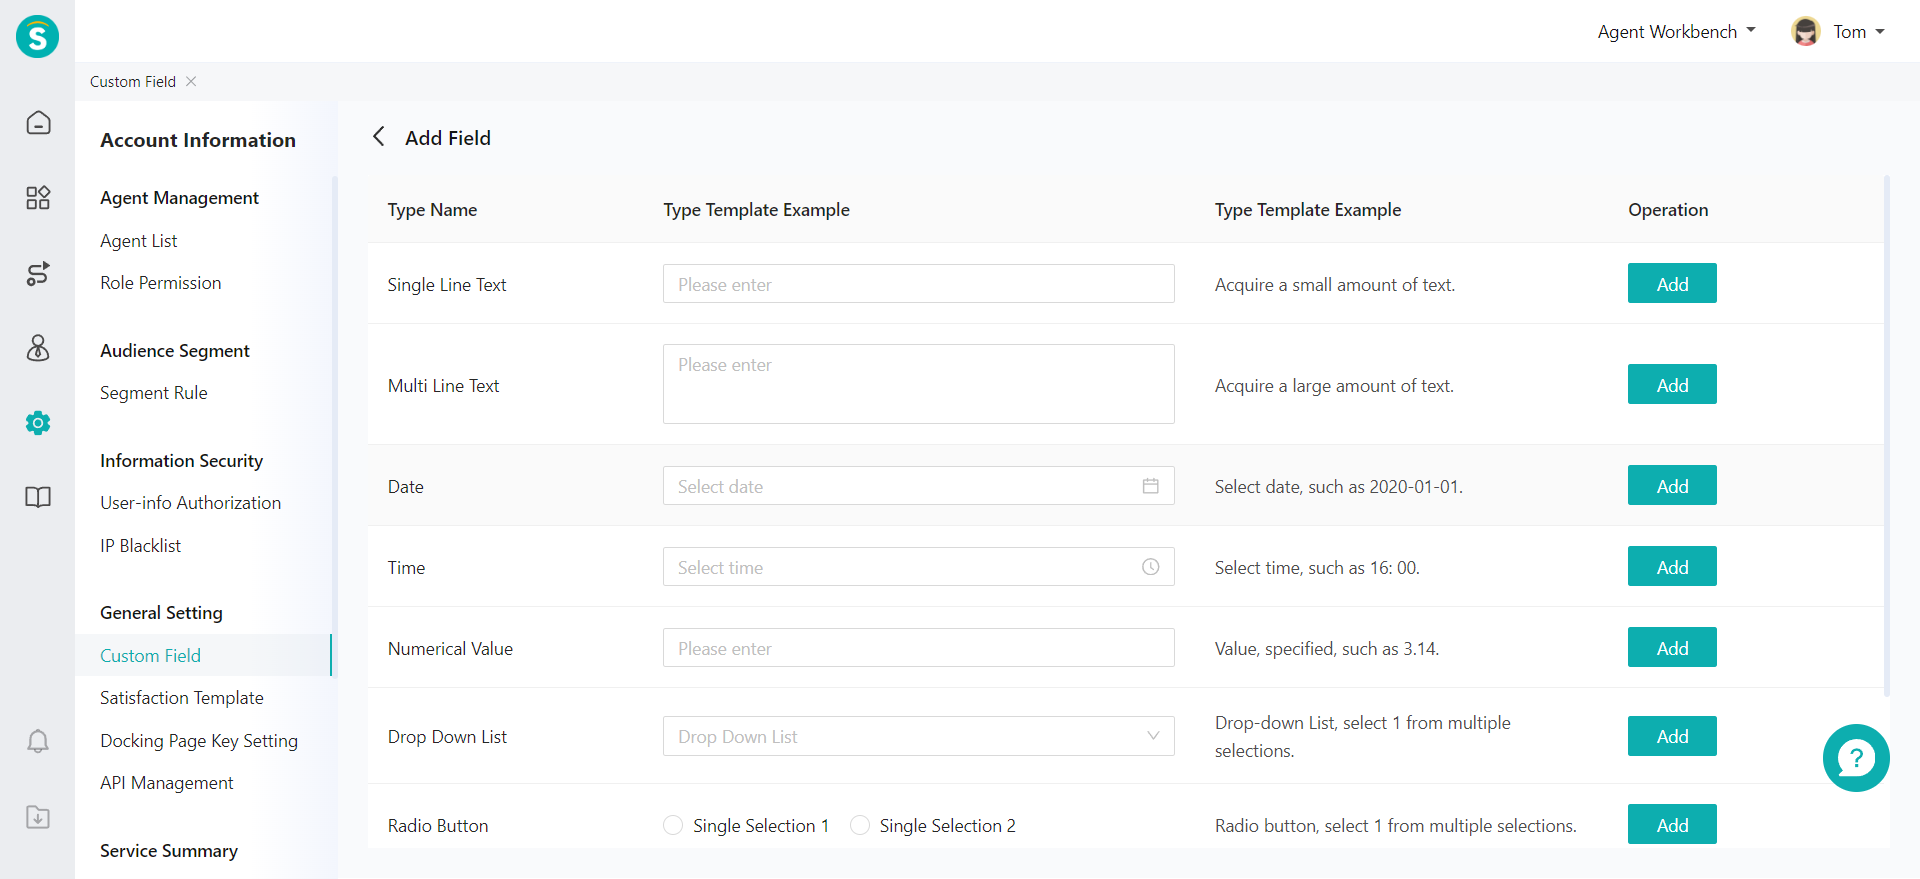
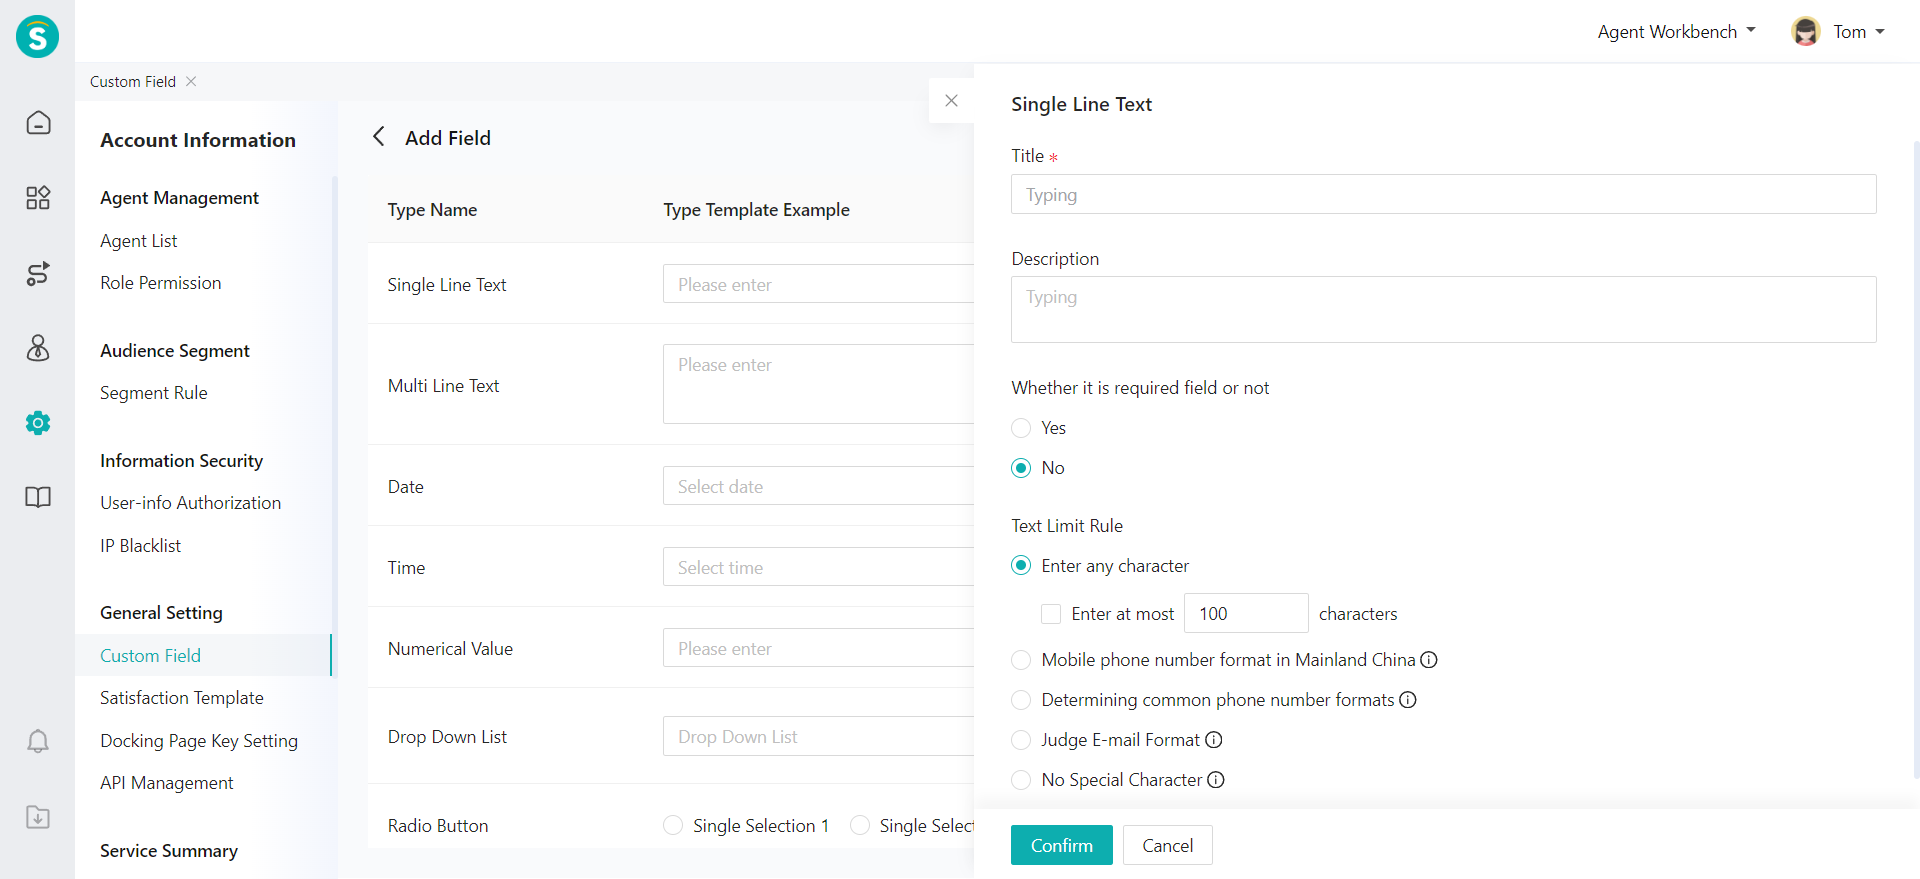
Select the type of field you want to add, fill in the field title and description in the pop-up window, set the field specific attributes, and then save it. After saving, you can click【Edit】to change the title, description, and attribute of the field.
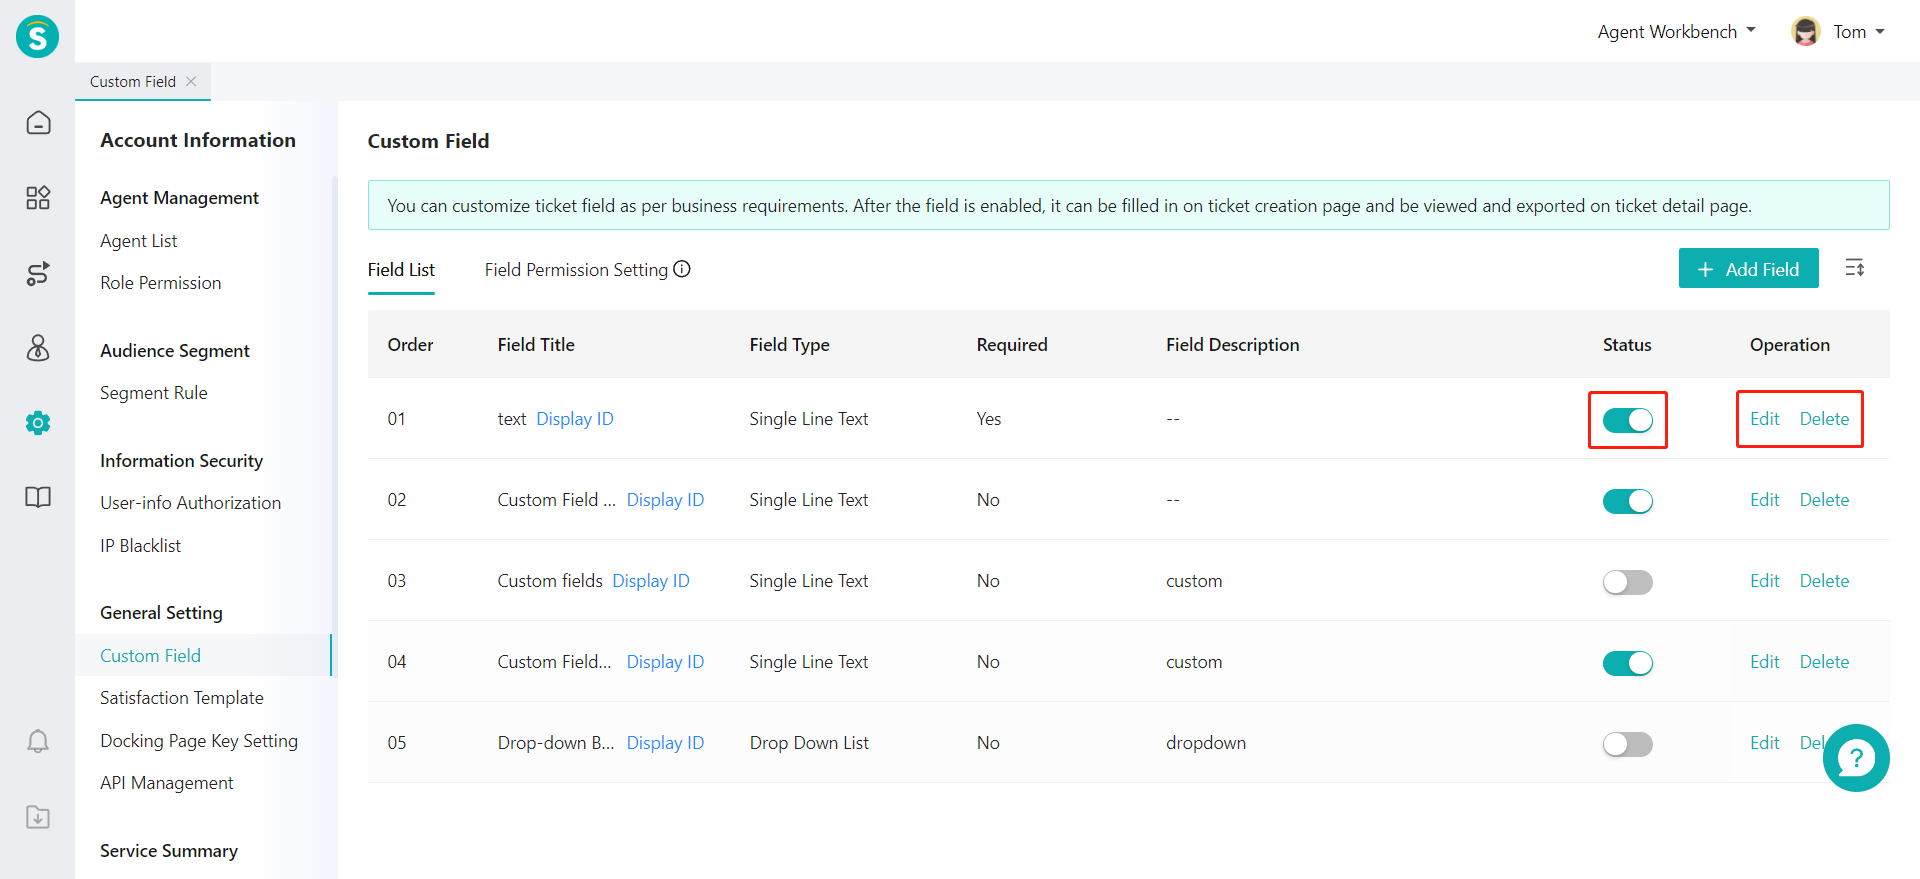
- Disable or delete field After a custom field is added, you can manage the field through the field list. If you change the field to the disabling status, you will no longer be able to use it, but the content of this field that has been filled in will not be affected. After the field is deleted, the field and its content will be deleted.
# ● Field Permission
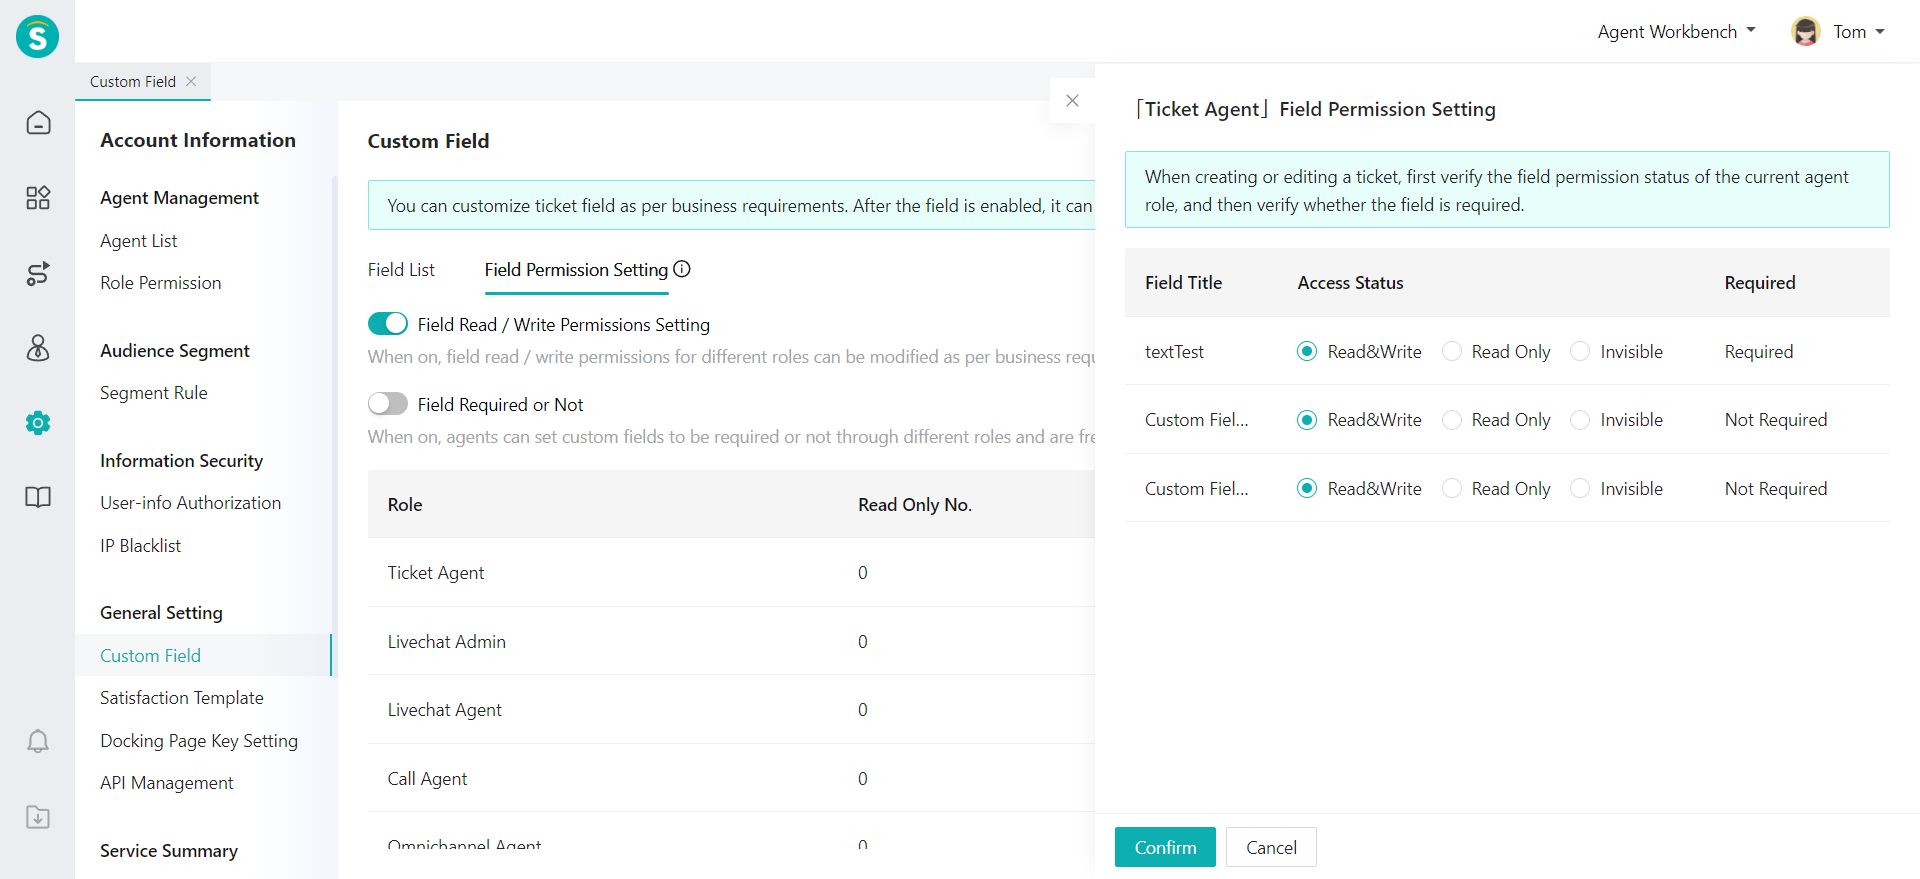
In actual business, it is often necessary to hide or display some fields for different users. Through field permissions, you can set the required, visible but not editable, and invisible status of fields for different agents according to roles.
- Field Read/Write Permissions After Field Read/Write Permissions is on, you can modify the status of the field by different roles according to the business needs, so that the field can be read-write, read-only, or invisible to the agent.
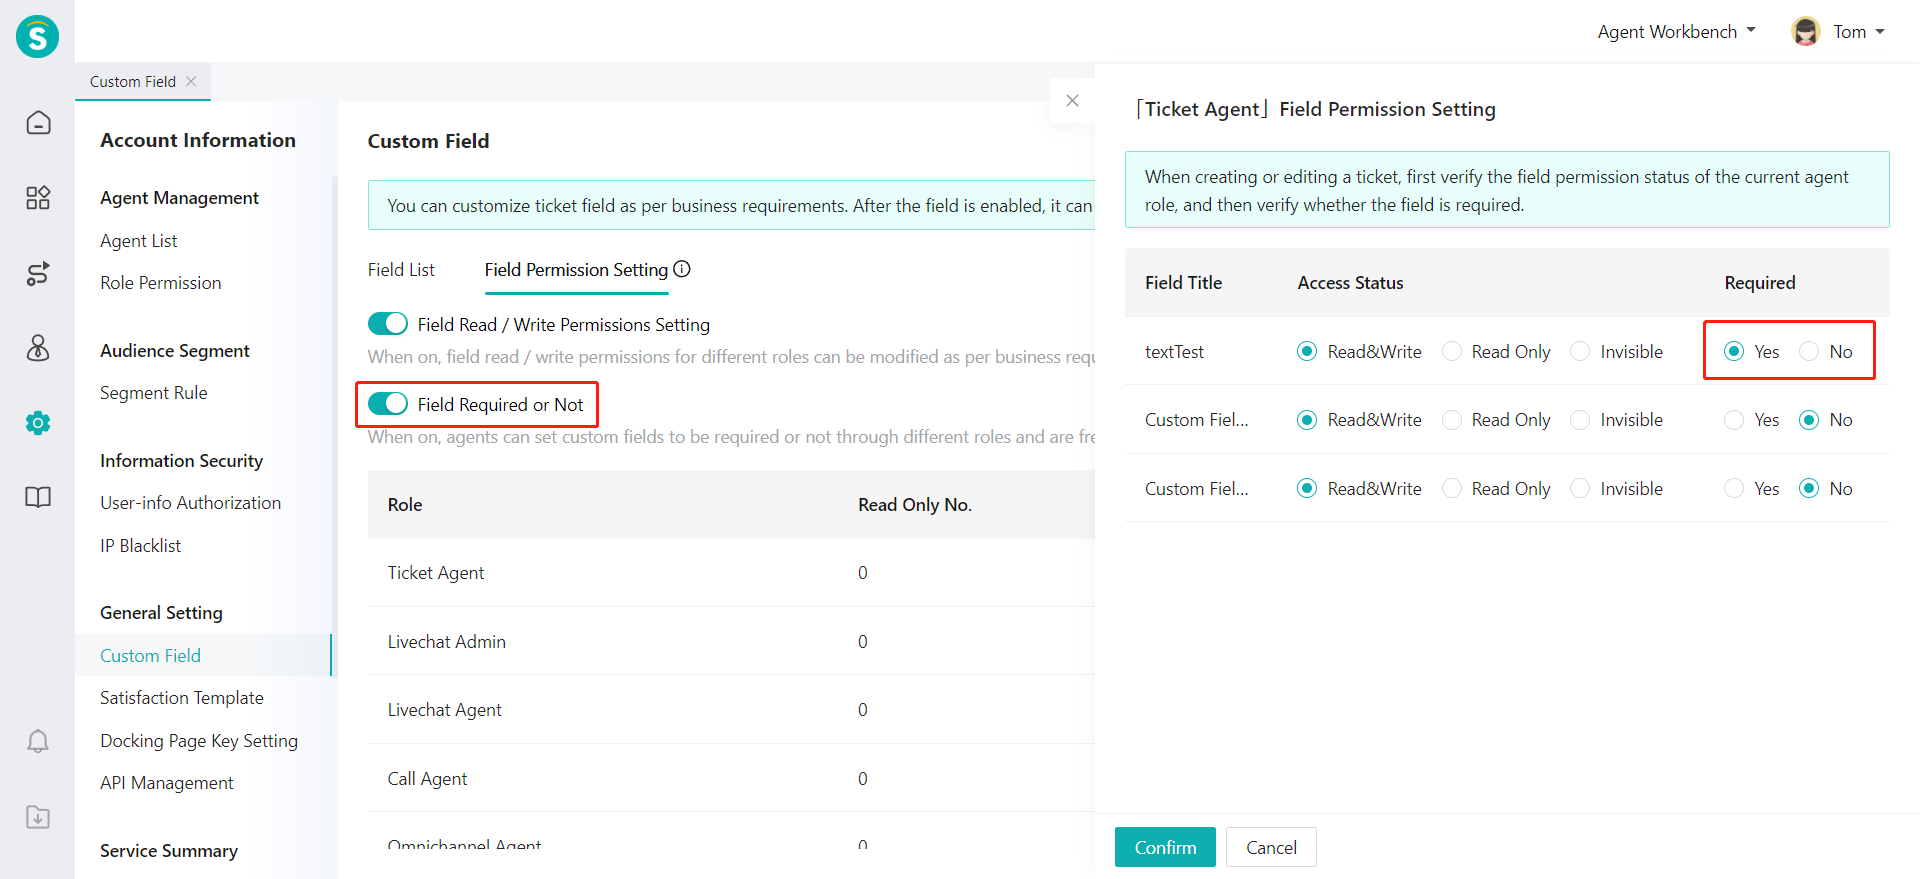
- Field Required or Not After Field Required or Not is on, you can set whether the custom field is required by different roles. At this time, the system will judge the required and non-required permissions of the field according to the role, rather than the required and non-required attributes of the field itself. Only when the role can read/write this field can the modified field be set as required. In non-read/write status, the field is non-required by default.
# ● Key Management
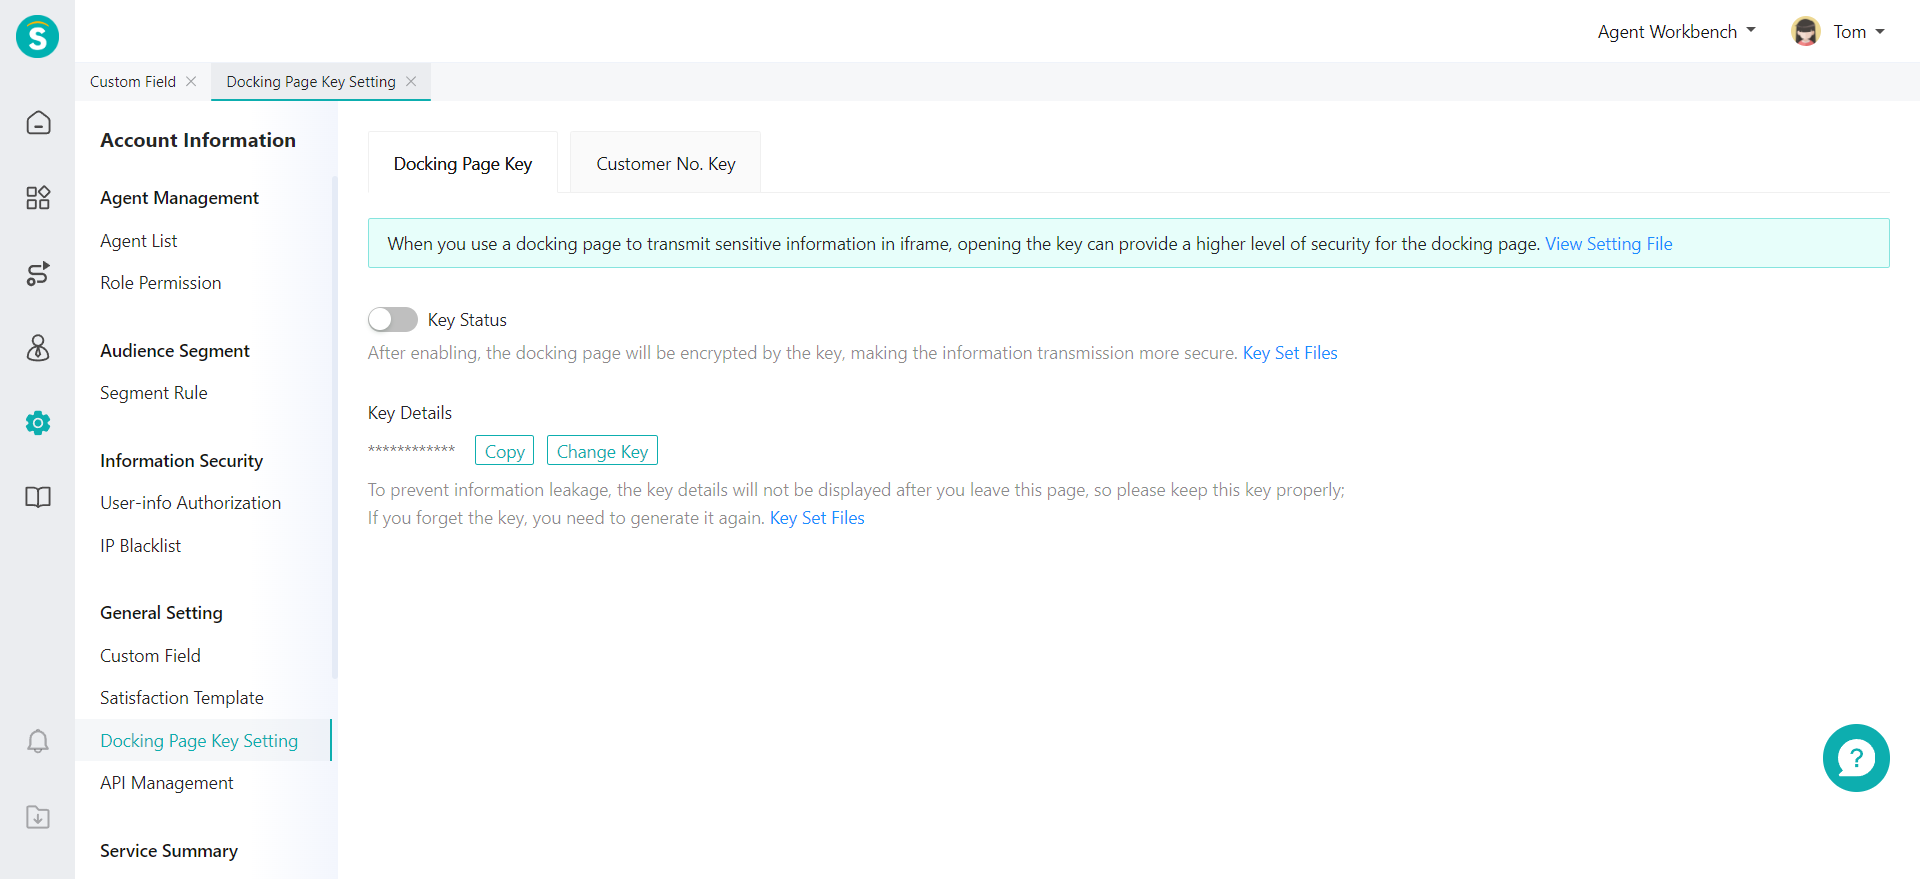
- Docking page key When you use a docking page to transmit sensitive information in iframe docking, you can open the key to provide a higher level of security for the docking page.
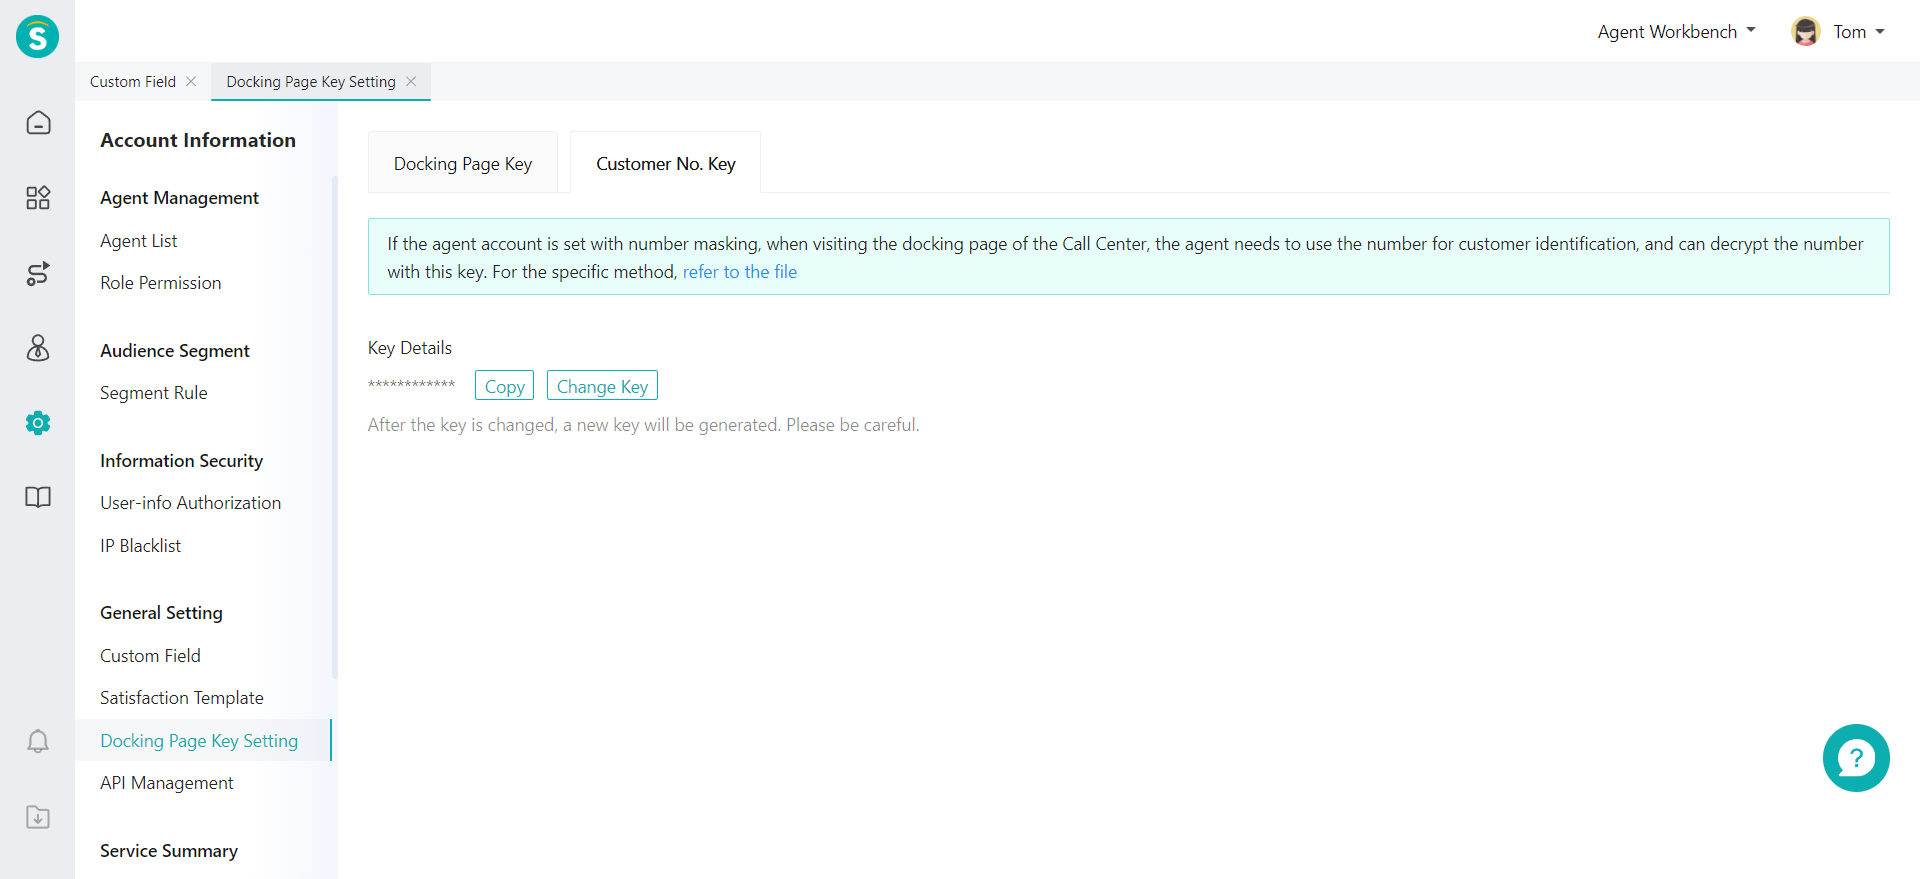
- Customer number key If the agent account is set with number masking, when visiting the docking page of the Call Center, the agent needs to use the number for customer identification, and can decrypt the number with this key.
# ● API Management
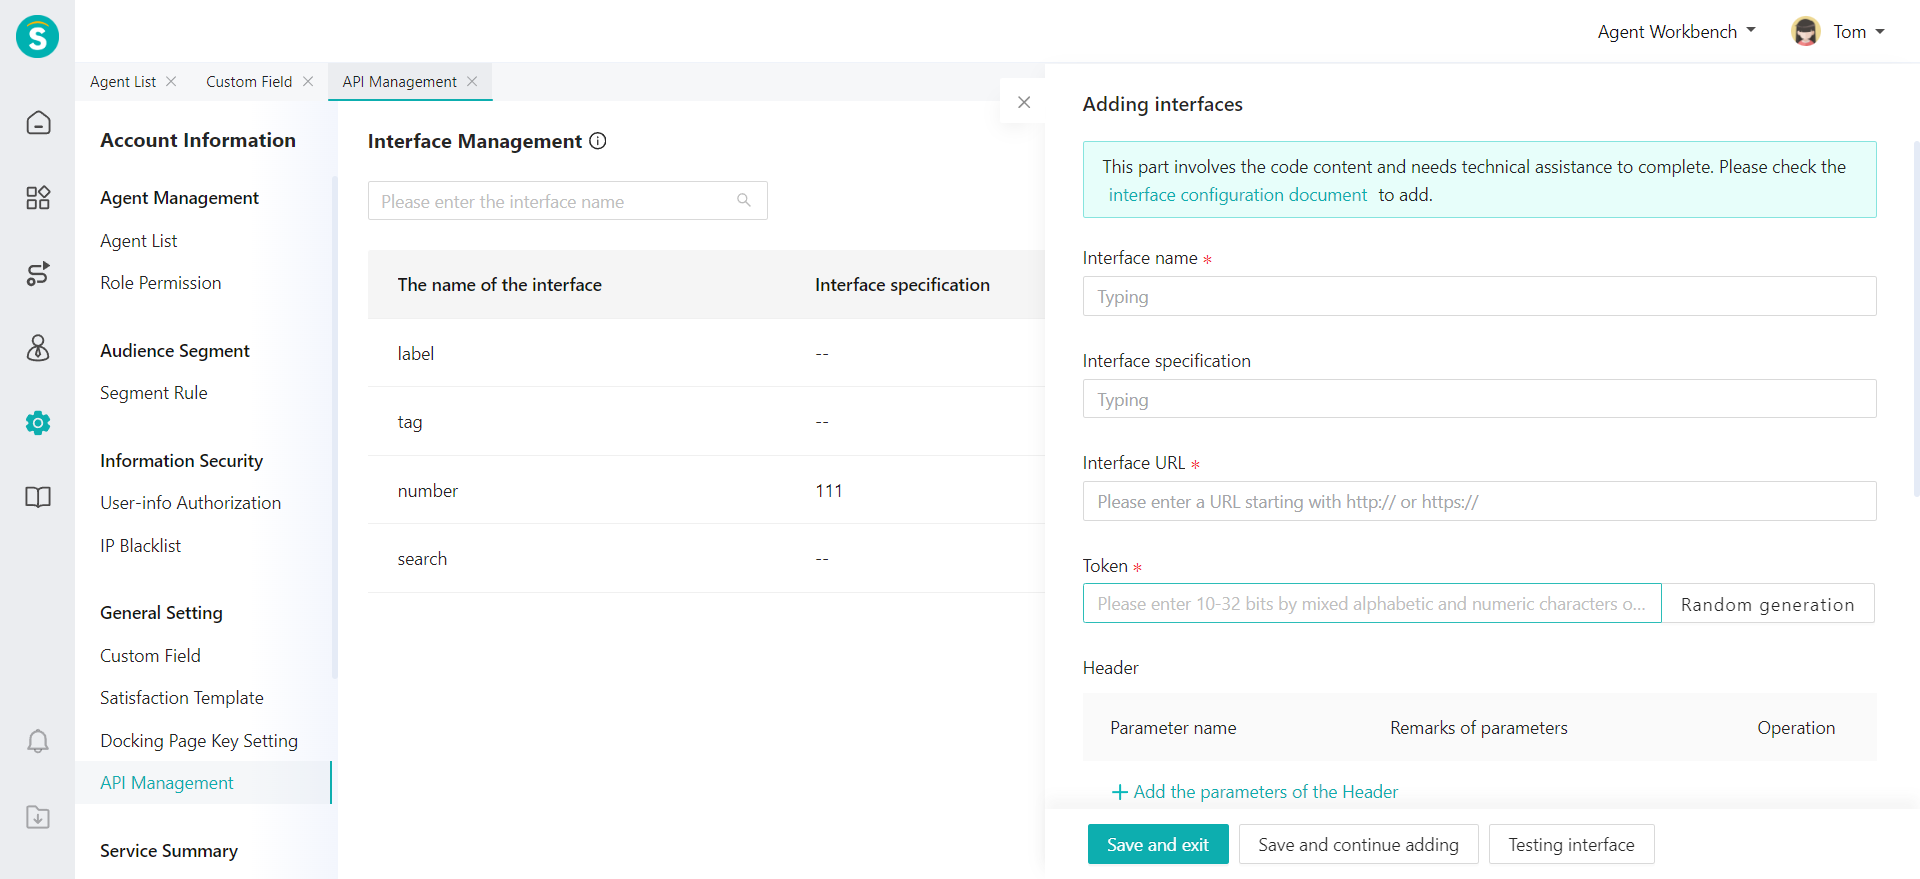
API management is used for data transfer by configuring link params. It is used to obtain the variables and content in user messages. After quoting the API in a question, the bot can give the user corresponding feedback through the obtained variables and customer message content.
- Add API Support custom input and return params.
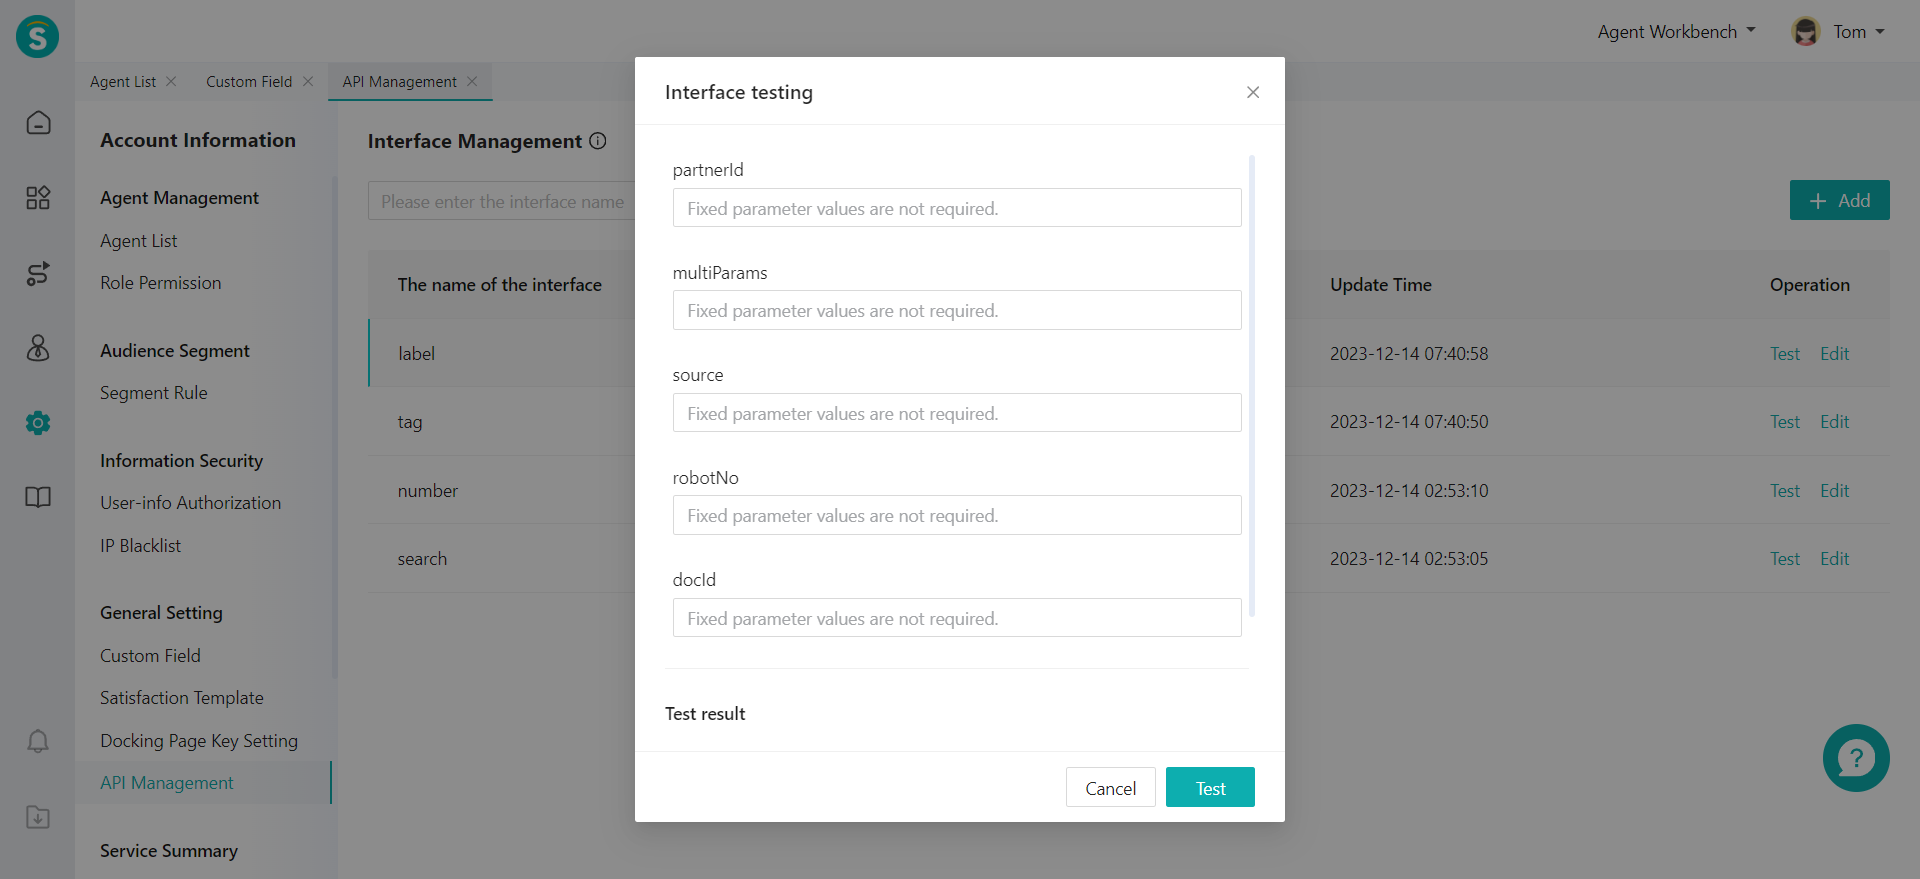
- Test API After adding API, you can click "Test" and enter the input params to verify the API.
# Time zone
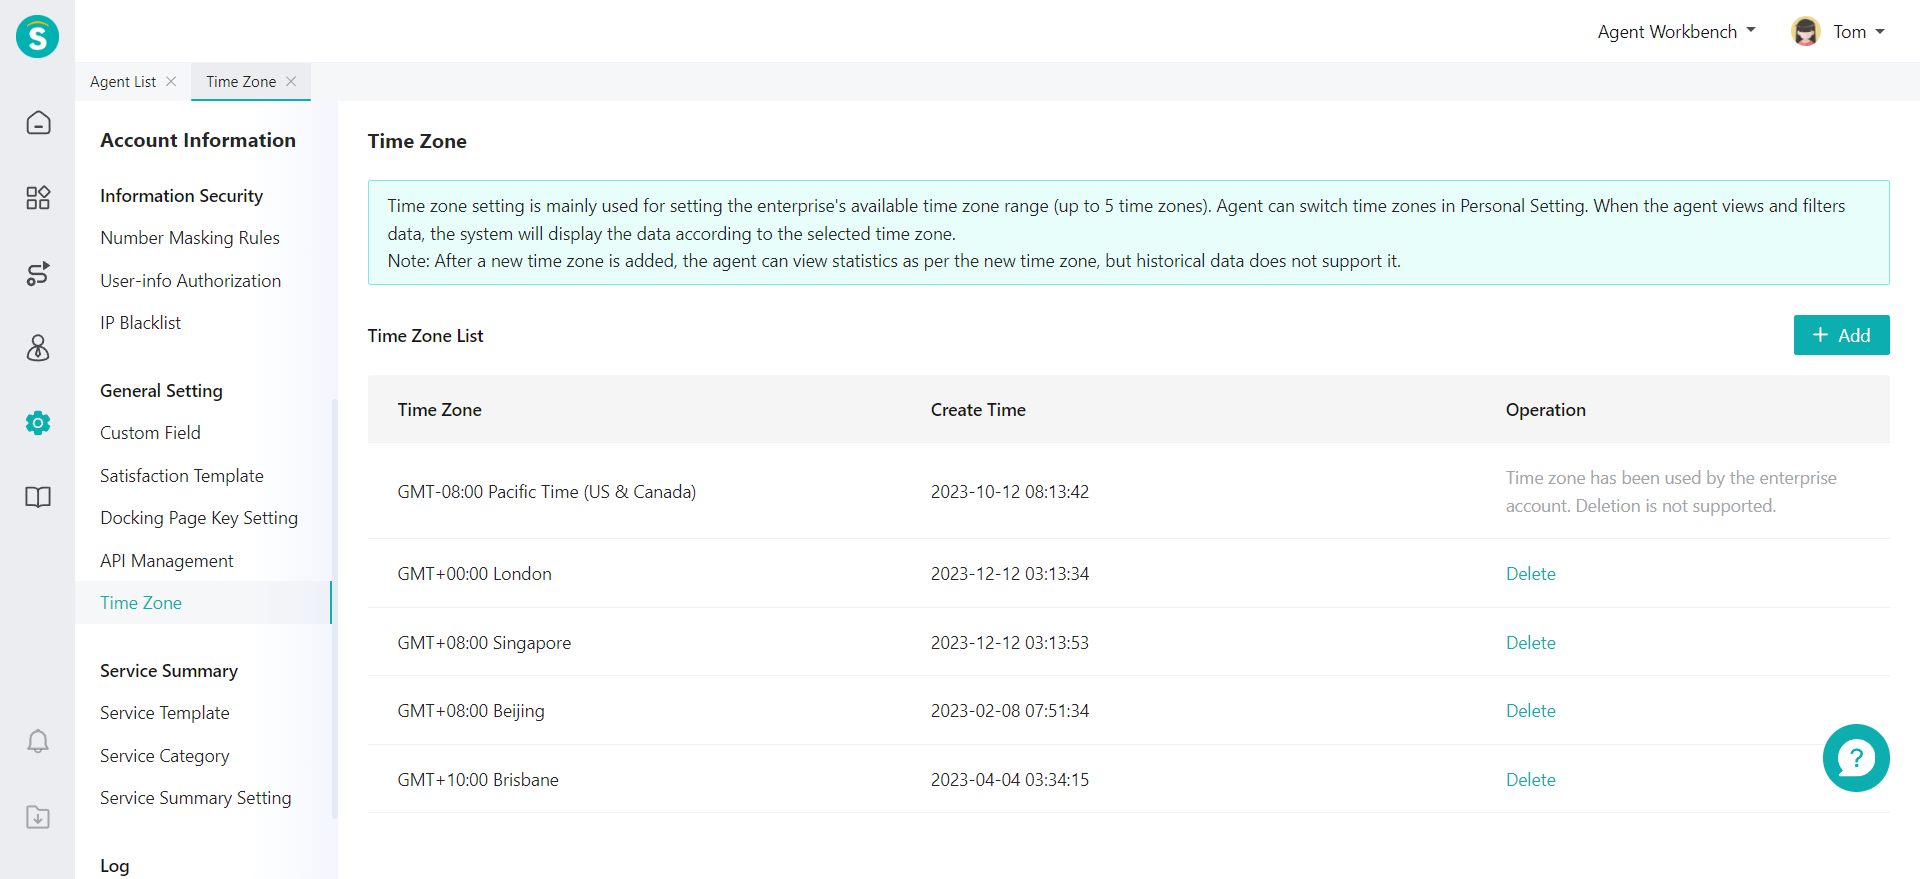
Time zone setting is mainly used for setting the enterprise's available time zone range (up to 5 time zones). Agent can switch time zones in Personal Setting. When the agent views and filters data, the system will display the data according to the selected time zone Note: After a new time zone is added, the agent can view statistics as per the new time zone, but historical data does not support it.
- Add time zone
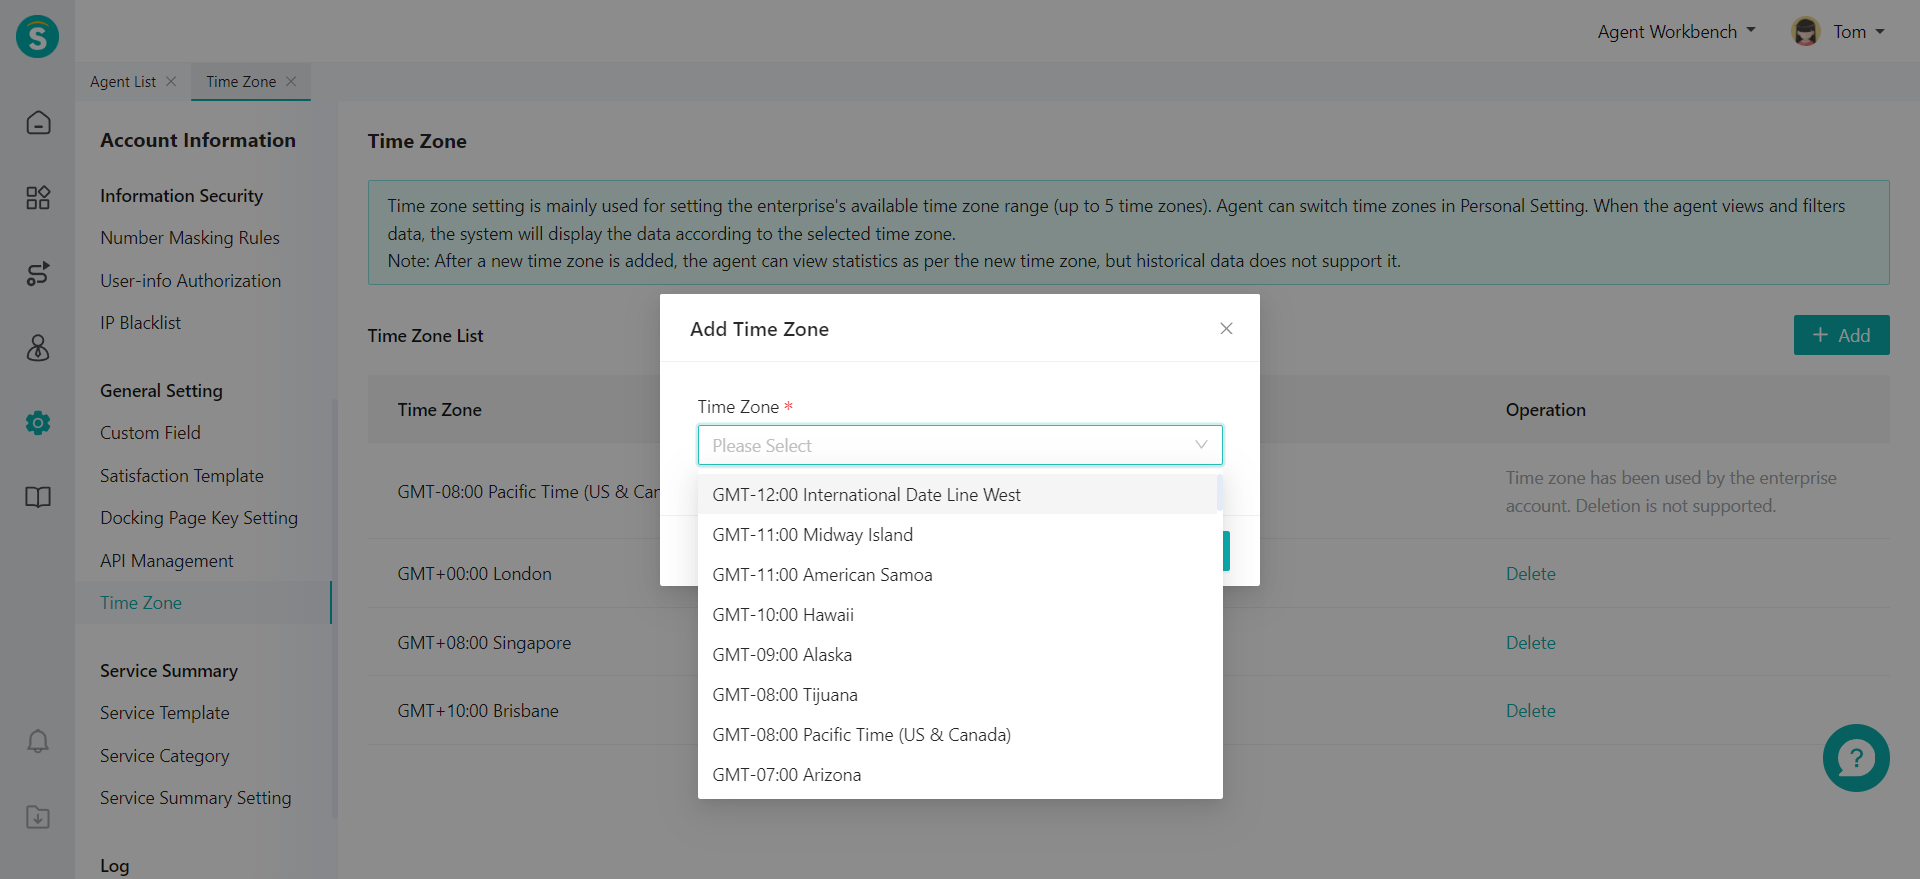
Click “Add” button to add up to 5 time zones.
- Delete time zone
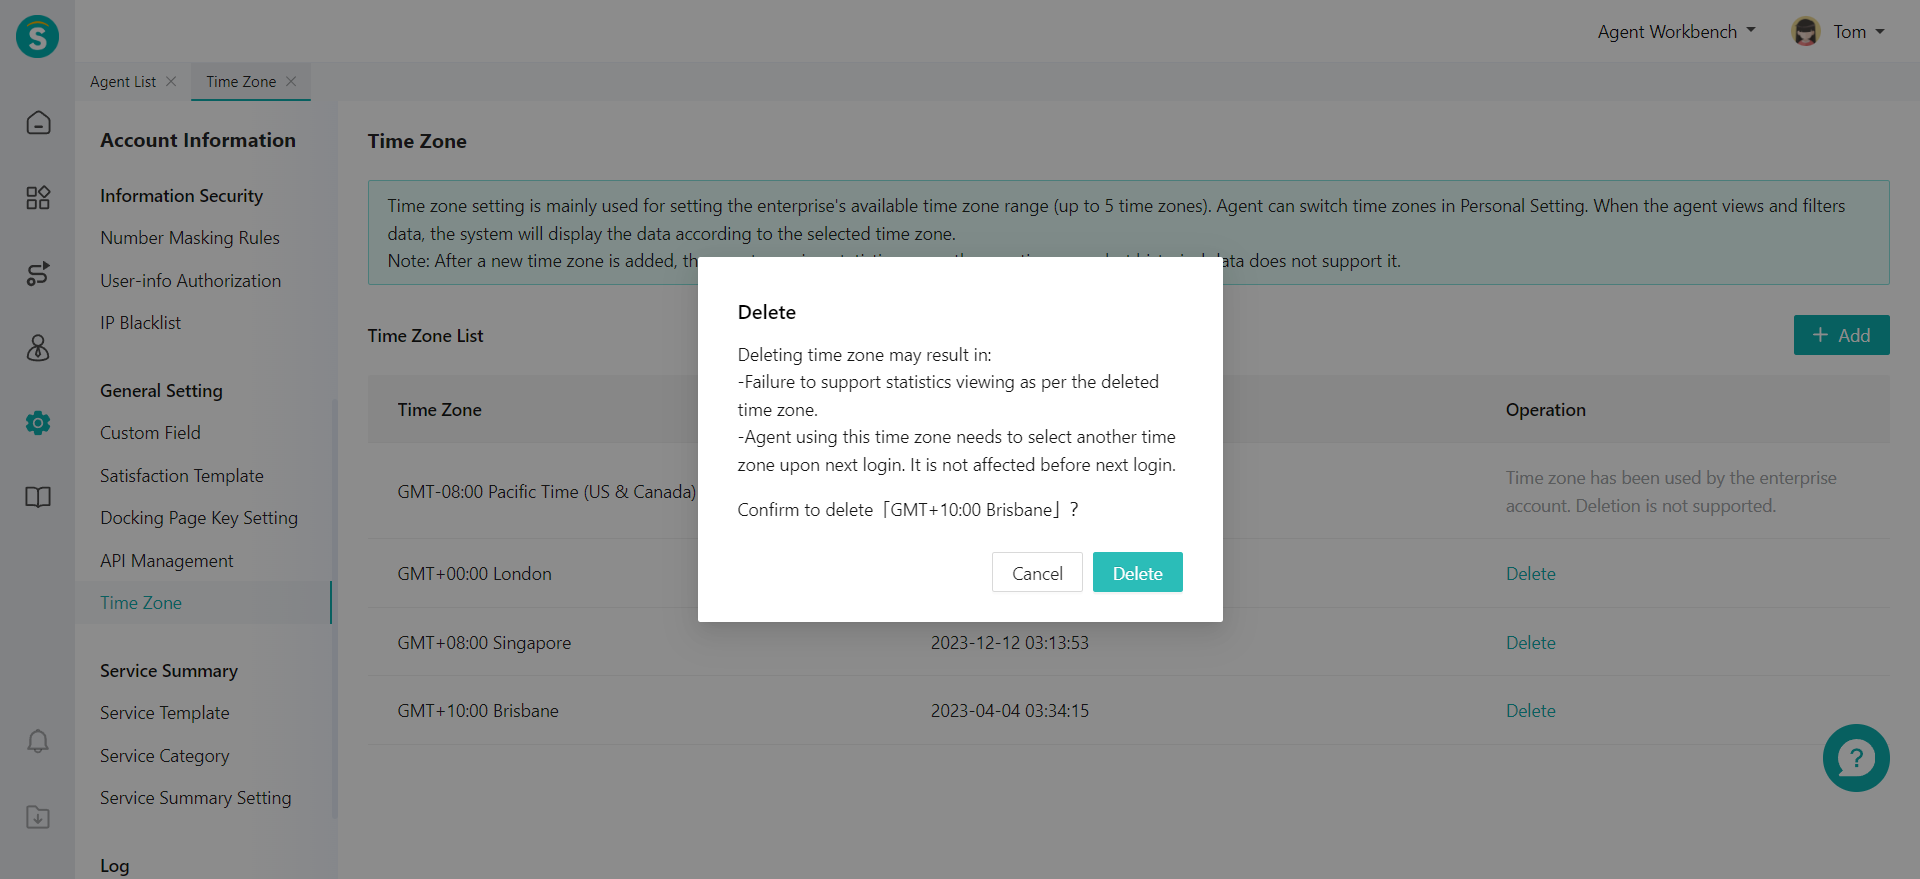
If a time zone is used as the main enterprise time zone, such time zone cannot be deleted. Note,Deleting time zone may result in: -Failure to support statistics viewing as per the deleted time zone. -Agent using this time zone needs to select another time zone upon next login. It is not affected before next login.
