Agent Management Guide
# Agent Management Guide
Manage your agent account according to business needs, set account access menu and function permissions, and manage department members of the enterprise and data permissions of accounts.
# Preparation
Before use, employees using the system shall open accounts according to the division of labor in different positions of the enterprise. The following preparations shall be made before opening accounts:
● In the system, the business data between departments at the same level is usually independent. The admin account of the superior department can view the data of the subordinate department and reasonably plan the agent department according to the business division;
● The role configured for the agent account affects the visible menu page and specific functions of the account. The number of available products purchased by the enterprise will be deducted when the account is enabled or logged in. Please open and manage the agent account according to the actual business;
● The system should open an account for the agent with an email address. Please collect the email address, phone number and basic personal information of the agent in advance and try to provide the authentic information for subsequent password retrieval.
# Agent Account Management
Agent account is the identity credential for the enterprise members to log in to the Sobot system. The agent account can only log in to the system when the enterprise has the quantity of accounts available for the corresponding product.
# ● Add Agent Account
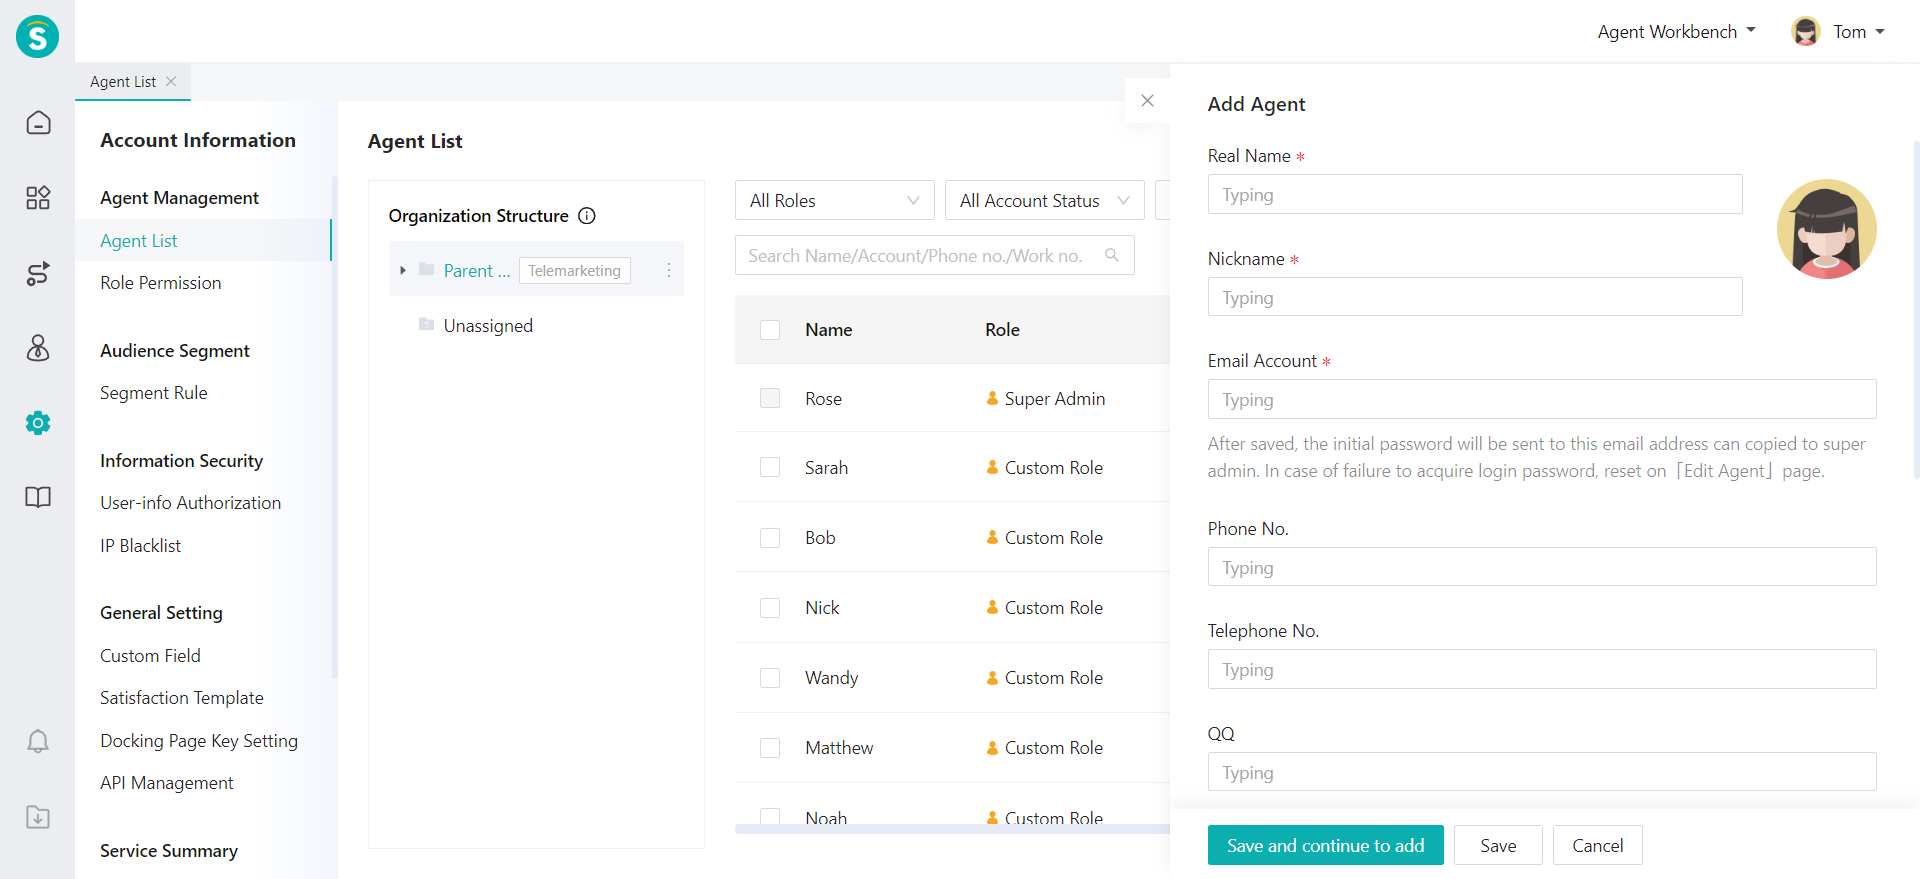
- Add a single agent You can add an agent account by clicking 【Add Agent】 through the Admin Center > Agent Management > Agent and Role > Agent List Page, as shown in the following figure. You can fill in the agent's personal information, select the agent role and department, and then save it. The system will send the login password to the email address you filled in, and you can log in to Sobot system with the email address and login password.
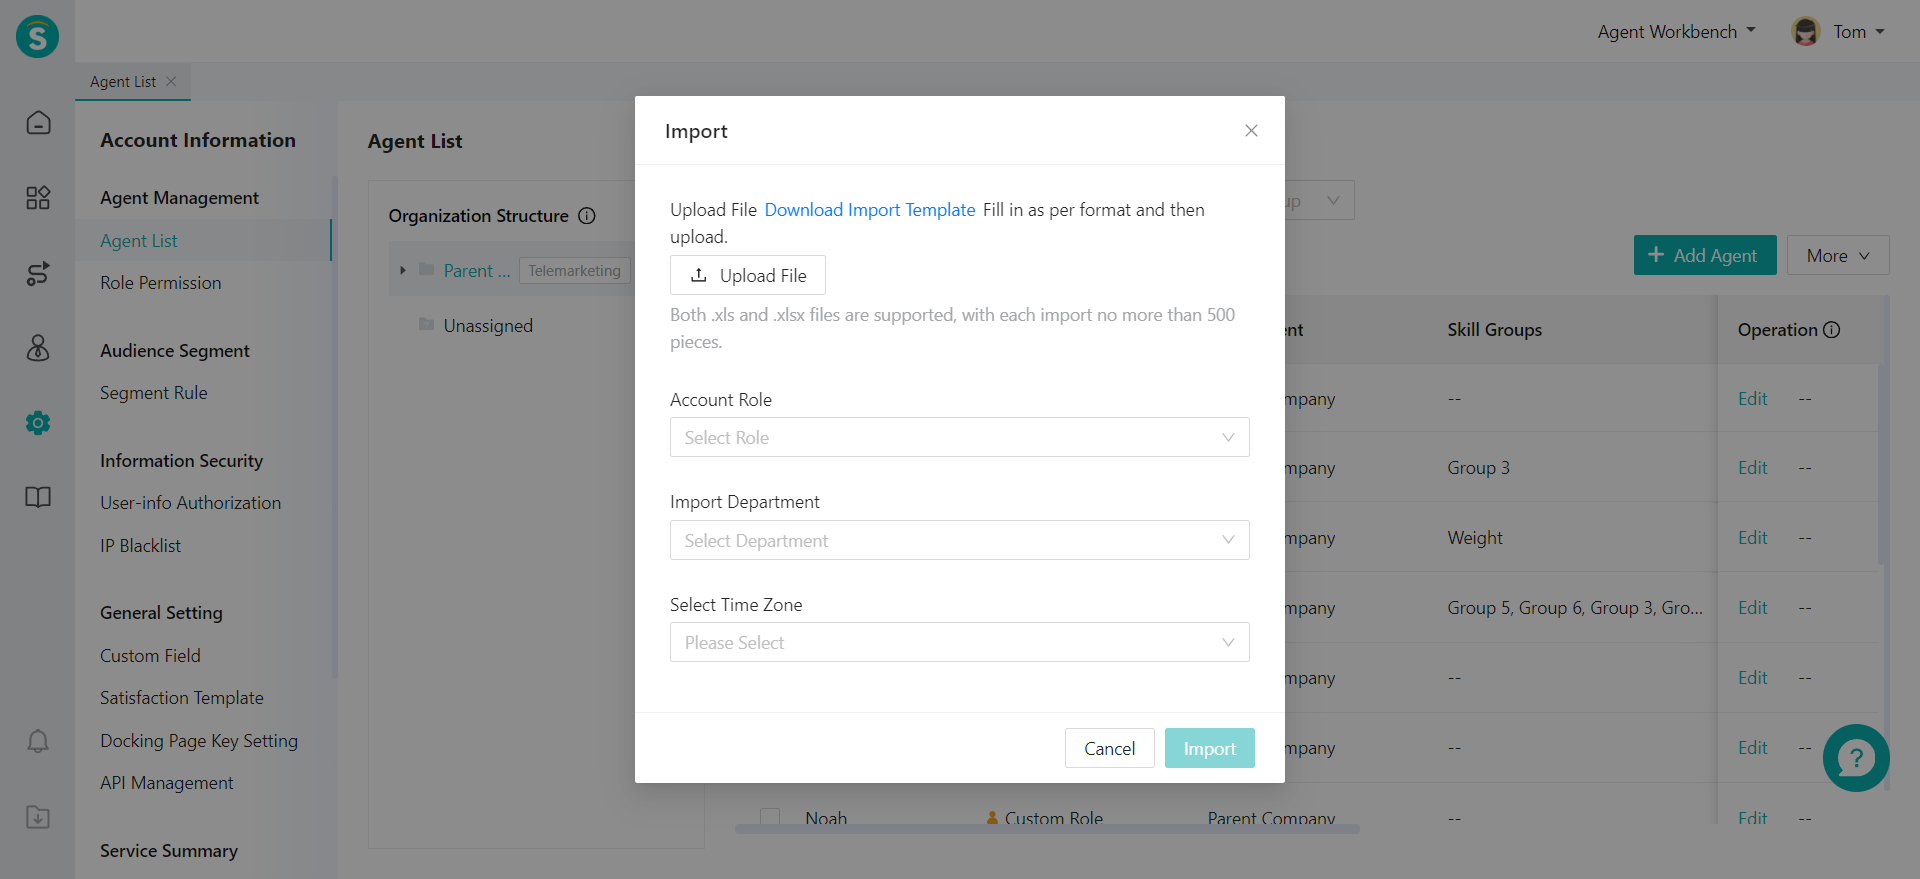
- Add agents in bulk You can add agent accounts in bulk with import template by clicking 【More】 and 【Import template】 through the Admin Center > Agent Management > Agent and Role > Agent List Page. You need to download the import template in the import pop-up window, fill in the agent's personal information line by line, select the account role, department and other information, and then import. After the import is done, the system will send the agent account and login password to the email address of the super admin, and you can log in to Sobot system with the email address and login password.
# ● Edit Agent Account
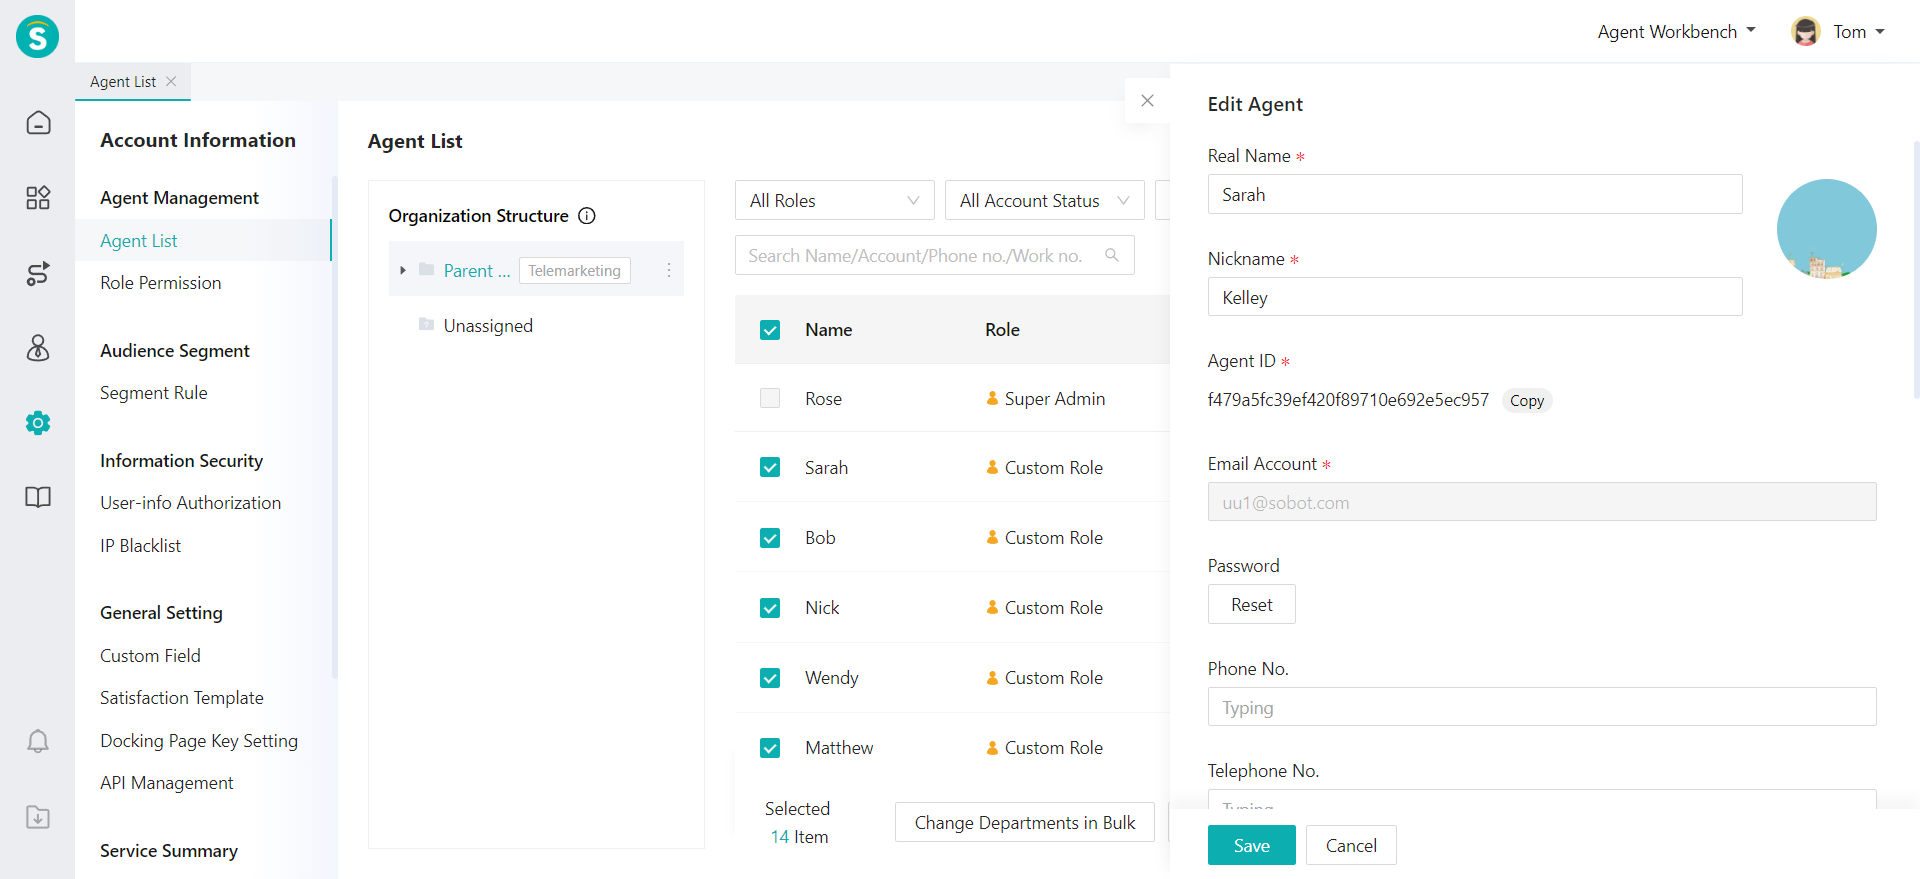
- Edit a single agent account In the agent list, you can click the status ON/OFF of a certain agent account to enable or disable the account directly and click 【Edit】 to modify the personal information, role, and department of the agent account. After saving, it will take effect. The agent's email account cannot be edited by others, but it can be changed through the personal information page after login.
# Organization Structure Setting
The organization structure reflects the hierarchical structure between the departments to which the agent accounts belong. The levels of the department are different, the permissions of the accounts vary. It is suggested to set the organization structure according to the real department structure in the enterprise. Generally, department admin can view the data of the department and sub-department members, while general agents can only view their own data (subject to the actual function of the product line).
# ● Add Sub-department
After the enterprise account is registered successfully, the head office department will be automatically opened for the enterprise. The super admin of the enterprise will join the top-level department by default. You can select any department and click "┇" on the right side to add sub-department, modify department names and delete department. When deleting a department, you need to delete all the agents under the department. The top-level department cannot be deleted.
# ● Add Department
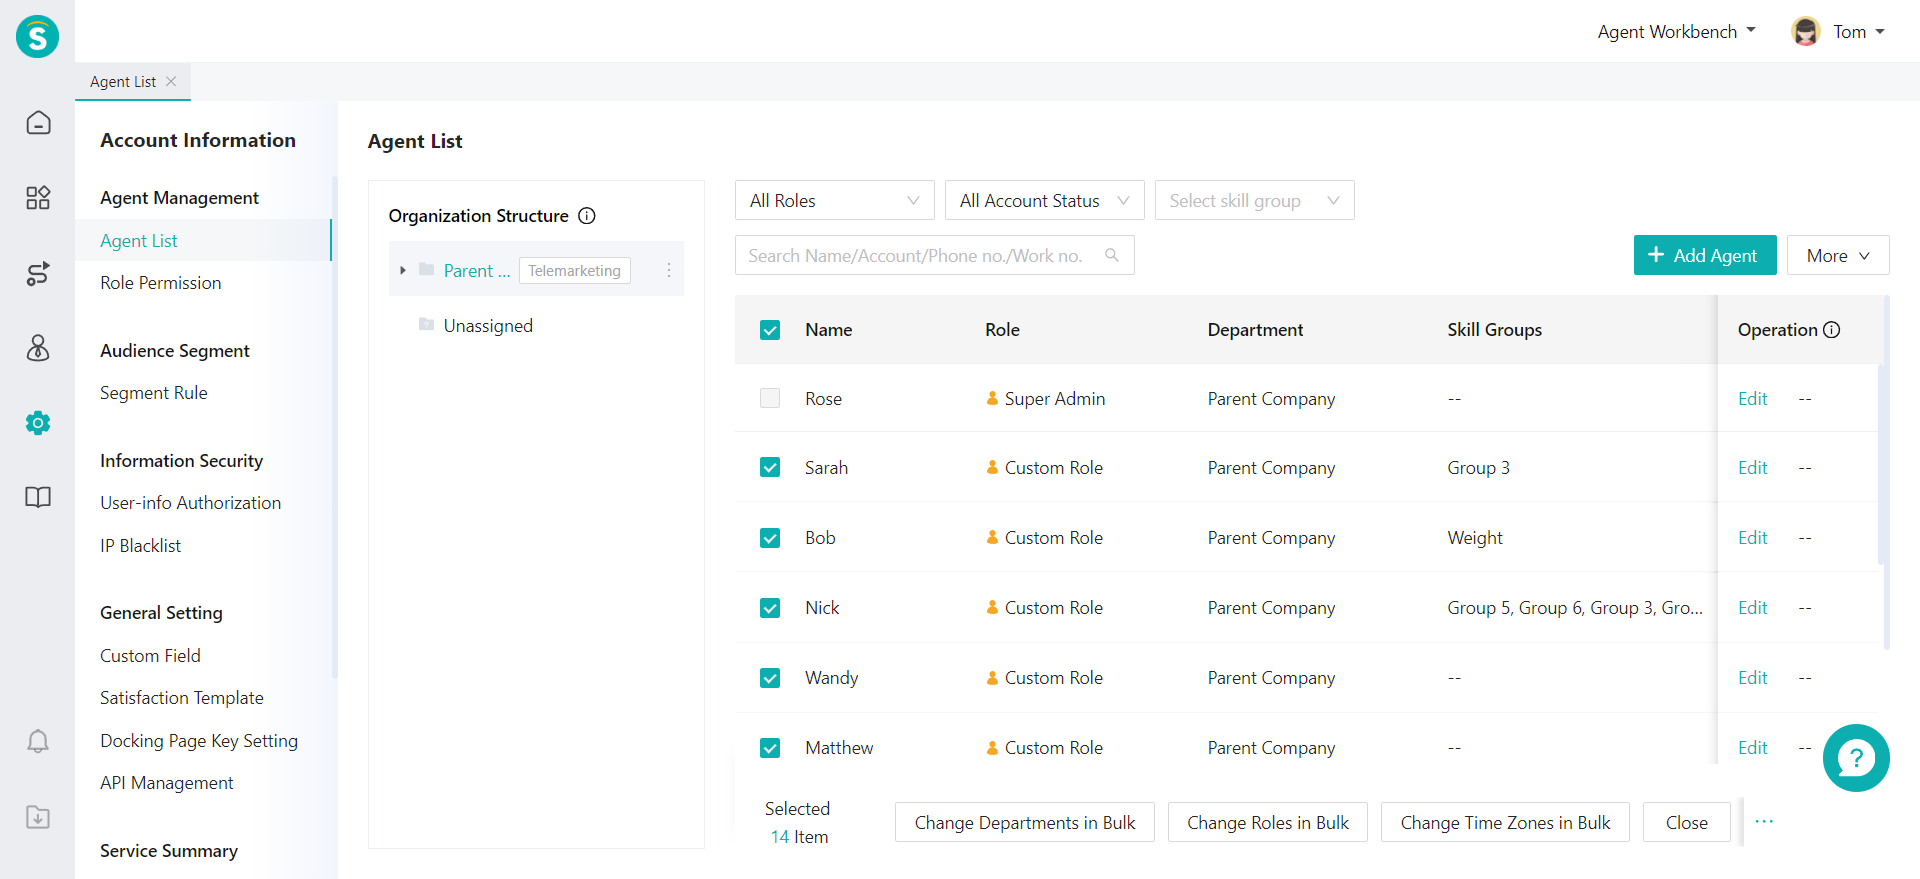
Members When adding agents or importing agents in bulk, you can select the corresponding department and add the new agent account to the corresponding department, or you can edit the agents individually or in bulk to change the department, select the new department, and add the agents to the corresponding department.
# ● Set Department
Admin You can click the More button on the right side of the agent list and select Set Admin to add an admin for the selected department. Only the accounts with the role type of admin can be added. Adding an admin will not remove the original department of the account.