Ticket Processing Setting Guide
# Ticket Processing Setting Guide
——Personalize the complete workflow of the ticket according to the actual needs
# Role of Ticket Processing Setting
Ticket processing settings are all user-defined configurations or content in the process of creating, processing, and transferring tickets. You can enable, disable, and customize these functions according to the actual business to meet the needs of daily use of ticket system functions.
# Preparation
● Understand the completion workflow of the ticket system, and be familiar with the basic functions of each module of the ticket as well as the meaning of the ticket list, ticket details and other fields.
● Create a ticket agent account and a ticket skill group. Multiple processing settings can be configured by group or for specific agent. Please set agent and group in advance to facilitate function setting.
Related article: Agent and Group Guide
● Create and process several tickets as test objects for modifying configurations and customizing functions.
# Create Ticket
# ● Required Field
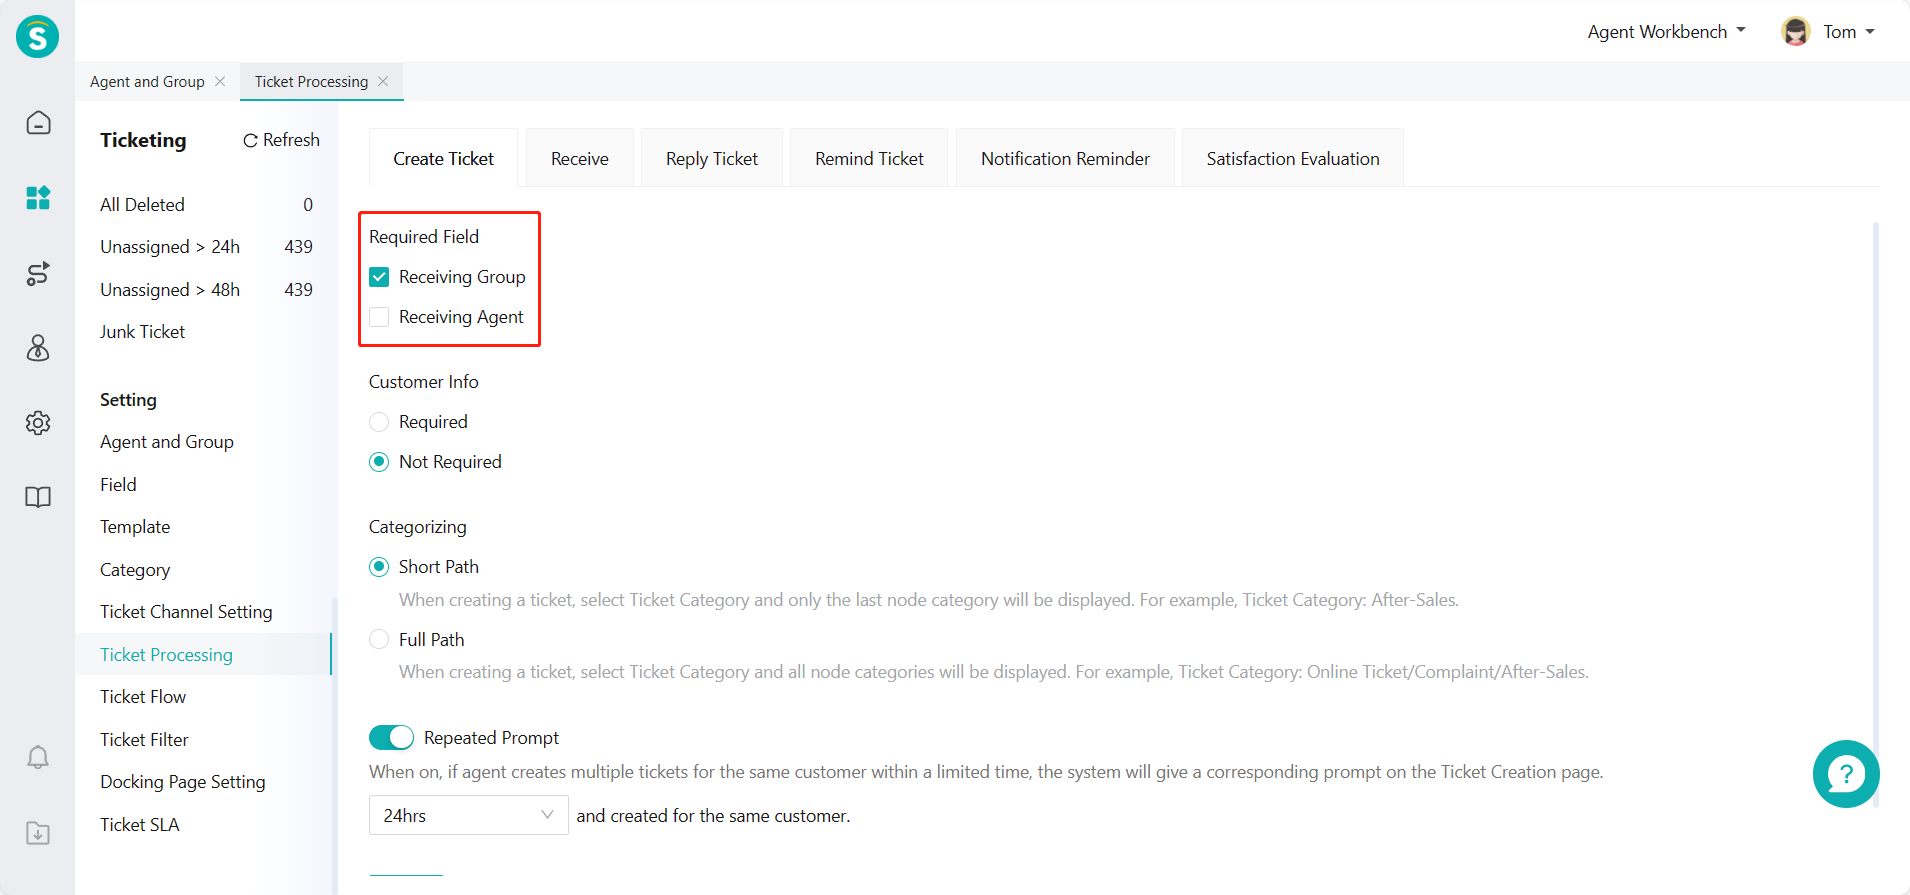
When creating a ticket, the ticket title and description, ticket category, and ticket template are required fields by default. In addition, you can set the receiving agent, receiving agent group and customer information associated with the ticket as required or not required fields.
# ● Categorizing Path
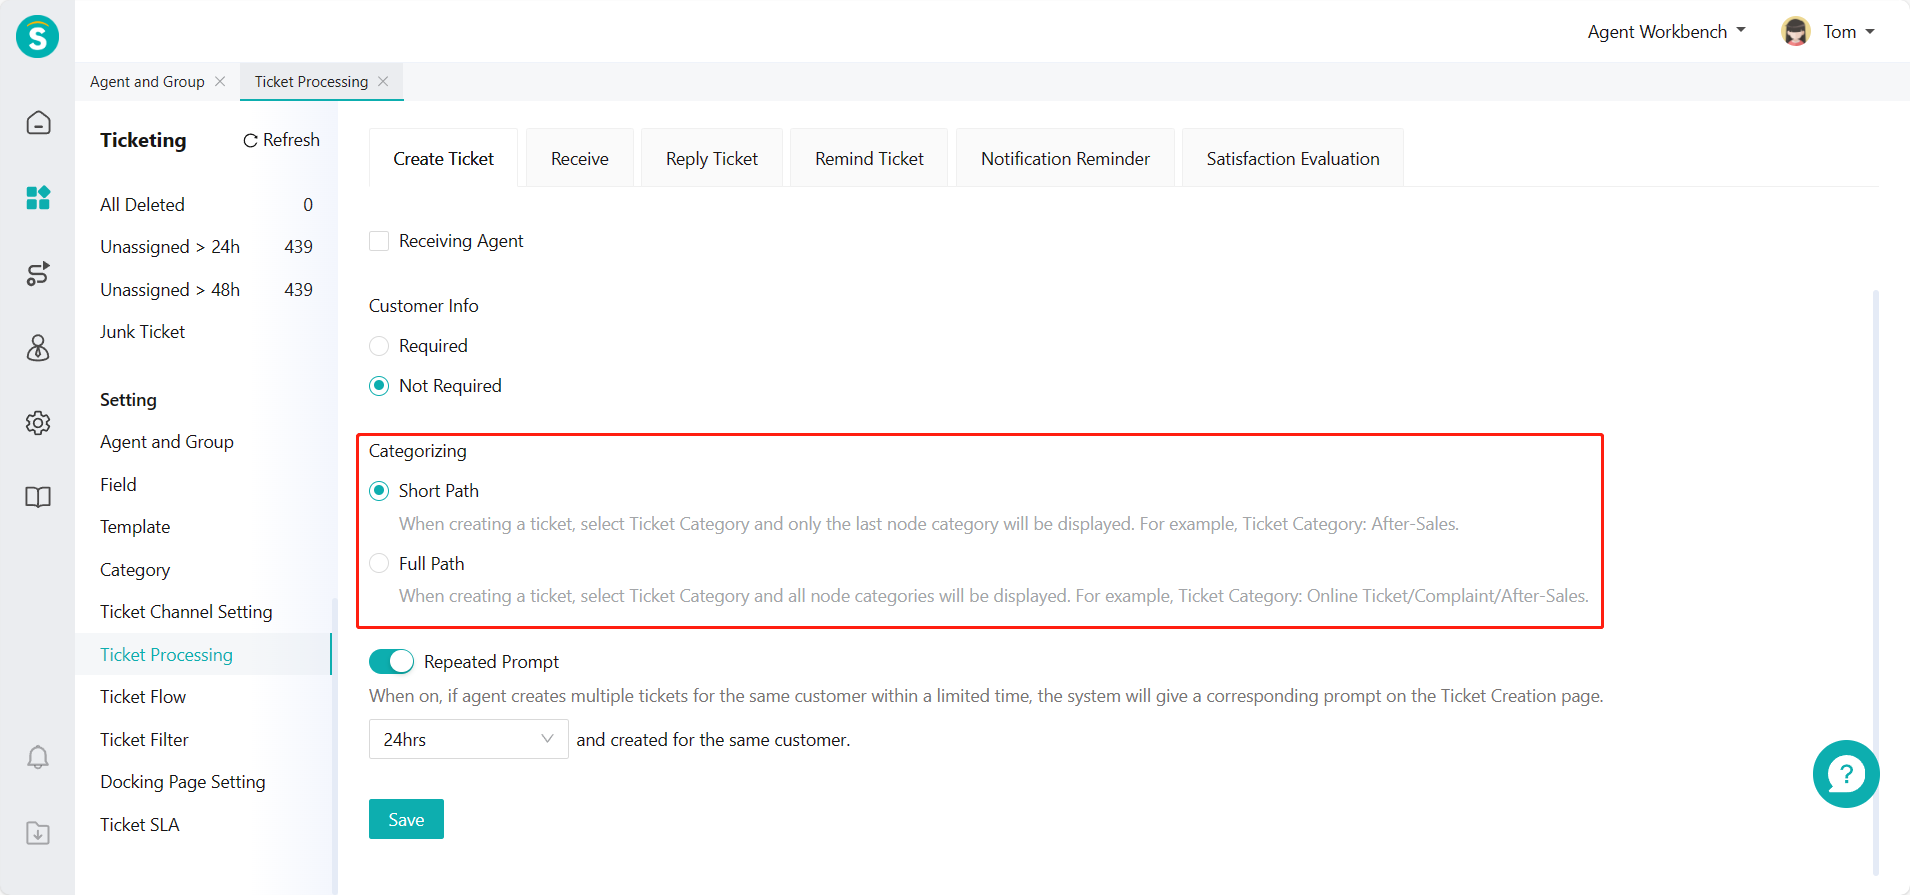
You can switch the display effect of full path/short path of ticket category by changing the ON/OFF of Categorizing Path.
# ● Repeated Creation Prompt
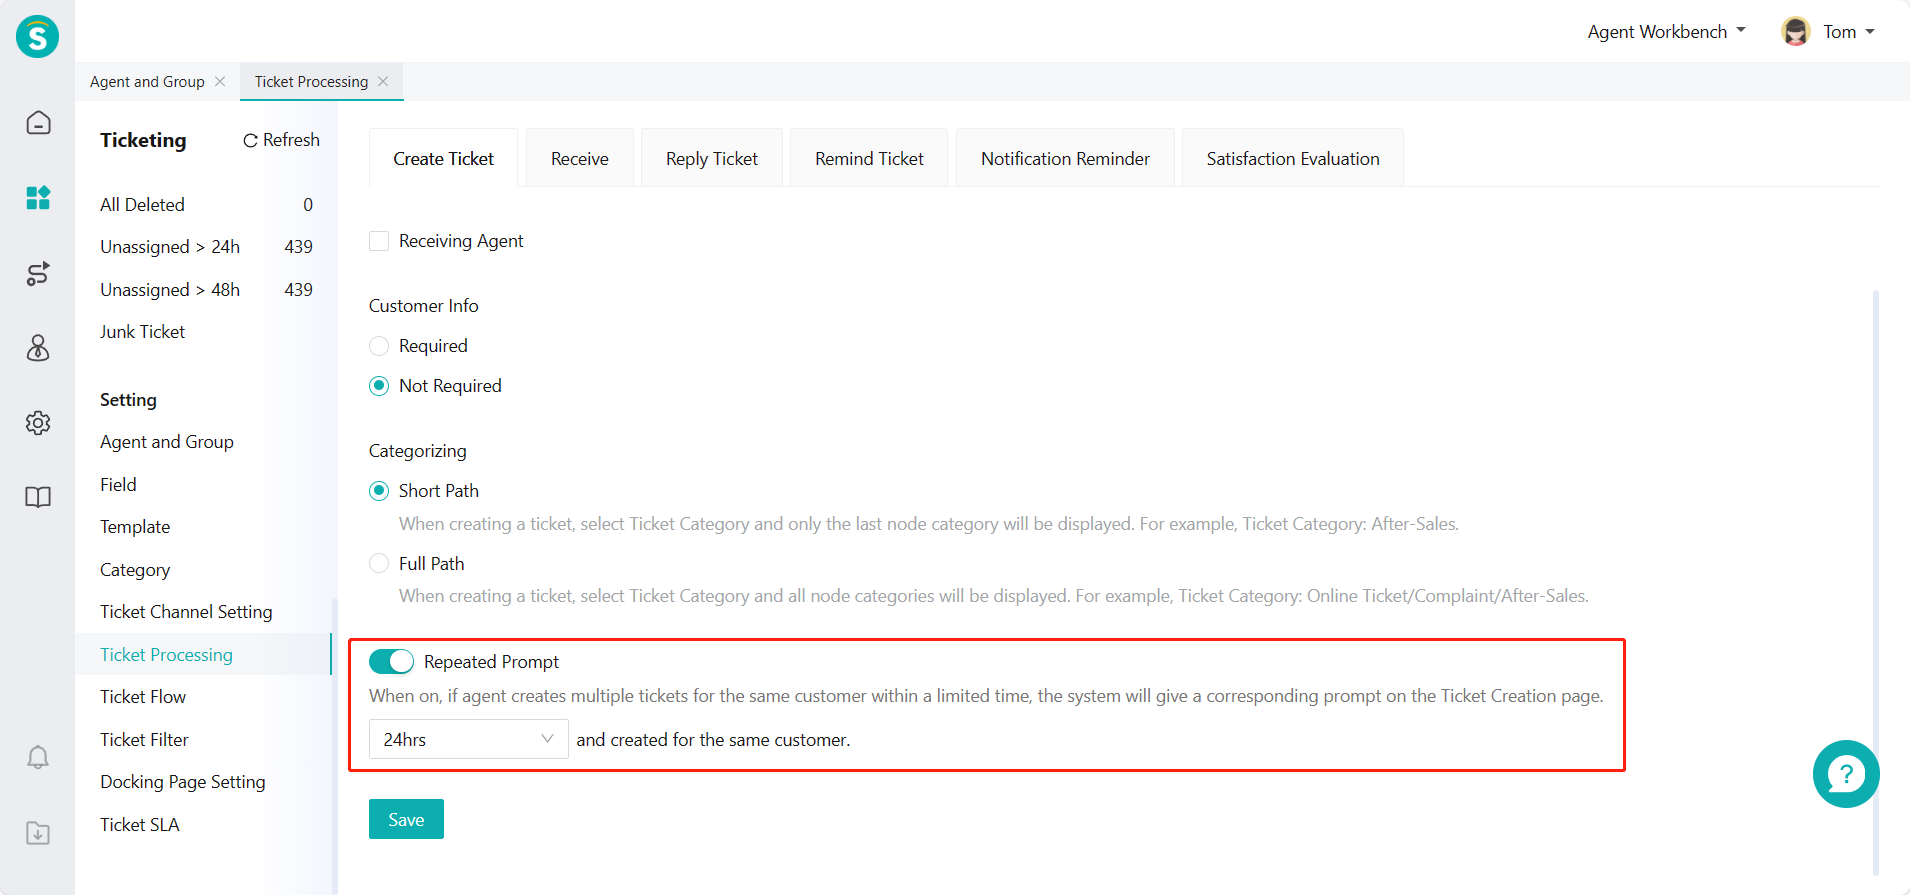
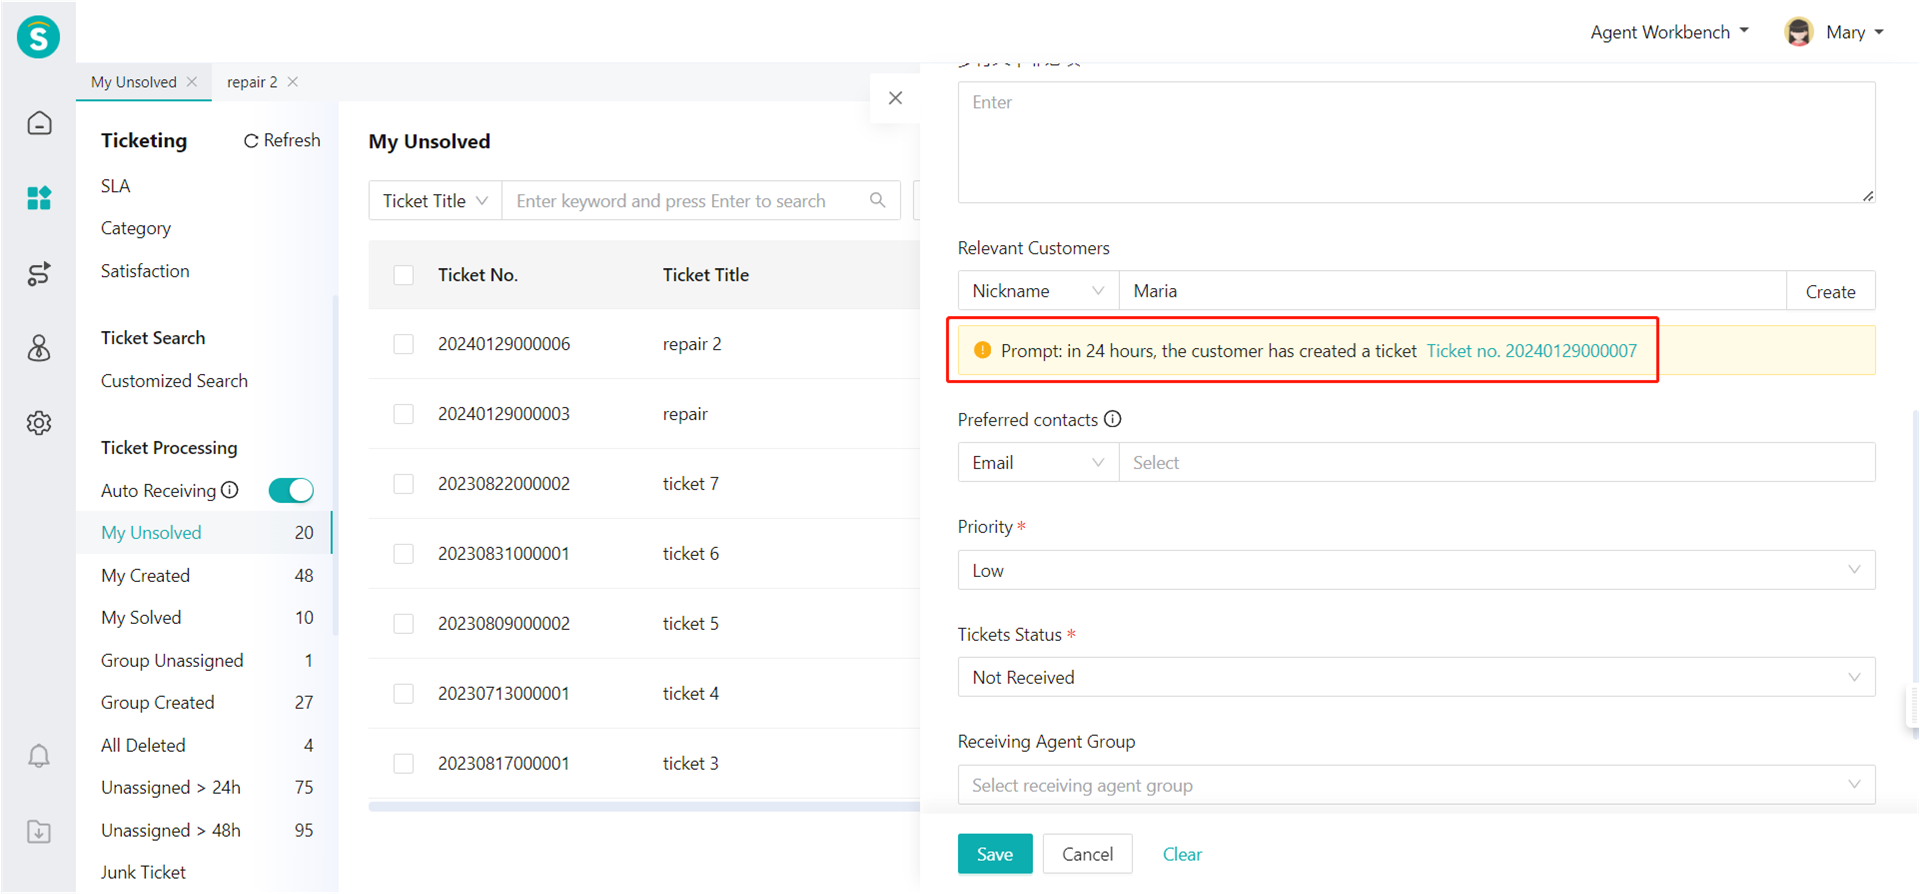
Enable the Repeated Creation Prompt and set the prompt time you need. When agent creates a ticket, if the same customer has created a ticket within the designated time, the system will prompt you to view that ticket to avoid repeatedly creating a ticket for the same problem of the customer and thus affecting the ticket processing efficiency.
# Ticket Receiving
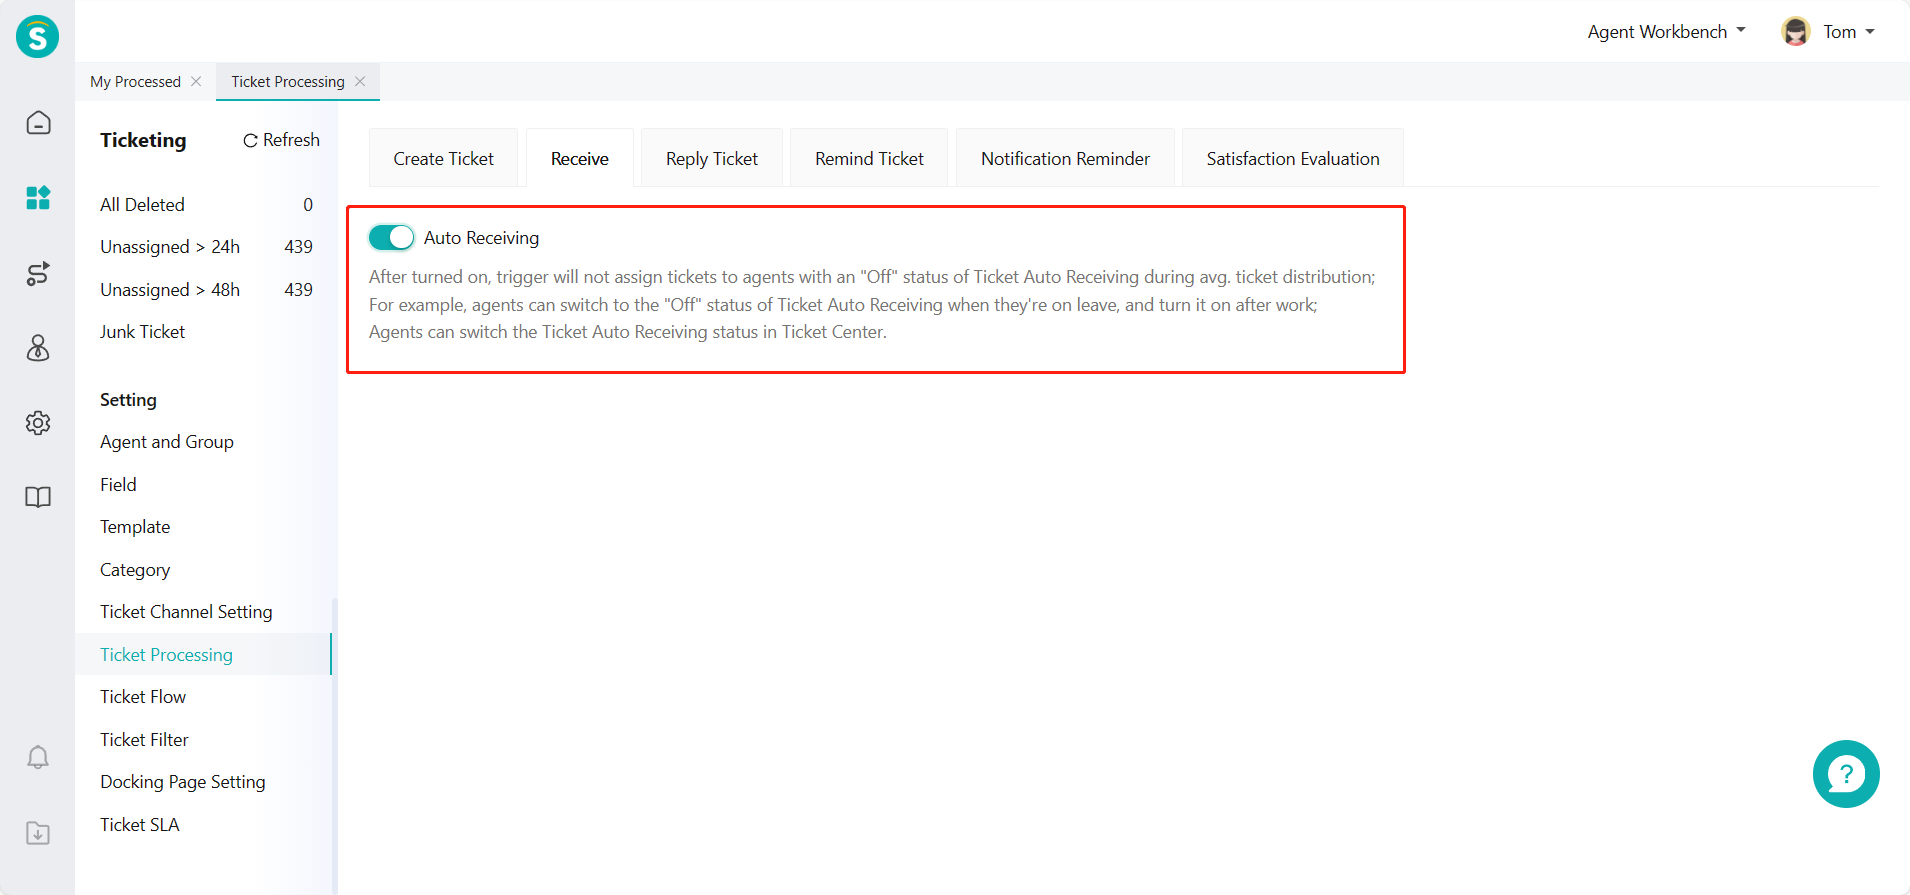
After Ticket Auto Receiving of the enterprise is on, all agents will find the Ticket Auto Receiving ON/OFF under the ticket processing menu. After it is on, it allows agents to normally receive the tickets assigned by the trigger. If you want to learn about the trigger configuration, please refer to the article: Ticket Flow Setting Guide
# Reply to Tickets
In the process of ticket processing, agent can enter the content to reply to single or batch tickets, or select the preset reply of the enterprise to reply directly to customers to improve work efficiency.
# ● Default Reply Available Range
When agent replies to a ticket, it can set the reply to be visible internally or externally, and modify the Default Reply Available Range,thus reducing the agent's action of switching the visible range in some cases and improving efficiency.
# ● Add Preset Reply
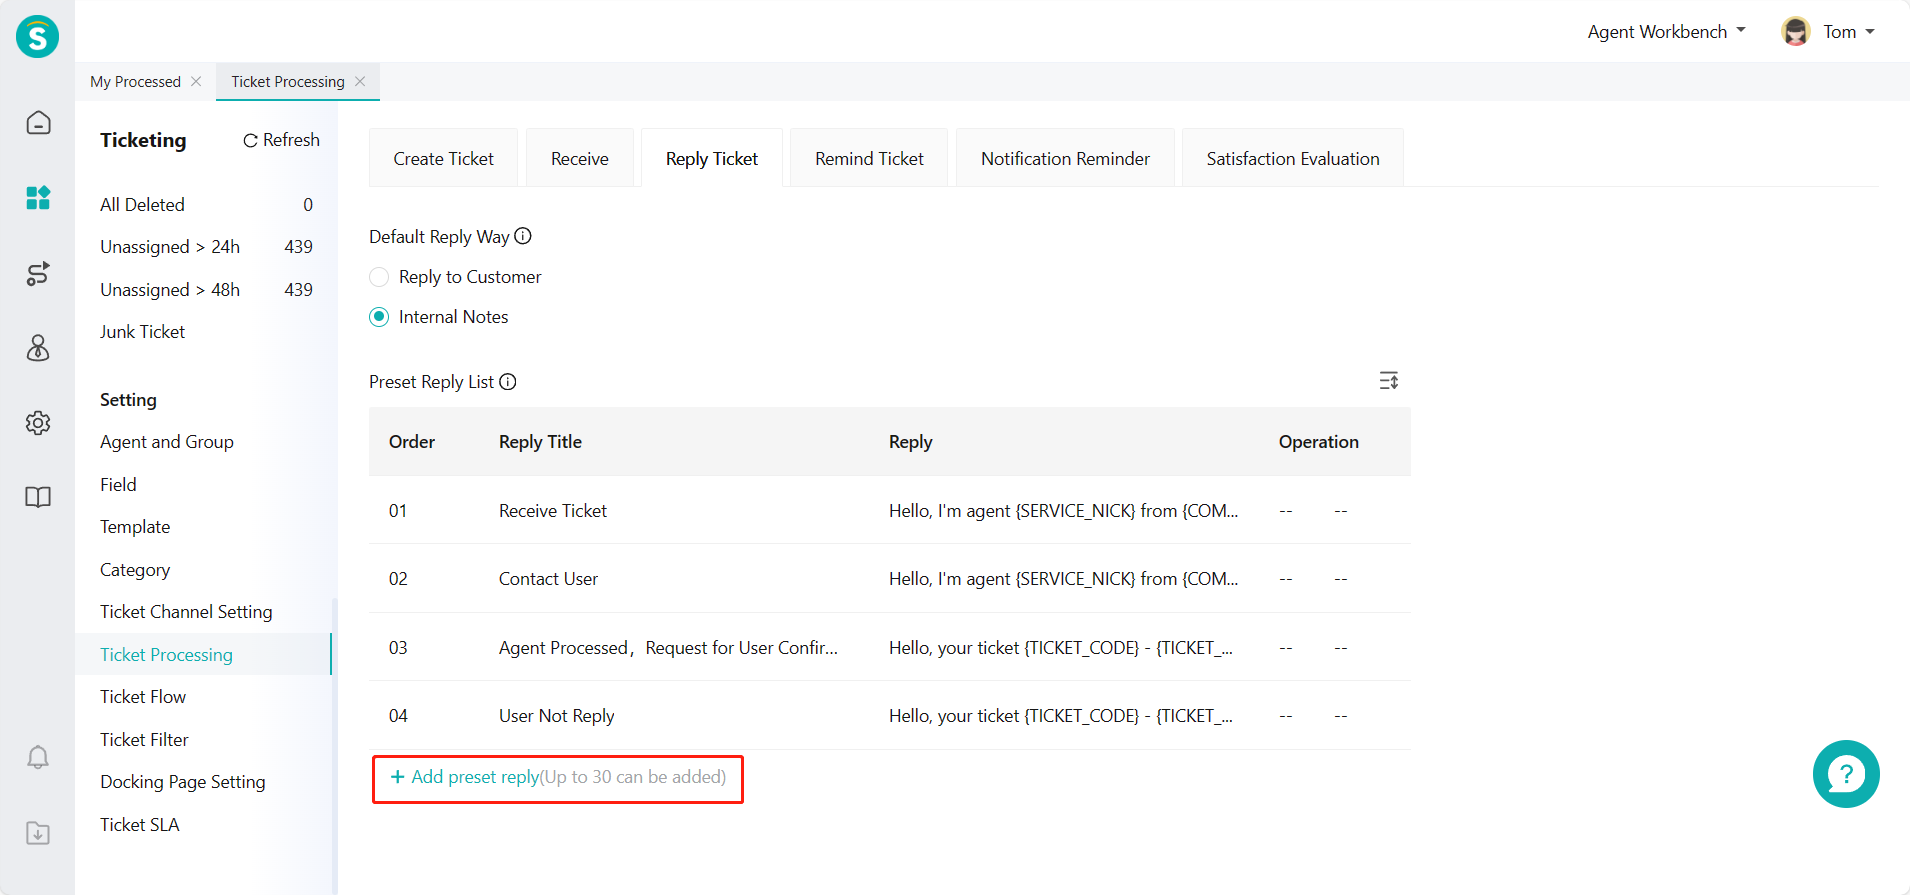
- The agent system has set multiple preset replies for the enterprise. If you need to add more preset replies, you can customize the reply content by clicking【+Add Preset Reply】through the Ticket Center > Setting > Ticket Processing Setting > Reply to Ticket page; 2. When adding a preset reply, you can insert a variable in the reply content. When replying in different situations, you can automatically replace the variable value, enabling more flexible usage; 3. The default preset replies of the system cannot be edited or deleted, and the first 10 preset replies can be displayed by sorting.
# ● Preset Reply Editing, Deletion and Sorting
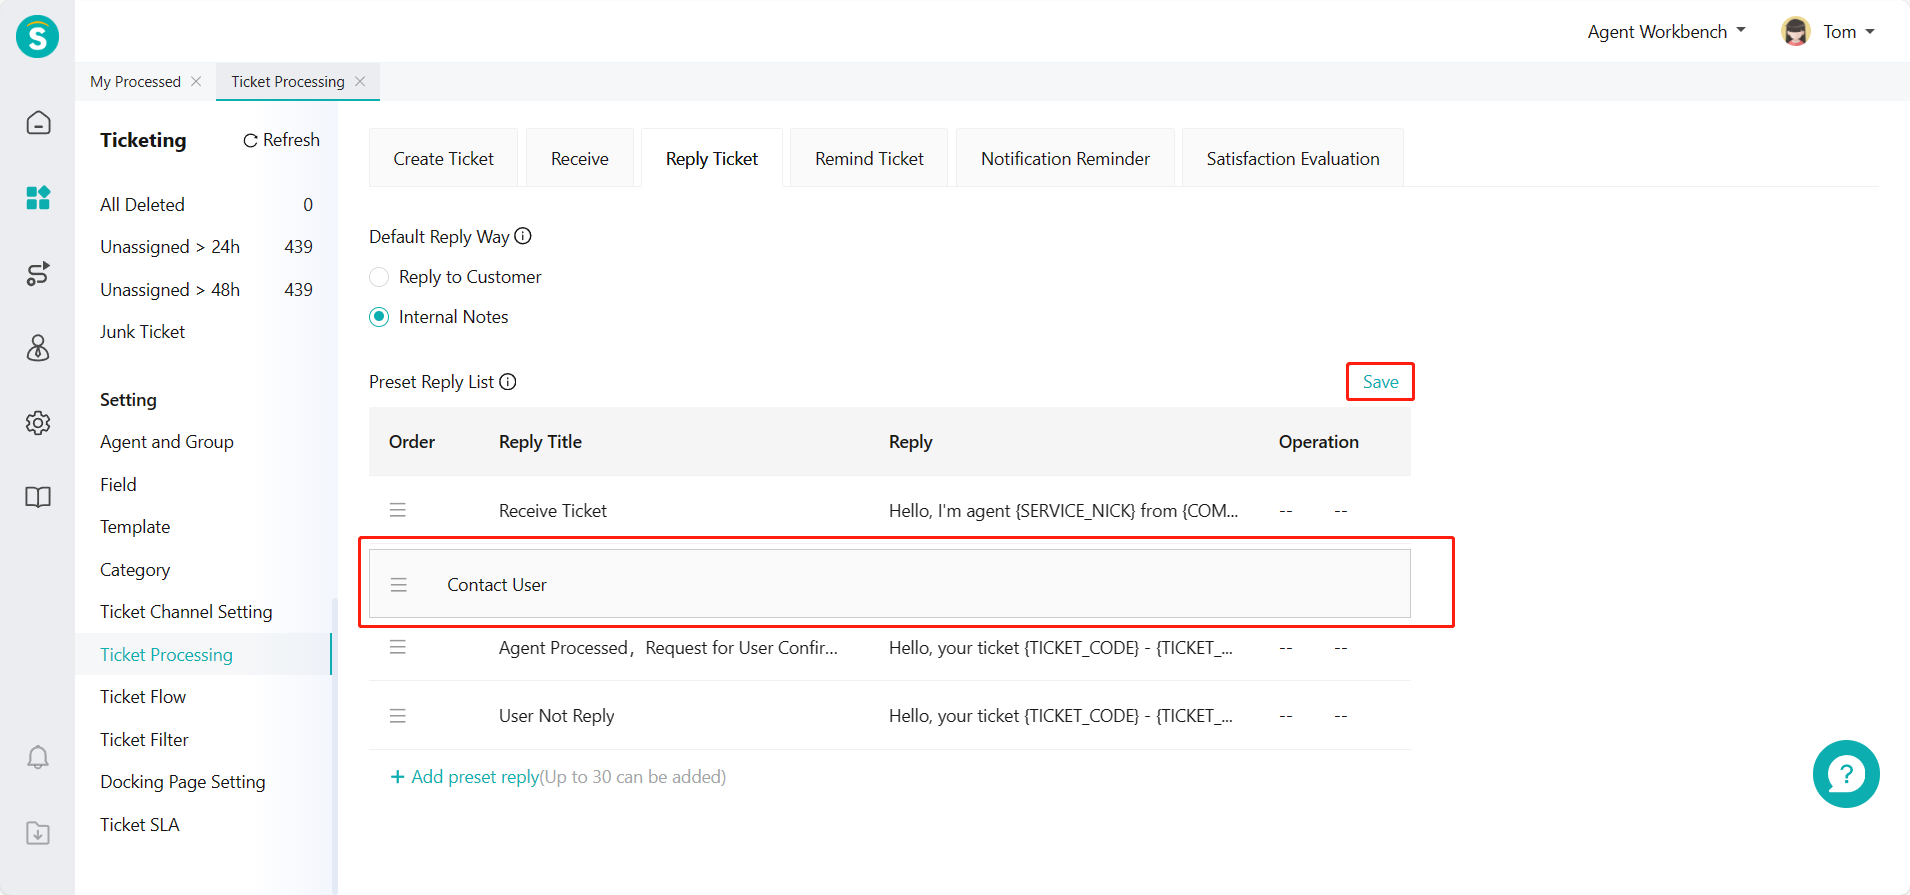
- The custom preset reply can be edited or deleted by clicking the corresponding function button in the action bar; 2. Click the Sort button on the right side of the preset reply list to activate the sorting status, and drag the sequence tag on the left side of the reply to quickly sort, which will take effect after saving.
# Reminder
Agent can urge ticket receiving agent to process this ticket asap through the reminder function.
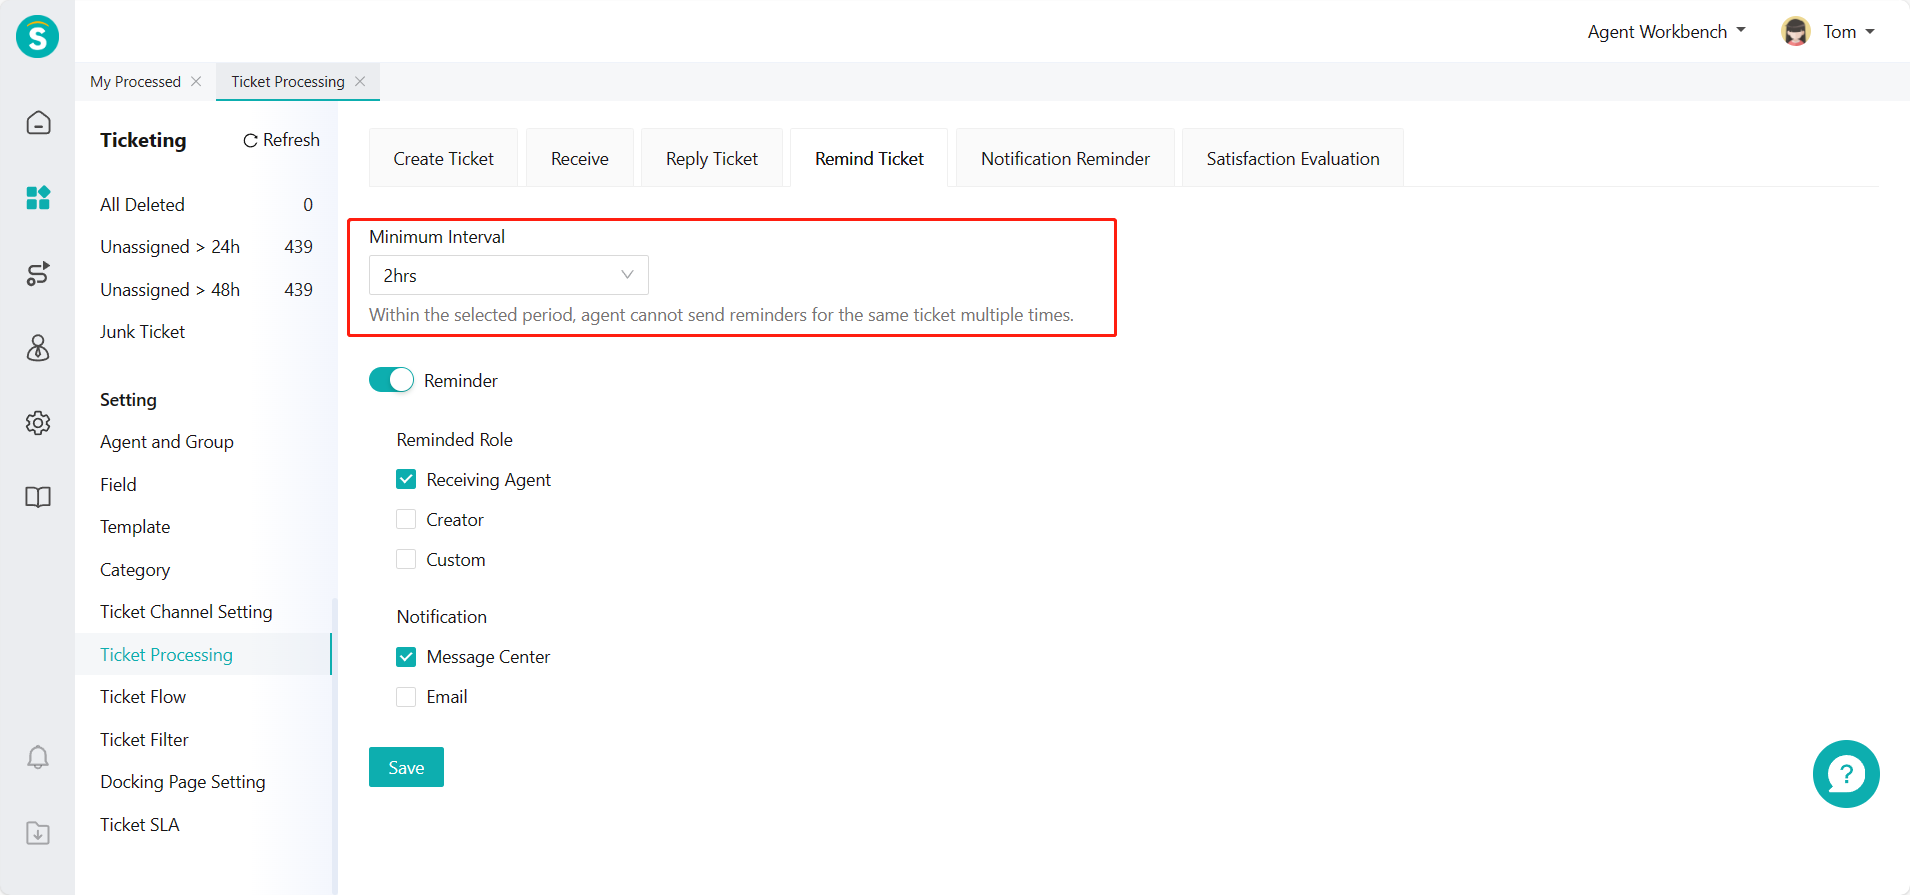
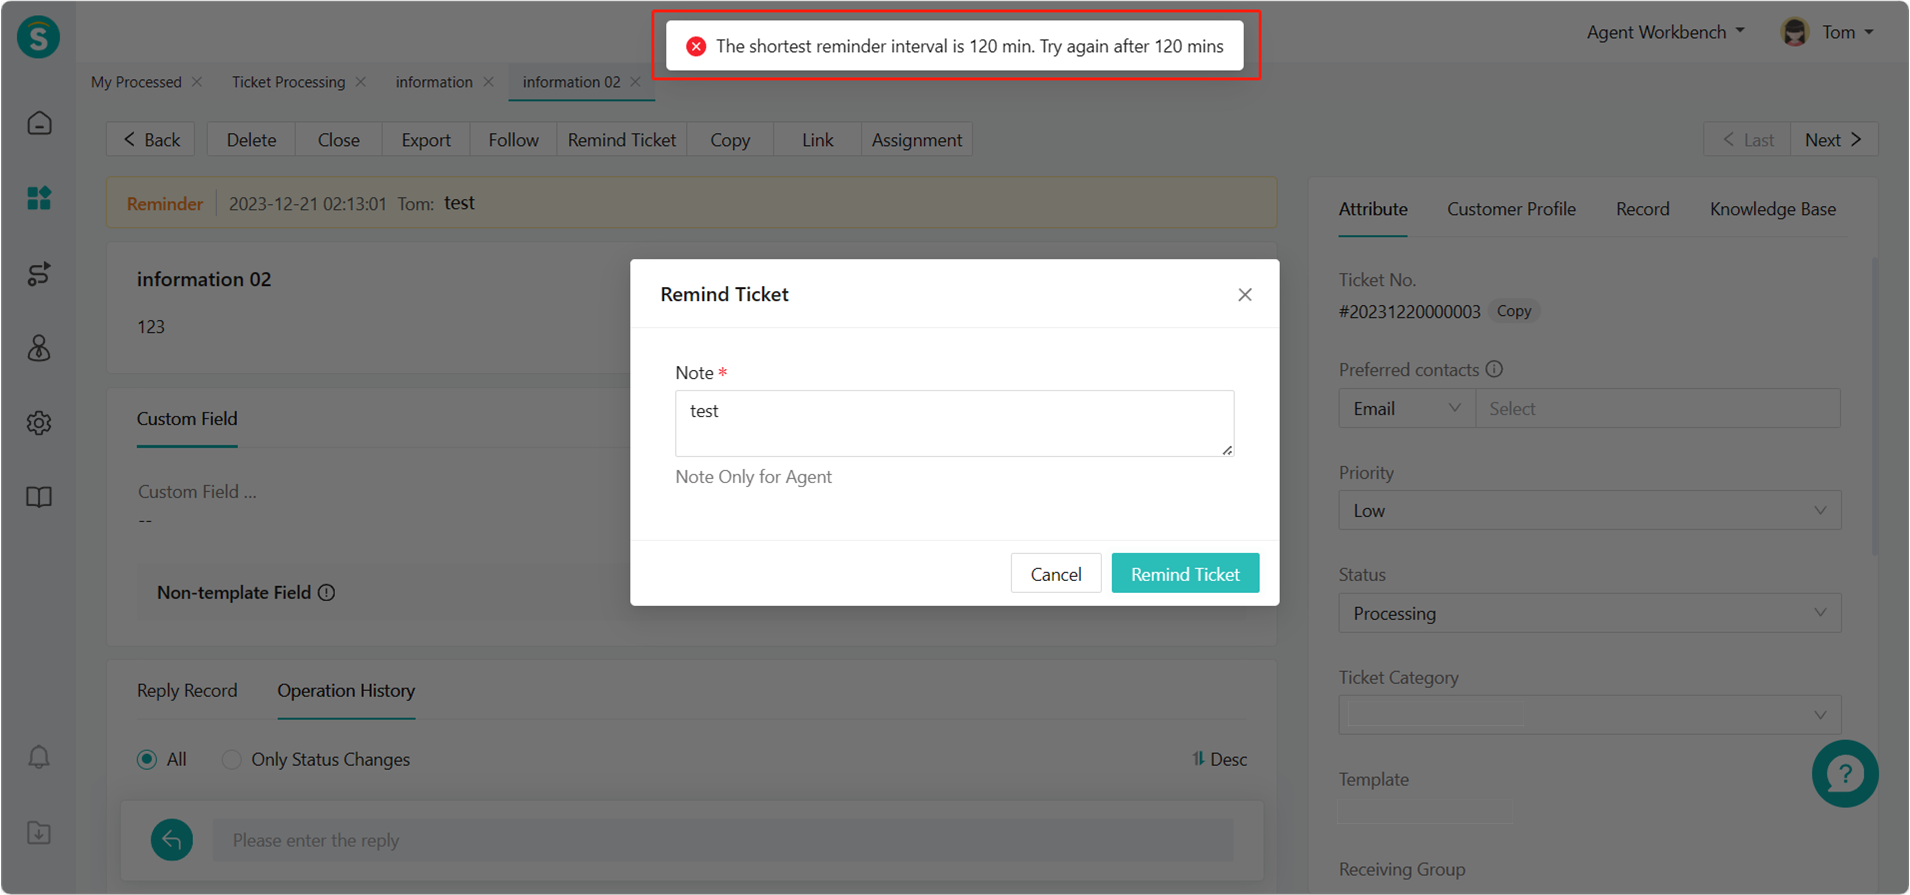
# ● Minimum Reminder Interval
After the enterprise sets the minimum reminder interval, the ticket cannot be reminded again within the designated time after the last reminder.
# ● Ticket Reminder
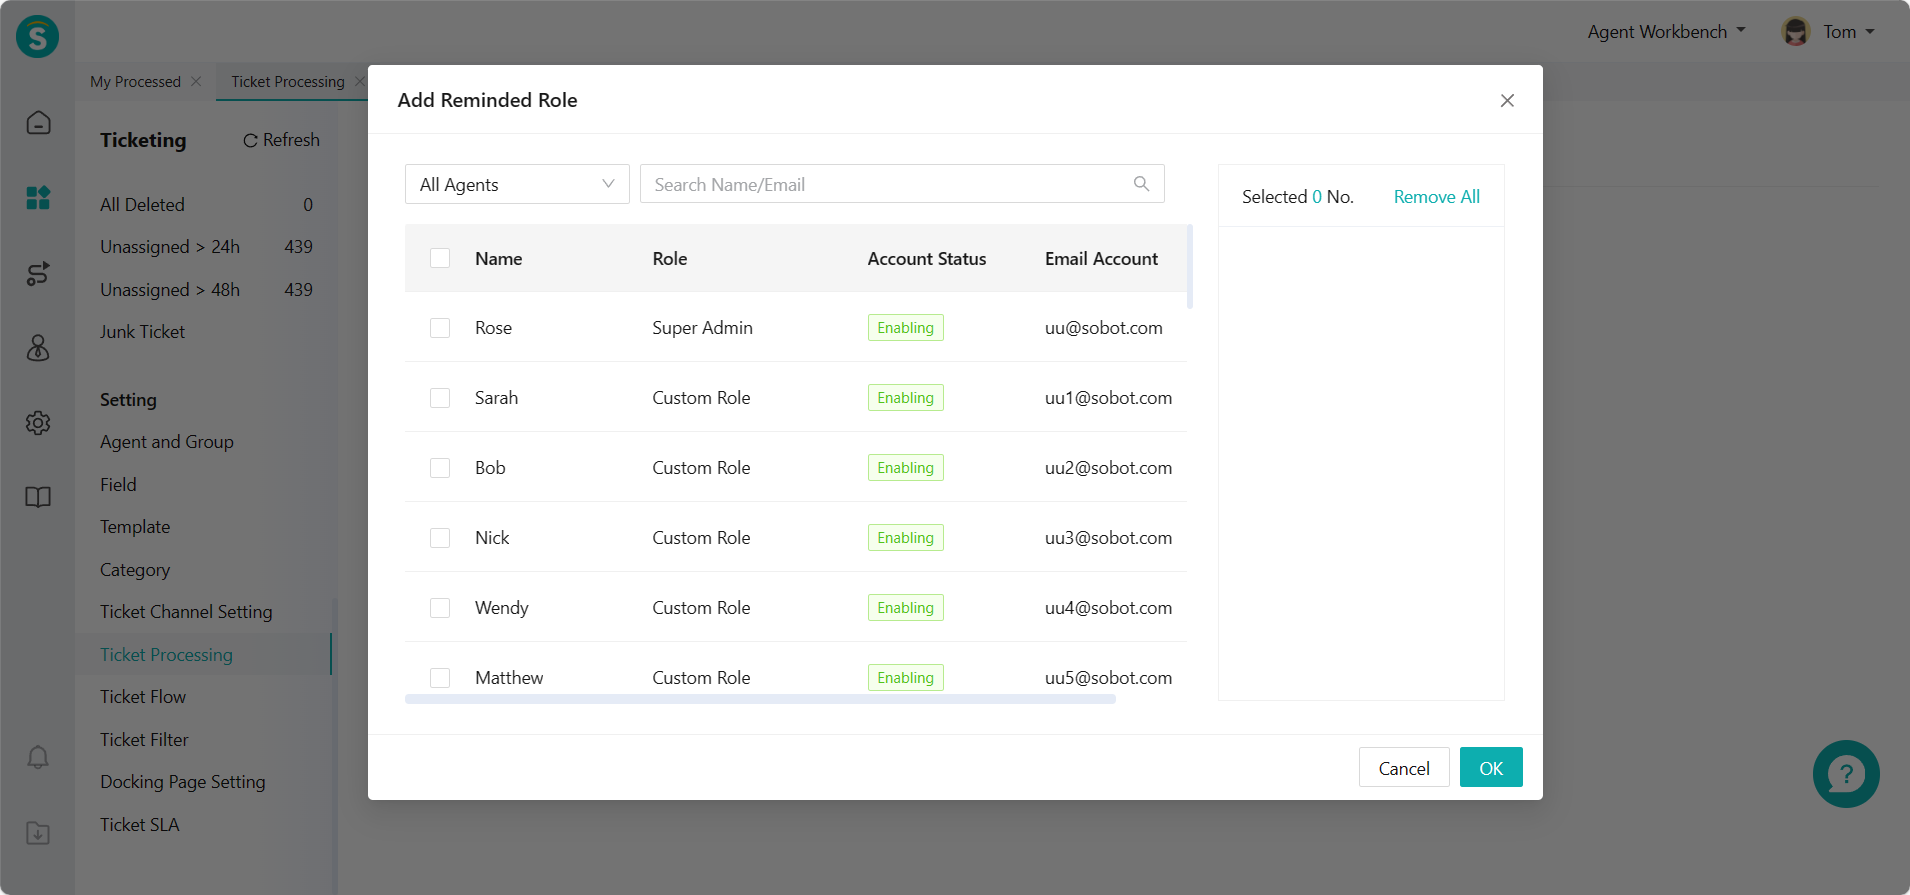
The enterprise can control whether to remind the receiving agent or other relevant processing personnel when a ticket is reminded by turning on the ticket reminder. 1. Reminder object After the ticket reminder is on, you can select the reminder object by selecting the receiving agent or creator or customizing the member in the agent system.
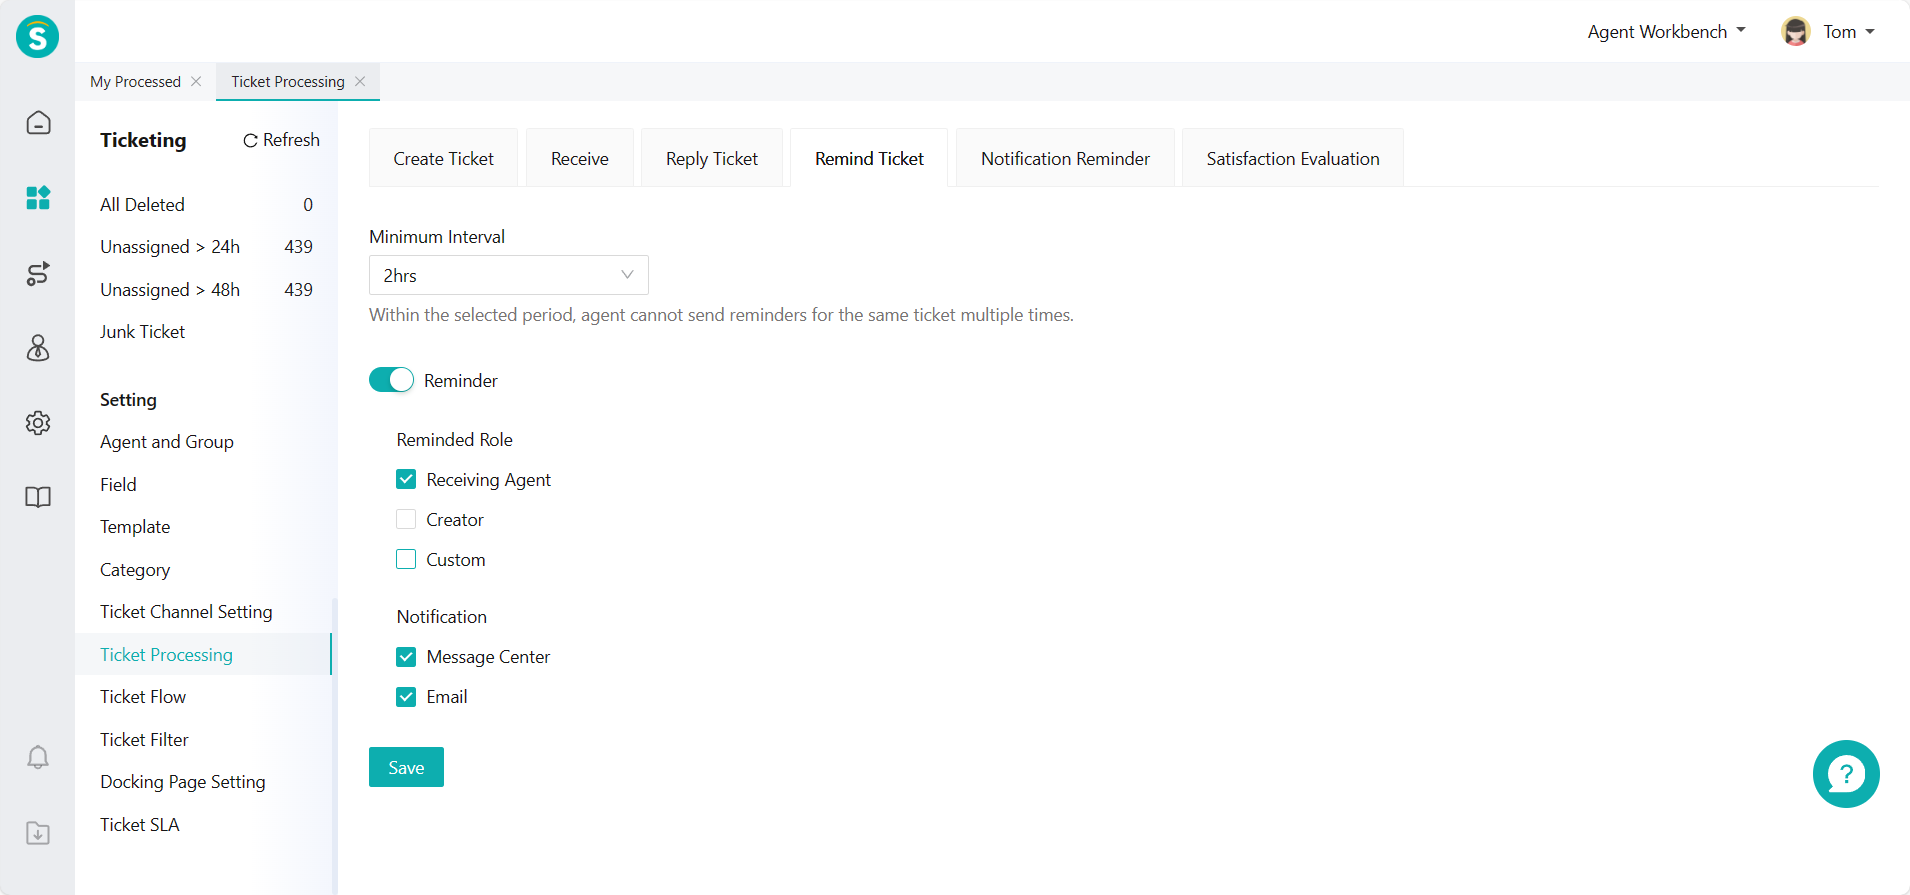
- Reminder method You can send reminders to the reminder object in multiple paths by selecting the reminder method, including private MSG, email, and SMS. To use the SMS reminder function, you need to recharge the SMS first. If multiple reminder objects are set, when a ticket is reminded, multiple SMS will be used for reminder.
# Notification Reminder
# ● Notify Customer
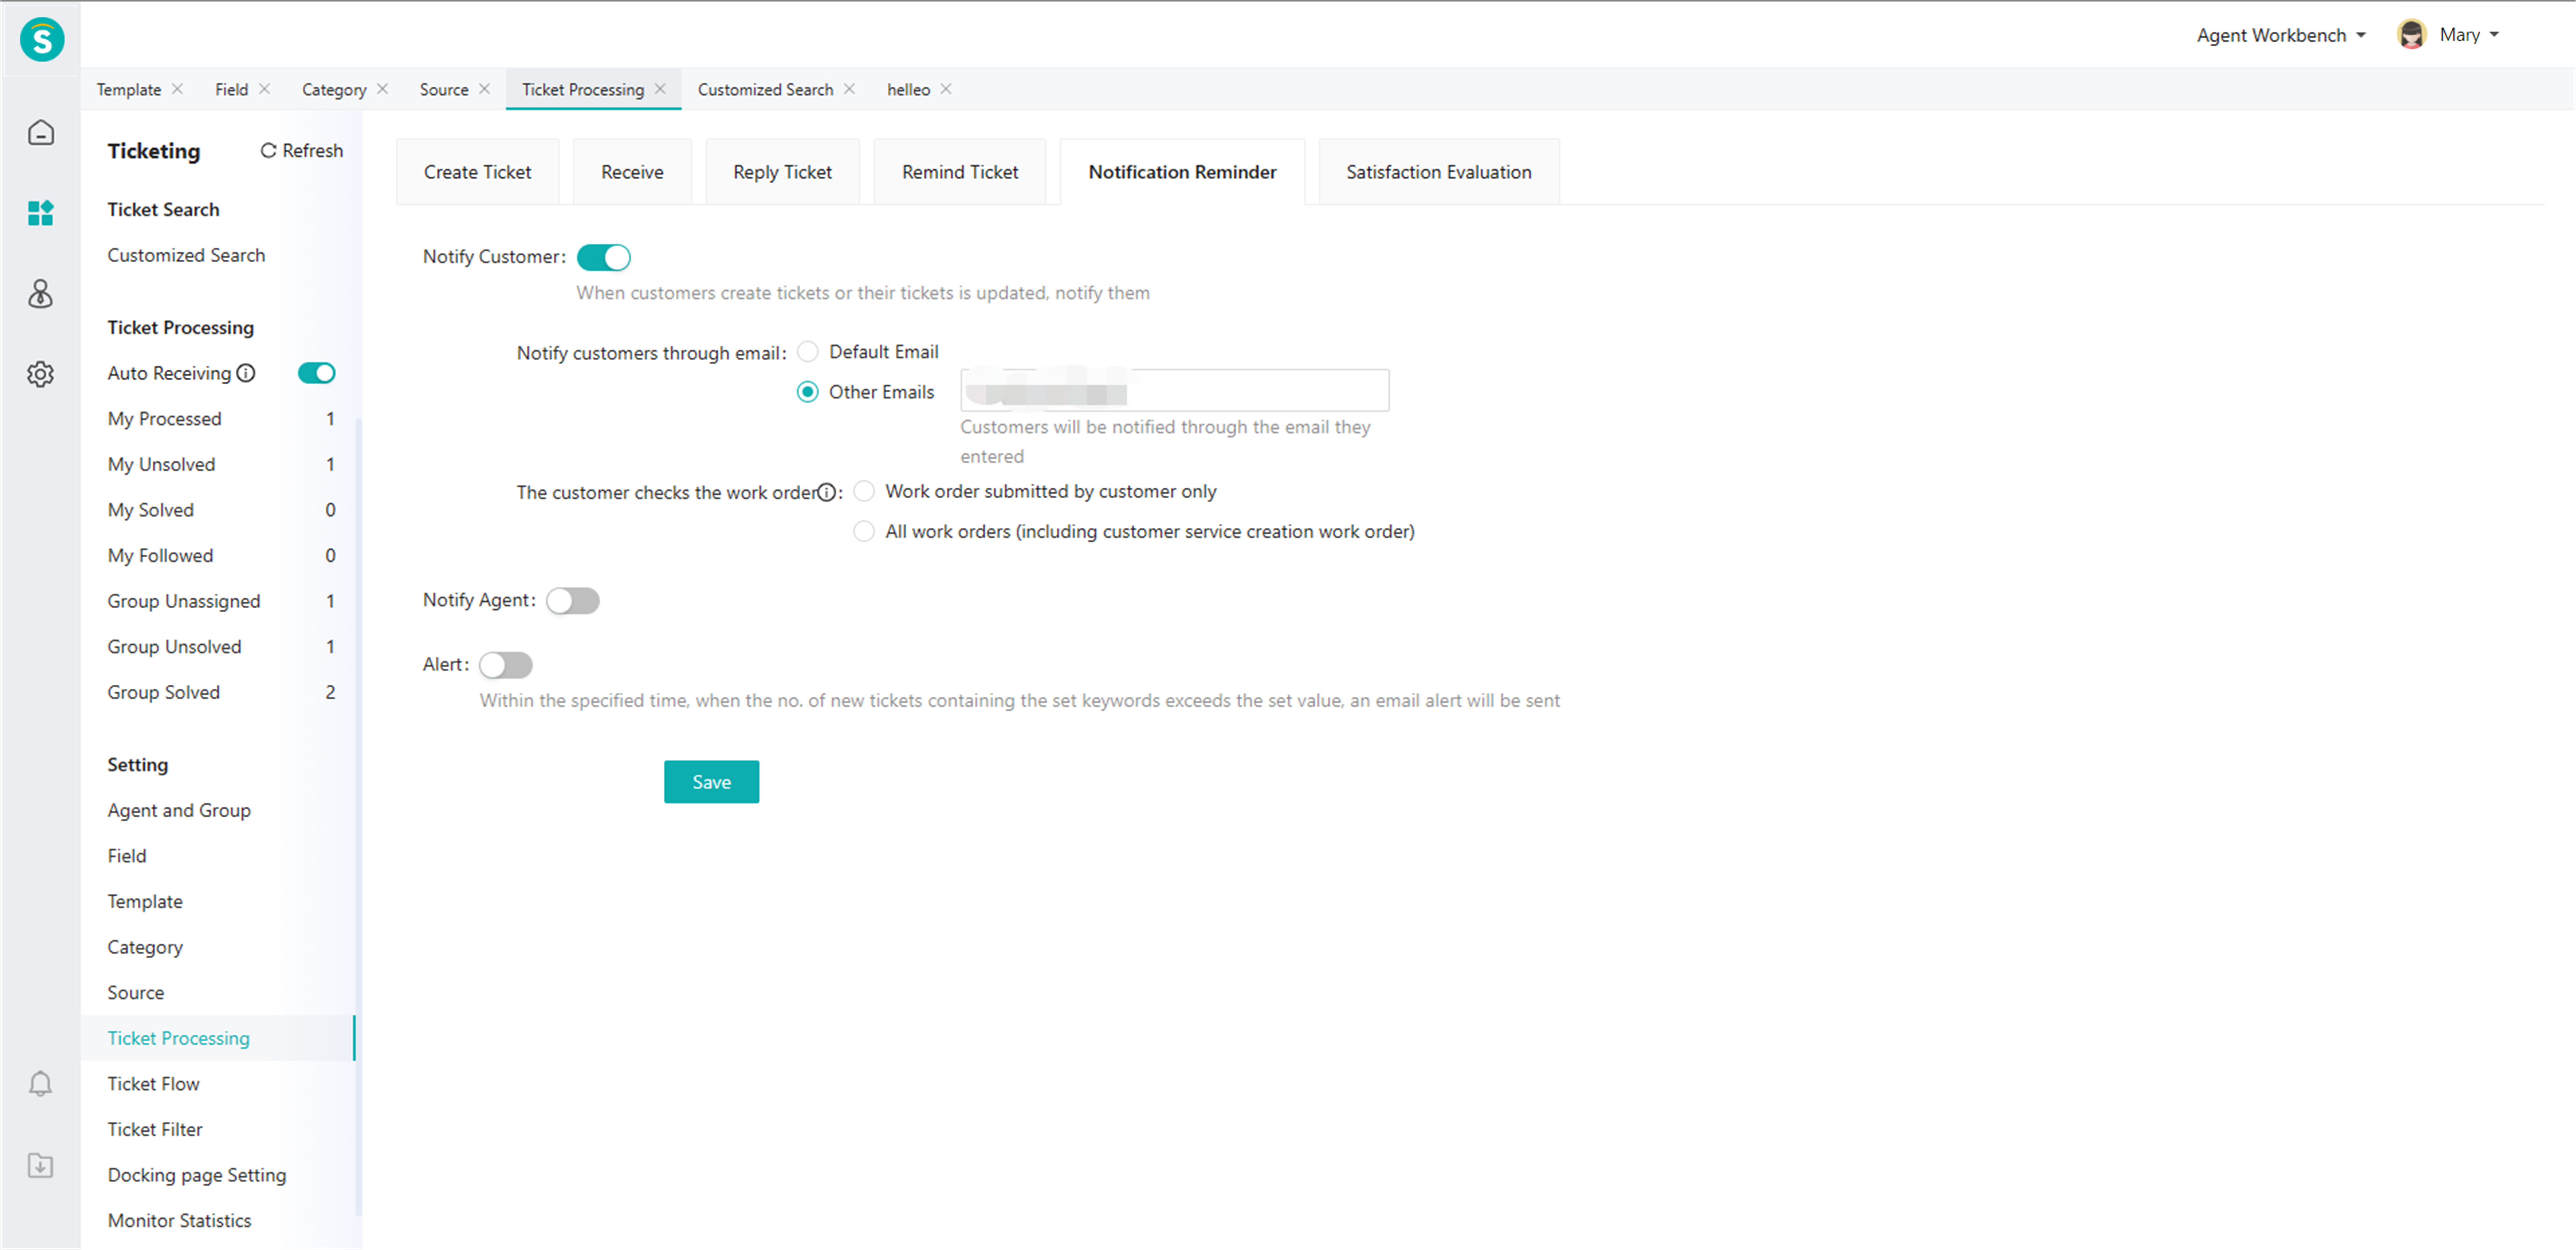
With the Notify Customer is on, you can notify the customer at the nodes of ticket created, ticket replied, and ticket resolved. If you select the default mailbox for notification, the system will send the email via the default email address opened for the enterprise. If you use another email address for reminder, the notification email will display the email signature you set (at this time, the email is still sent through the default email address).
# ● Notify Agent
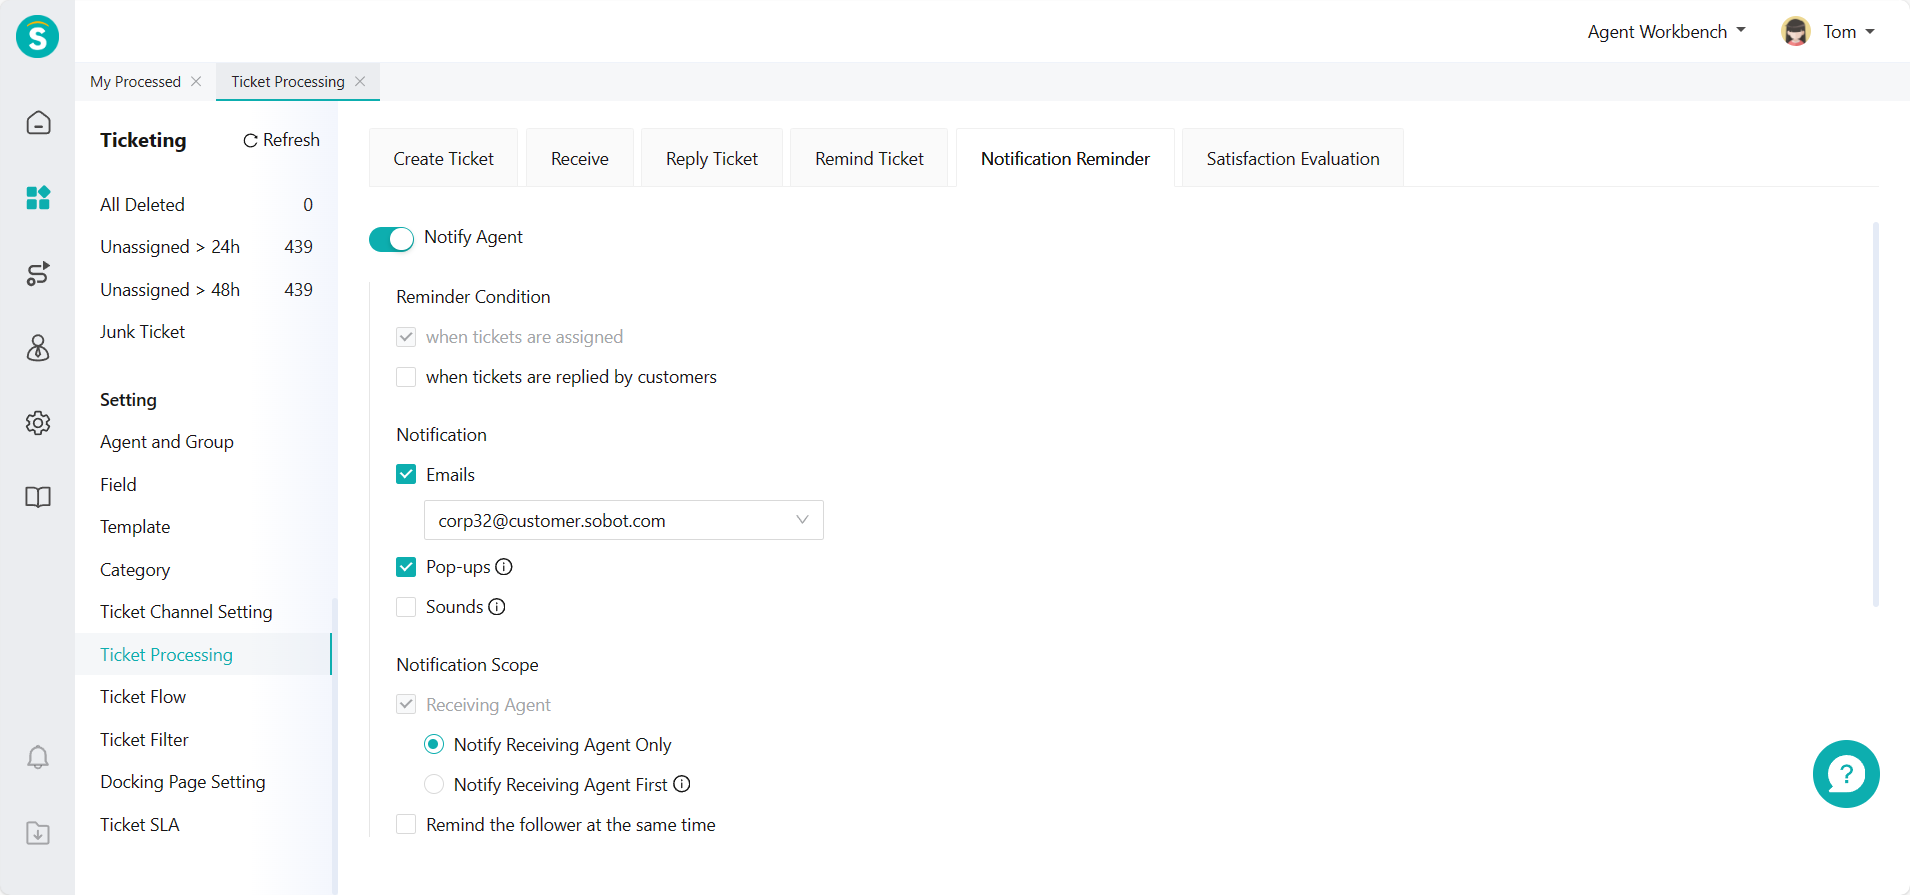
After Notify Agent is on, you can send a reminder email to the receiving agent when the ticket is assigned and replied by the customer. You can also remind the agent through browser MSG pop-up window and browser voice. If the ticket is assigned with no receiving agent, you can set 【Notify Receiving Agent First】in the reminder range to notify the receiving agent when there is one and notify all members in the group when there is a receiving agent group but no receiving agent.
# ● Alert
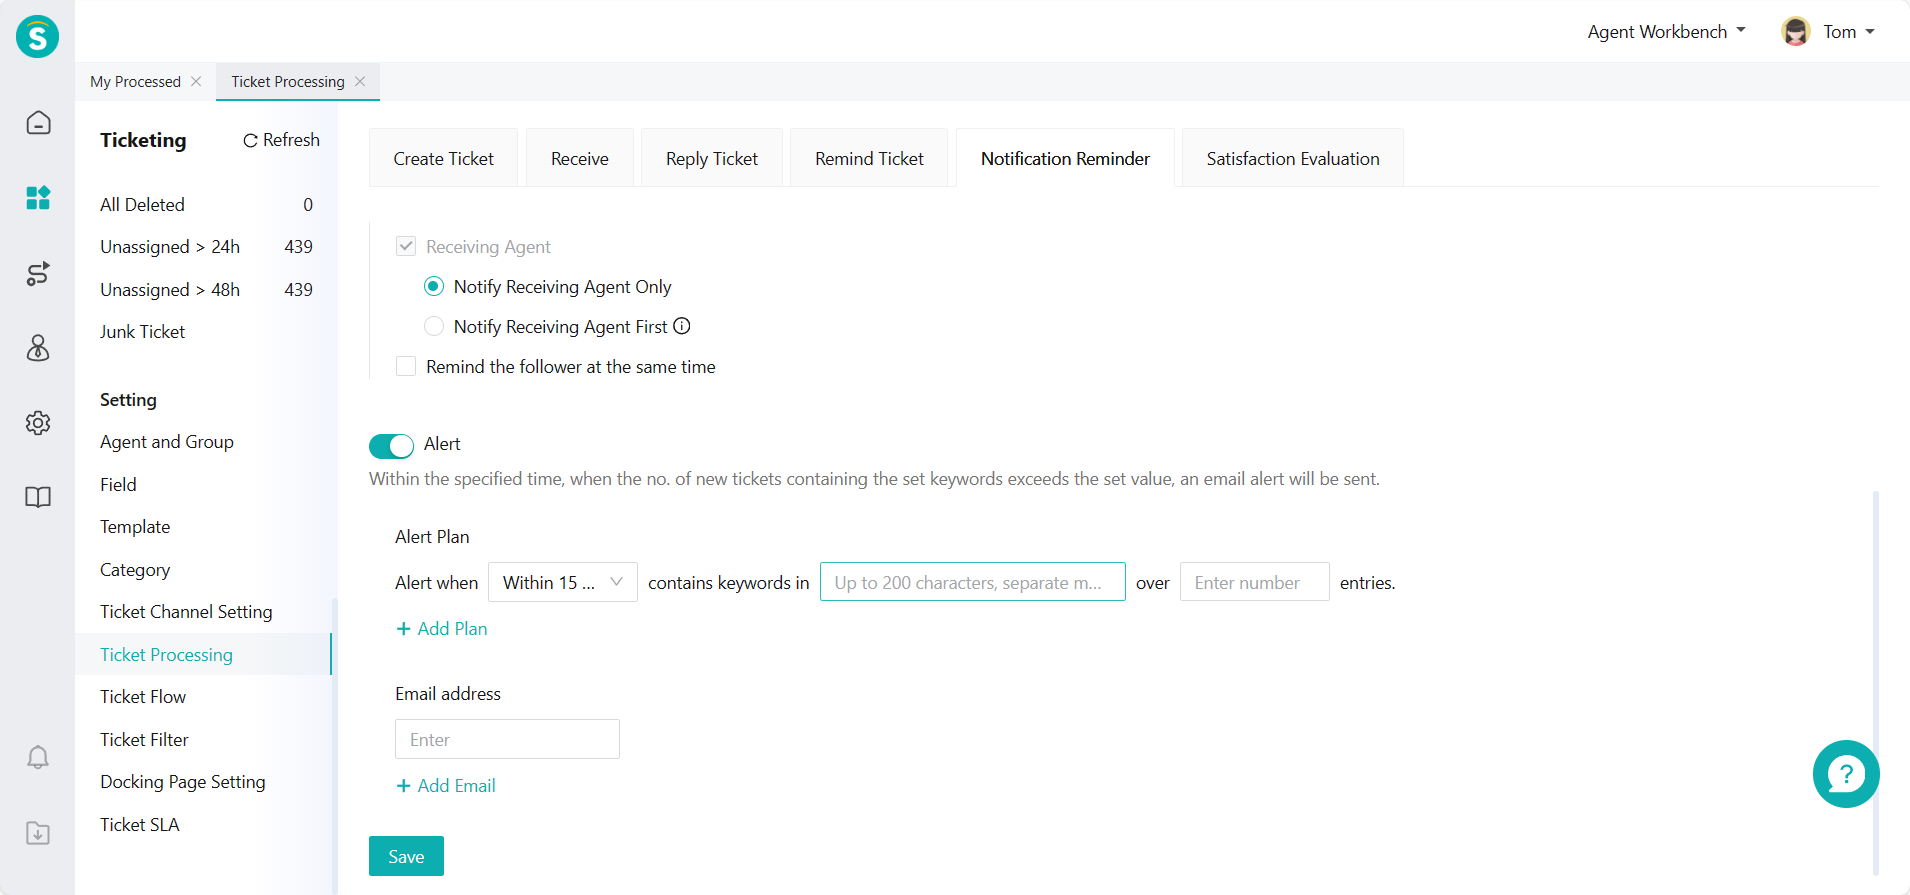
Alert can monitor the frequency of some keywords contained in the ticket created in the enterprise. For example, in a certain period of time, when the ticket repeatedly mentions "login", it can remind the staff to check the relevant functions. You can add multiple alert schemes after the reminder is on. When the keywords you set in the ticket title and description within the set time exceed a certain number, a reminder email will be sent to the email address you set.
# Satisfaction Evaluation
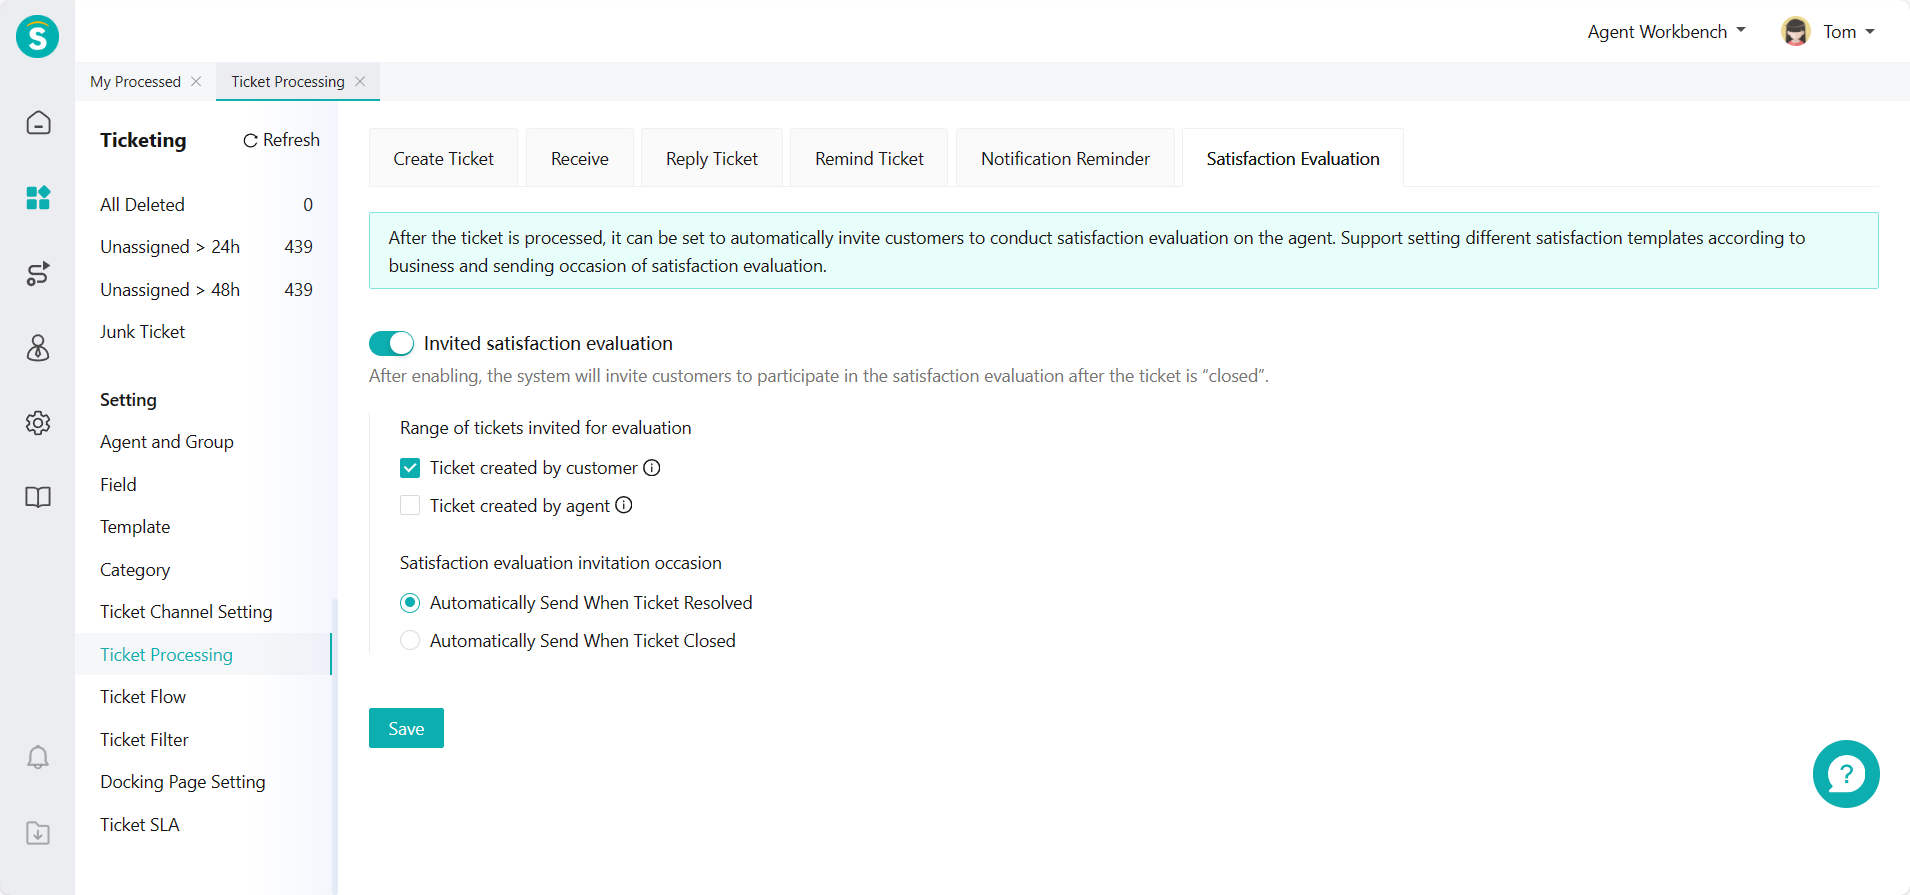
When customers make submission using the agent system or directly submit a ticket using the ticket plug-in, they can evaluate the ticket and service after the ticket is resolved. You can associate different satisfaction evaluation templates with different submission templates to meet more personalized business needs, or set templates in other languages to satisfy the needs of customers in other languages. Related article(s): Ticket Plug-in Guide
# ● Sending Occasion
Sending occasion refers to the status under which the ticket is processed to send the invitation for satisfaction evaluation to customers. You can choose to send the invitation when the ticket is set to the resolved status or closed status for the first time. The invitation for satisfaction evaluation can only be sent once for one ticket.
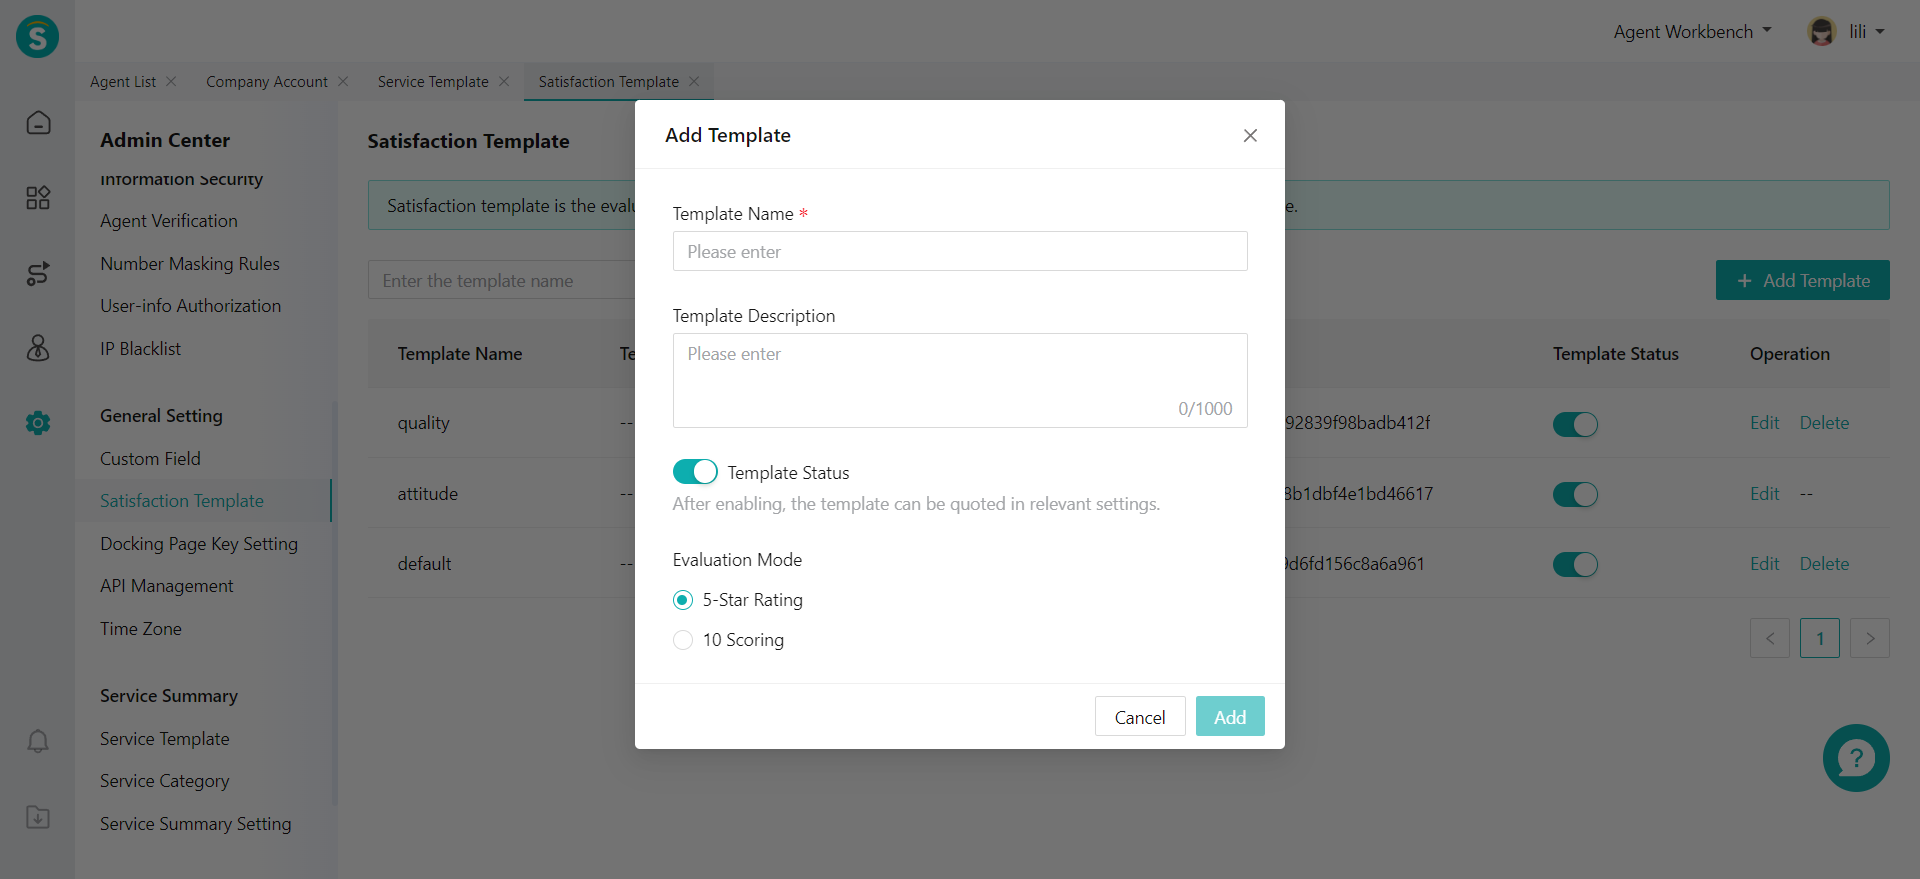
# ● Satisfaction Template
You can add multiple satisfaction evaluation templates by clicking【+Add Template】via the Ticket Center > Setting > Ticket Processing Setting > Satisfaction Evaluation page. By adding a template, you can customize the guidance text, evaluation star description, evaluation text, and submission button text. You can add multiple satisfaction evaluation templates to meet the needs of different businesses, scenarios, and languages.
