Rule Engine Guide
# Rule Engine Guide
The rule engine allows your enterprise to connect existing customer reaching methods. The enterprise can build a smooth customer journey canvas based on different customer personas and behaviors, achieving goals such as improving service satisfaction and customer operation and conversion.
● With the rule engine, users can be provided with "proactive service support": through a series of preset trigger conditions in the system, you can proactively send SMS to customers, obtain satisfaction evaluations and other information, and improve service quality;
● "Customer operation" through the rule engine: based on different customer personas and time nodes, online customer operation plans are established through the canvas, suitable activity contents are pushed to customers, dormant customers are activated or long-term operation and maintenance are performed;
● "Customer conversion" through the rule engine: based on the customer's historical consumption behavior, a series of marketing and promotion plans are established on the canvas to promote customer conversion and order placement.
While meeting the above scenarios of the enterprise, the rule engine also has the following characteristics:
● Cross products: the rule engine connects products, allowing the enterprise to connect online services, tickets, or SMS functions to provide users with integrated product service solutions;
● Workflow automation: the rule engine provides users with workflow service capabilities rather than point-to-point functionality. The enterprise can build a complete set of automated service workflows for specific user groups;
● Flexible and scalable: currently, the rule engine has the underlying service capabilities. In the future, we will quickly expand new open functions based on this framework to meet more application scenarios for the enterprise.
# What is a rule engine
# ● The rule engine is composed of modules
After connecting these modules on the canvas, the enterprise can build a set of exclusive user service/marketing workflows.
There are four modules in the workflow canvas:
| Module Name | Description |
|---|---|
| Enter Rule Module | Enter Rule Module is used to set which users who meet the conditions can enter the workflow canvas; you can filter users based on their behavior and persona through the two functions of "trigger conditions" and "target customers". |
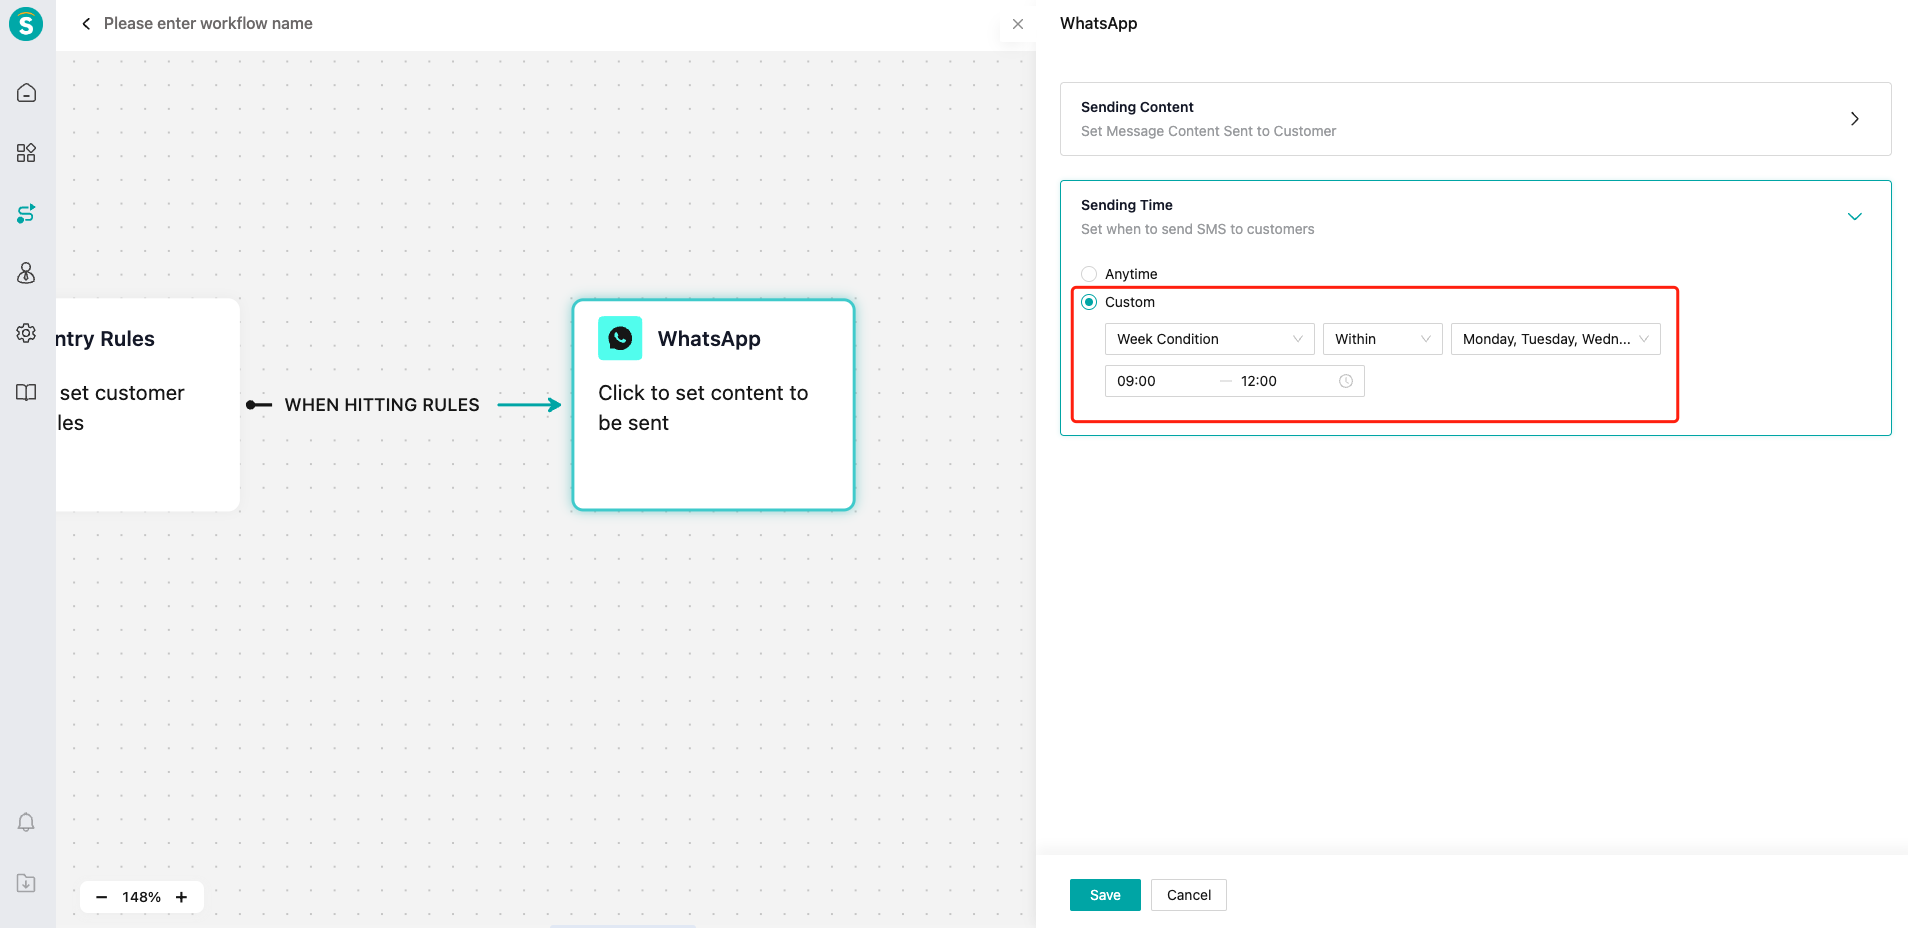
| Send Message Module | The Send Message Module is the way your enterprise wants to reach users, including SMS and WhatsApp messages and other functions; you can set the specific "content" of the message and the specific "time" to be sent to the user through the Send Message Module. |
| Waiting Module | The Waiting Module is used to define the length of time that users want to wait in the workflow. Users must wait after this time before receiving subsequent content or executing the next module node. |
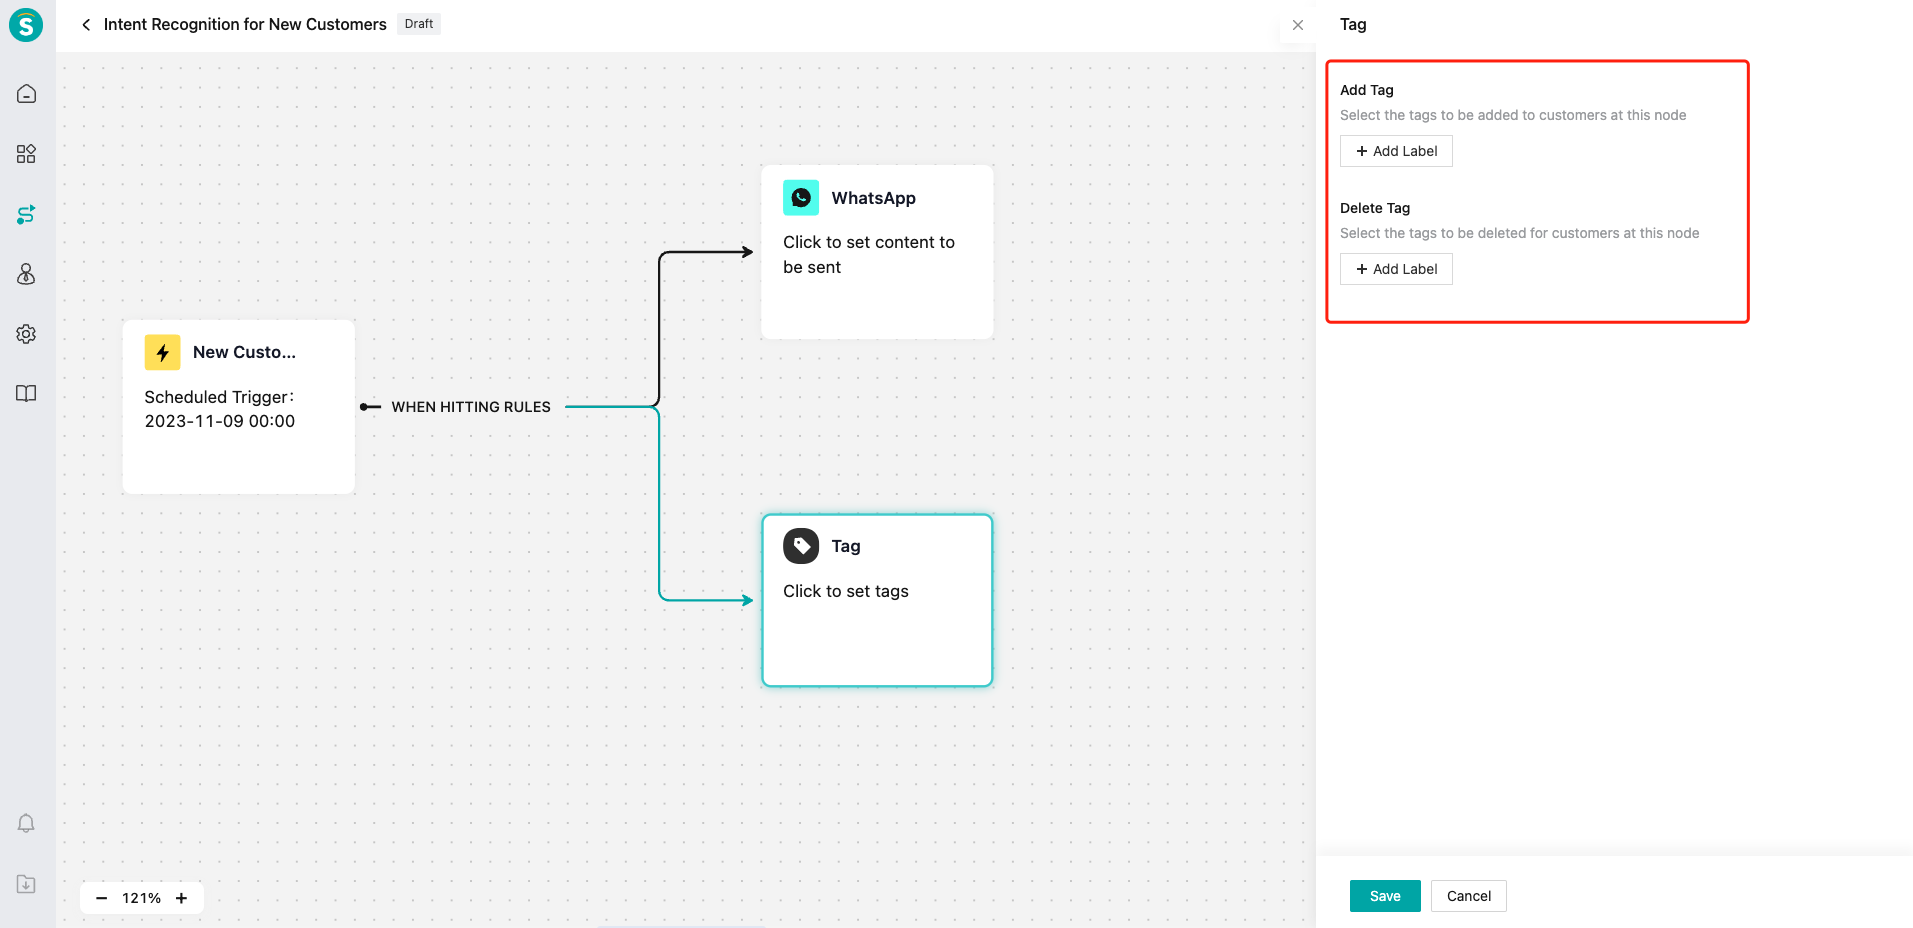
| Tag Module | The Tag Module allows your users to automatically maintain "customer tags" after completing a certain module, including adding and deleting tags. |
# ● Modules are connected in series by connection
You can set a simple workflow path, e.g.: send SMS to the user who queue up to connect to agent in livechat receptions. If the user voluntarily ends the chat, send a satisfaction evaluation invitation SMS.
# ● Function module of rule engine
| Function | Description | Domestic edition | Overseas edition |
|---|---|---|---|
| Workflow management: workflow list | Workflow data and status | Yes | Yes |
| Workflow management: workflow template | 5 templates | Yes | Yes |
| Workflow canvas: rule node | Scheduled trigger; event trigger | Yes | Yes |
| Workflow canvas: SMS node | Quote the template to send SMS | Yes | No |
| Workflow canvas: tag node | Add or delete tag | Yes | Yes |
| Workflow canvas: WhatsApp message node | Quote the template to send messages | No | Yes |
| Workflow canvas: waiting node | Waiting day, hour and minute | Yes | Yes |
| Language time zone: multi-language | Chinese and English | No | Yes |
| Language time zone: multi-time zone | Enterprise time zone | No | Yes |
# How to create workflow canvas
The following content will introduce the creation method of the workflow canvas in the rule engine in steps
# Step 1: Rule Engine Function Entry
The rule engine is currently a standalone primary menu that can be found on the left side of the admin console. It is currently a basic product and can be viewed by super admin. Admin can also be assigned this function permission through the "Role Permission Management" function.
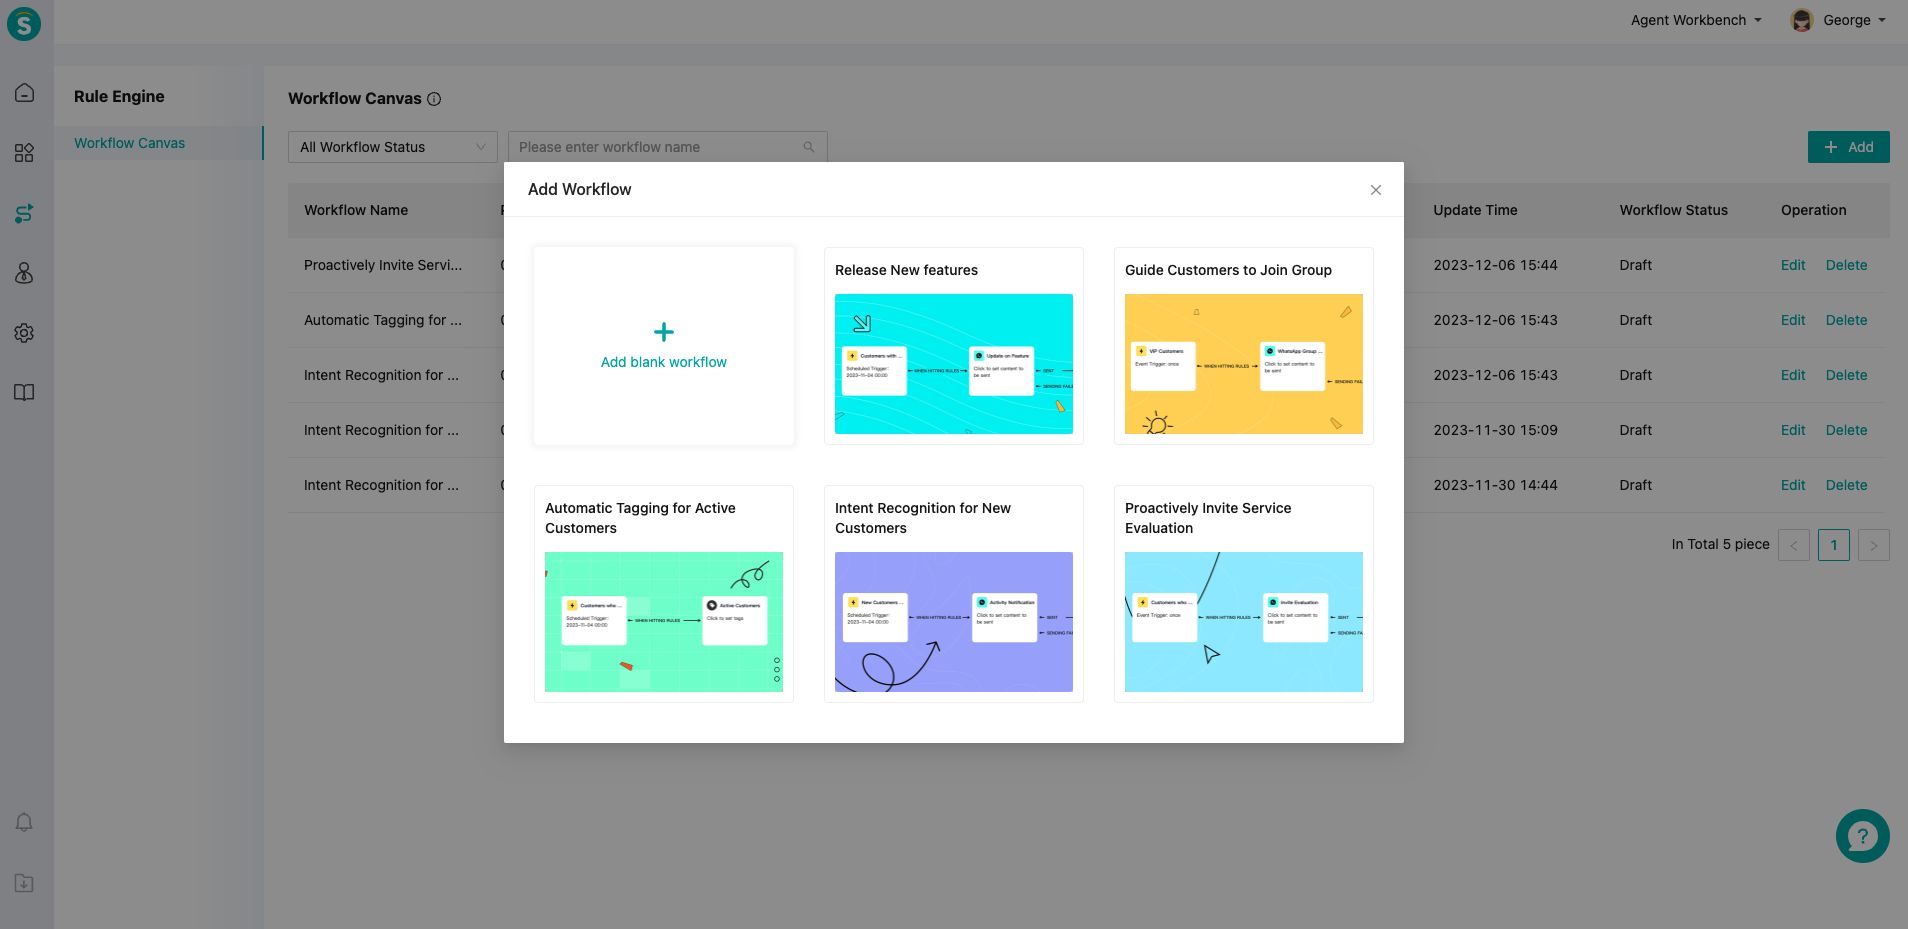
# Step 2: quickly create a canvas starting from the preset template
After clicking the【+Add】button, you can view the preset templates in the system. You can create a new blank workflow or choose a preset template that matches the business.
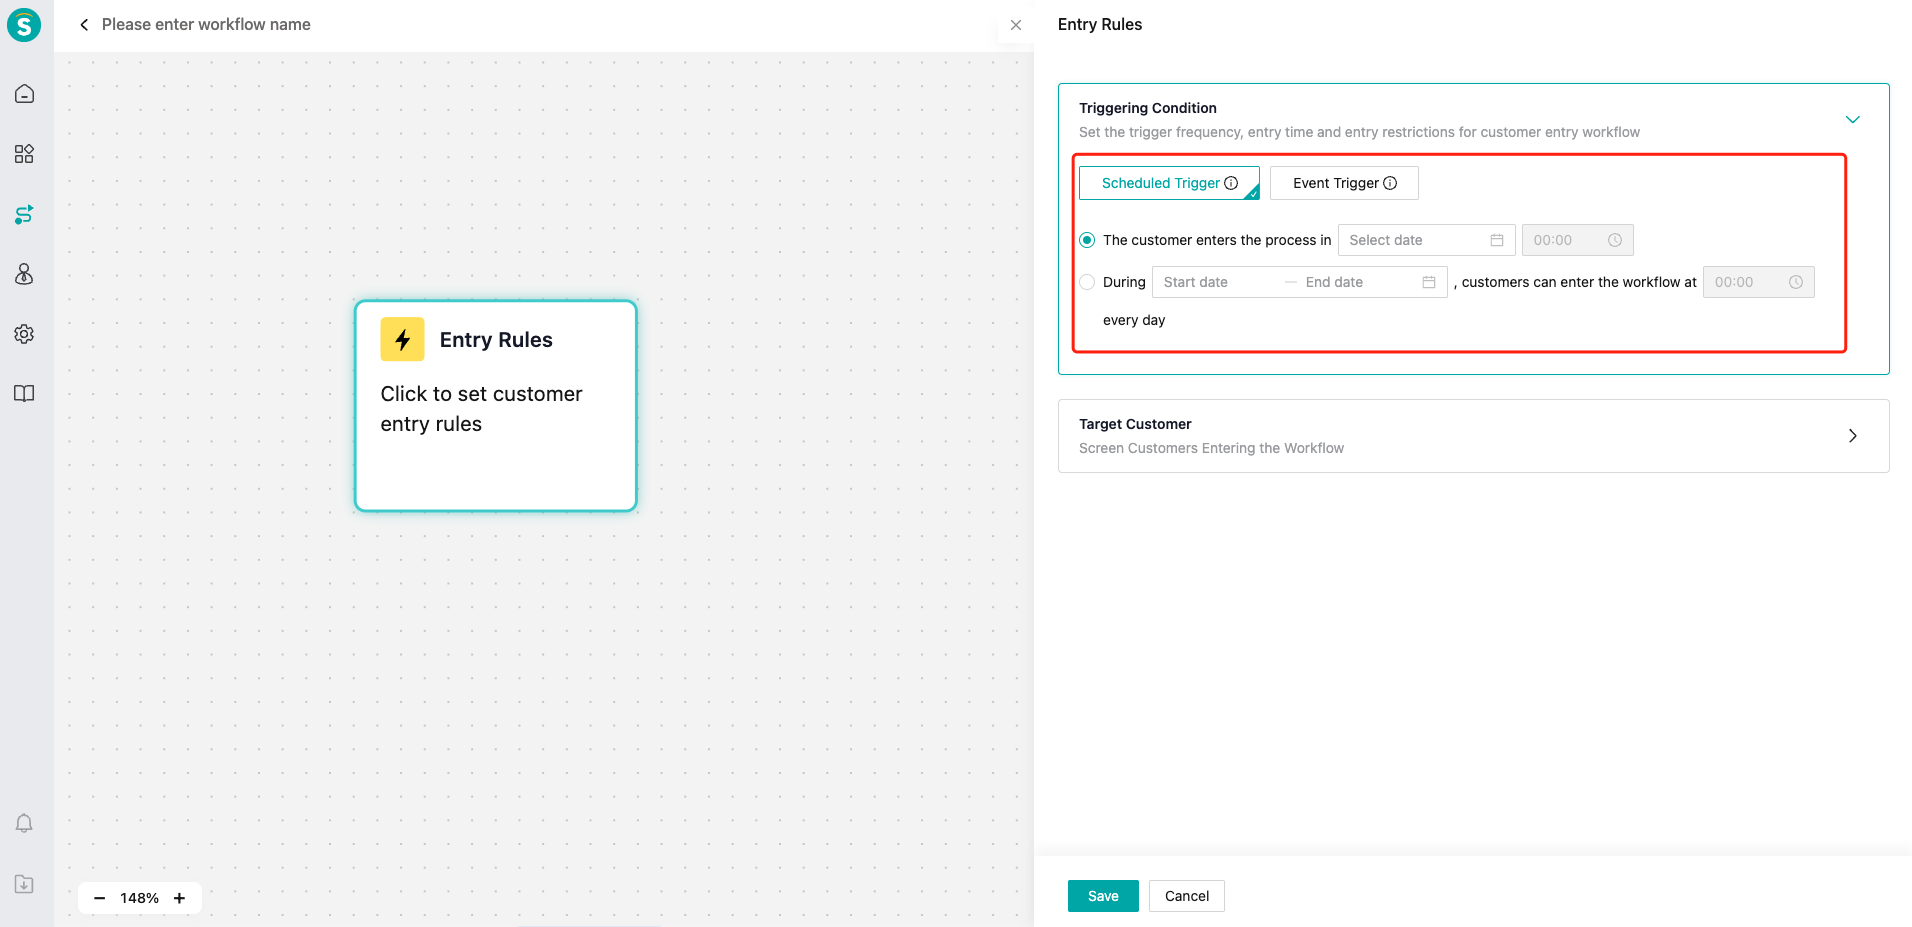
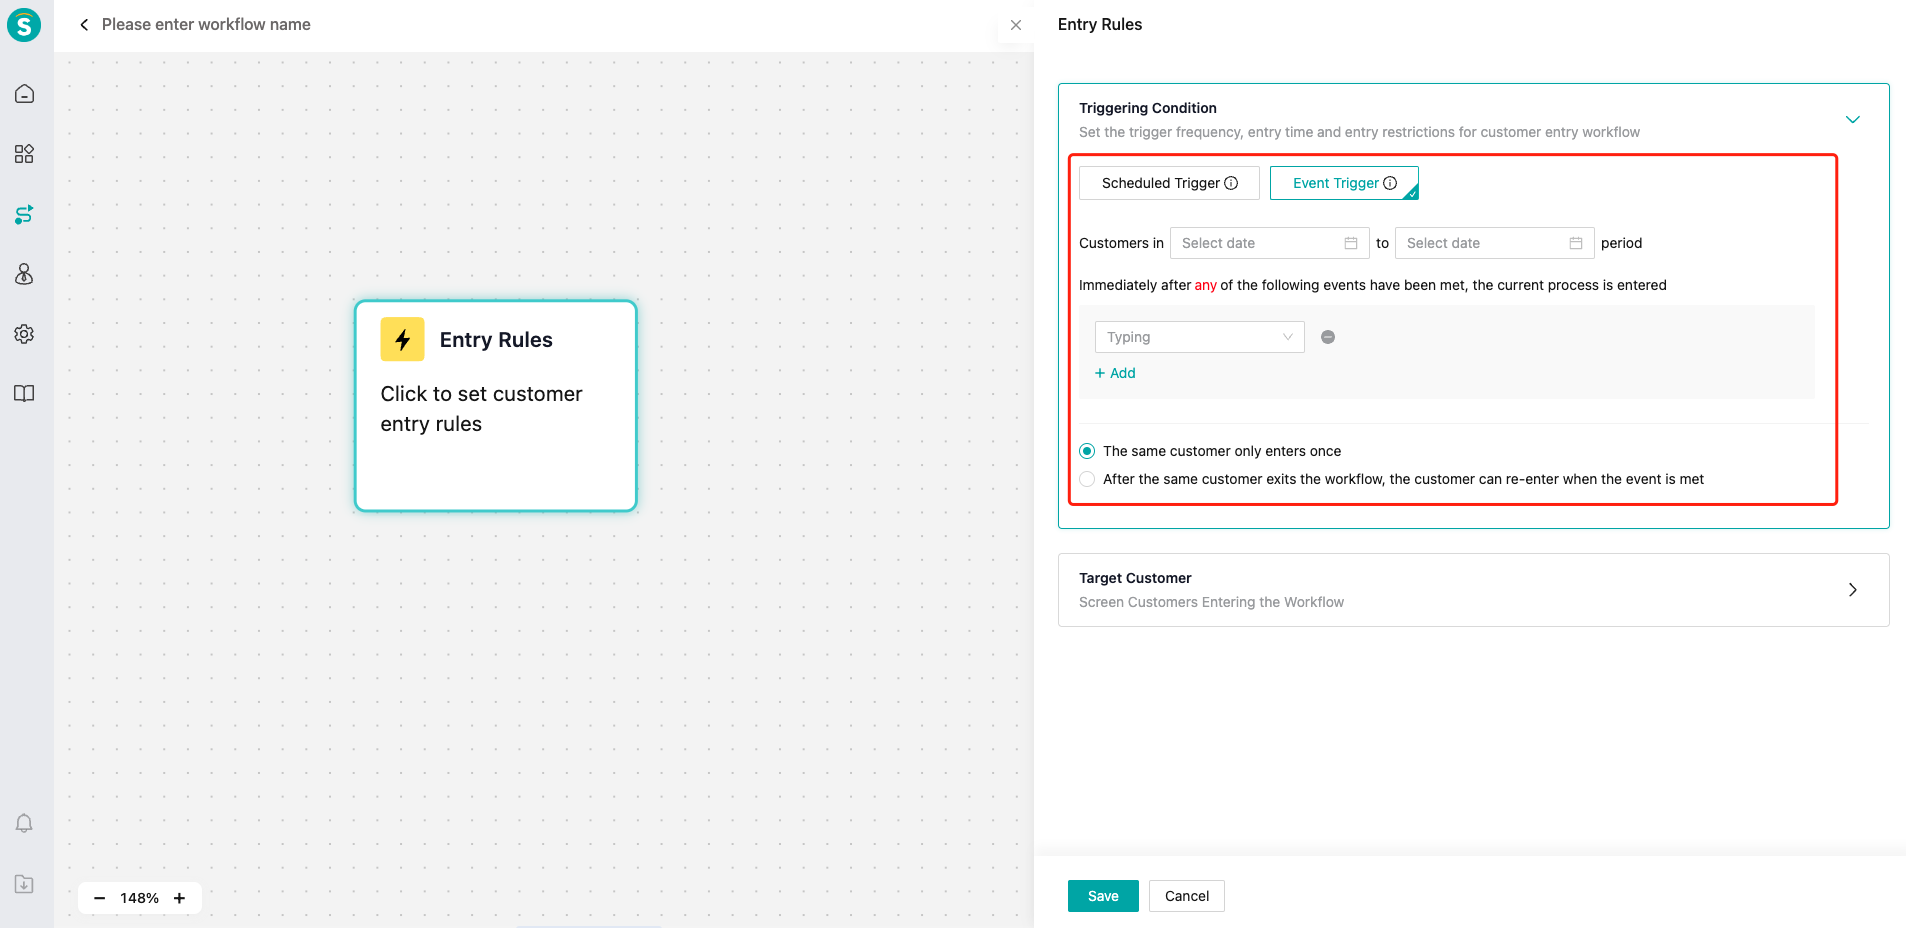
# Step 3: when to execute the canvas workflow
Click on the first module in the canvas, which is Enter Rules, and we will start the specific workflow canvas setting process. The system supports two types of workflow trigger methods: scheduled trigger and event trigger. The scheduled trigger rule is used to execute the workflow based on the designated date at 0:00. You can also choose a date range and execute it daily.
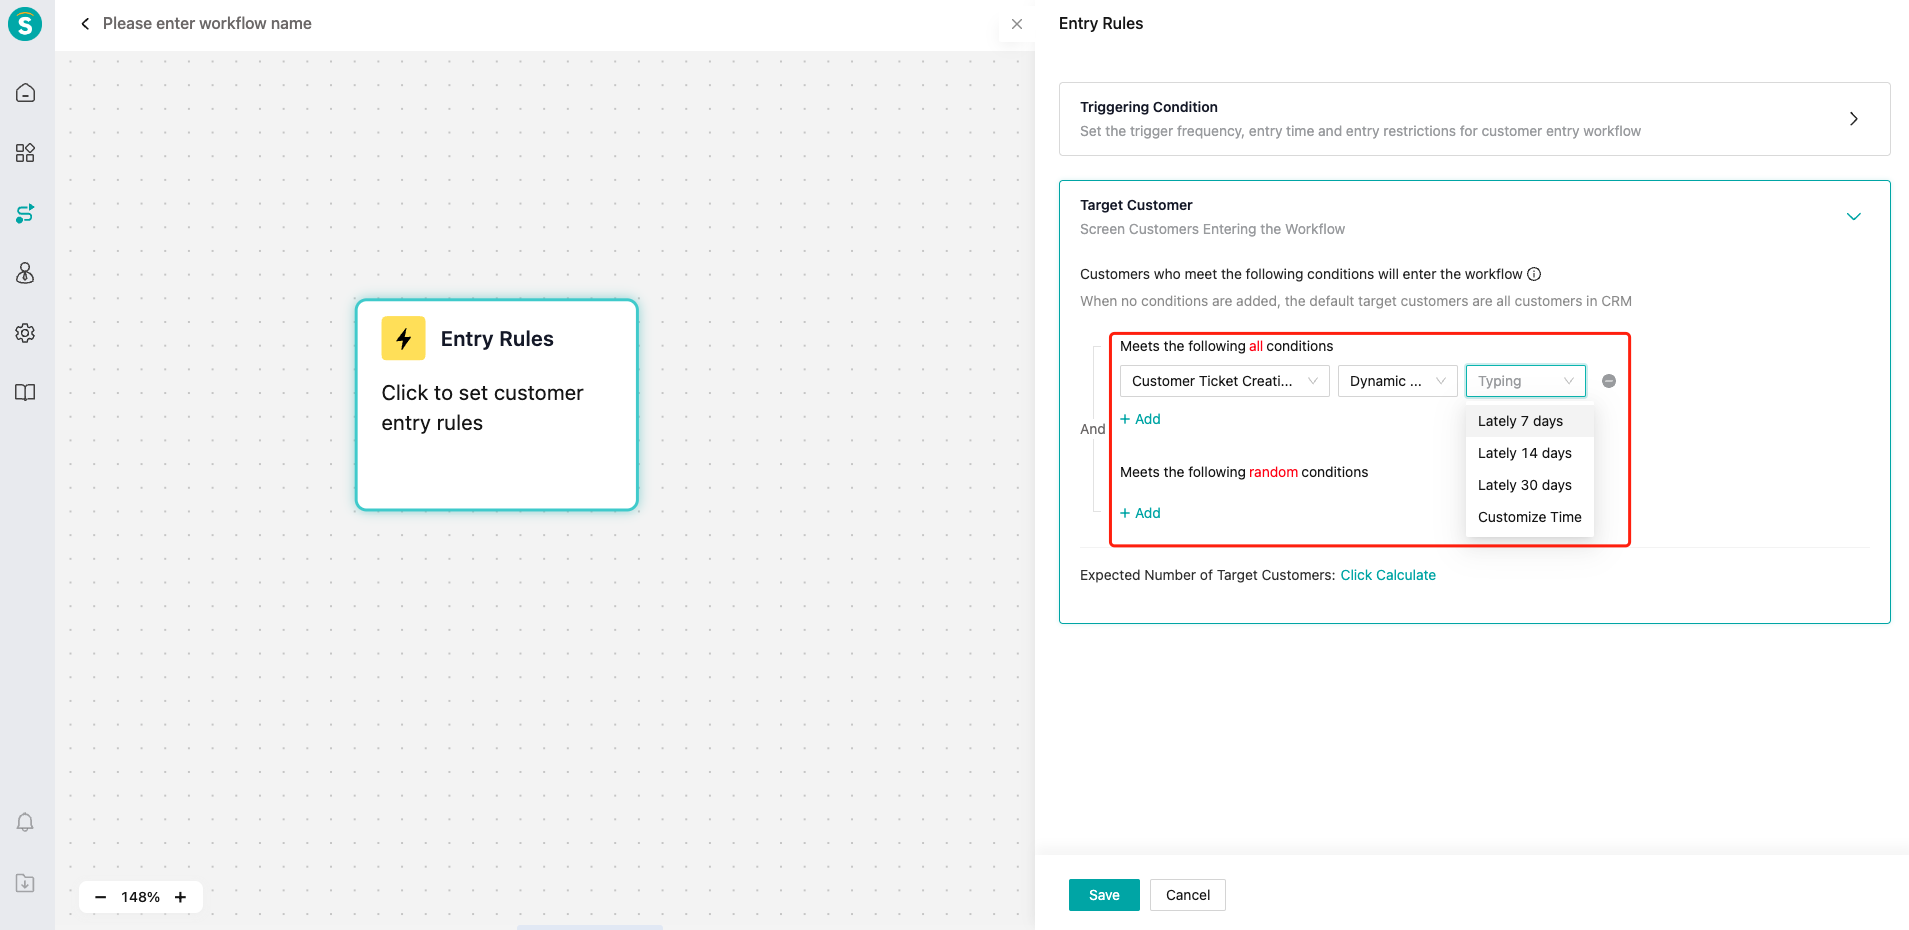
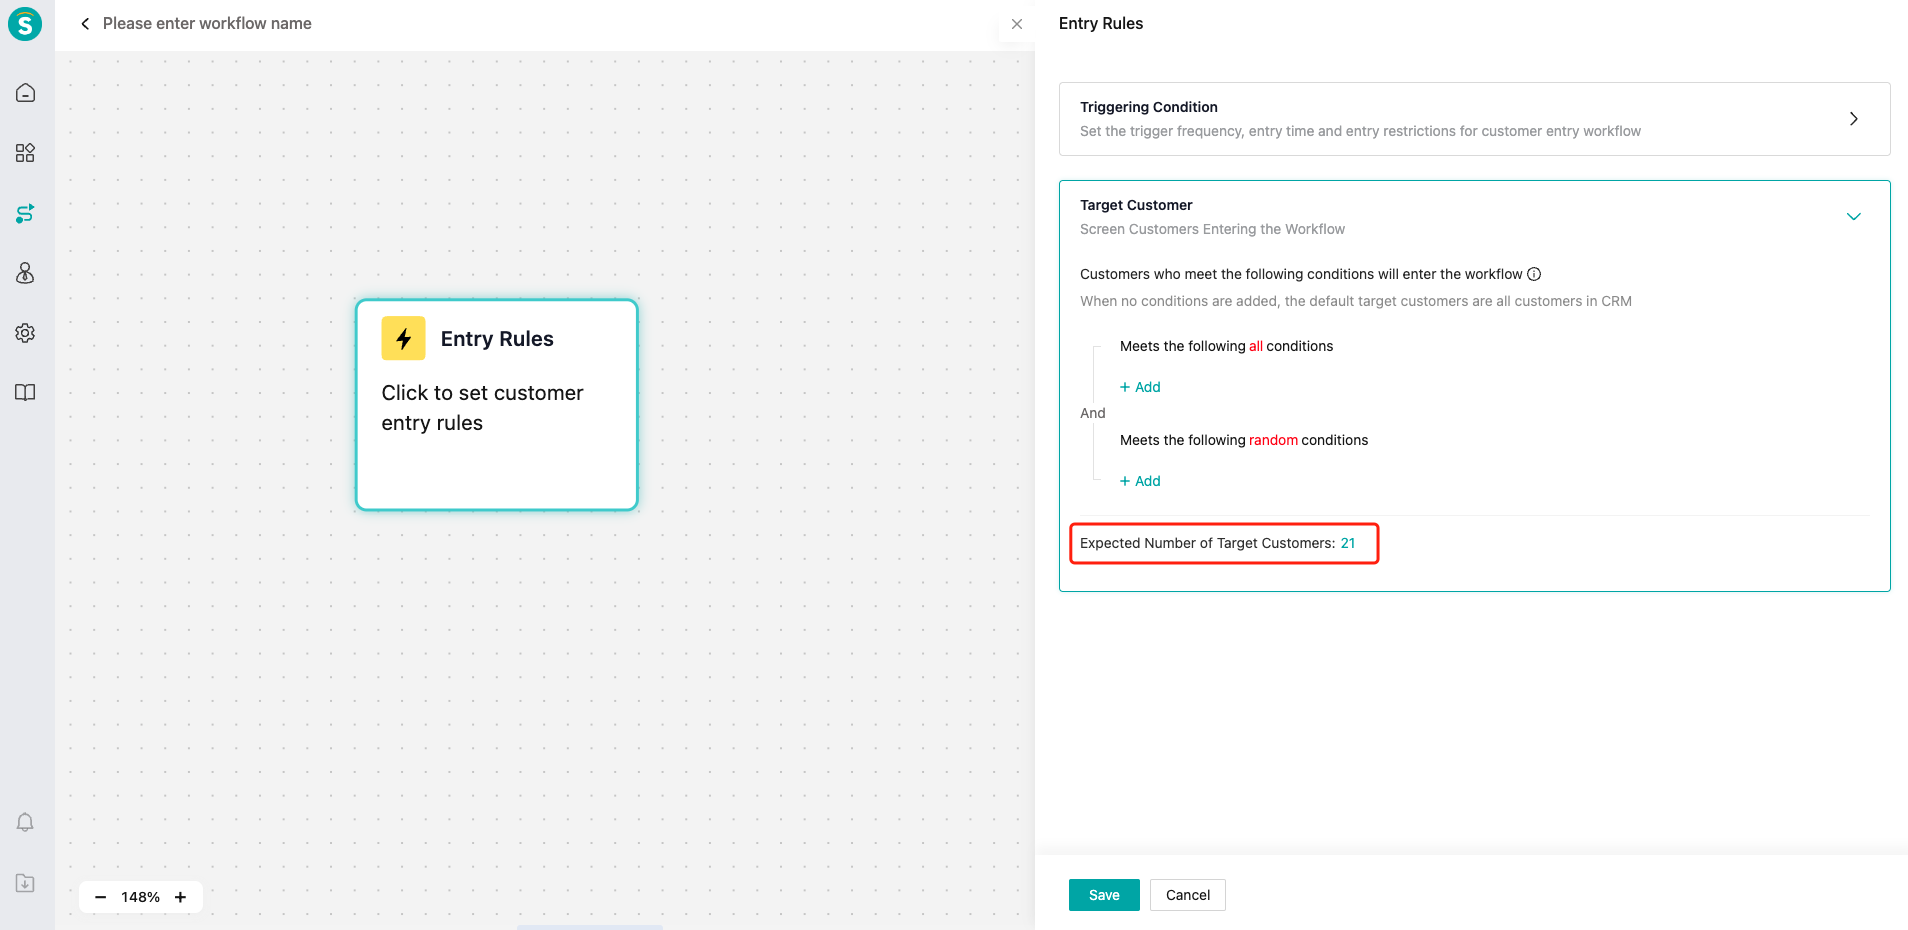
# Step 4: which users enter the canvas workflow
We can filter the specific range of users who can enter the workflow through "target customers", and provide rich conditions. We can define which users can enter the workflow by configuration.

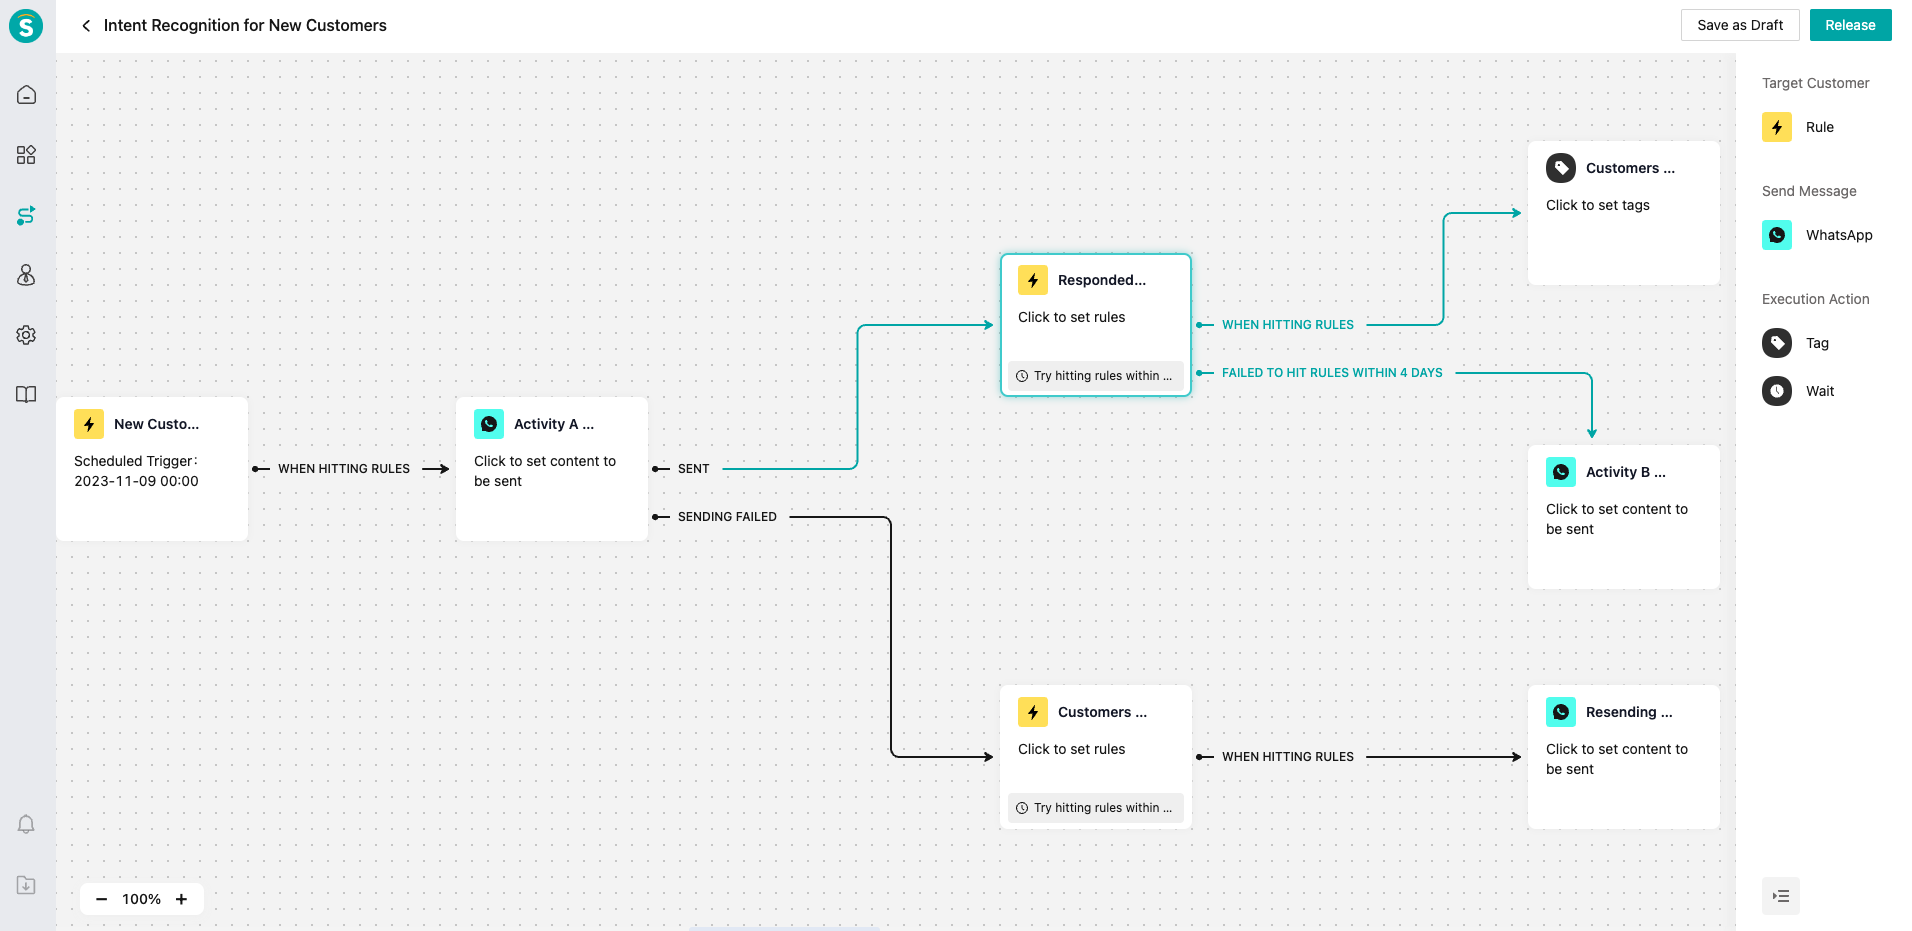
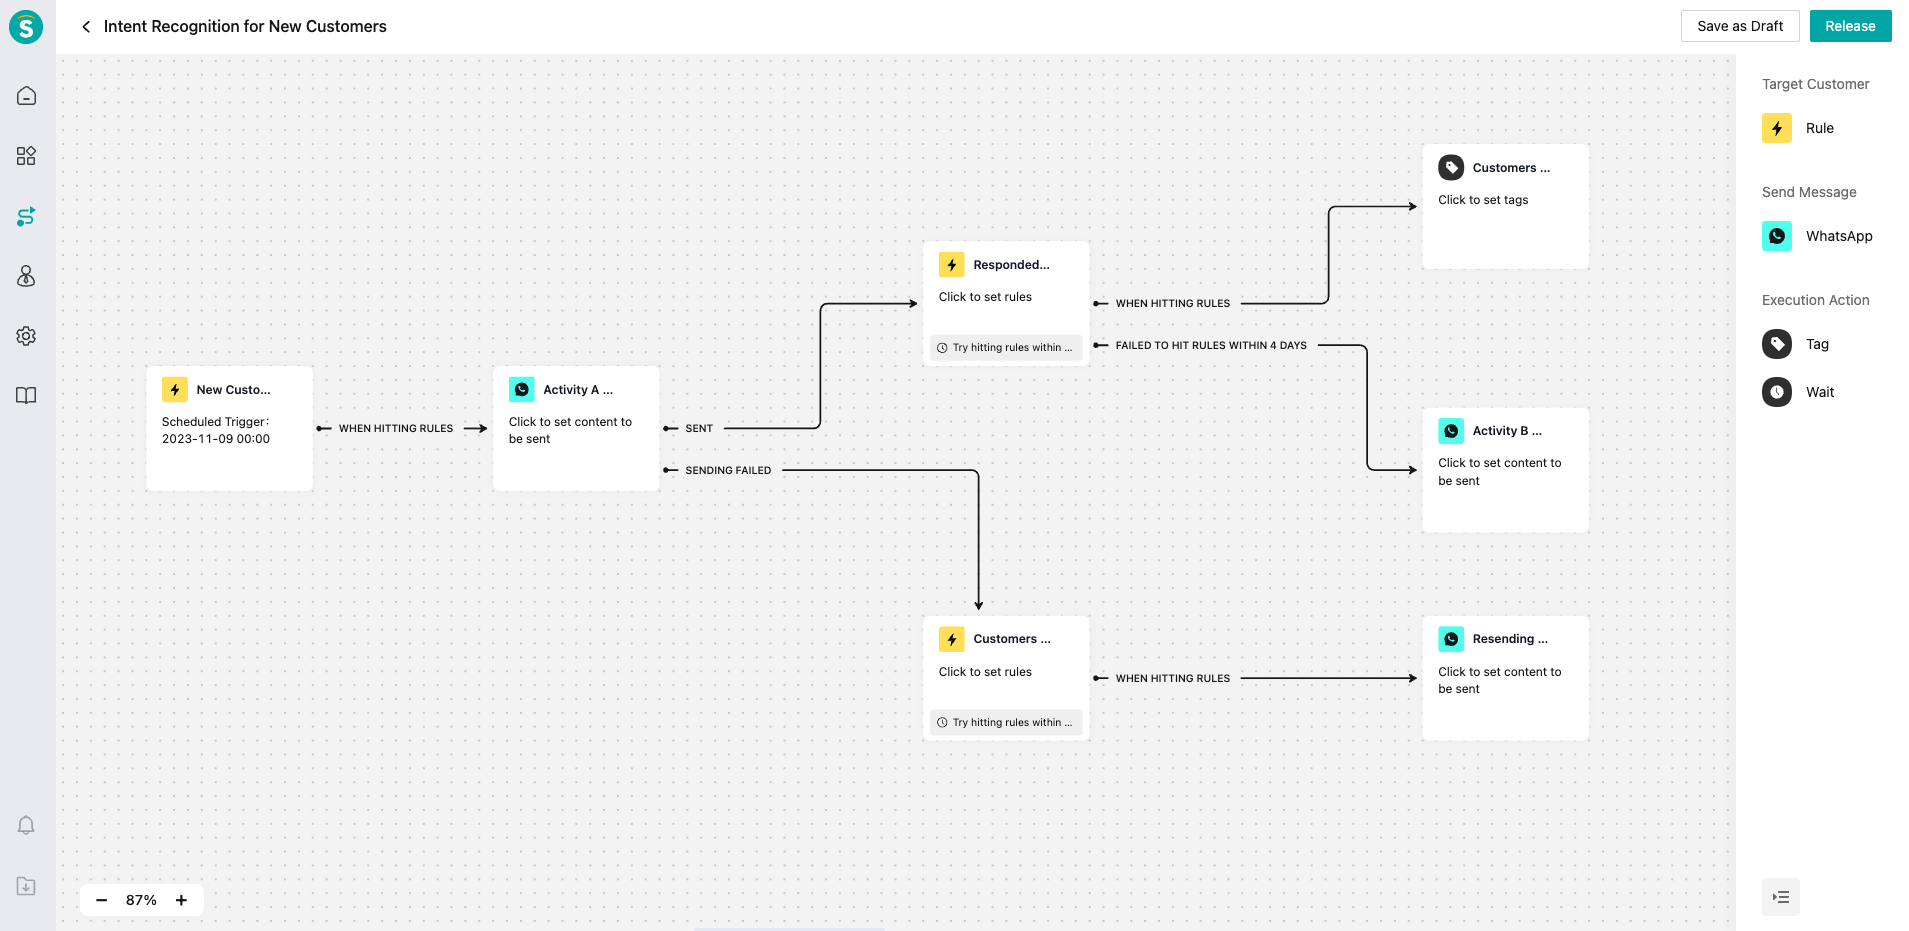
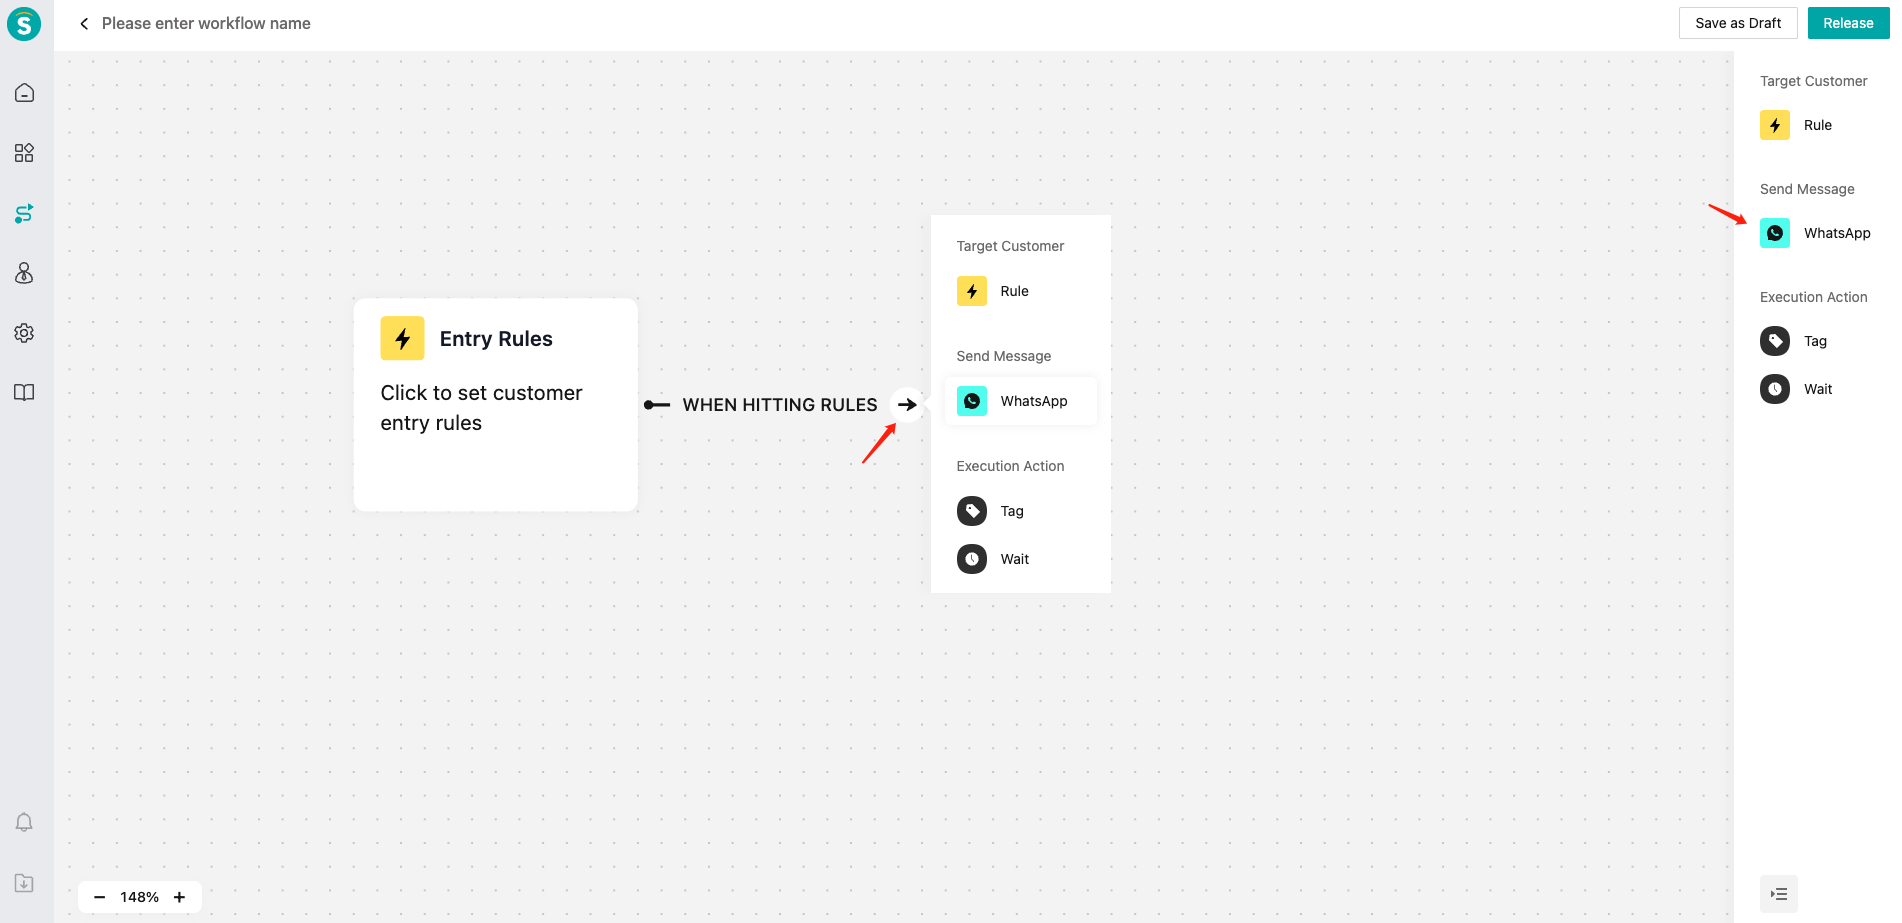
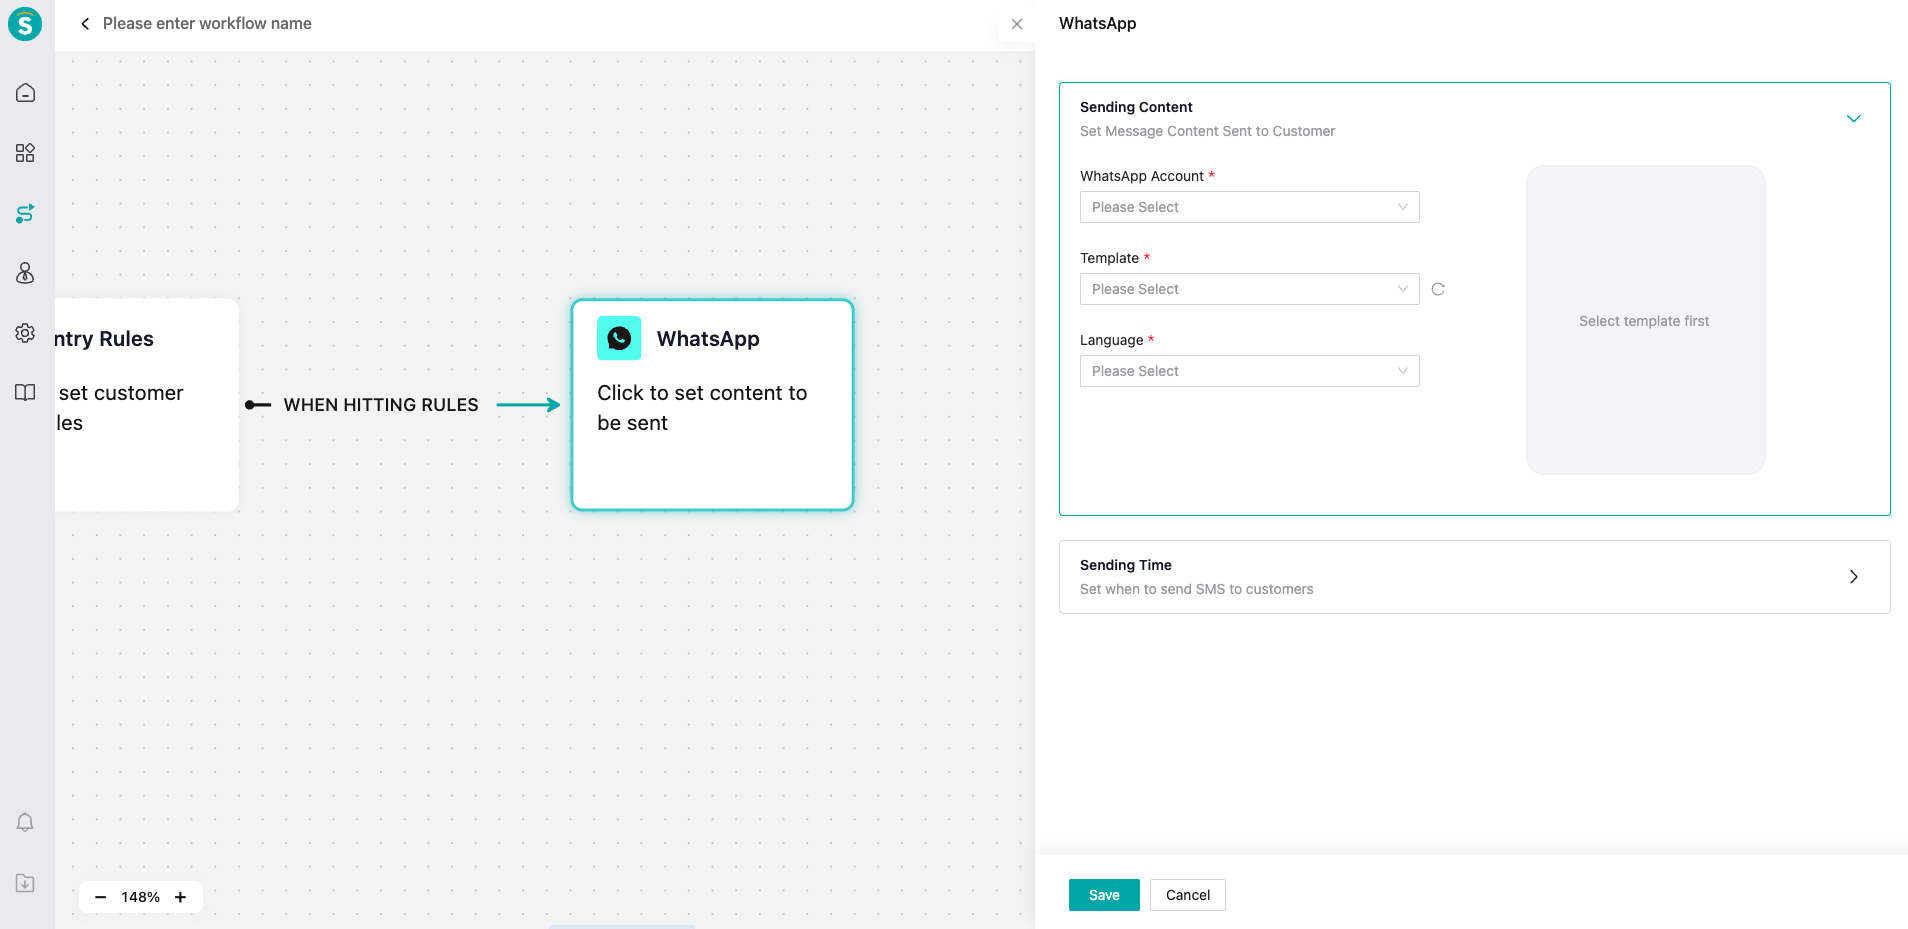
# Step 5: what messages to send to users
The enterprise can create subsequent messages to be sent to users by clicking 【Arrow】or dragging the module on the right.
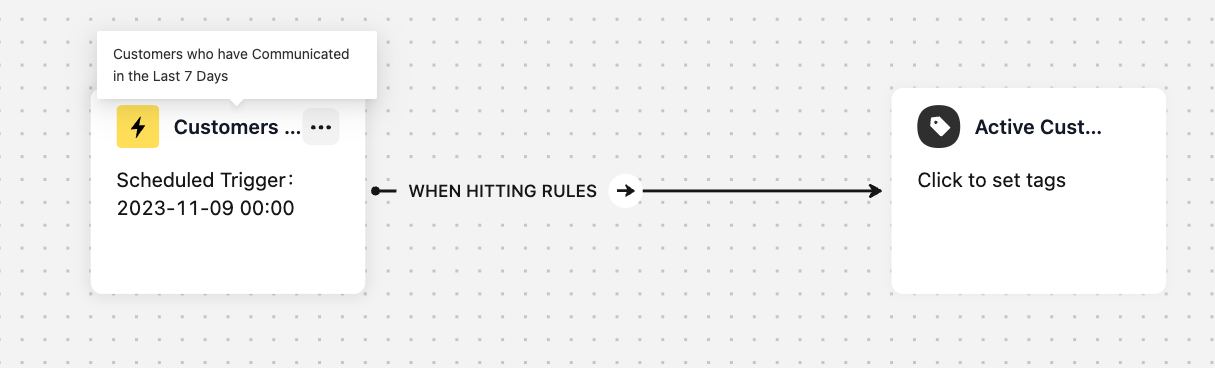
# Step 6: automatically update customer tags. While sending SMS, we can also automatically add customer tags to mark the same batch of customers. At this time, we can use the tag module. On the details page of the tag module, we can select【Add Tag】or【Delete Tag】. Note: only customer tags that have been configured in the CRM can be quoted.
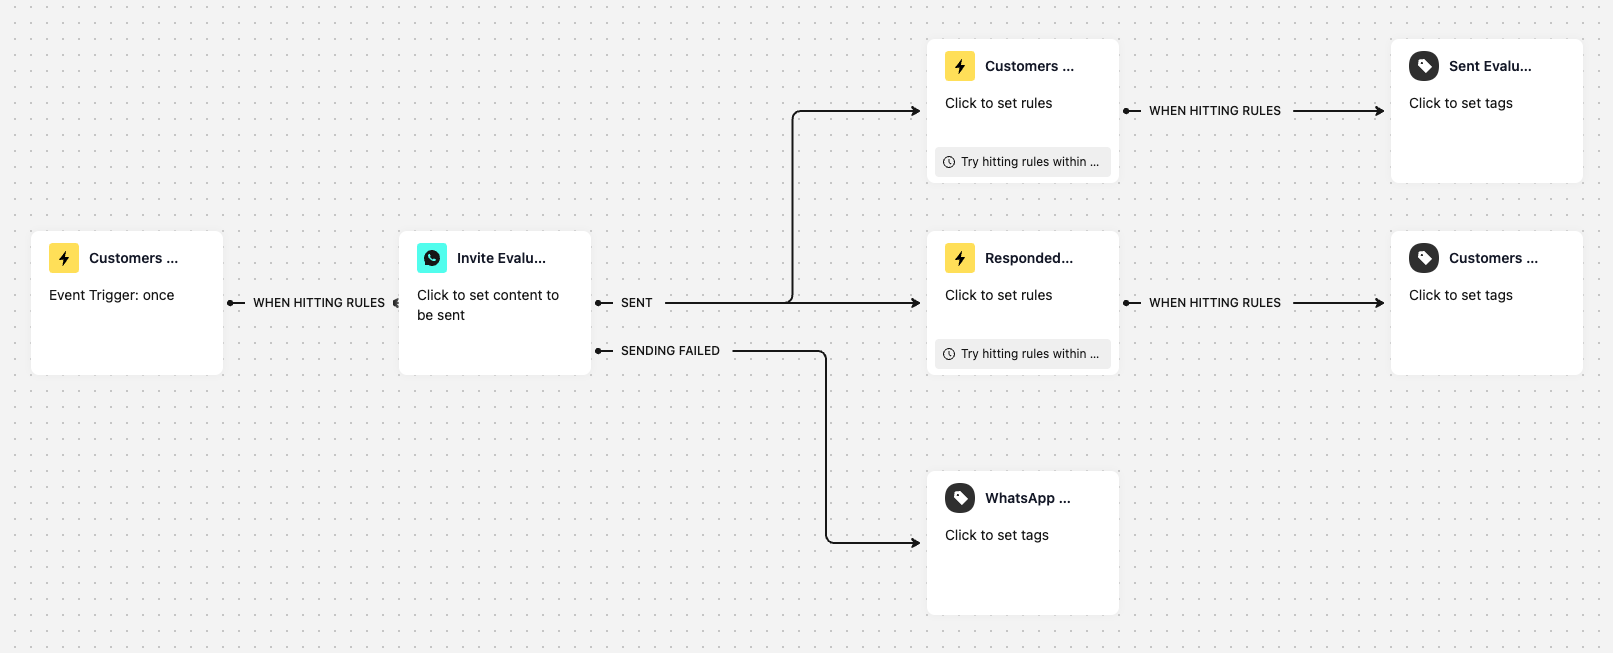
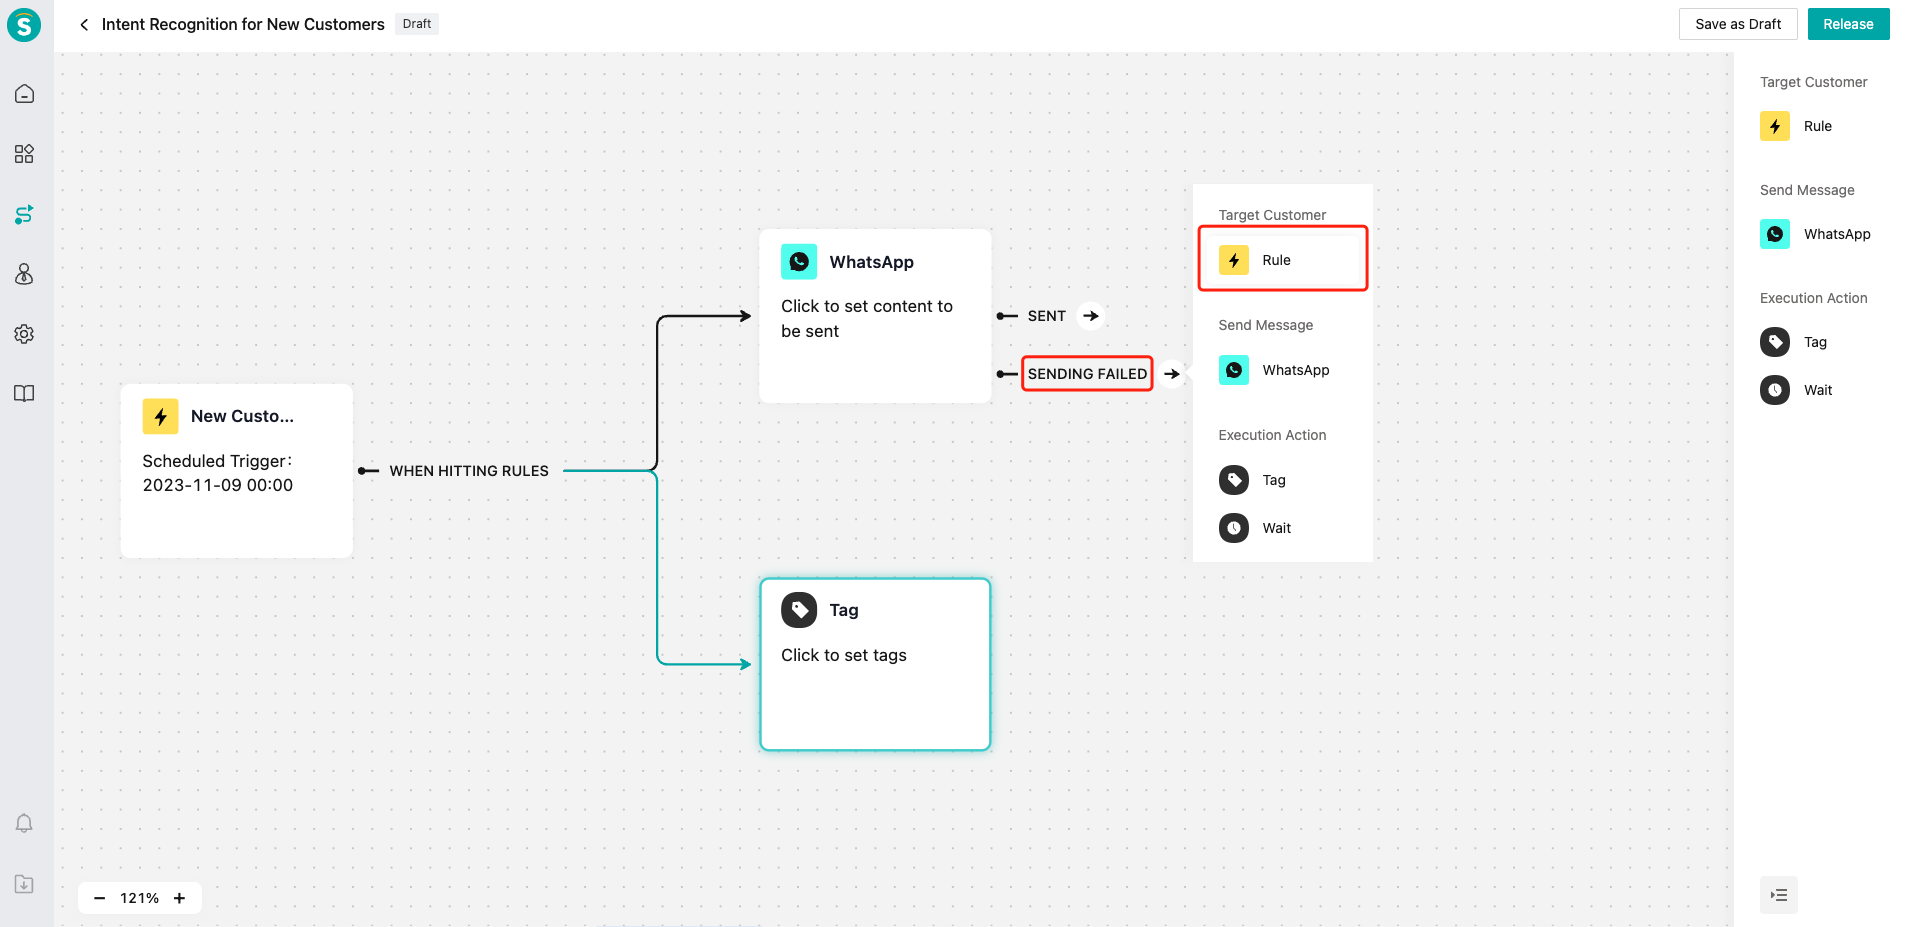
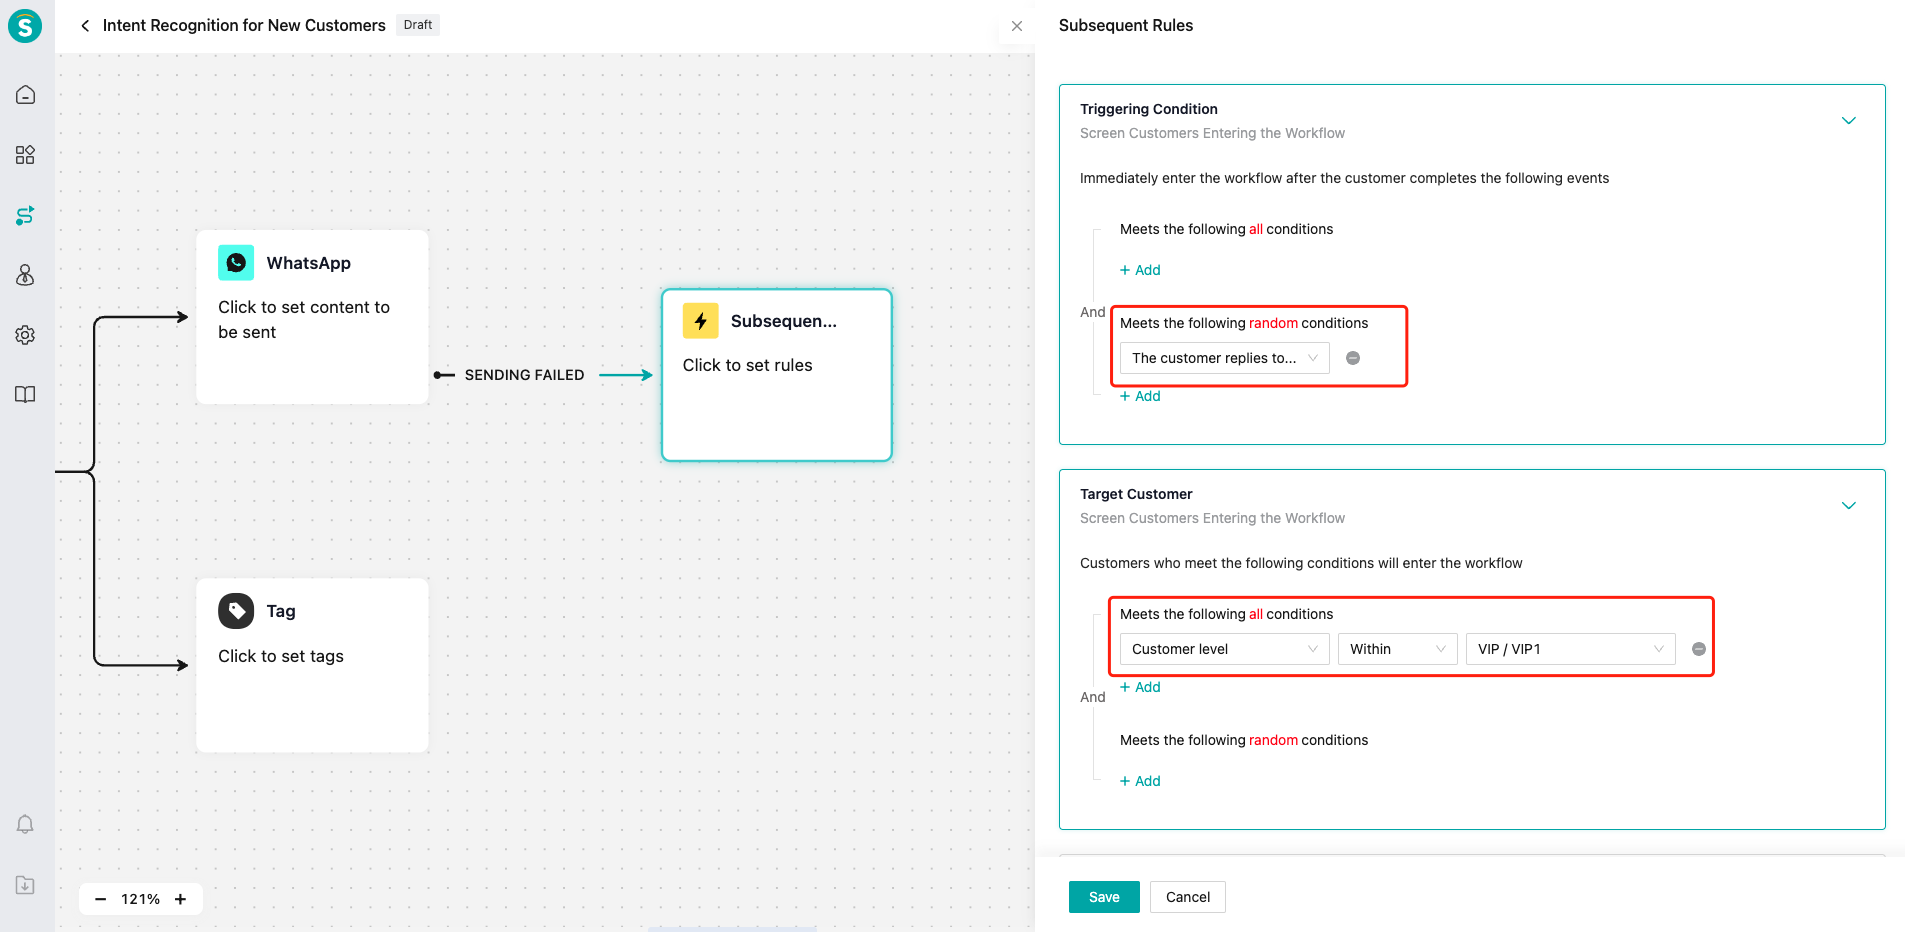
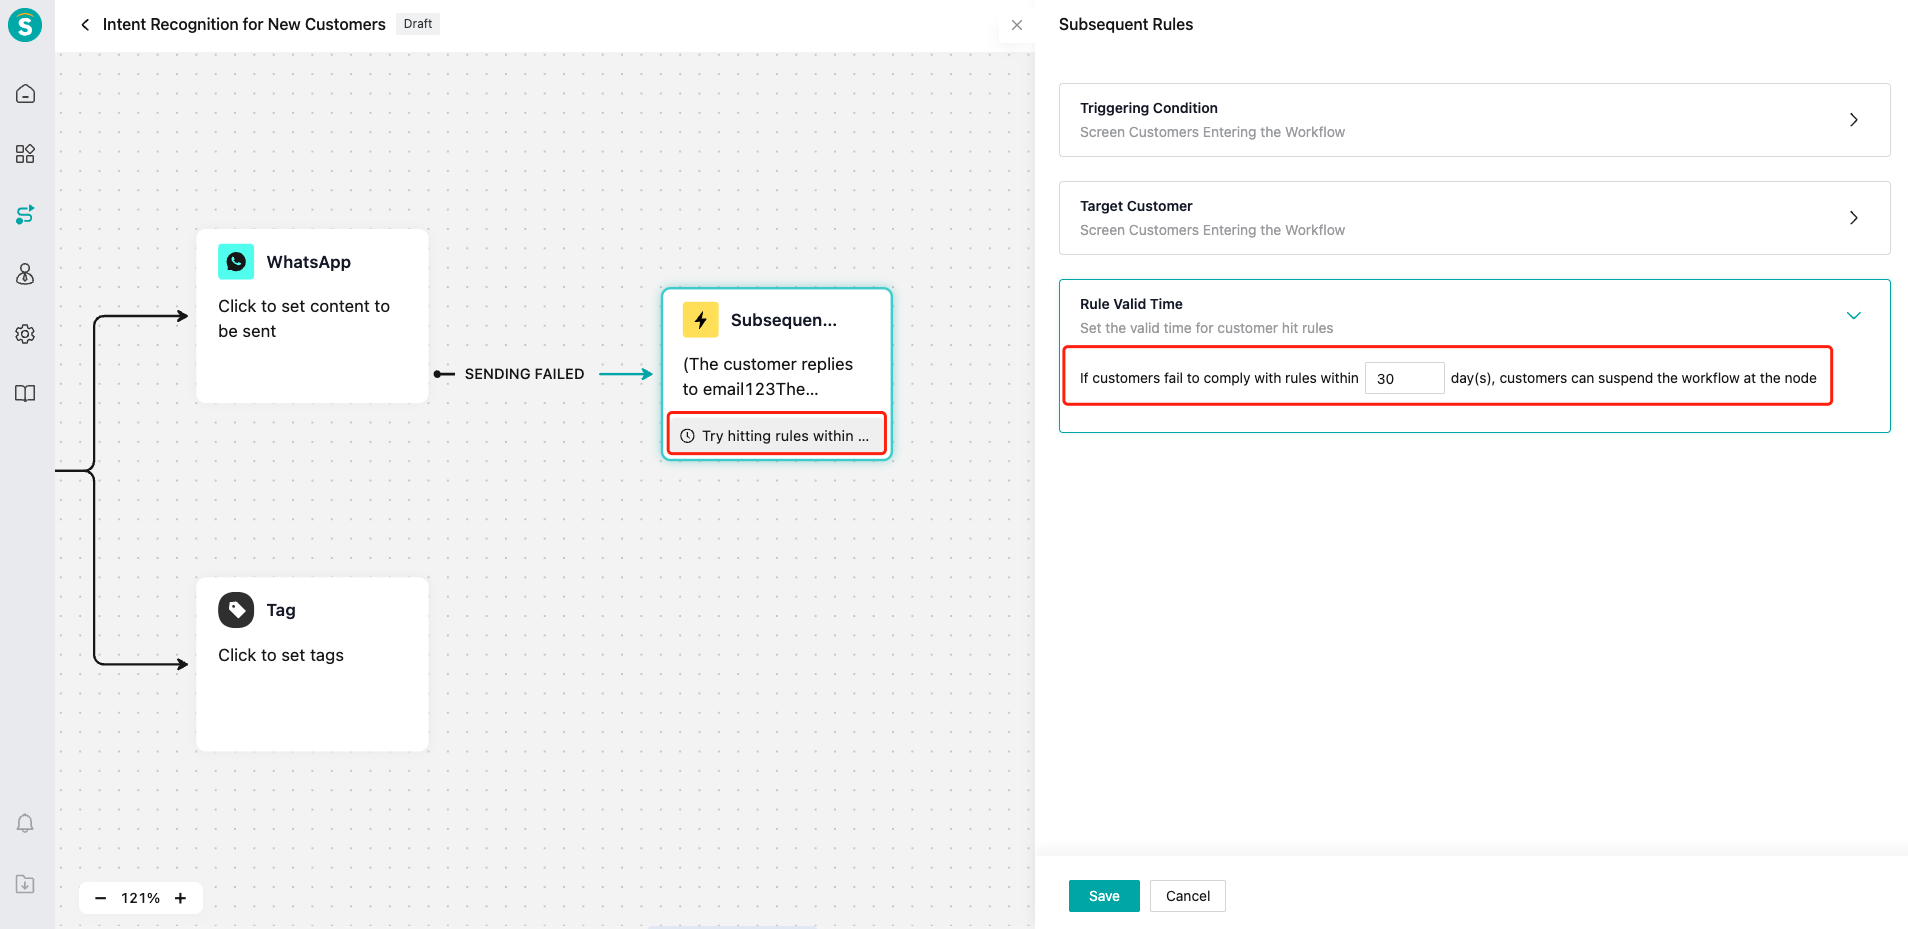
# Step 7: add Subsequent Rule Module. If SMS sending failed, we can also add【Subsequent Rule】module for customers to add new user filtering rules.
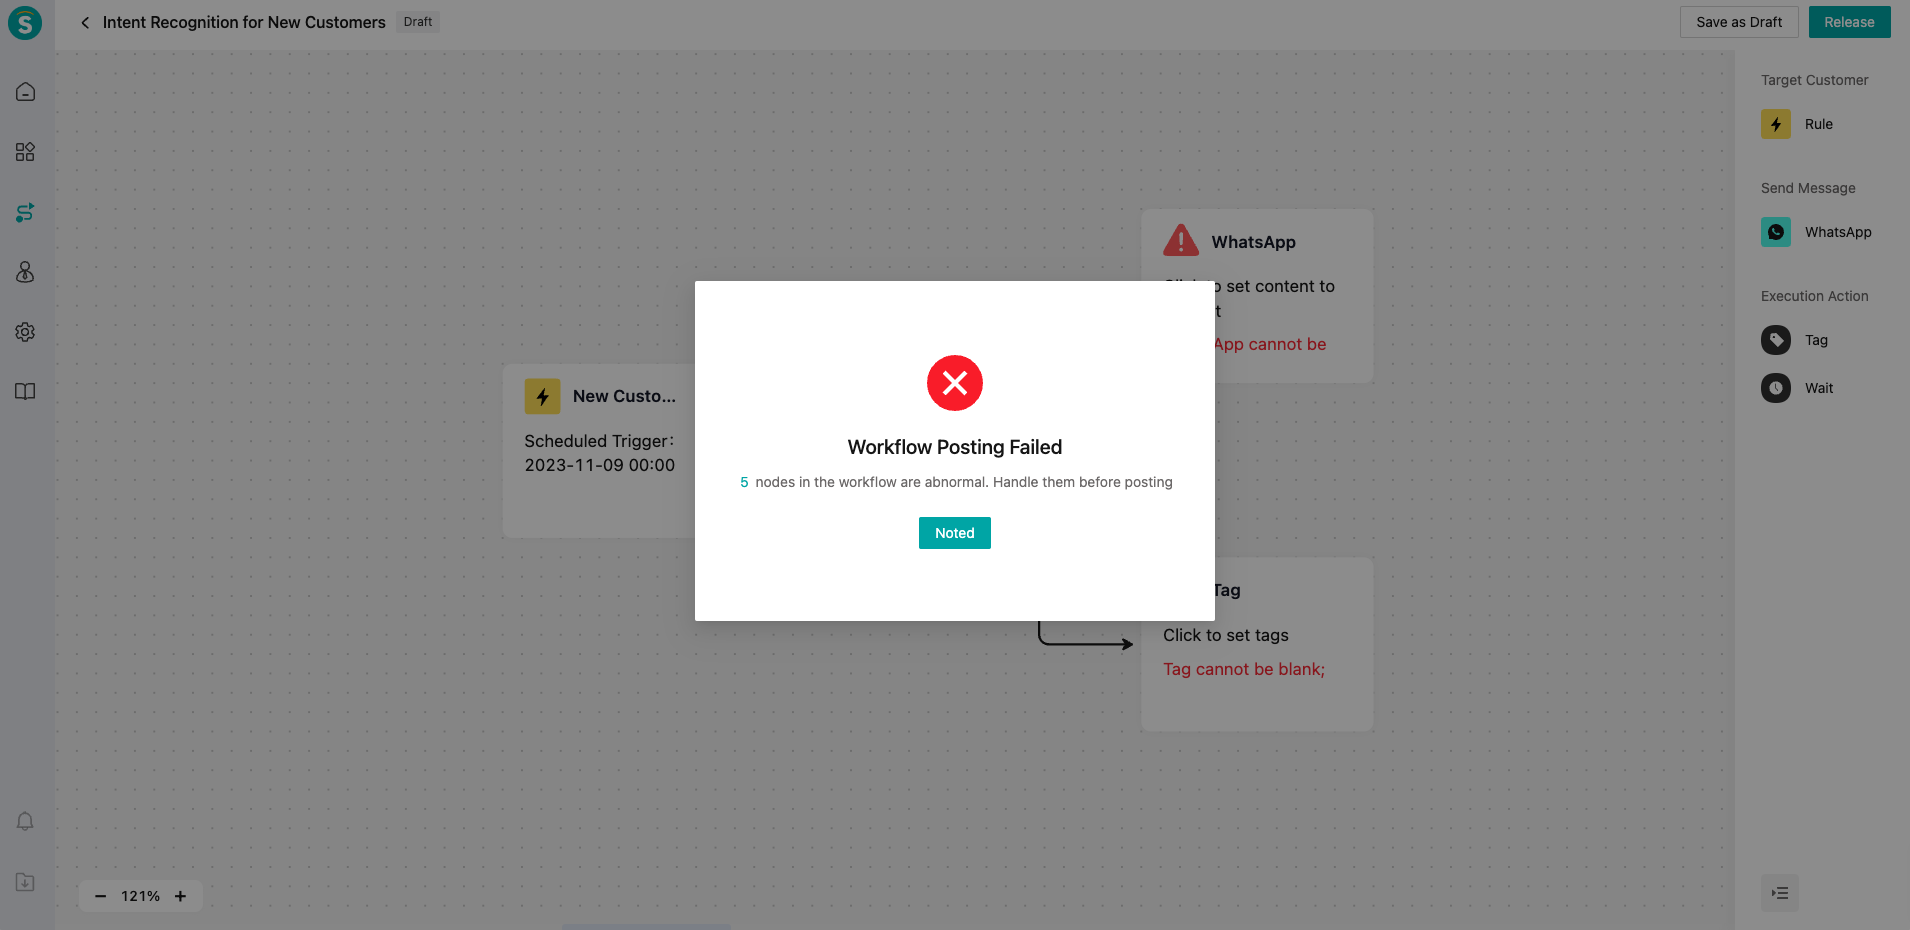
# Step 8: Post workflow canvas. After the workflow canvas is built, we can post the workflow. During the posting, we will perform node verification and the system will prompt for problematic nodes.

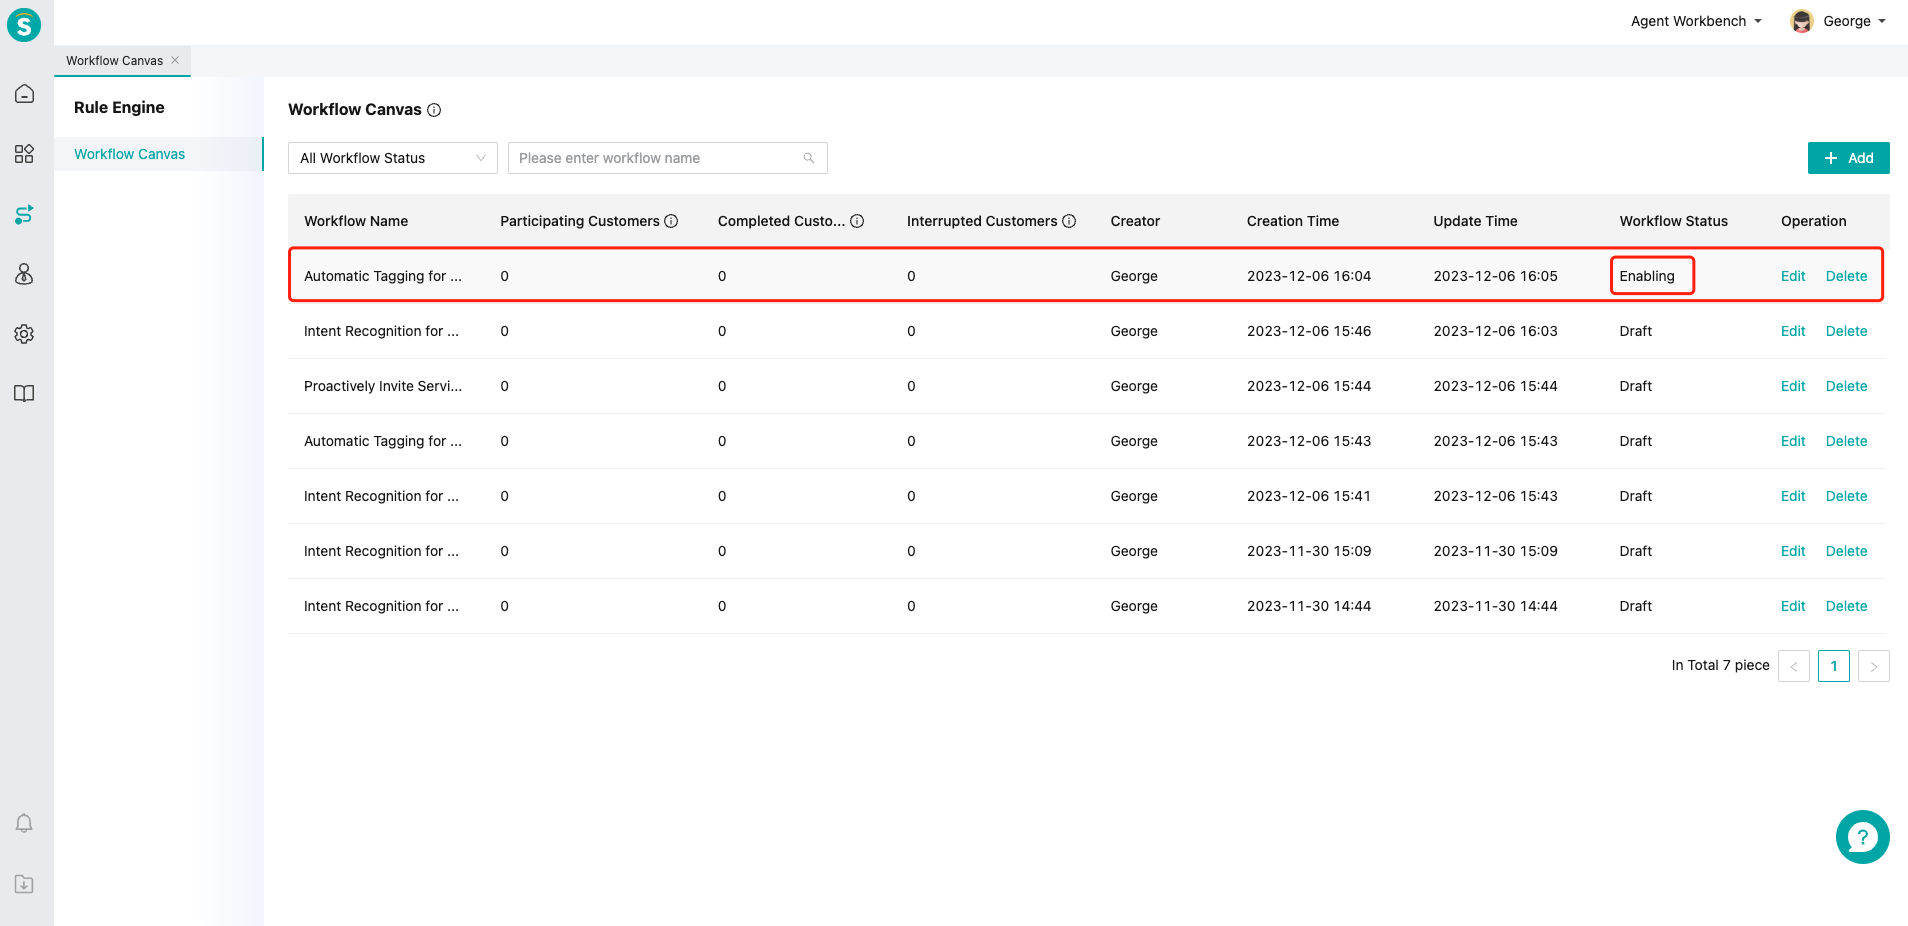
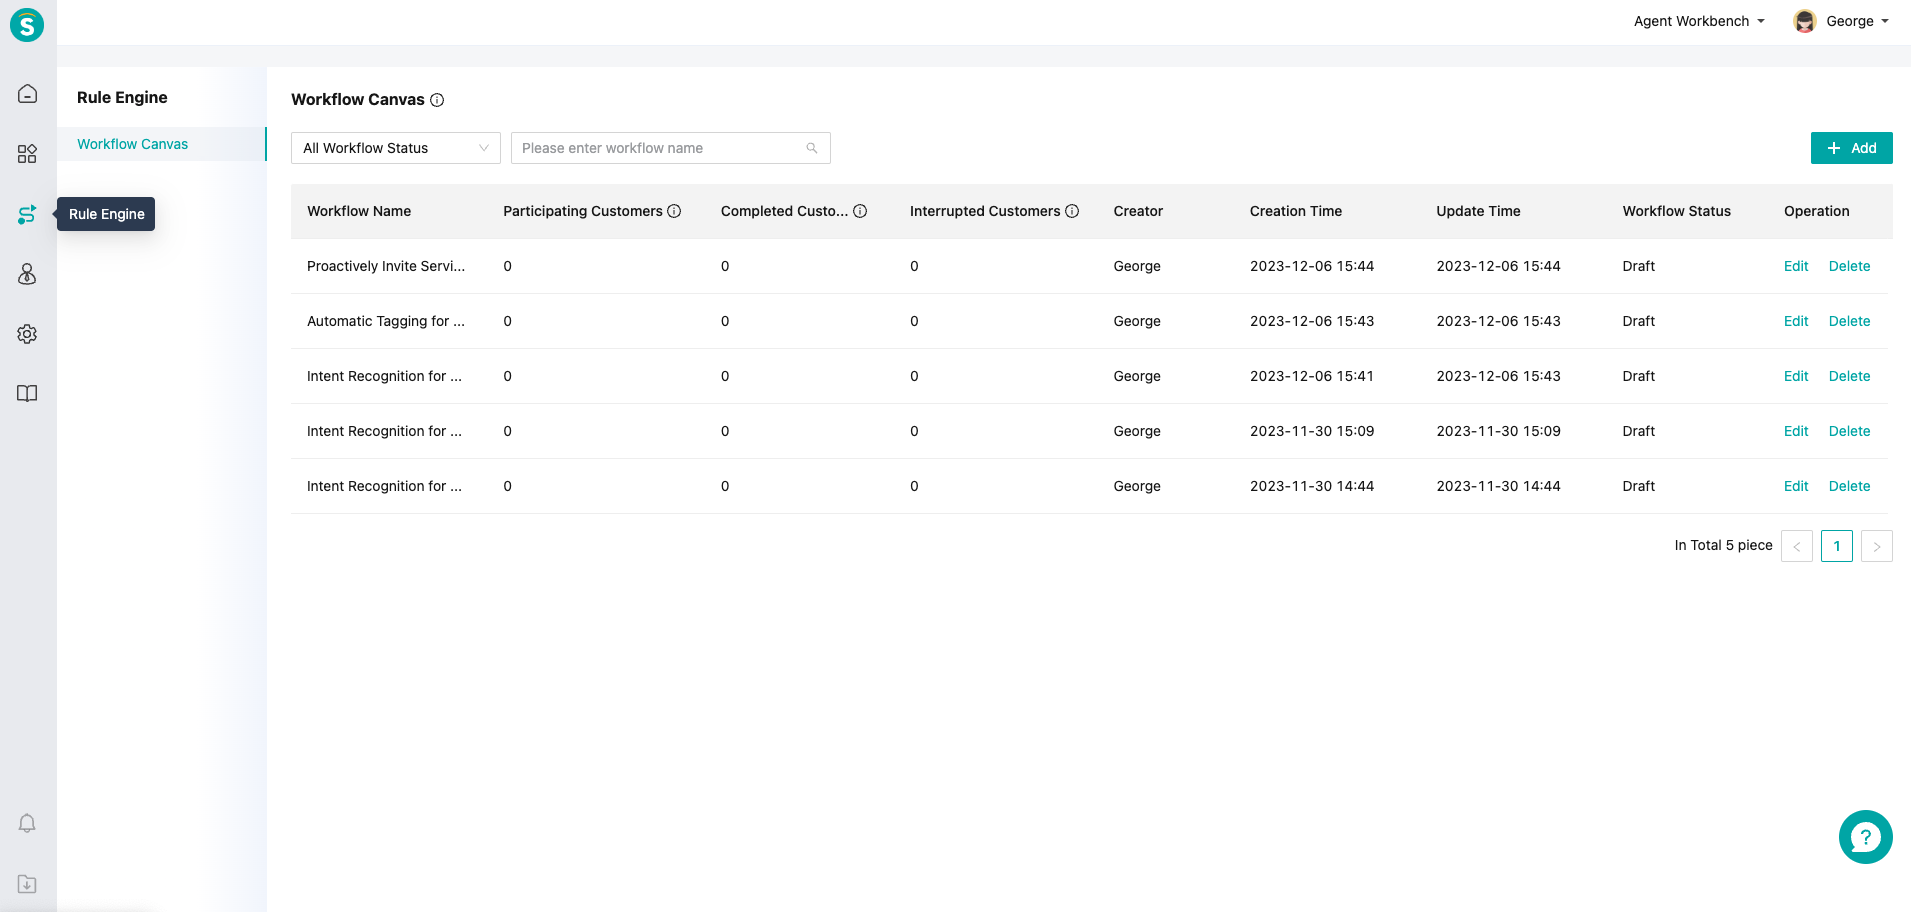
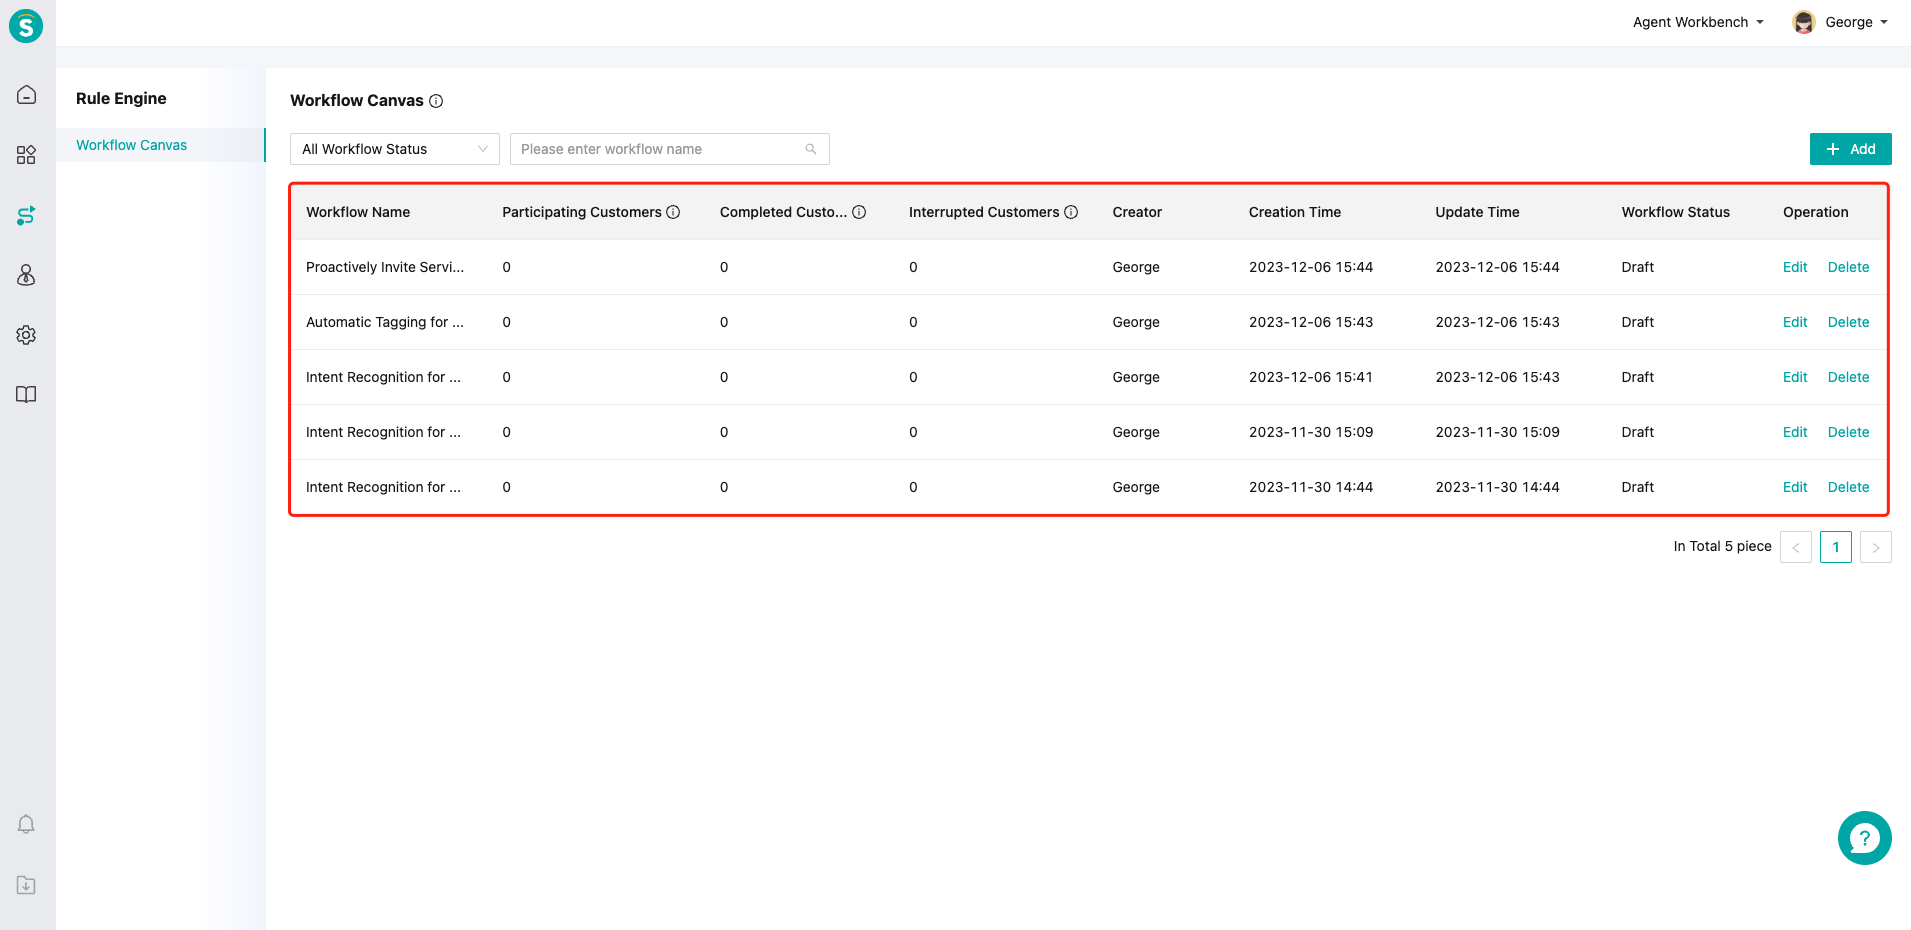
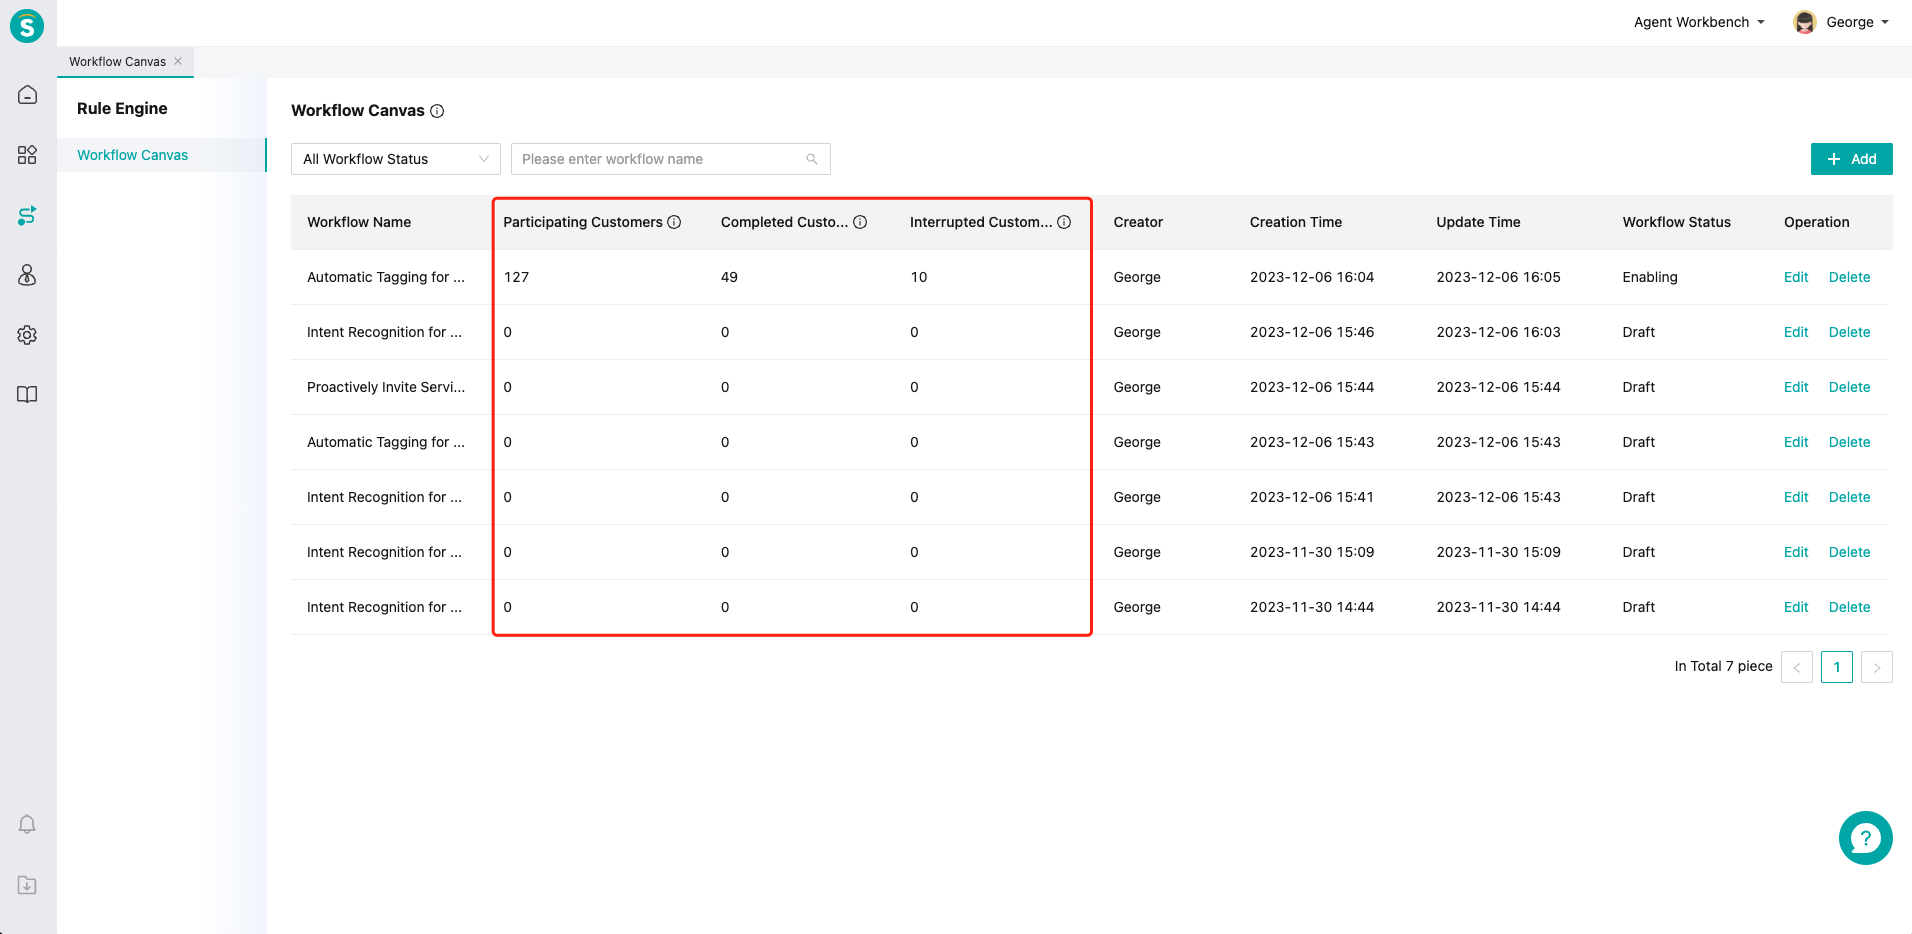
# Step 9: track the execution status of the canvas
When the canvas is in the enabled state, we can view the "Participating Customers", "Completed Customers", and "Interrupted Customers" indicators on the canvas to measure the execution effect of the workflow.
- 01
- WhatsApp Number Migration Guide06-23
- 02
- AI Assistance User Guide02-26