Ticket Processing Guide
# Ticket Processing Guide
——Agents transfer tickets within the enterprise through ticket operation, and finally solve customer problems.
# Role of Ticket Processing
Ticket processing refers to transferring tickets among various departments and agents in various skill groups for processing through basic operations such as editing, assigning, changing the status of, and replying to tickets, and finally solving customer problems.
# Preparation
● Agent account preparation: Agents need to have ticket permission to process tickets. Please set up accounts for agents in advance and configure relevant role permissions.
Related article: Agent Management Guide
● Ticket creation: Before processing a ticket, you need to create a ticket. Agents of each product line can create tickets. You can also click [+Add] on any page of Ticket Center > Ticket Processing to create a ticket, or customers can create a ticket. Related articles:
● Ticket processing settings: The functions and permissions during ticket processing are mostly related to the ticket processing settings. You can view and understand the ticket processing functions by reference to the ticket settings.
Related article: Ticket Processing Settings Guide
# Ticket Filtering
You can quickly filter tickets according to the query criteria through the Ticket Center > Ticket Query > Custom Query page, or Ticket Center > Ticket Processing > Any Ticket Filter page. Different agent accounts can view different tickets because of different roles' data permissions. For example, agents can view all tickets, tickets in a group, and only my tickets.
Related article: Agent Management Guide
# Custom list fields
You can customize fields in the ticket list through the Ticket Center > Ticket Query > Custom Query page, or the Ticket Center > Ticket Processing > Any Ticket Filter page. Click the "Gear" icon in the header of the ticket list to select or cancel the fields displayed in the list. You can also display the reminded tickets on the top by using the function of assigning the reminded tickets to quickly view and process these tickets.
# Ticket Operation
Through ticket list filtering, click the corresponding ticket to enter the ticket details. You can perform multiple operations on the ticket details page. Different agent roles have different operation functions for tickets with different statuses and attributes. See the following table for details.
| Operation | Judgment logic |
|---|---|
| Ticket Receiving | There is no receiving agent, ordinary agent: the receiving agent group is empty or the agent group is the group where the agent is located |
| Ticket Reminder | The ticket status is to be resolved: Not received, being processed, waiting for a reply |
| Ticket Editing | Tickets not in closed or deleted status, the current receiving agent or administrator role |
| Public Reply to Tickets | Tickets not in deleted or closed status, the current receiving agent or administrator |
| Internal Reply to Tickets | Tickets not in deleted or closed status |
| Assignment | Tickets not in deleted or closed status, the current receiving agent or administrator |
| Ticket Closing | Tickets not in deleted or closed status, with closing permission, the current receiving agent |
| Ticket Deletion | Tickets not in deleted status, with deletion permission |
| Activation | Tickets in closed status, with the permission |
| Ticket Field Editing | With the permission to edit tickets, and to customize fields |
| Follow/Unfollow | -- |
| Export Tickets | -- |
# ● Ticket Receiving
You can receive tickets through the [Receive Ticket] button on the operation bar on the right side of the ticket list, or the [Receive Ticket] button on the top of the Ticket Details. After receiving a ticket, you are the receiving agent for the ticket, and other agents will no longer be able to receive the ticket. Only after receiving the ticket can the agent have the permission to edit, reply to, and assign the ticket. The agent role of the administrator can perform the above operations without receiving the ticket.
# ● Editing
If you are an administrator or have received the ticket, you can enter the agent details page and click the [Edit] button to modify the ticket title, description and custom fields.
# ● Activation
When you have the permission to activate tickets, you can reactivate the closed ticket. Enter the ticket details page, click the [Activate] button on the top, and select the priority, status and other information of the ticket to complete the ticket activation.
# ● Deletion
When you have the permission to delete tickets, you can delete tickets. Enter the ticket details page and click the [Delete] button on the top to delete the ticket. The deleted ticket will not be processed by SLA timing and trigger.
# ● Export
Enter the ticket details page and click the [Export] button on the top to export all the contents of this ticket, including ticket information, reply records, operation records, etc.
# ● Follow
Enter the ticket detail page and click the【Follow】button at the top to add followers to the ticket. Afterwards, you can view all the tickets you follow in the Ticket Processing > My Followed.
# ● Ticket Reminder
On the ticket details page, you can remind receiving agents to process the tickets in not received, being processed, or waiting for reply status as soon as possible. Click the [Remind] button on the top and fill in reminder remarks to complete ticket reminder.
# ● Association
On the ticket details page, you can associate other tickets with the current ticket, and can view the associated ticket in the associated ticket section. Click the [Associate] button on the ticket details page to enter the number of the ticket to be associated to complete the association. The two associated tickets can be viewed together in the associated ticket section.
# ● Copy
On the ticket details page, you can copy the content of this ticket to create a new ticket. The new ticket creator and channel are subjected to the actual agent and channel. Click the [Copy] button on the ticket details page, edit the ticket again in the Copy Ticket pop-up window, and then save to complete the copy, or click [Save and Associate This Ticket] to associate the copied ticket with the original ticket at the same time.
# ● Assignment
On the ticket details page, you can assign tickets to other agents. Click the [Assign] button on the ticket details page to select the receiving agent and receiving agent group to complete the assignment. The ticket assignment here is equivalent to changing the receiving agent and receiving agent group of the ticket when editing the ticket.
# ● Close
On the ticket details page, you can change the ticket status to Closed. Click the [Close] button on the ticket details page to close the ticket. Closing here is equivalent to changing the ticket status to Closed when editing the ticket.
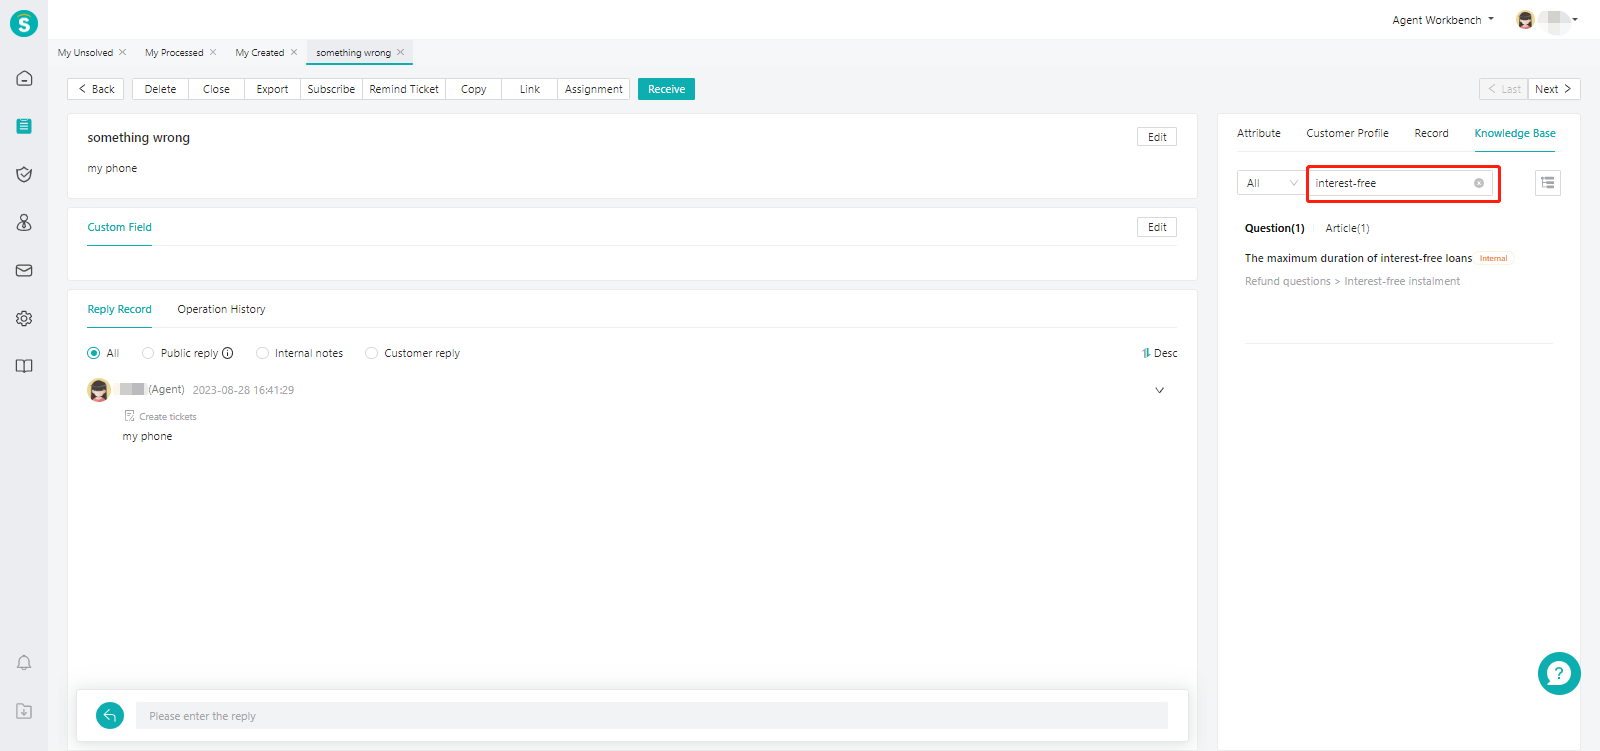
# ● Knowledge Base
The knowledge base is a tool that helps you quickly process tickets. You can add answers to questions that are easily asked in your work to the knowledge base, making it convenient for you to quickly search for keywords in the knowledge base to find answers when encountering the same questions in the future, thus saving response time.
You can categorize FAQs on the right and add answers to them. There is also a filter inside the page, making it easy to filter questions and answers.
In Knowledge Base Management > Settings > Basic Information, you can configure the available range of the knowledge base to be "visible only to internal" or "visible to internal/external". The difference is that "visible only to internal" cannot directly send answers to customers, while 'visible to external' can send the answers directly to the customers.
In Knowledge Base Management > Settings > Permission Settings, you can configure who can use and operate the knowledge base. After operator is authorized, he/she can add, delete, modify and check questions in the knowledge base.
During daily ticket processing, you can open the knowledge base and see all pre set questions and related answers.
You can also search for a question and answer based on keywords. Content can be copied, which reduces ticket response time.
# Bulk Operation
In the ticket list, you can perform bulk operation on tickets by selecting two or more tickets, to edit the category, priority, status, receiving agent group and receiving agent information of tickets in bulk, or to reply to, receive, follow or unfollow tickets in bulk.
# Bulk Ticket Import
In addition to creating tickets through various product line functions or Ticket Center, agents can also click [More] in the ticket list and select [Import Ticket] to create multiple tickets at one time through an execl file. You need to download the import template first, fill in the ticket content according to the template requirements, and then import the ticket.
# Batch Ticket Update
You can also batch edit the fields of existing tickets. The first step is to select the fields that need to be updated in the ticket, and the system will generate an import template based on the fields; the second step is to download the template, fill in the data according to the template format, and upload and update it.
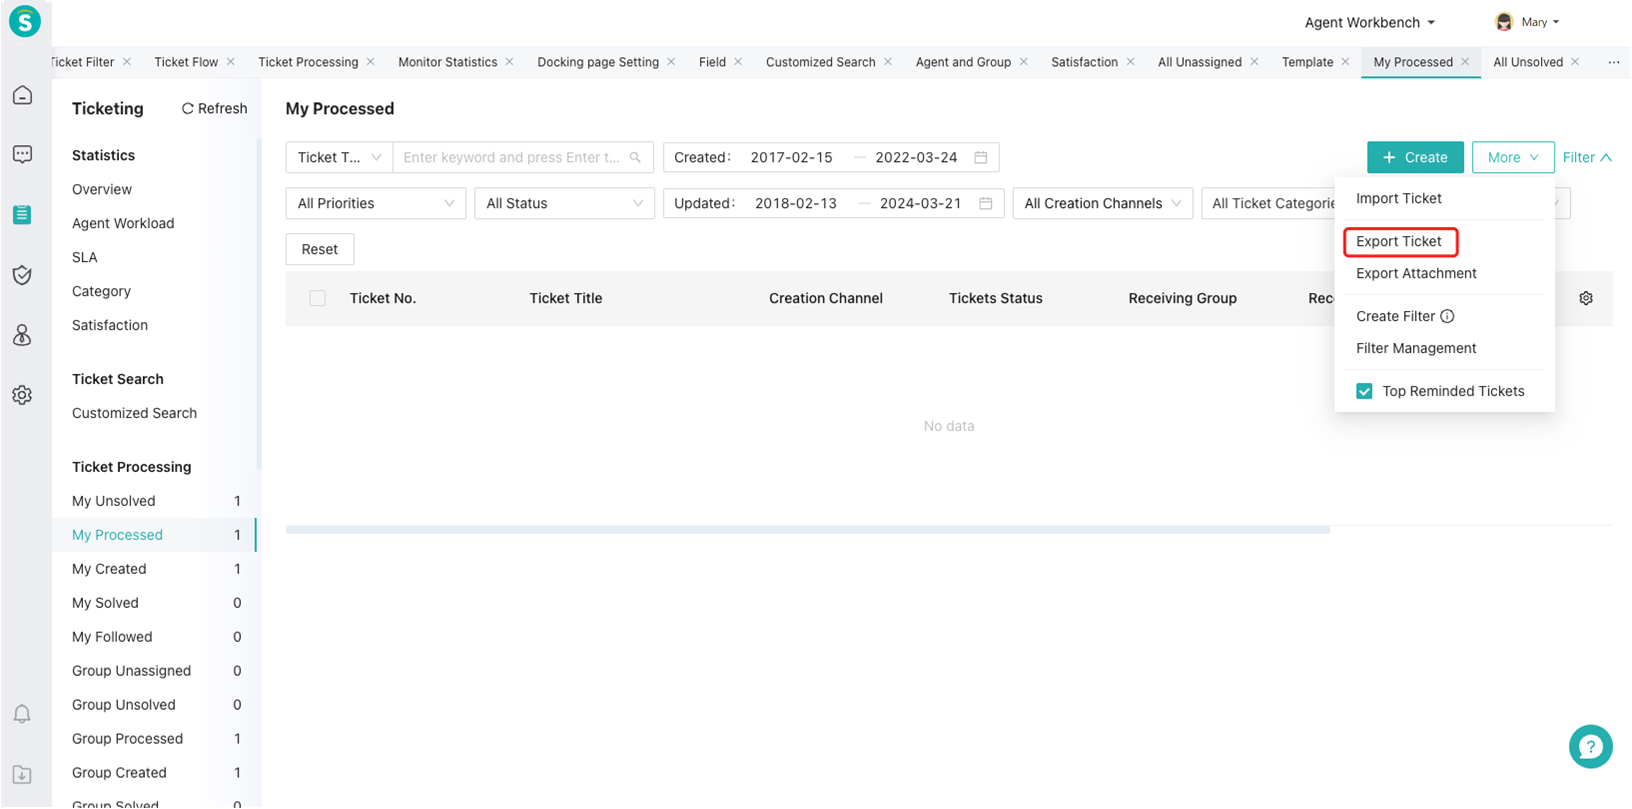
# Export Ticket
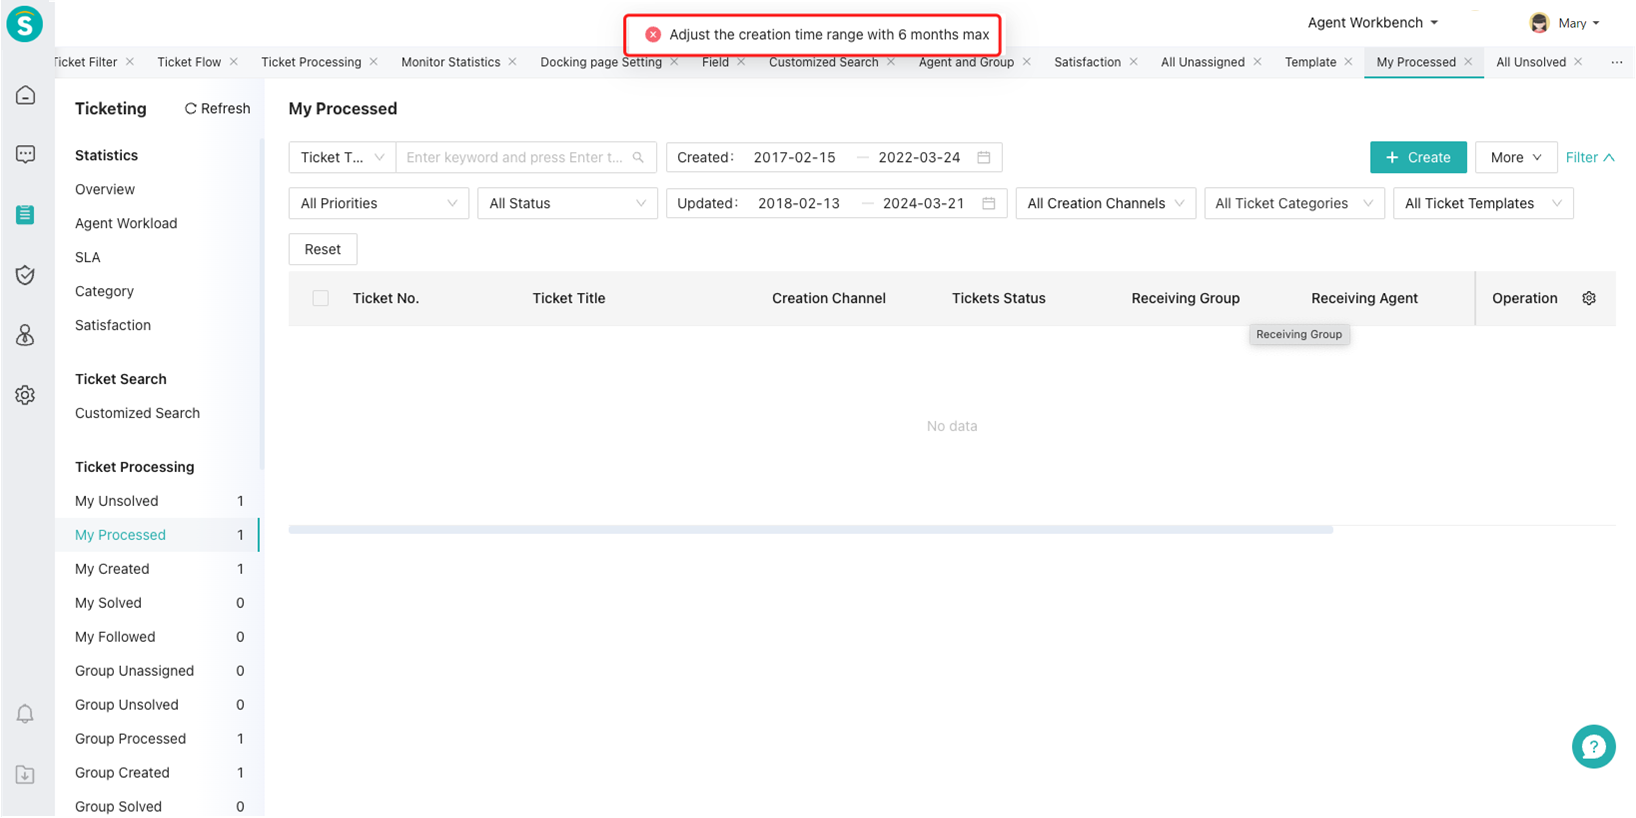
If you need to view or process a ticket outside the agent system, you can export the ticket. Click [More] in the ticket list and select [Export Ticket] to export the selected tickets through an execl file. When exporting tickets, you can select tickets that have been created within 6 months at most each time.

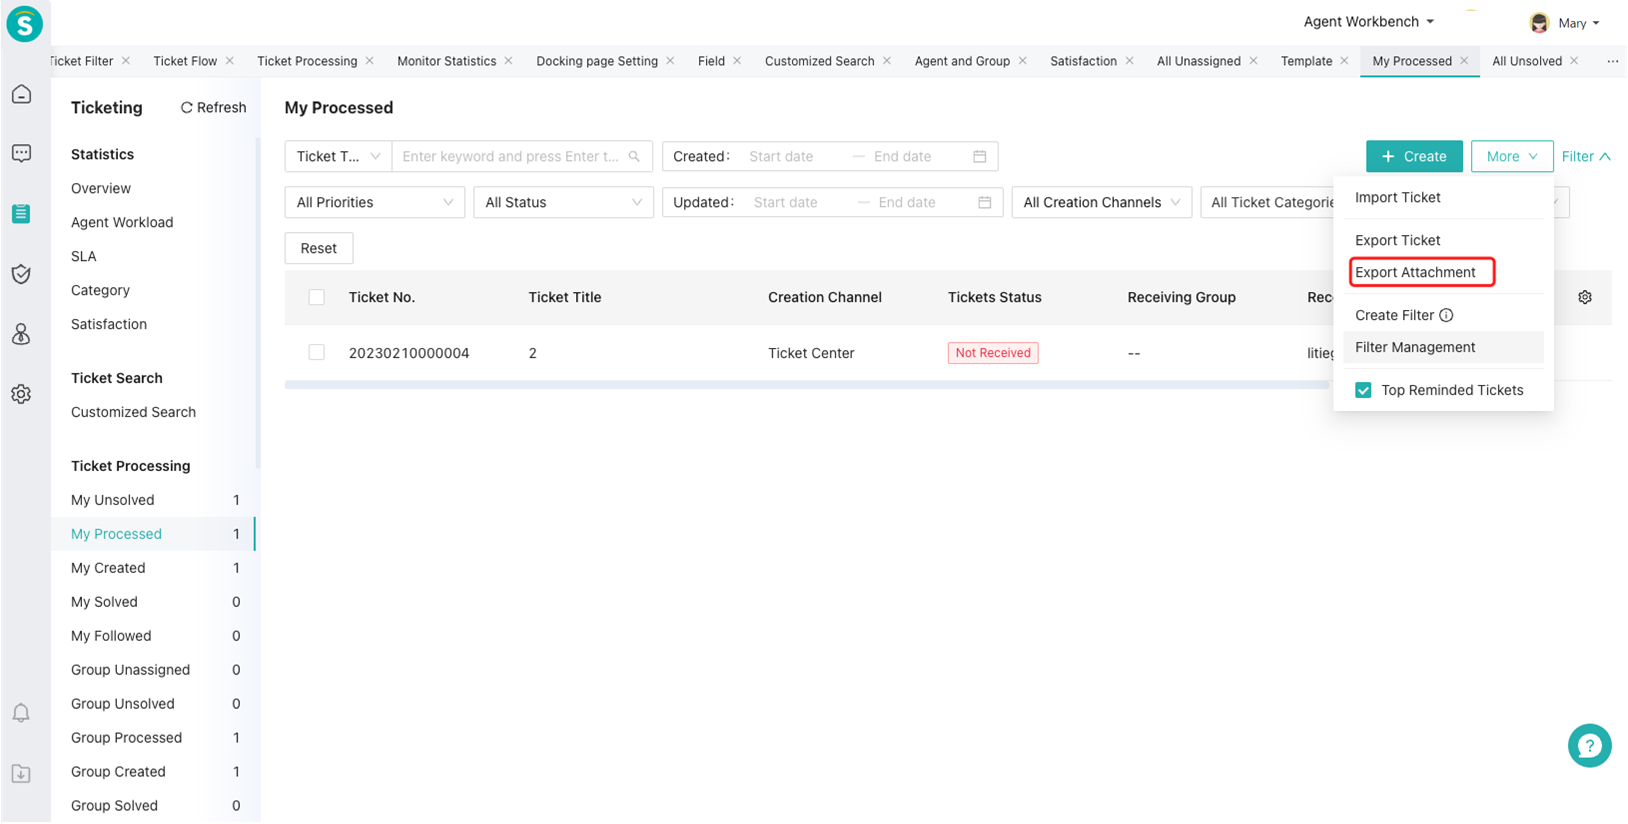
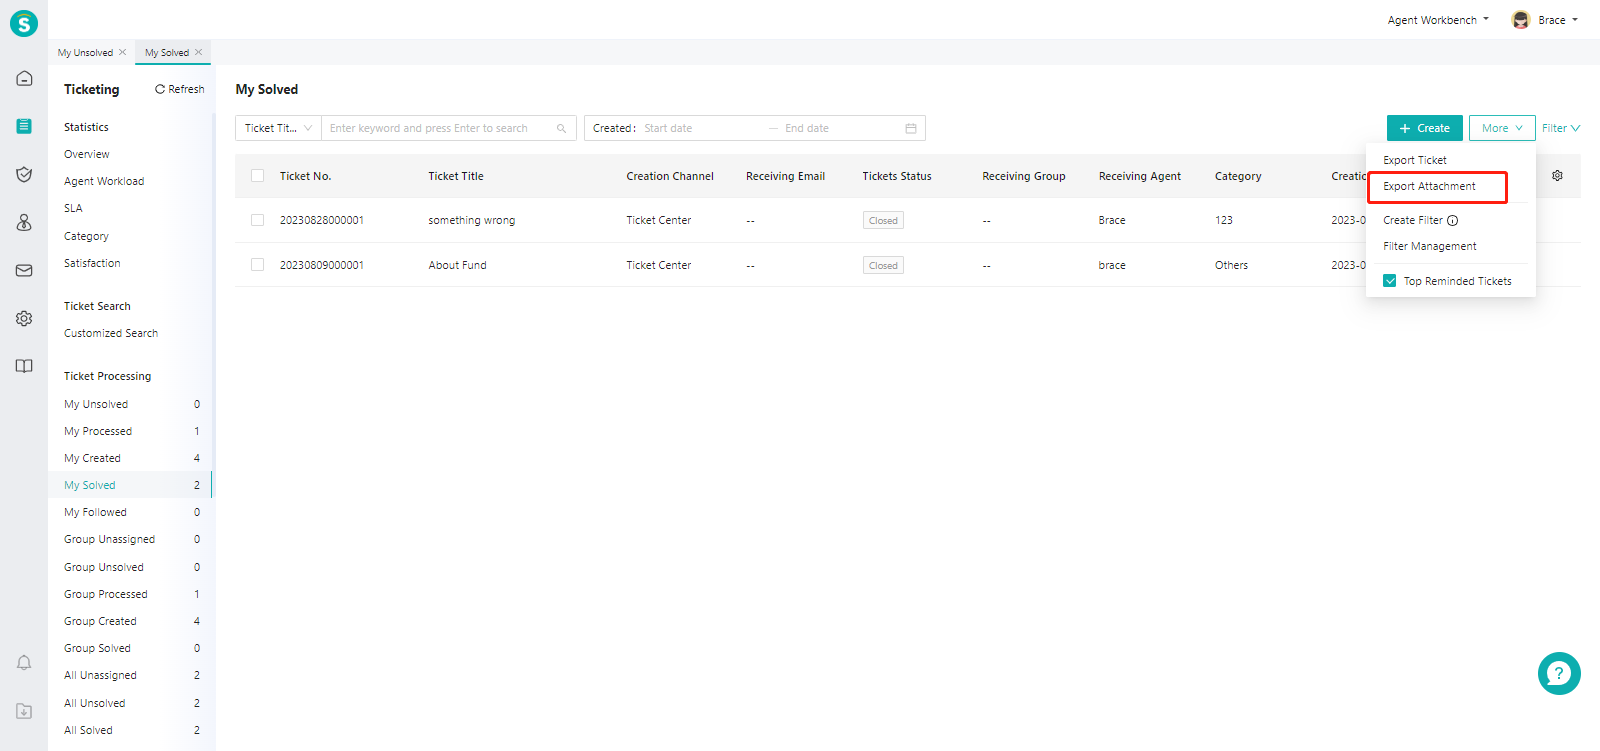
# Export Attachment
When exporting tickets, the attachments added for creating tickets or replying to tickets cannot be exported together. You can use the Export Attachment function to export ticket attachments. Click [More] in the ticket list, and select [Export Attachment] to export the selected ticket attachments through a compressed file. When exporting ticket attachments, you can select the attachments of tickets that have been created within 6 months at most each time.
# Filter Creation or Editing & Filter Management
You can manage the ticket filter in the ticket list or create or edit your personal filter. For specific functions, please refer to the article: Ticket Filter Setting Guide