Phone Bar Guide
# Phone Bar Guide
——Learn how to use phone bar to make call operations through this article
# Role of Phone Bar
The phone bar is a component that the agent needs to use when making a call. This component can provide you with these capabilities:
- The agent can conduct the basic operations of answering calls and making outbound calls through the phone bar.
- During the talk, you can transfer, inquire and hold the calls and send satisfaction.
# Preparation
You need to make the following preparations before using the phone bar function:
- Agent has the call permission and has bound an extension account
- The agent has configured display rules (necessary for outbound calls)
# Main Functions of Phone Bar
# ● Login
- Support the selection of login status when logging in. You can log in as "Online" or "DND".
- Support the fixed and dynamic binding of extension numbers for some employee extensions. For example, in large workplaces, some employees need to work at fixed positions, and other employees need to work in alternate shifts in the morning and evening.
- Support the mutual squeezing of multiple login terminals for the same agent
- Support 3 kinds of answering methods, including sip phone, web phone and cell phone.
# ● In-call Operation
- Support transferring calls. Transfer: The current agent ends the talk and transfers the call to the skill group/agent/3rd-party number.
- Support inquiry calls. Inquiry: During the talk, the agent can initiate an inquiry call with another agent if it needs an assistance. During the inquiry, the current agent establishes a temporary talk with the inquired party, and the customer talk is on hold. During the inquiry, the agent can add the inquired party to the 3-party talk, transfer the call to the inquired party, or return to the one-to-one talk with the customer.
- Support the agent to send satisfaction manually during the talk
- Support holding calls
- Support muting
# ● Post-call Sorting
Support agents to manually extend the sorting time or end the sorting ahead of time.
# ● Switch Display Rules
When the agent has multiple sets of display rules, it can switch them at any time to meet the requirements of using different display rules in different scenarios.
# ● Assistance Function
- Support displaying the queuing number.
- Support displaying the connection speed between web phone and server.
# ● Internal Talk
- Support internal talks between agents in the enterprise through the SIP phone and web phone on the phone bar, and agents can answer the call by SIP phone, web phone and cell phone.
- Support direct dialing by searching the agent name/work number and extension number.
# How to Use Phone Bar
# ● Login
- Log in to the phone bar. When logging in, you can select the login status, the extension number, and whether to automatically unbind after going offline (for dynamic binding scenarios)
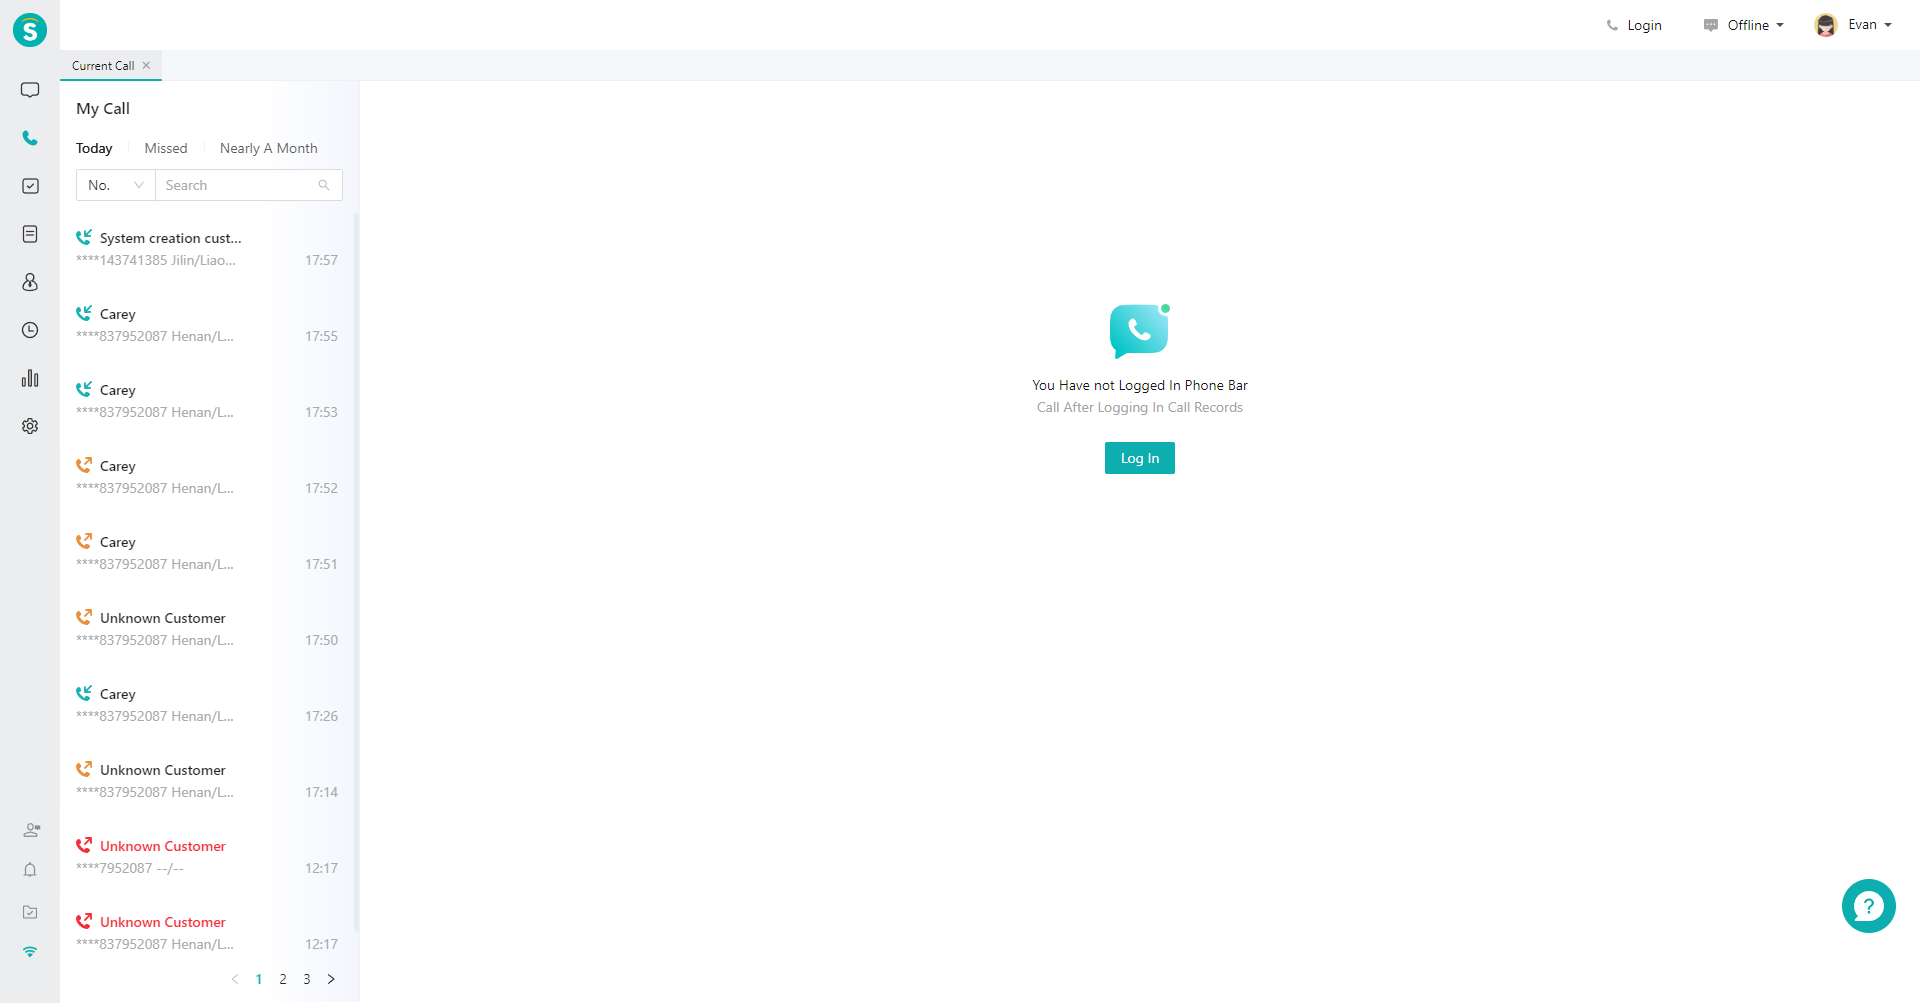
- Click the【Log in to Phone Bar】(Figure 1) in the upper right corner of the workbench, select the login status and answering method in the pop-up window, and then click【Login】(Figure 2) (see the table below Figure 2 for details of each function in the pop-up window).
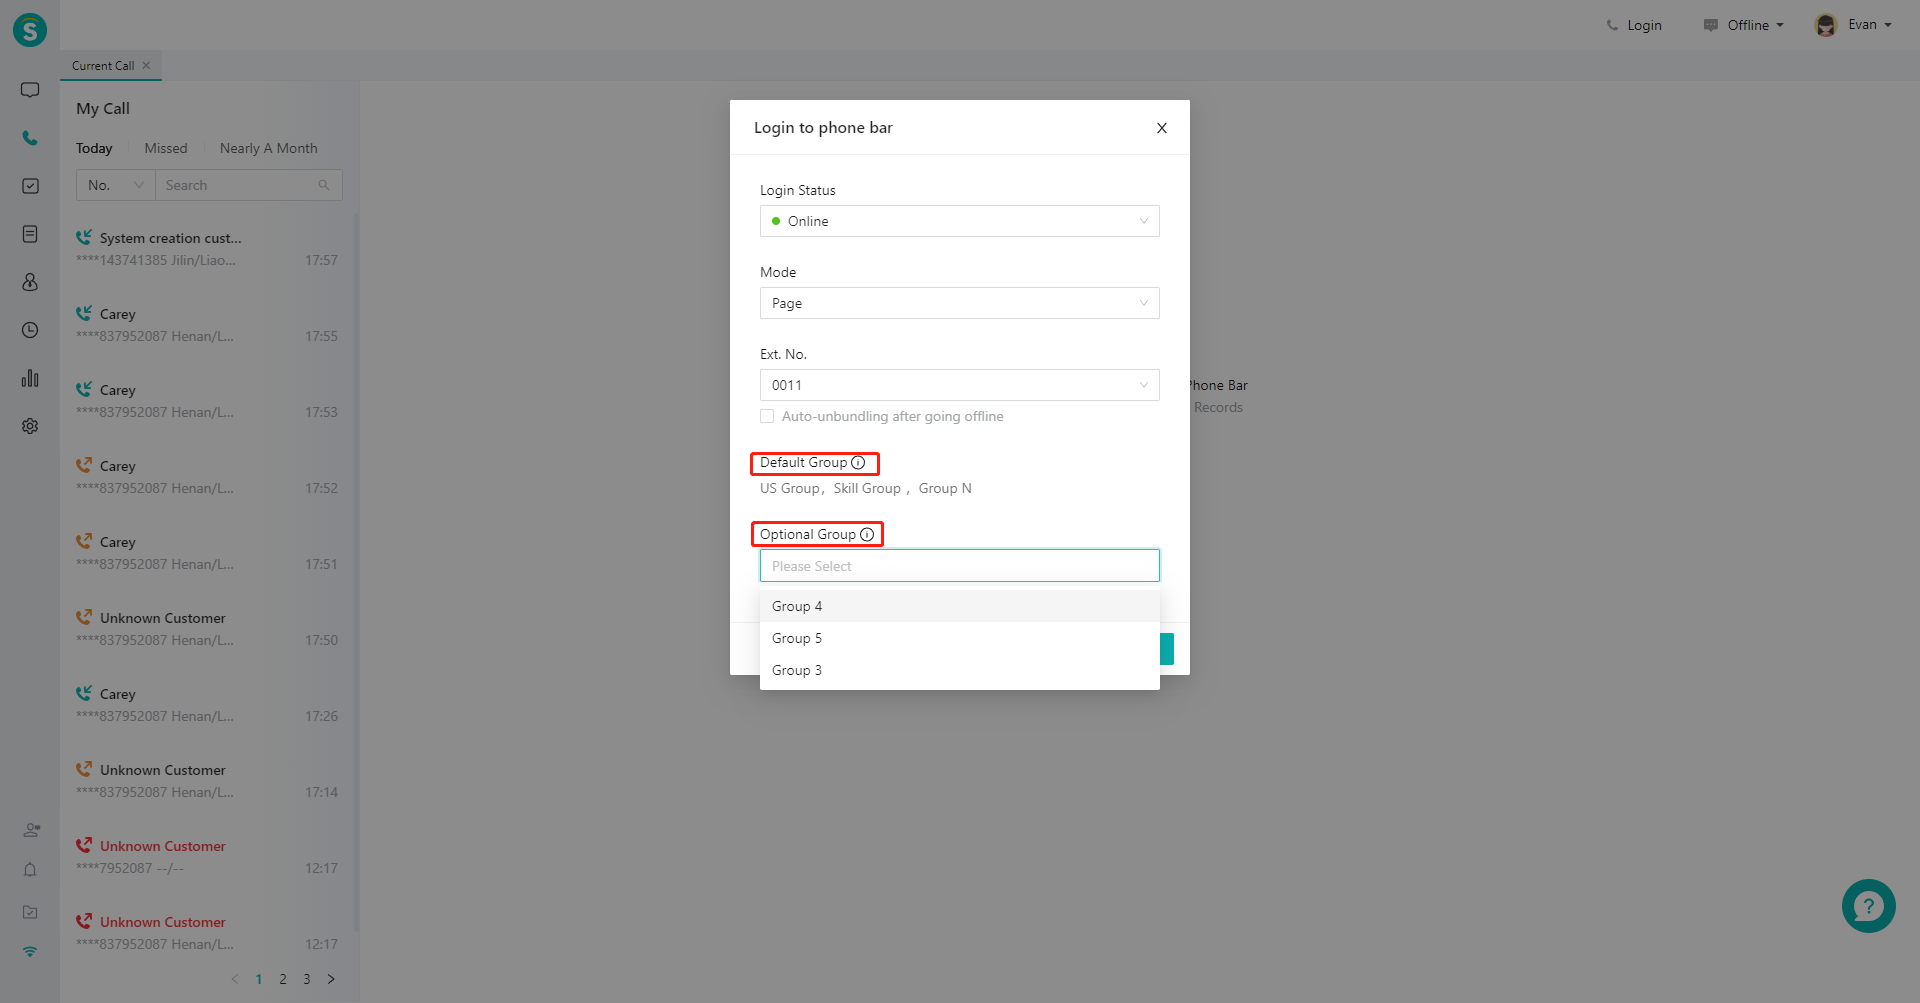
- After enabling「Agents select skill groups manually to log in」in the Admin Console\Call Function Settings\Talk Function, the agent can select the skill group for login when logging in to the phone bar (Figure 3).
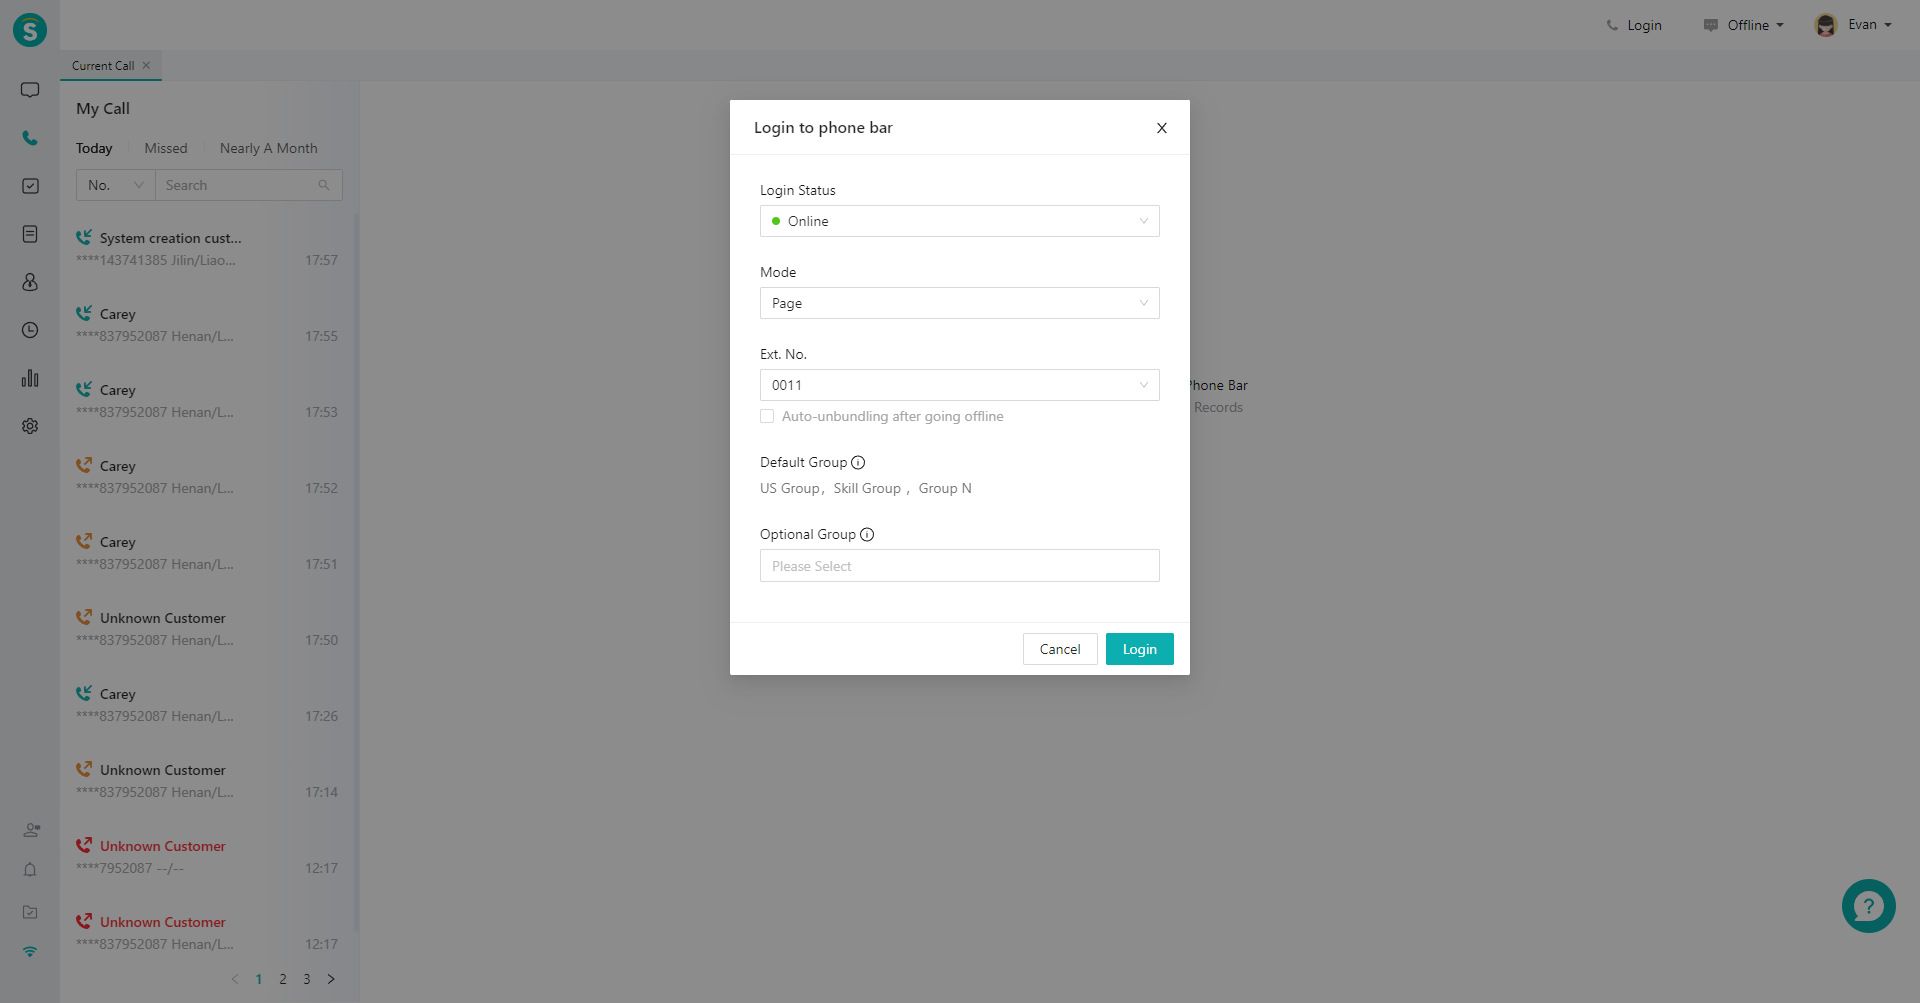
| Function | Description |
|---|---|
| Login status | You can log in as "Online" or "DND" status. For example, if you don't want to answer the call immediately after login, you can log in as the 「DND」 status. |
| Answering method | Support 3 kinds of answering methods, including SIP phone, web phone and cell phone. |
| Extension account | The extension account that has been bound to the current agent is selected by default, and can be switched to other unbound extension numbers |
| Agents select skill groups manually to log in | After enabling, an agent can select a skill group to log in when logging in to the phone bar, and it will only receive calls assigned by the log-in skill group. The admin can set the default log-in skill group for agent (the agent must log in this skill group) and the optional log-in skill group (the agent can choose whether to log in or not) |
| Unbind automatically after offline | After checking, the agent will be automatically unbound from the extension when going offline, which is used for scenarios that require dynamic binding. For example, in the day and night shift scenario, two agents need to share one extension number. |
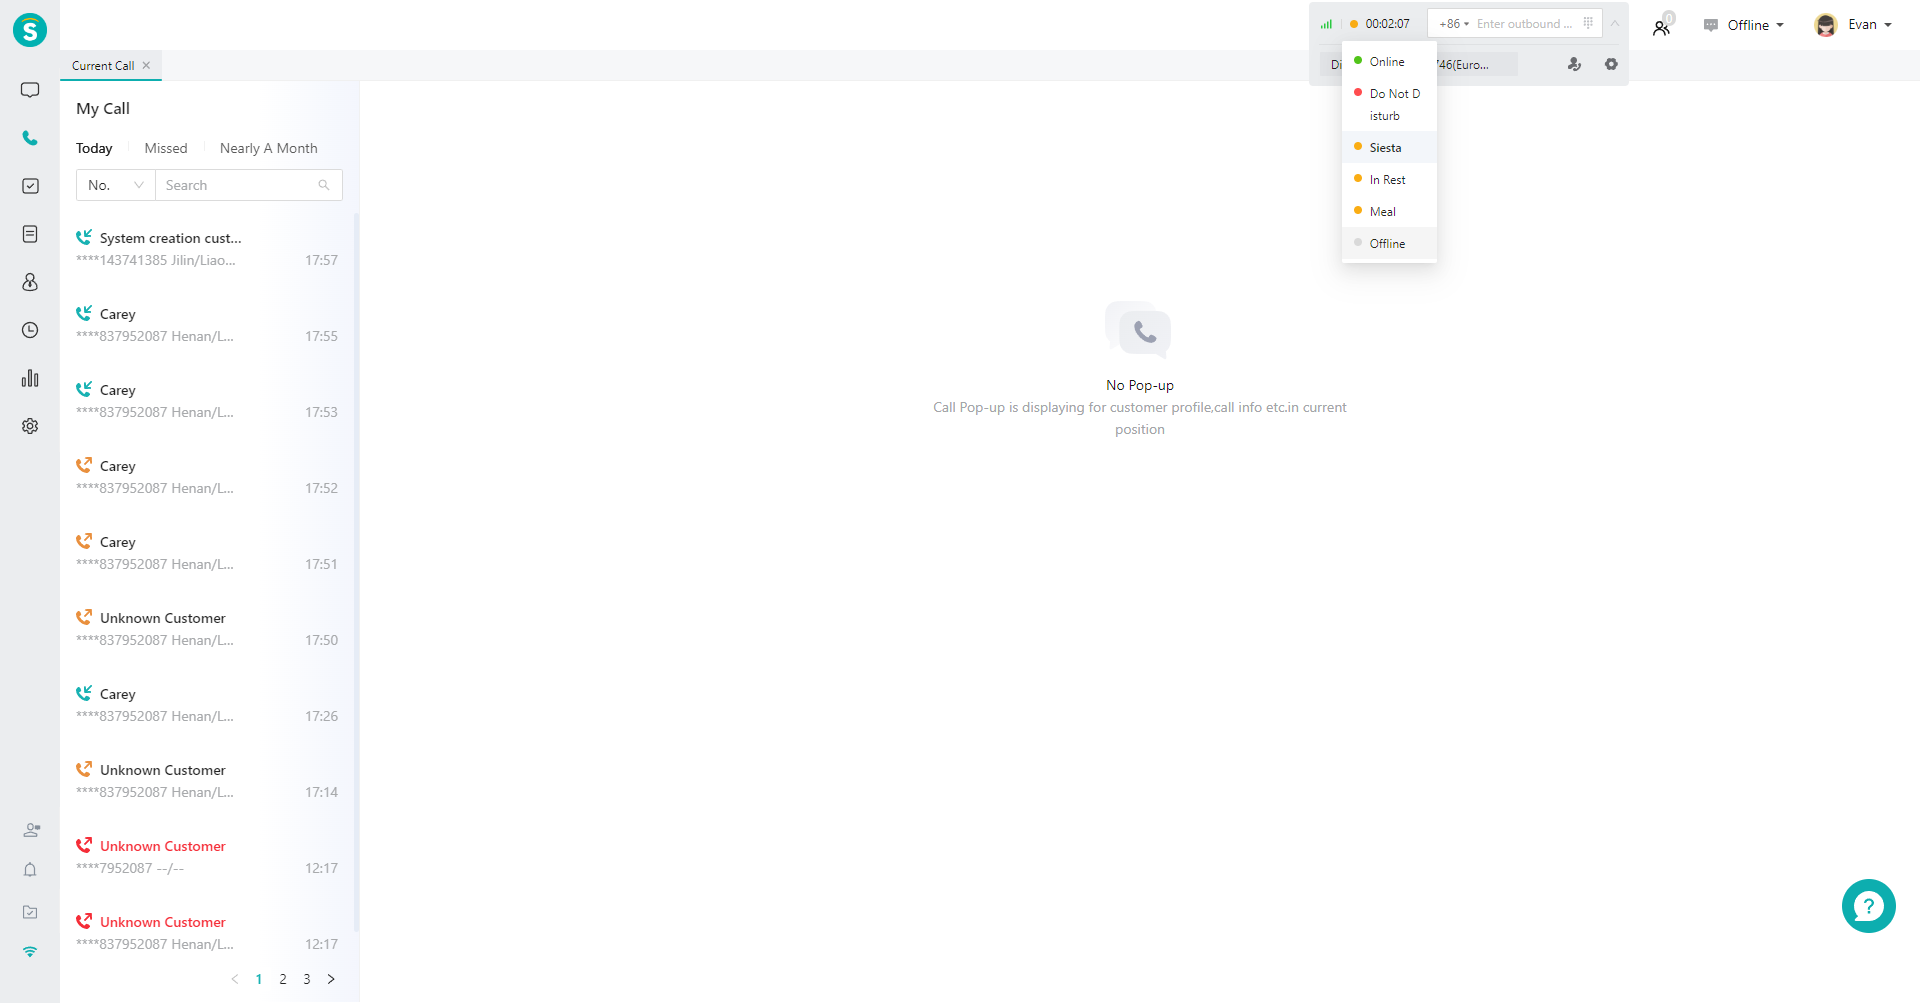
# ● Switch Login Status After Logging In
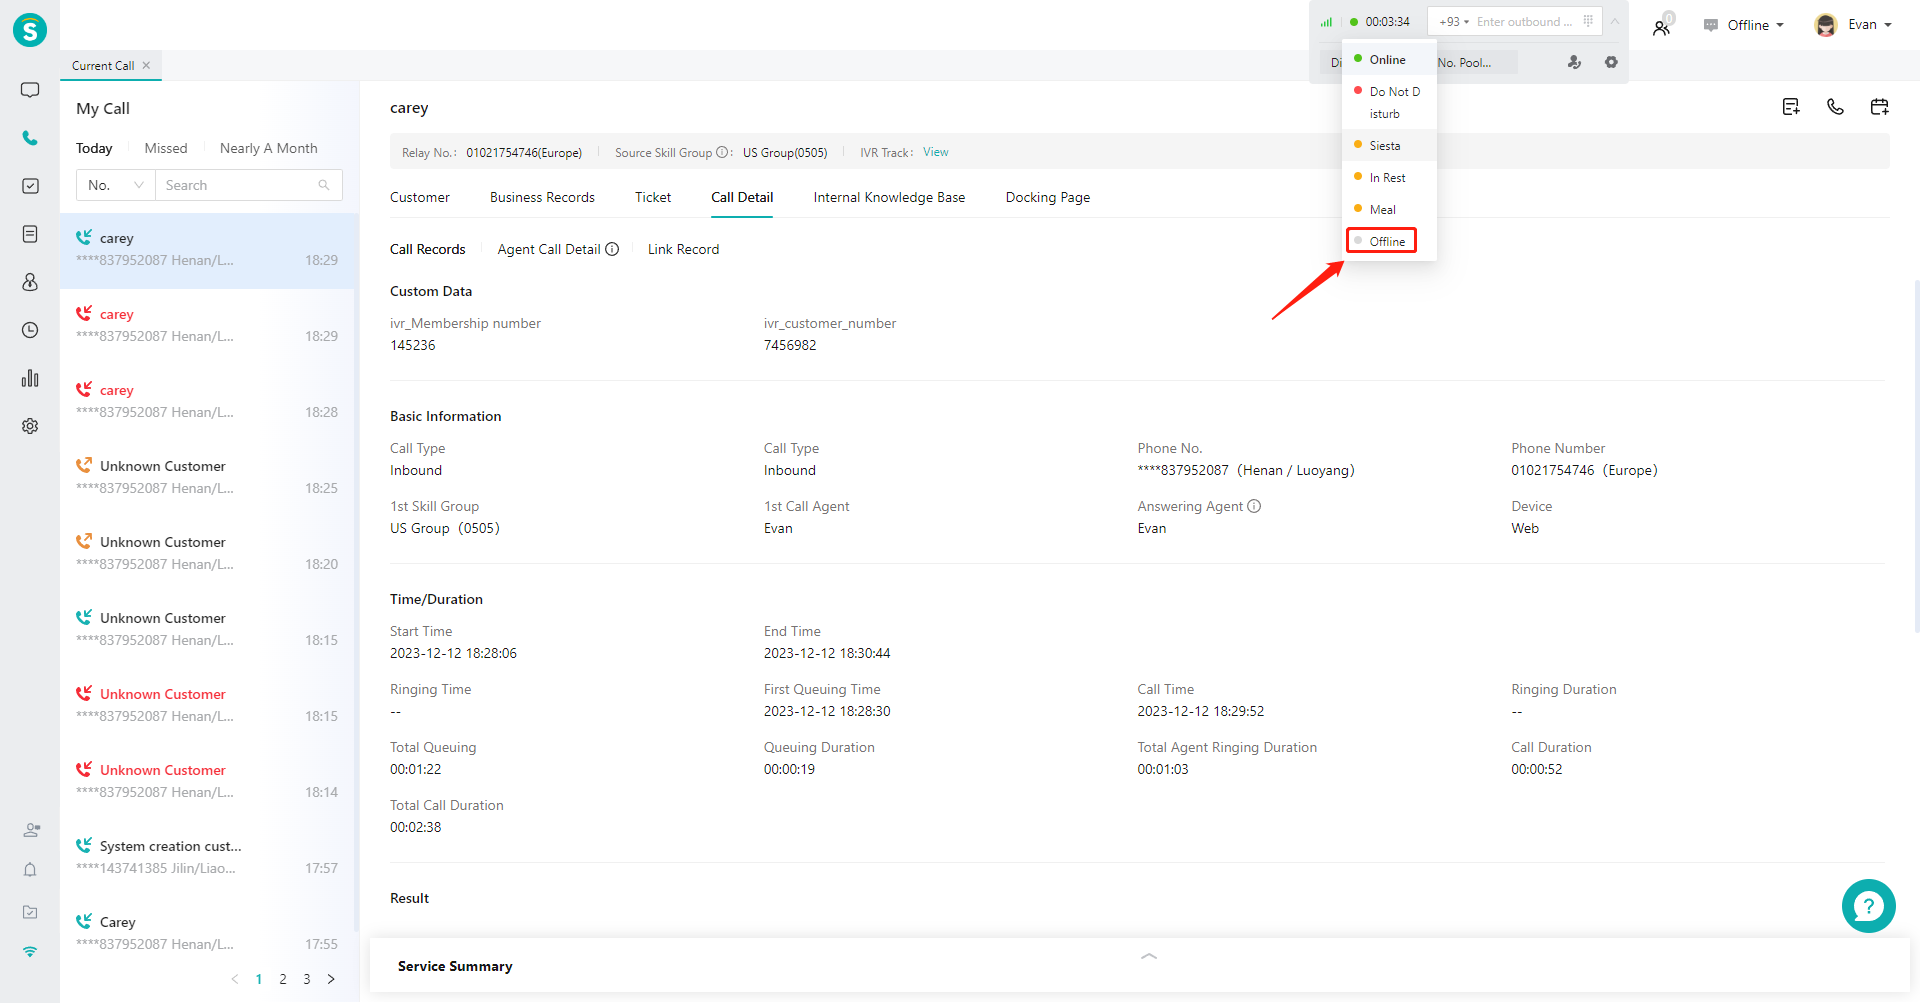
Click the status icon on the left side of the phone bar to expand the status list. When you select "Offline", the phone bar will be logged out.
# ● Answer Calls
When an inbound call is assigned to the agent, the phone bar will be switched to the active status, and the inbound call number and【Answer】button will be displayed (Figure 5). Click【Answer】to enter the talking status (Figure 6). Note: When the answering method is "cell phone", you need to answer on the corresponding phone; both 「web phone」 and 「SIP phone」 can be answered through the phone bar.

# ● Make Outbound Calls
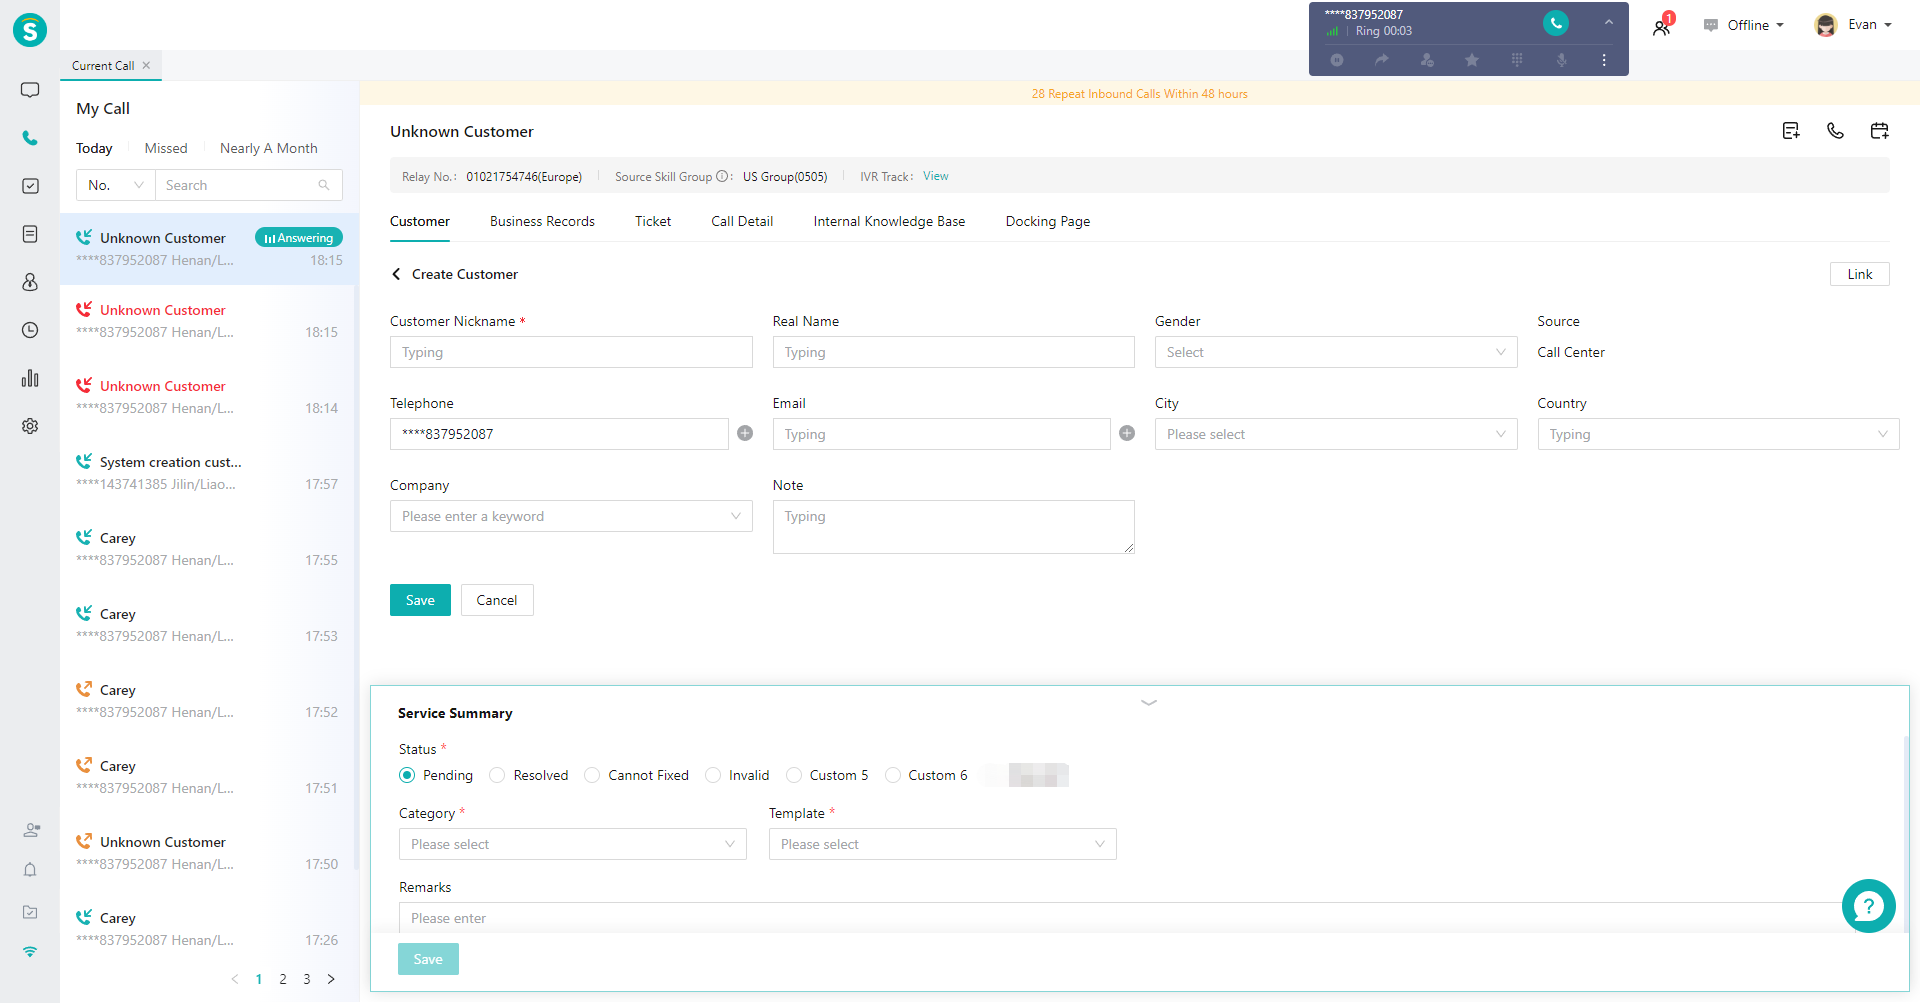
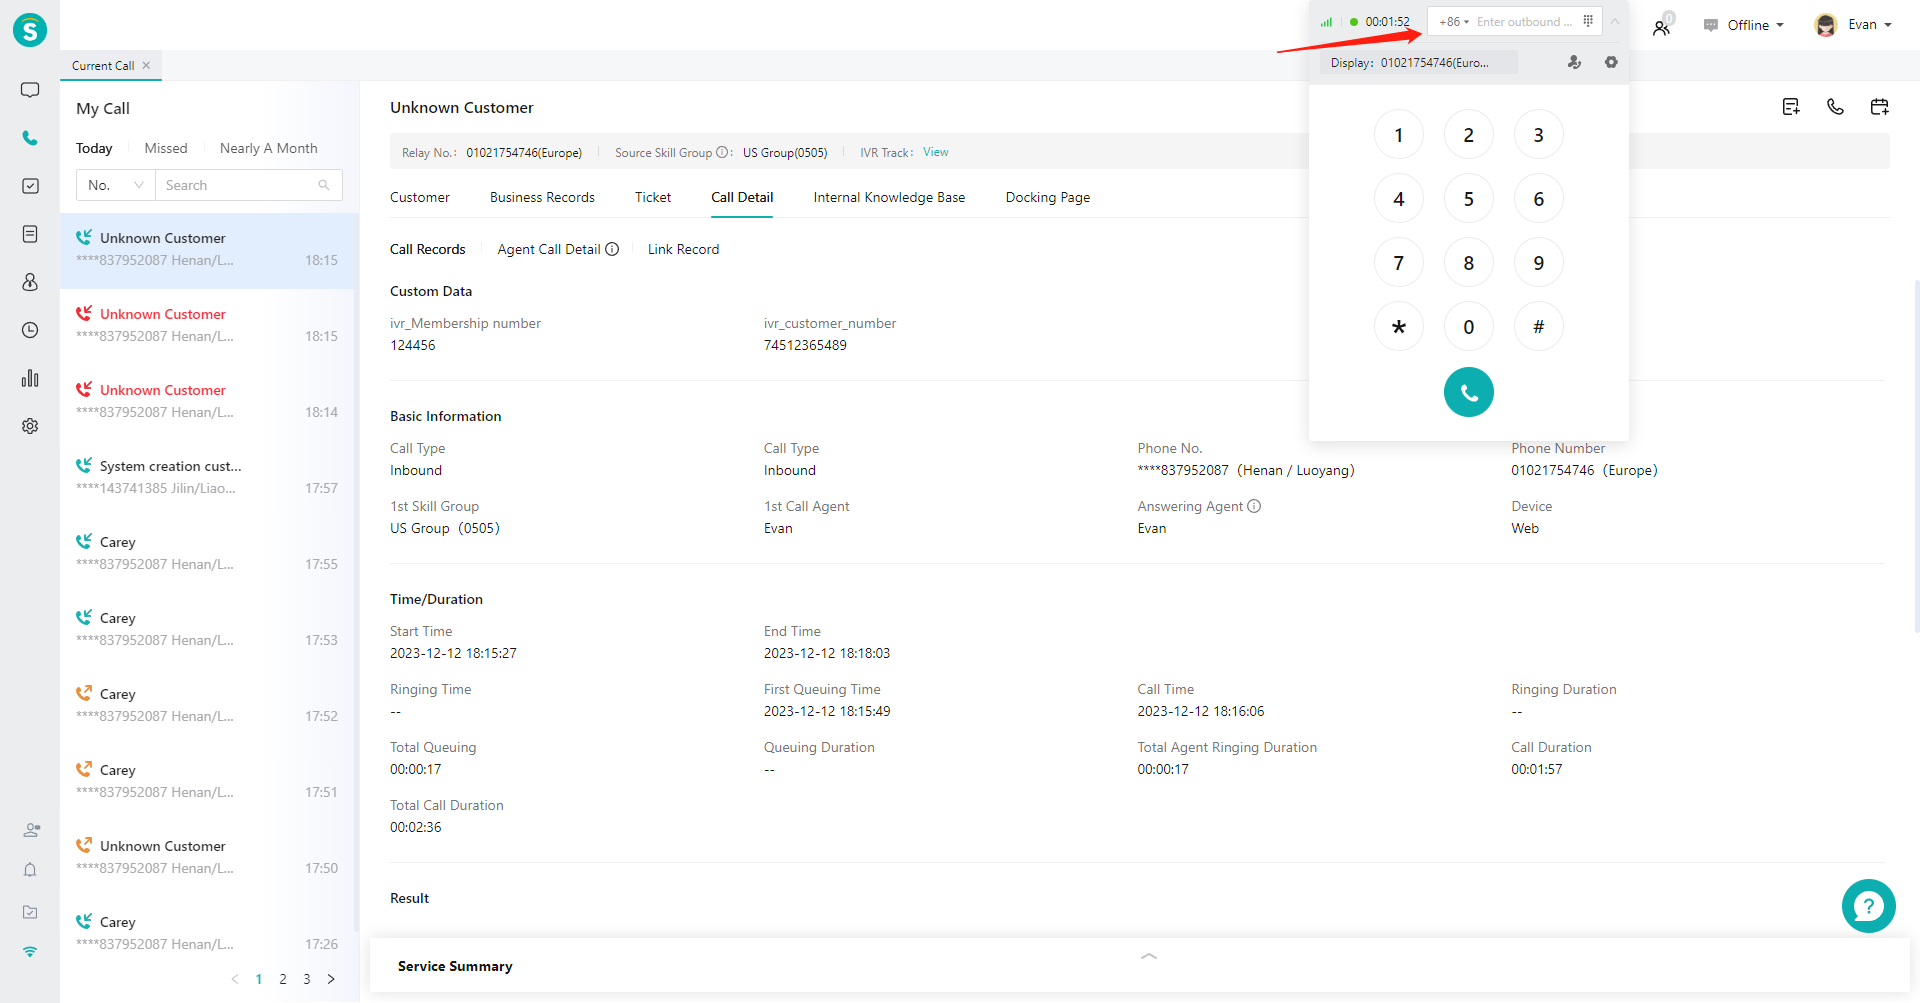
After entering number in the input box of the phone bar, press Enter to make outbound calls (Figure 7).
# ● Transfer
Click【Transfer】button on the phone bar (Figure 8). After selecting the transfer object, the call will be assigned to the selected object, and the current agent will end the talk.

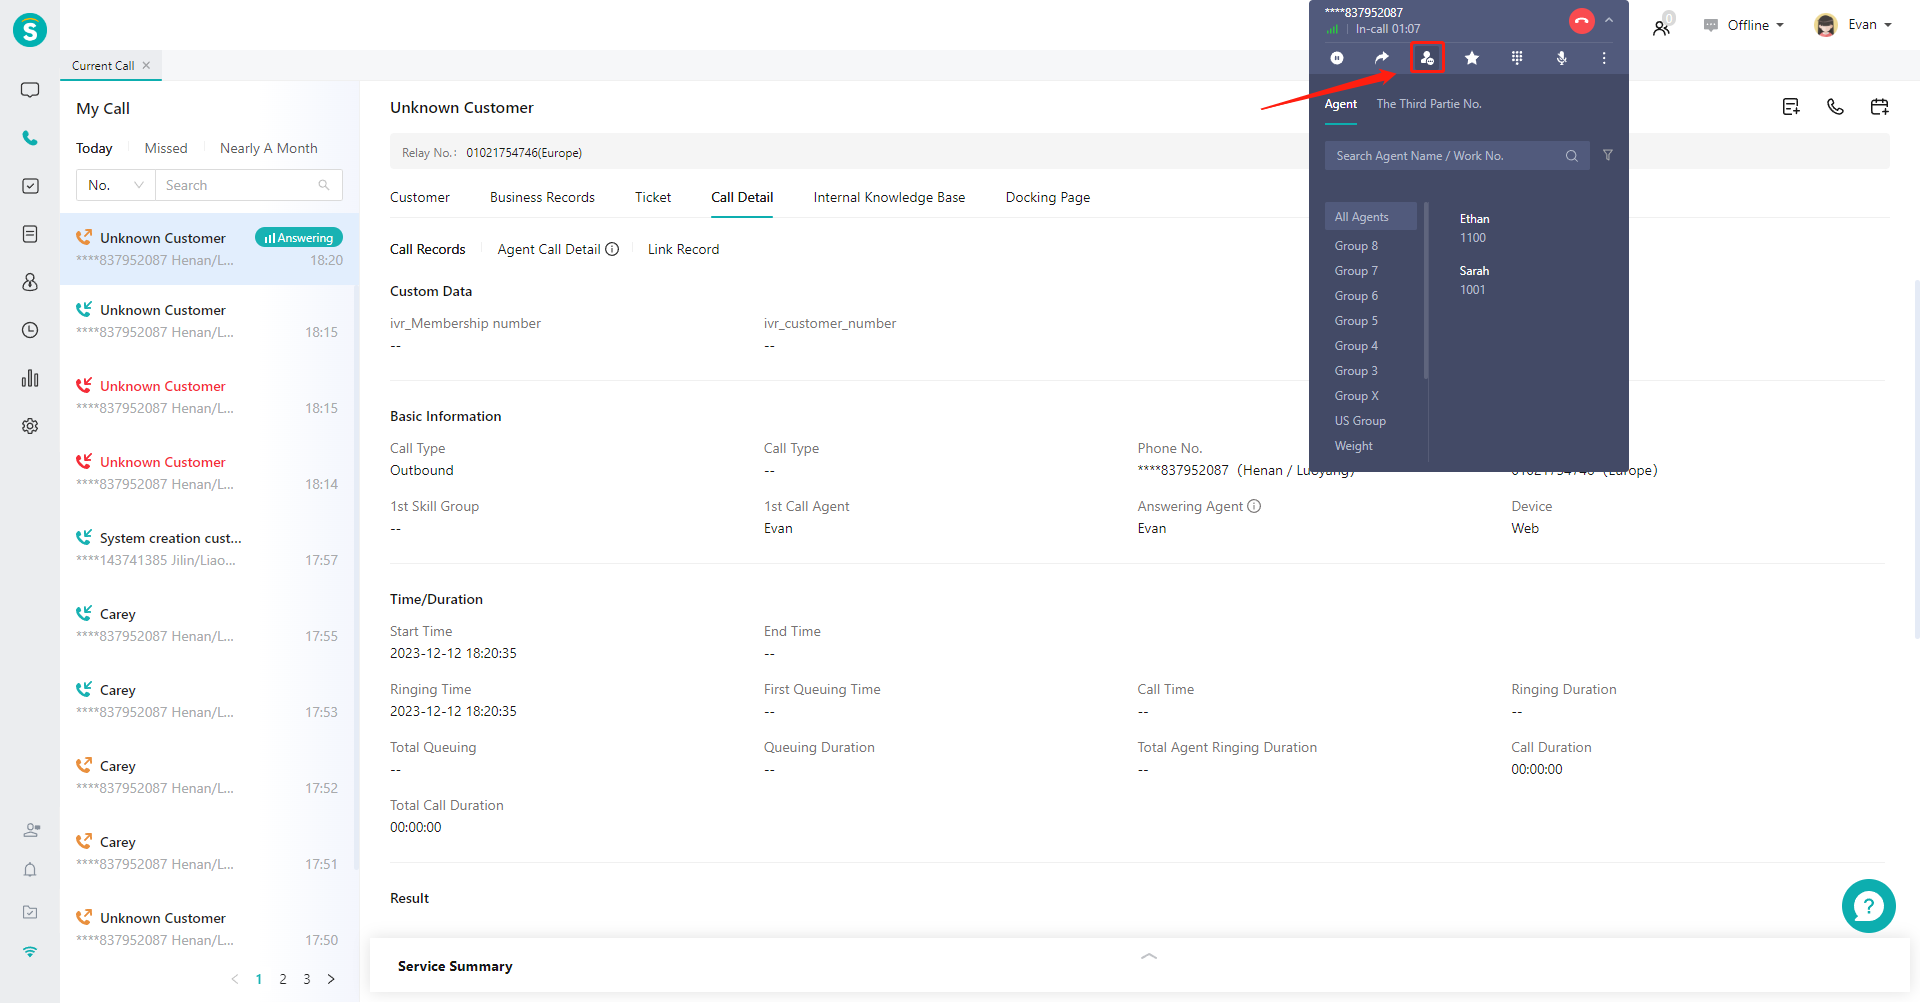
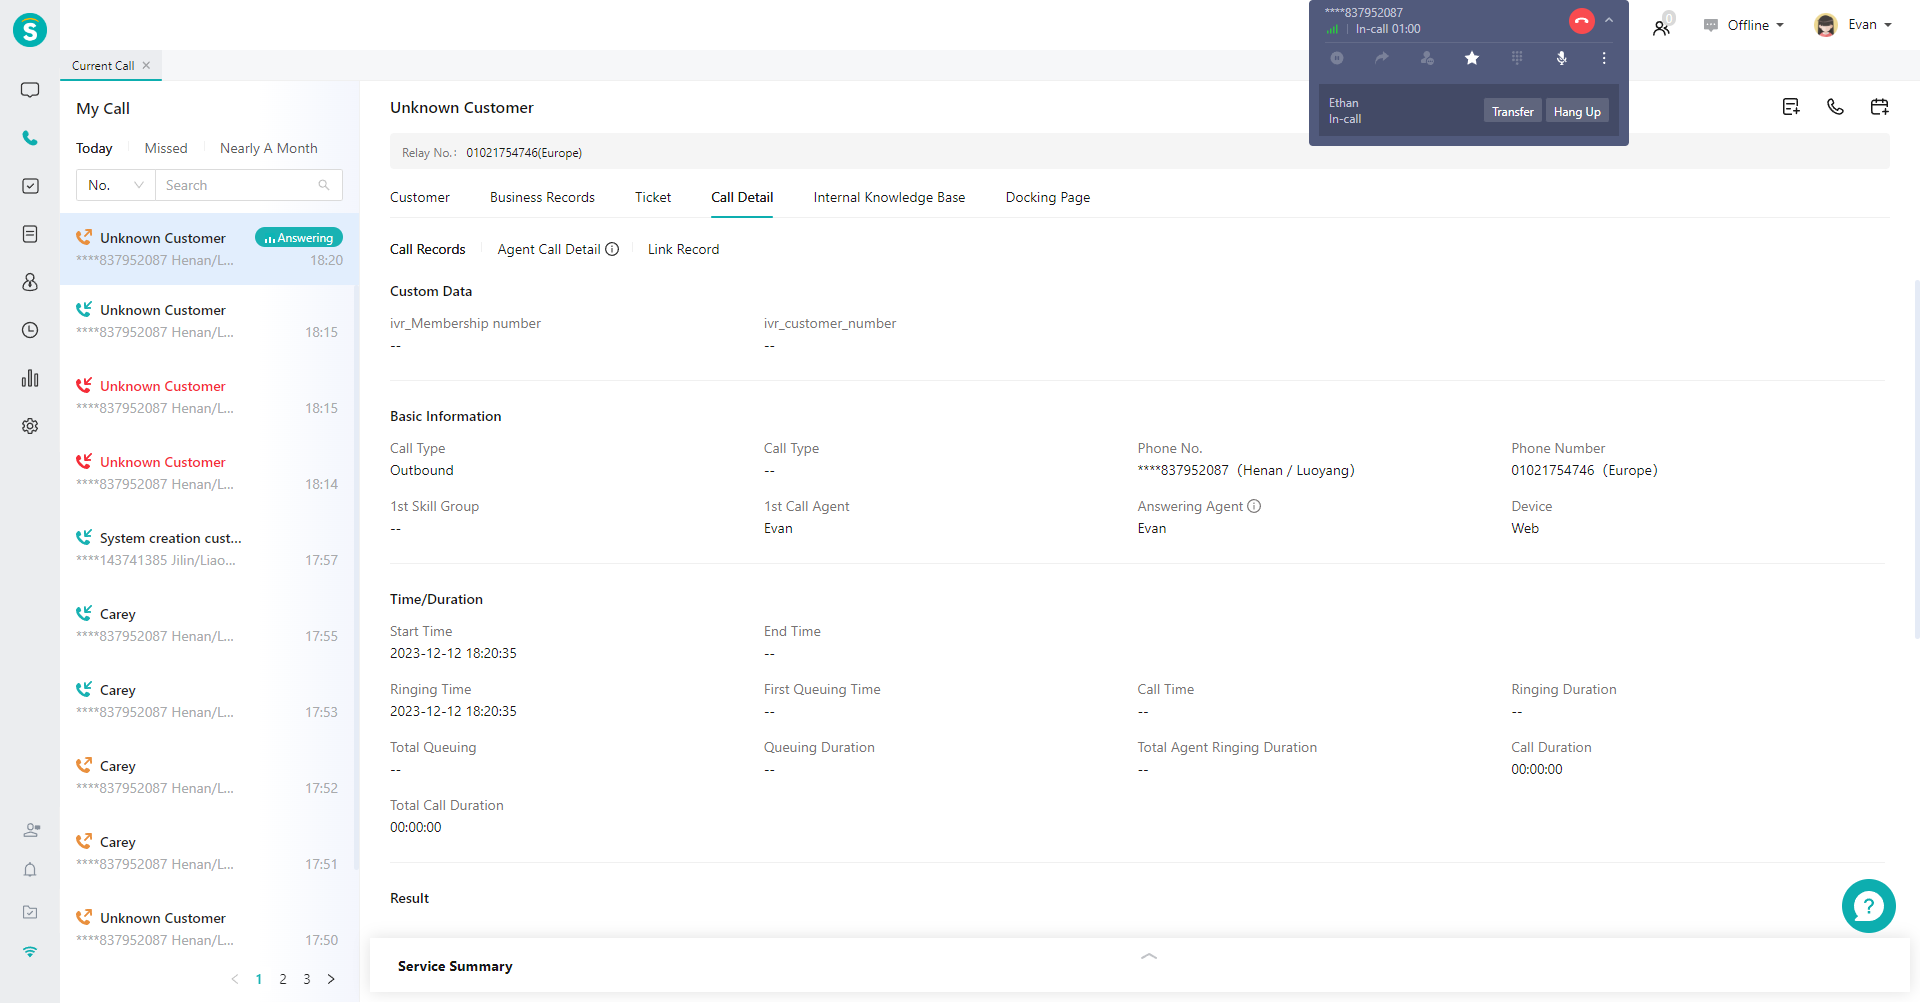
# ● Inquiry and 3rd-Party Talk
- Click【Inquiry】button on the phone bar (Figure 9). After selecting the inquiry object, the current agent will establish a talk with the inquired agent, and the customer is placed on hold temporarily (Figure 10);
- During the inquiry, you can click【Transfer】to transfer the call to the inquired party, click【3rd-Party】to add the inquired party to 3rd-party talk (Figure 11), or click【Cancel】to return to one-to-one talk with the customer.

# ● Hold or Mute
Hold on: After clicking, the customer side will enter the holding status, and the customer will hear the continuous holding background music (the background music can be customized in「Admin Console > Call Center > Settings > Basic Settings > Workbench Settings > Talk Function」). Mute: After clicking, the agent side will be muted, and agent will be not heard by the customer but can hear the customer.
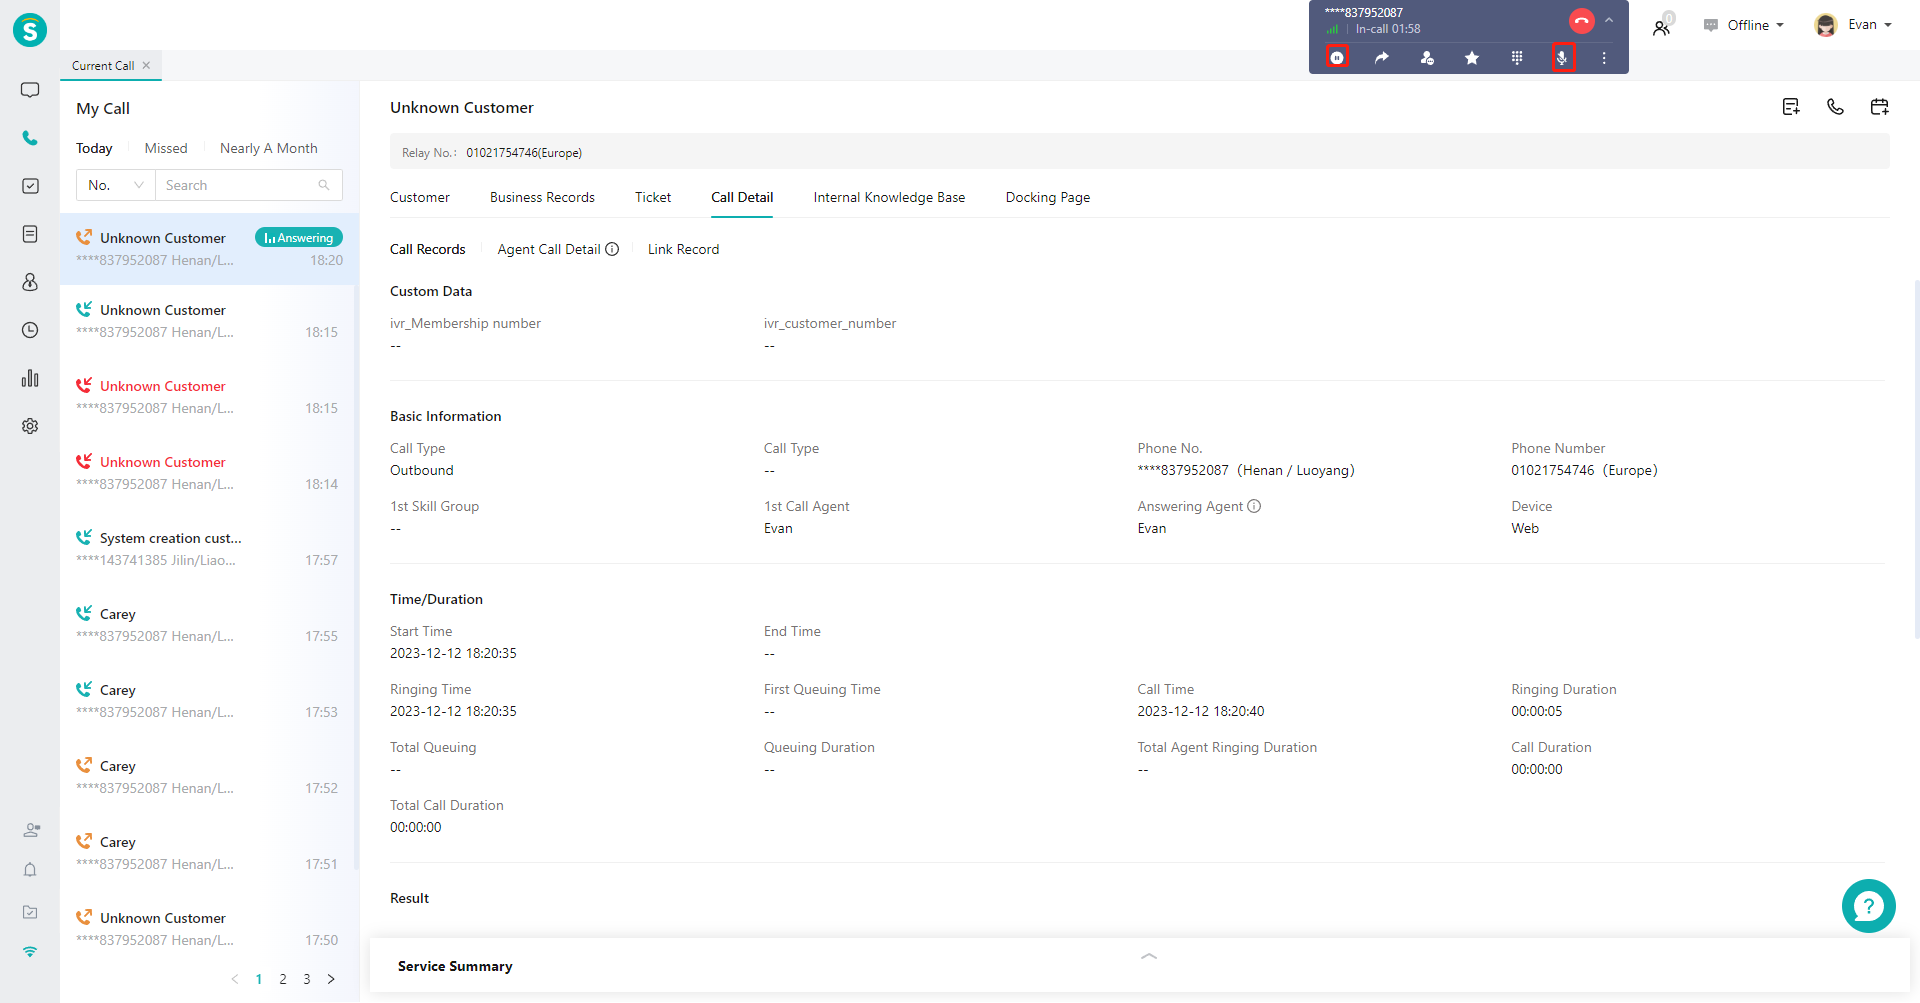
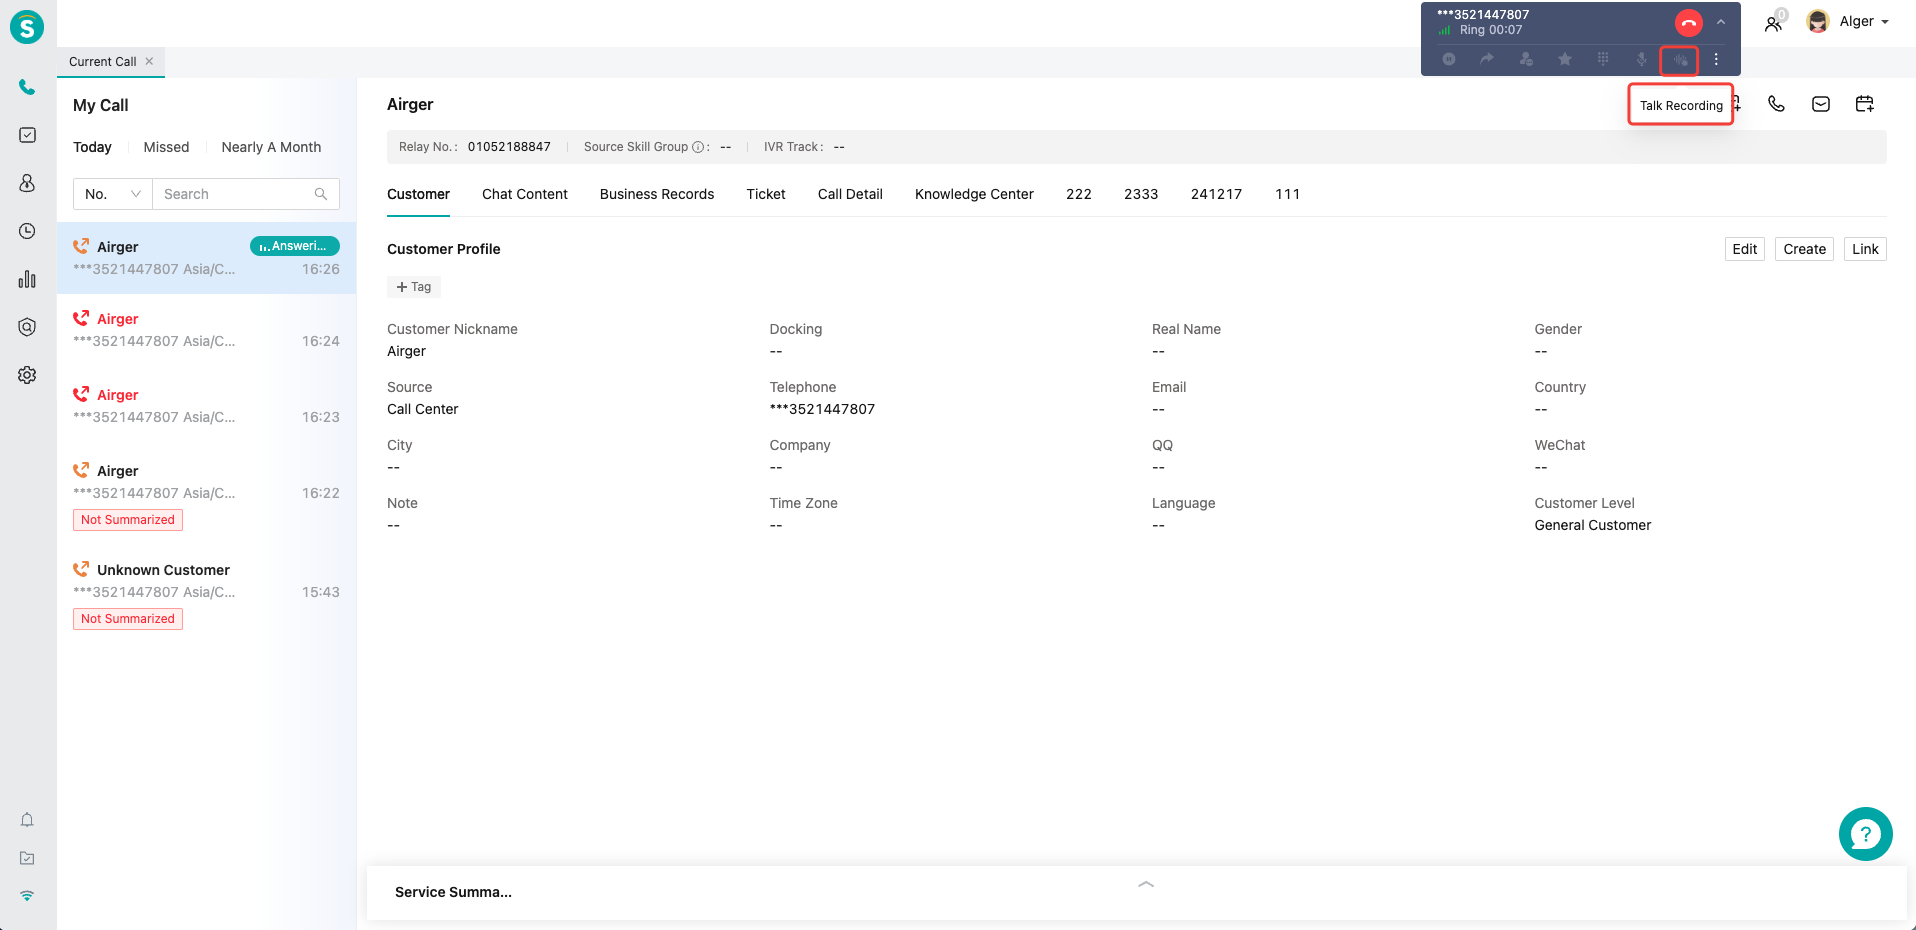
# ● Talk Recording
The agent can control the recording of the call audio by clicking this button.(Figure 13).
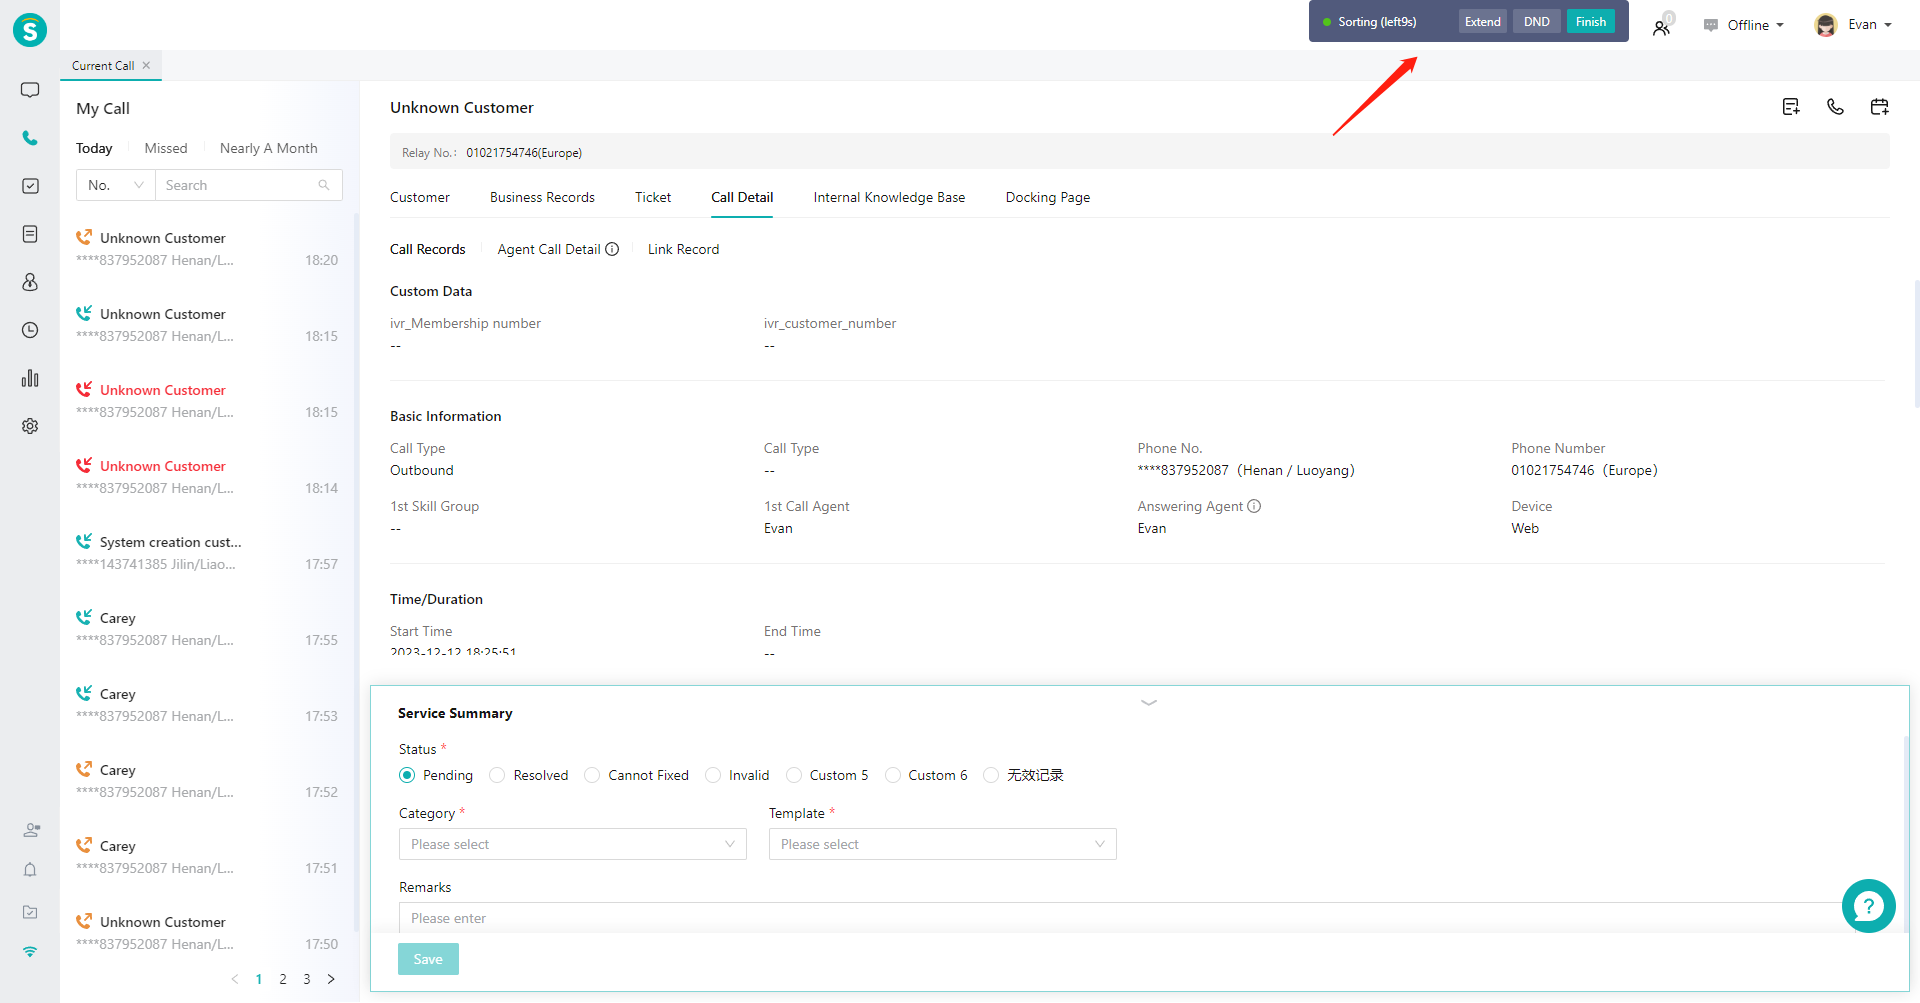
# ● Extend Sorting Time and End
Sorting When the agent's login status is「Online」, the system will enter the post-call sorting status after the call is ended. At this time, the system will not assign calls to the agent. Agent can click【Extend 60s】button on the phone bar to manually extend the sorting time, or click【Finish】to finish sorting ahead of time (Figure 14).
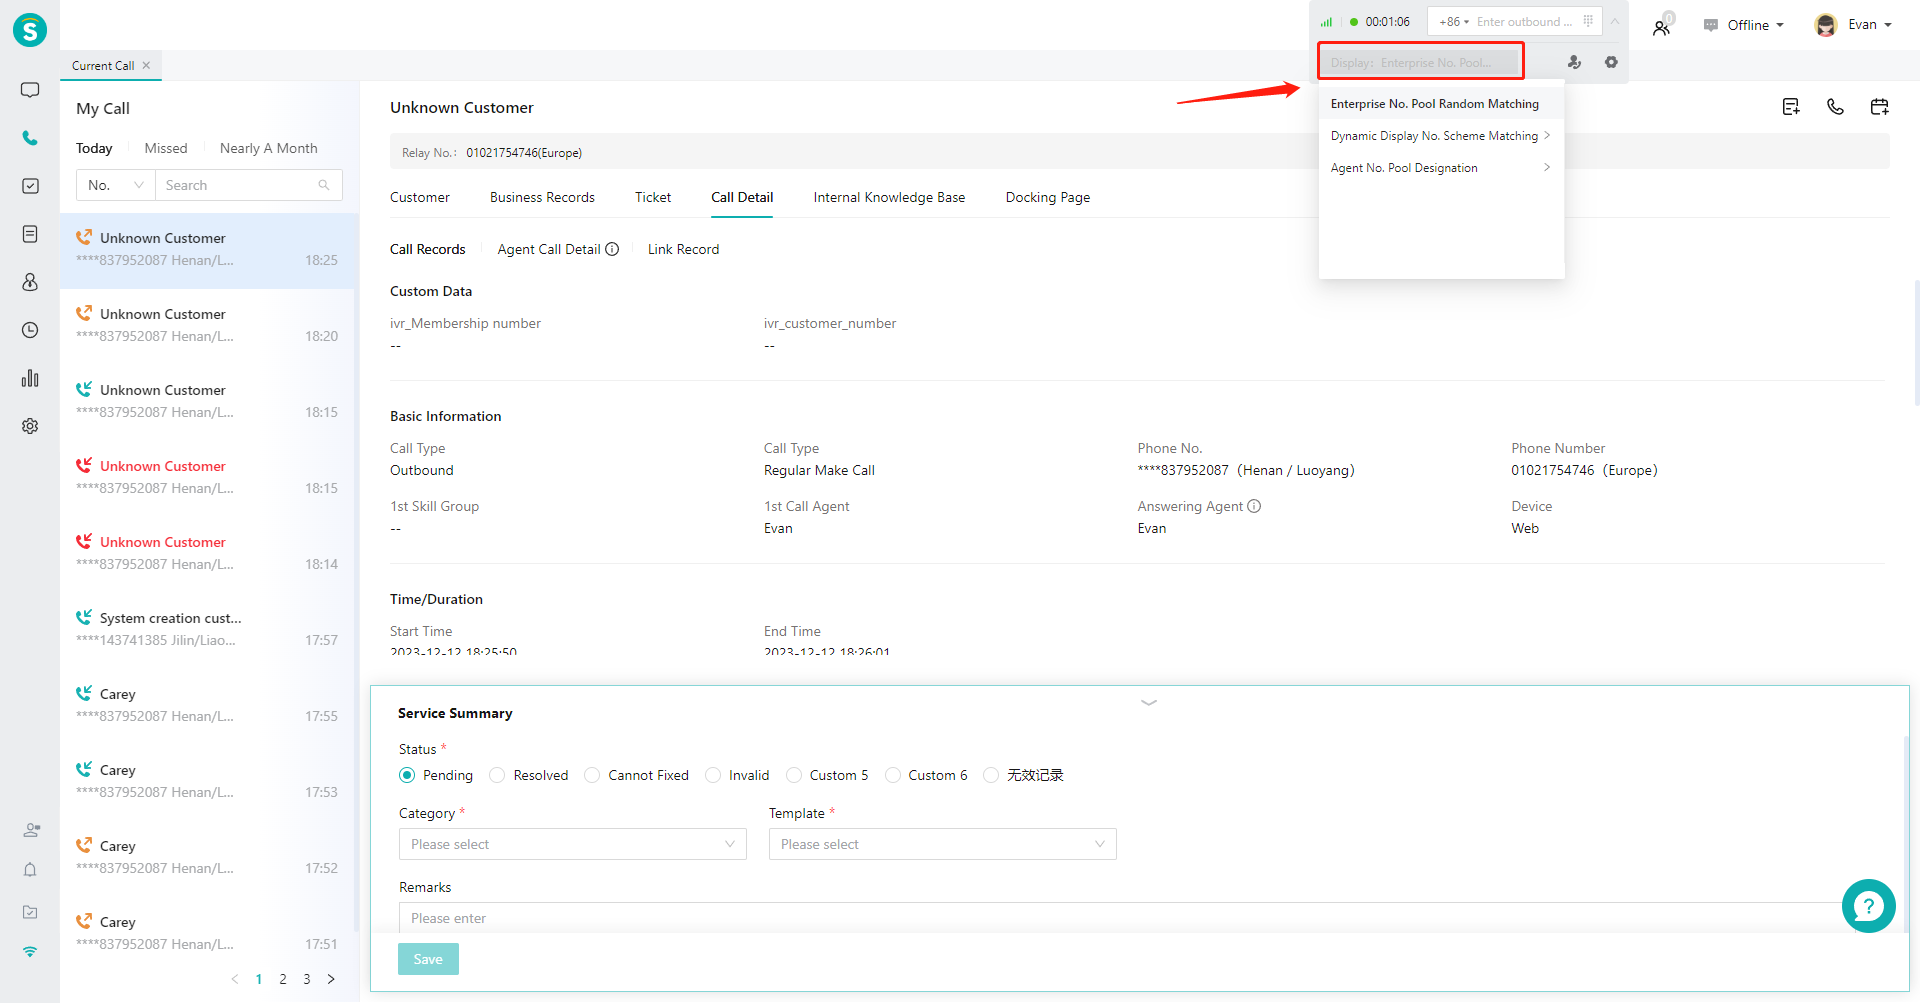
# ● Switch Display Rules
After the admin configures multiple sets of display rules for the agent in「Admin Console > Call Center > Settings > Basic Settings > Outbound Routing」, the agent can switch the display rules at any time in the phone bar. Click【More Settings】on the right side of the phone bar to switch display rules in the expanded menu (Figure 14).
# ● View the Queuing No.
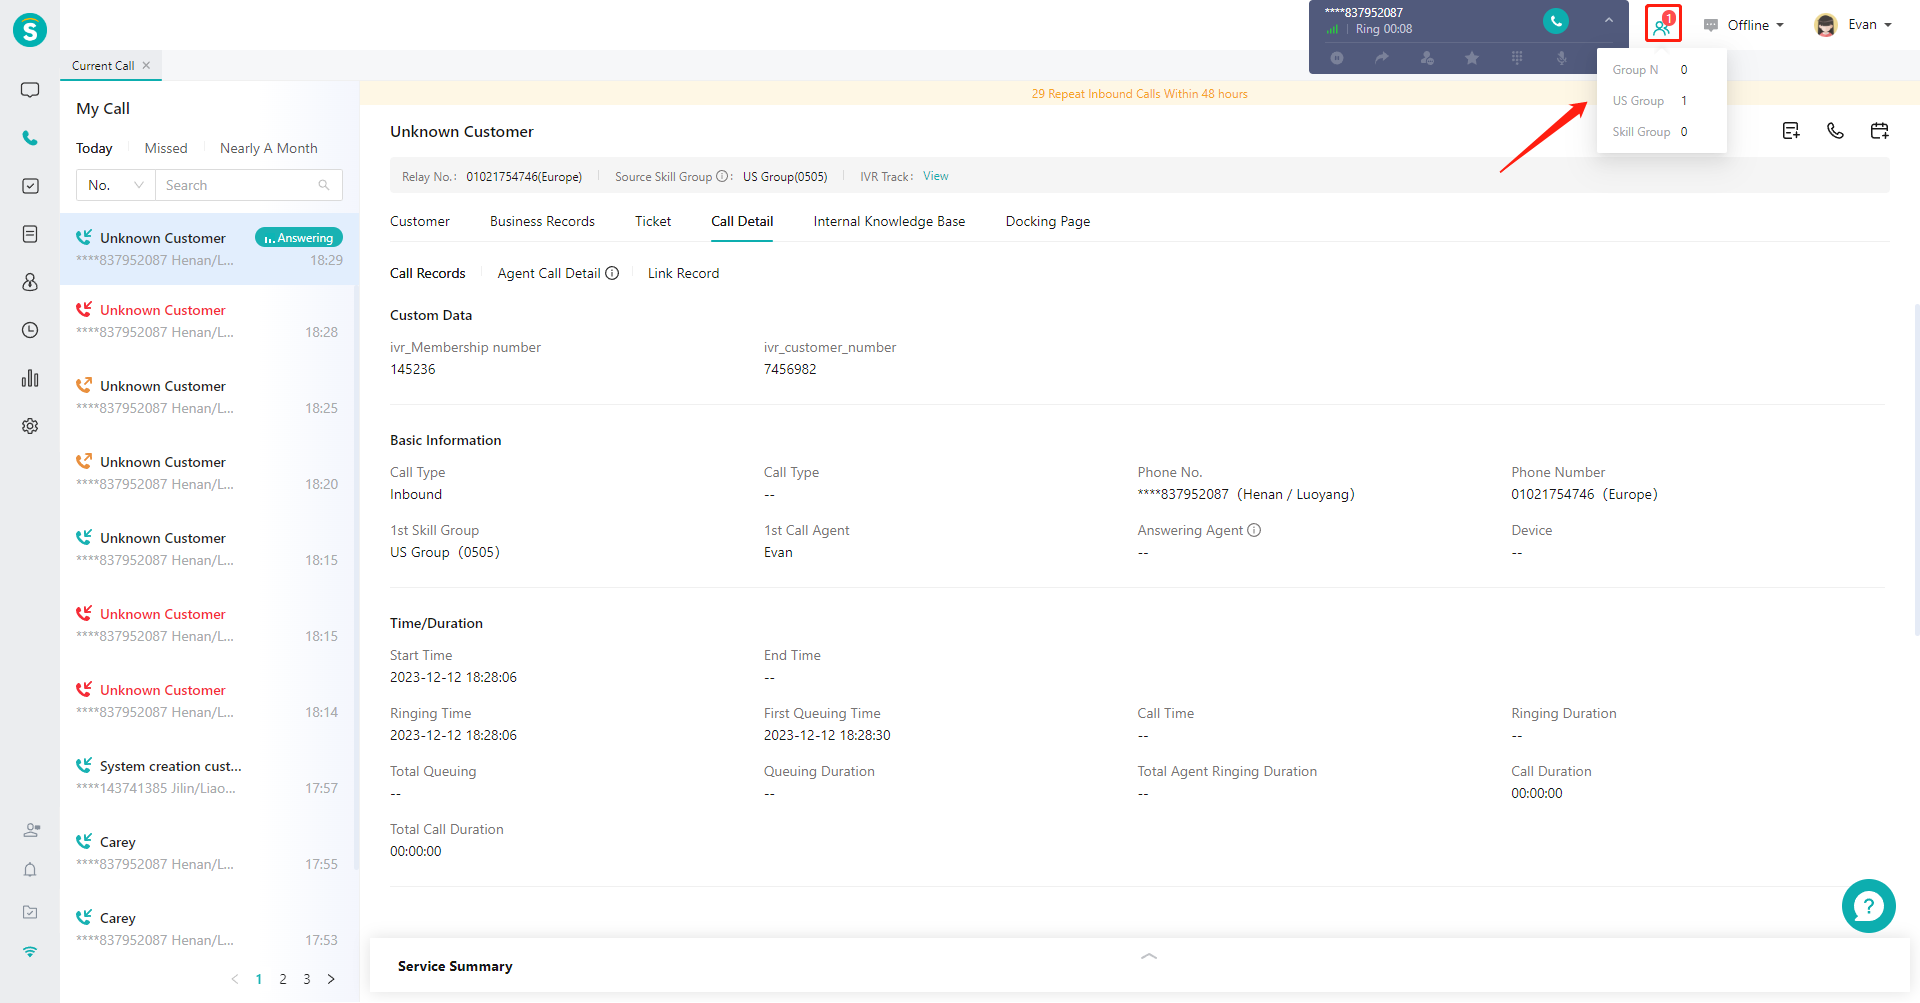
Move the mouse to the【Queuing】text button on the right side of the phone bar to display the queuing number in the skill group joined by the current agent (Figure 15). Note: This function can be displayed only after being enabled by the admin in「Admin Console > Call Center > Settings > Basic Settings > Workbench Settings > Talk Function」.
# ● View Connection of Web Phone
After the agent logs in to the phone bar in the answering way of "web phone", the connection between the web phone and the server can be viewed on the right side of the phone bar (Figure 17).

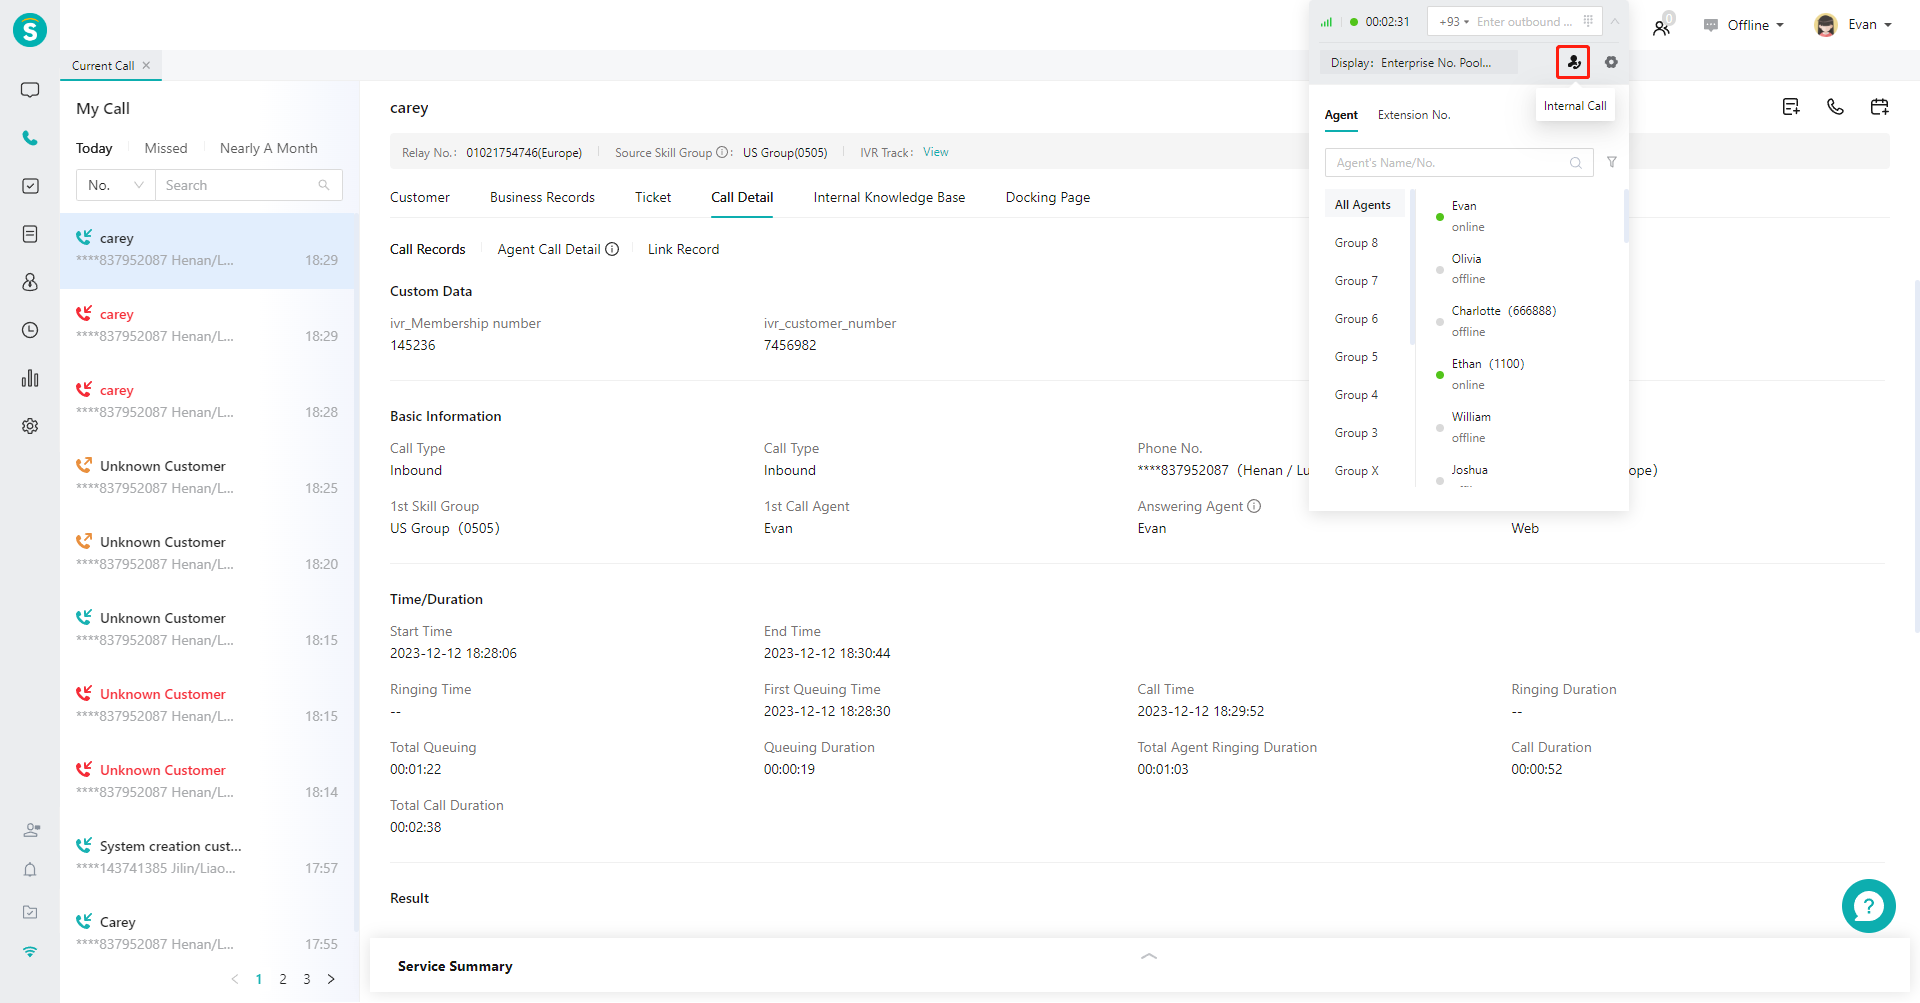
# ● Internal Talk
Click the【More】button on the right side of the phone bar, and click the "internal talk" button in the expanded menu to expand the list of agents and extension numbers in the enterprise. You can directly dial by searching the agent name/work number and extension number. (Figure 18)
# ● Logout
Switch the login status to offline to log out the phone bar (Figure 19).
# ● Reset Offline
- When encountering abnormal conditions on the phone bar, you can exit the phone bar through the「Reset Offline」function.
- Click the【More】button on the right side of the phone bar, click the【Settings】button in the expanded operations, and then click the【Reset Offline】button in the lower right corner of the expanded setting menu. (Figure 19).