IVR Flow Guide
# IVR Flow Guide
——Learn how to use and build the IVR flow through this article.
# Role of IVR Flow
「IVR Flow」is used to flow calls to different skill groups for reception according to different rules, which can realize customer diversion and improve enterprise service efficiency. This module is mainly used for the creation and management of IVR flow.
# Preparation
You need to prepare the following work before using IVR flow:
- Available relay numbers
- There are available agents who have been bound to extension accounts
- Available skill groups
# Main Functions of IVR Flow
- The graphical configuration interface is convenient and intuitive, with unlimited levels. It can flexibly support the data docking with the enterprise's own system and meet the customization requirements of various complex workflows.
- Key node supports dividing customers to different skill groups for reception according to the keys entered by customers.
- Trans-to-Skill Group node supports setting reception skill group
- Trans-to-Agent node supports direct calls to agent (e.g.: assign to a special agent for reception for queuing timeout of skill group)
- Trans-to-Submission node supports customer submission and generation of tickets
- Time Judgement node supports dividing customers to different IVR nodes according to time. For example, transfer to business group in work time, and transfer to on-duty group in off-duty time.
- It supports copying IVR flow
- It supports saving as draft (editing IVR does not impact IVR in use)
- Supports setting the audio broadcast mode within the IVR node to text-to-speech voice style settings.
# How to Use IVR Flow
IVR configuration workflow: Create → Edit flow and node → Post → Set complete routing rules for assigning customers to IVR in inbound calls in「Admin Console > Call Center > Settings > Basic Settings > Inbound Routing」.
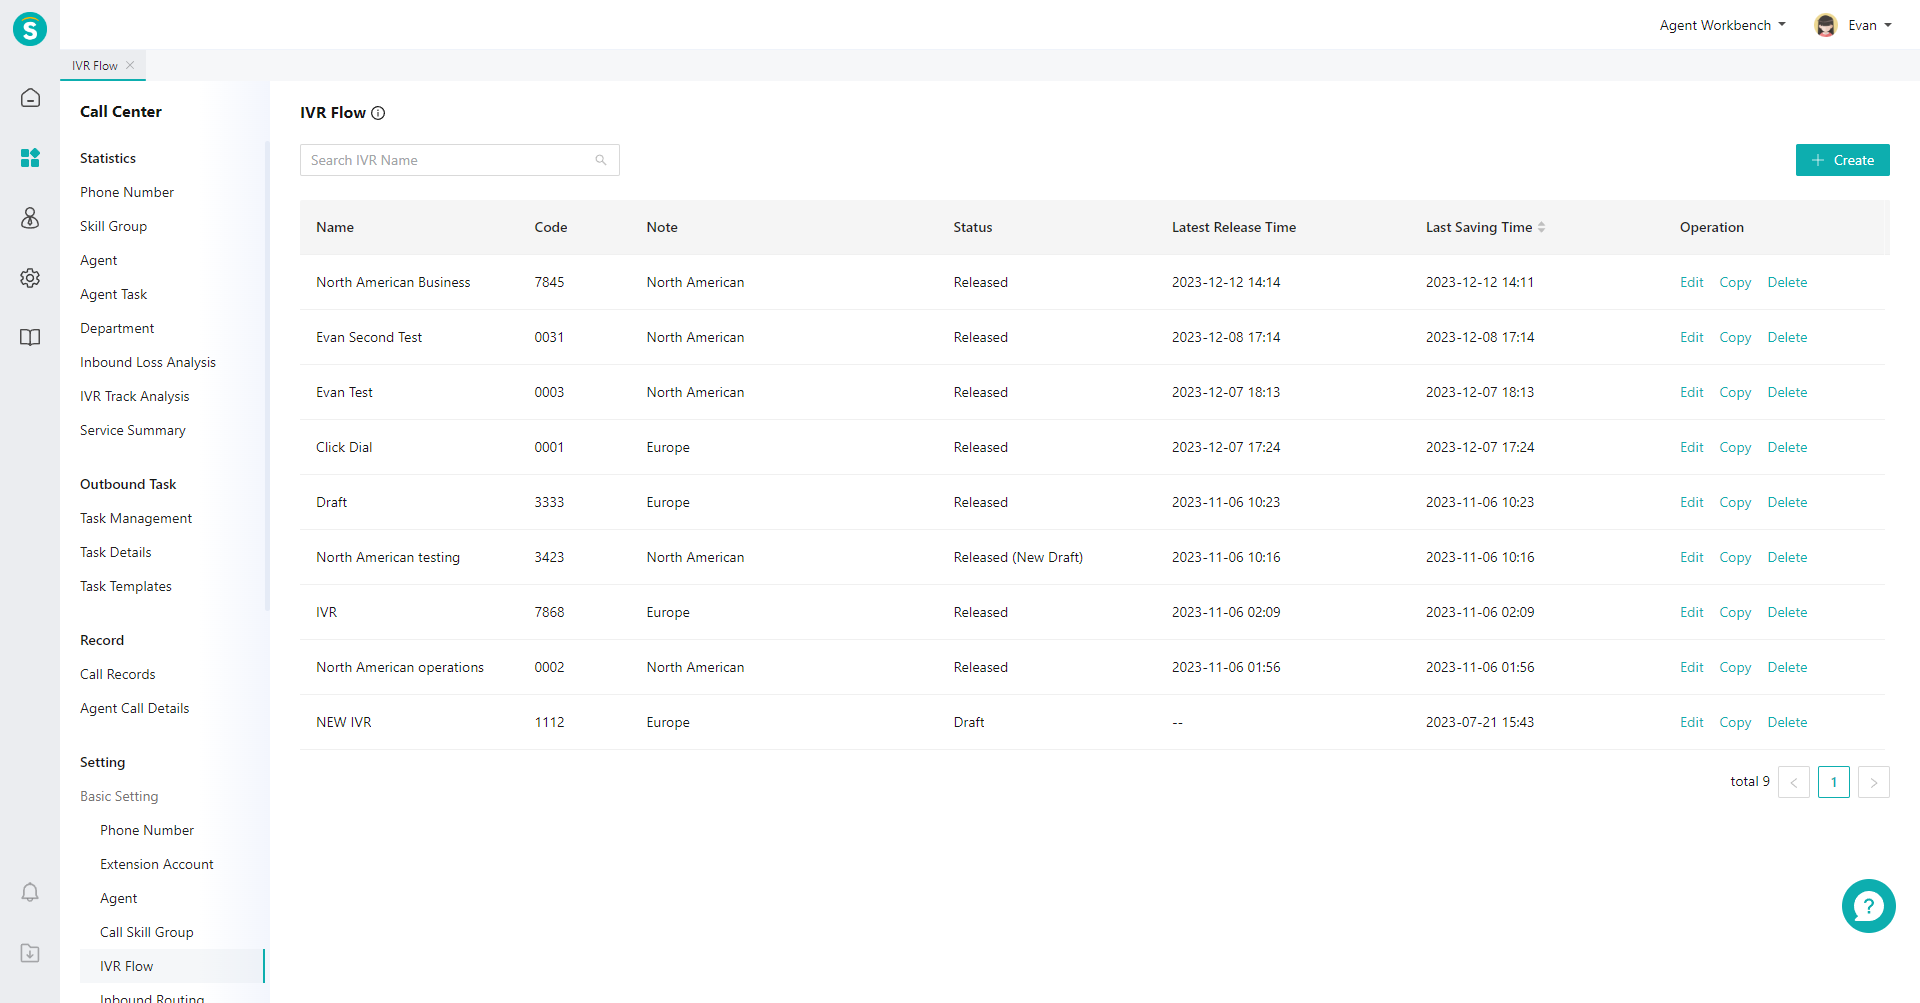
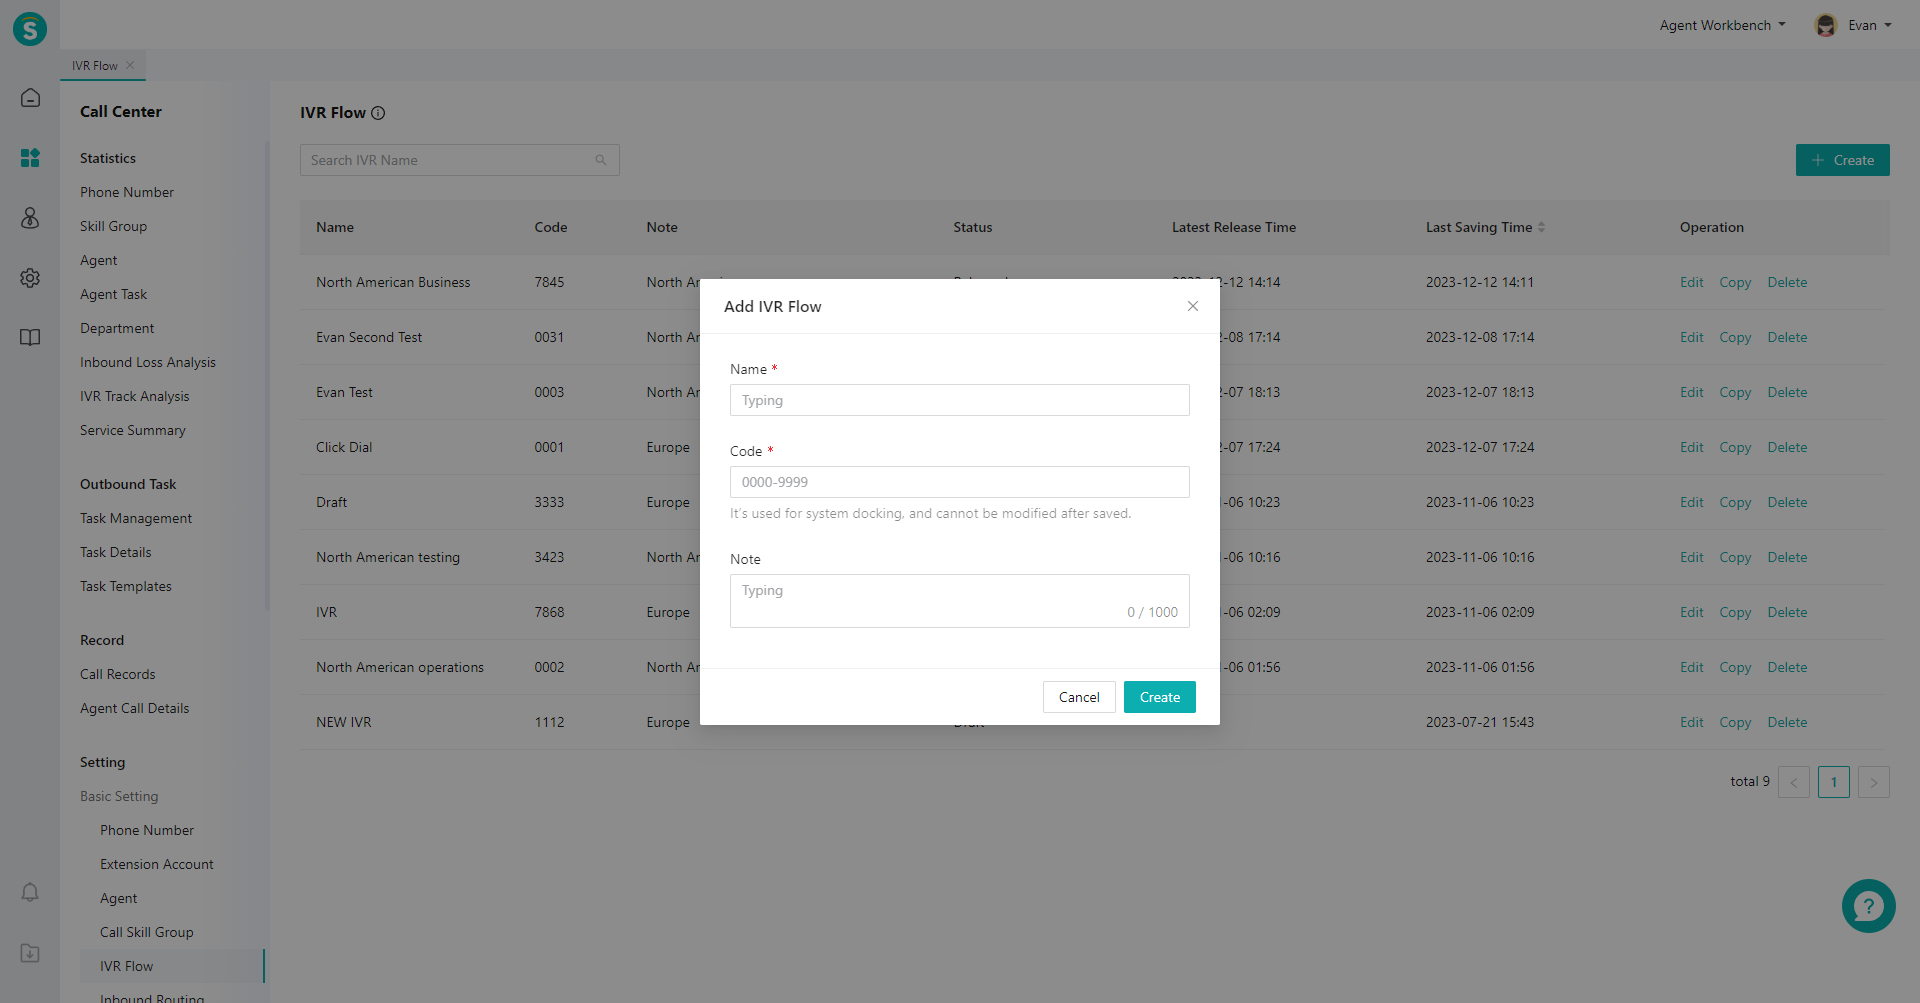
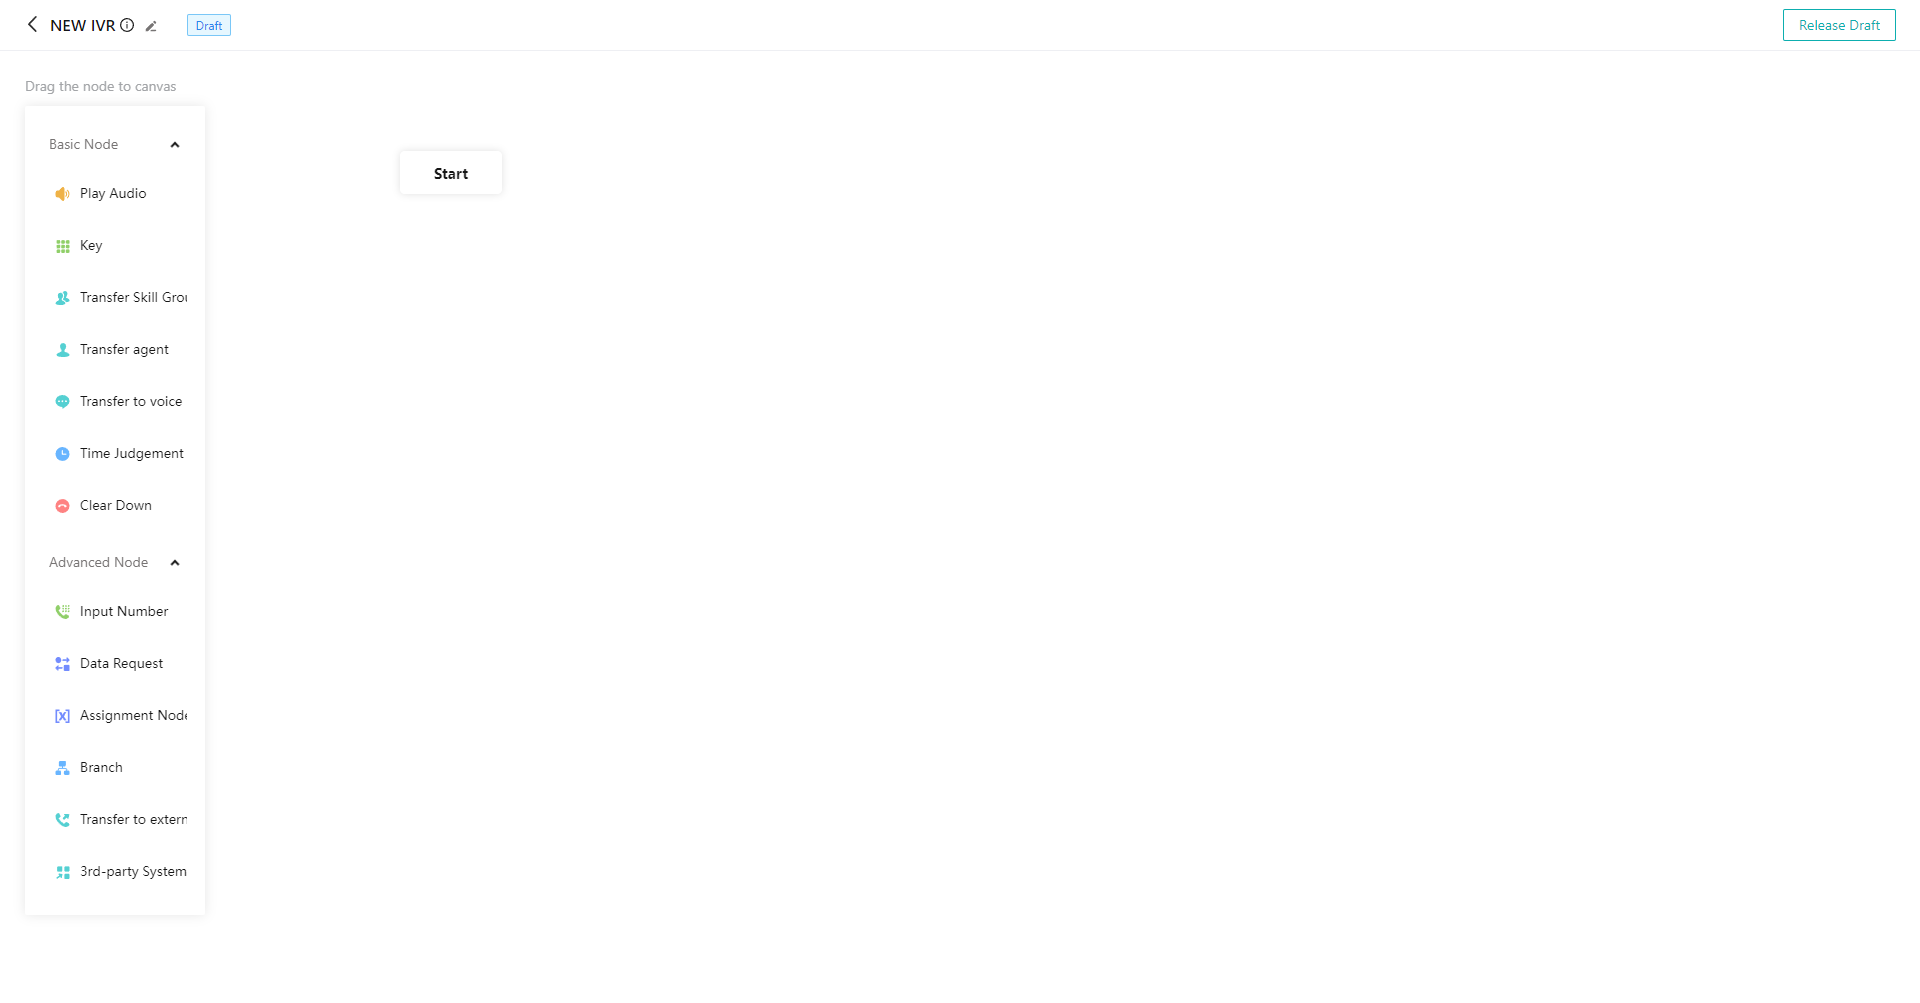
# ● Create IVR
Click【Create】 on the right side of the list (Figure 1), fill in the IVR name and notes (Figure 2) in the pop-up window, and enter the IVR flow edit page (Figure 3) after it is created.
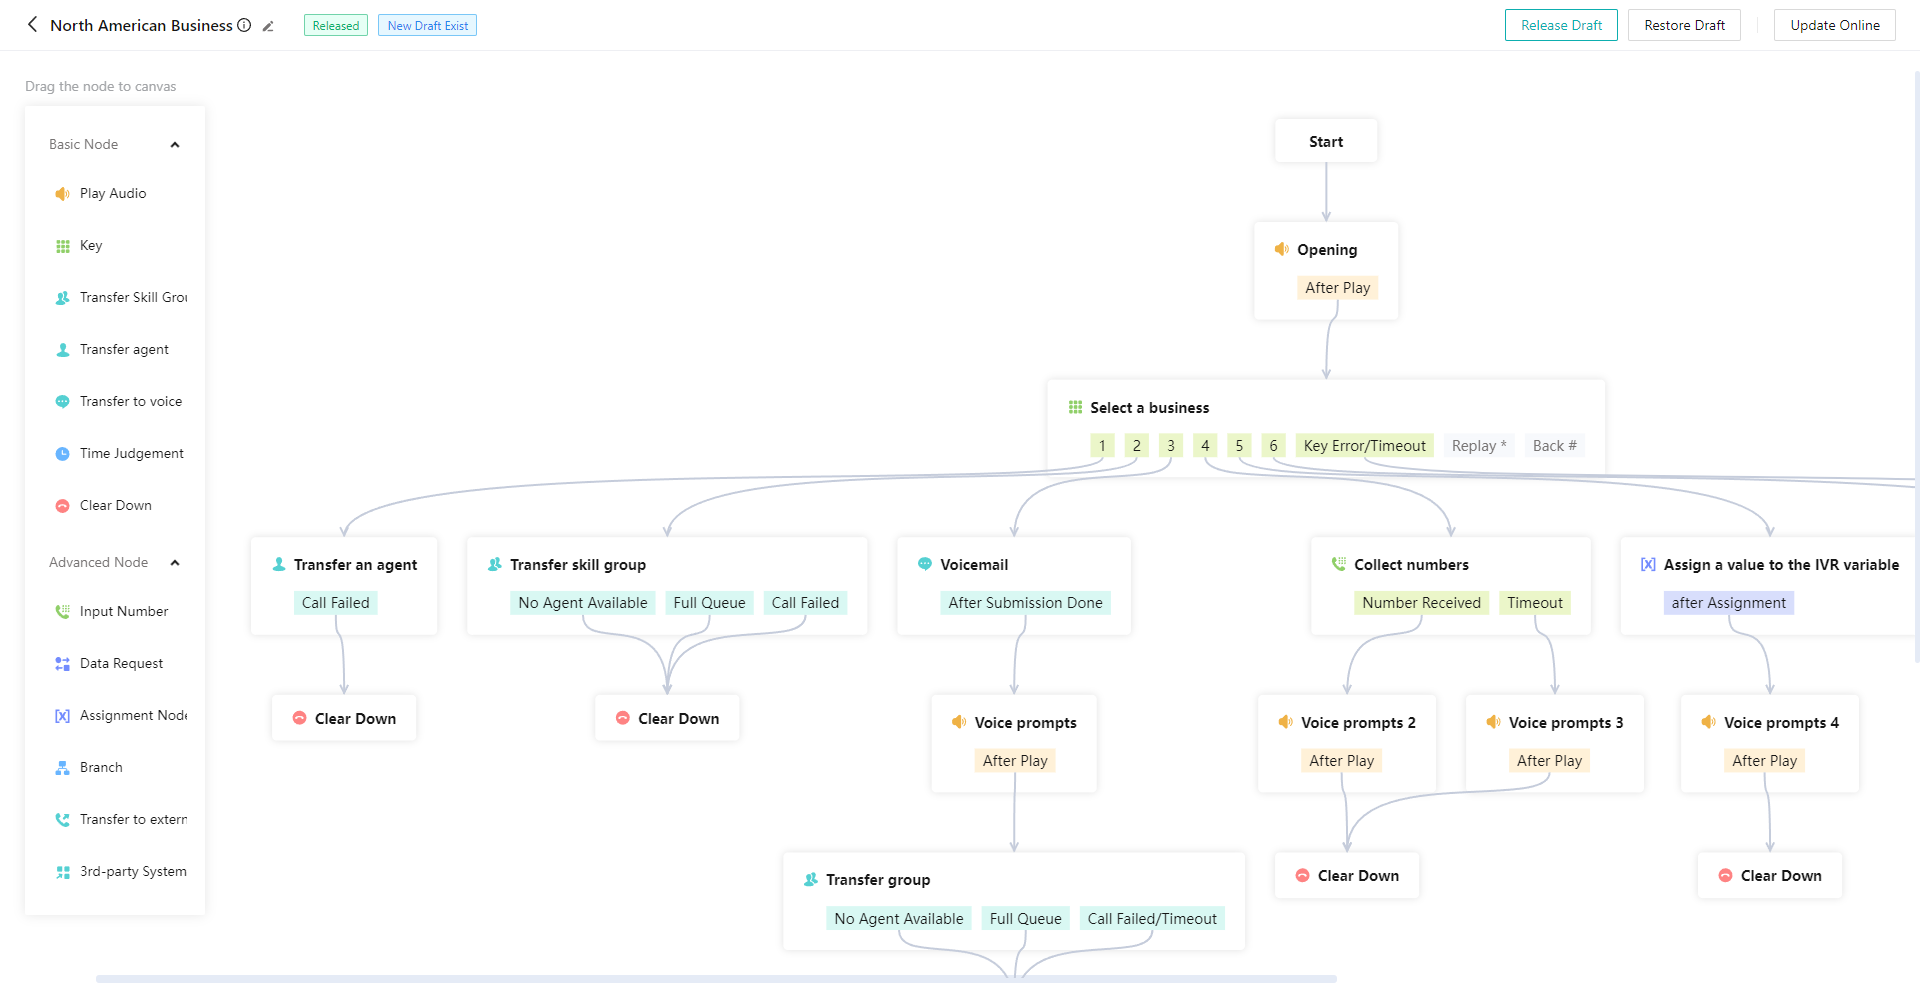
# ● Flow Example
Inbound calls → Play greetings → Press key → Transfer to skill group for reception
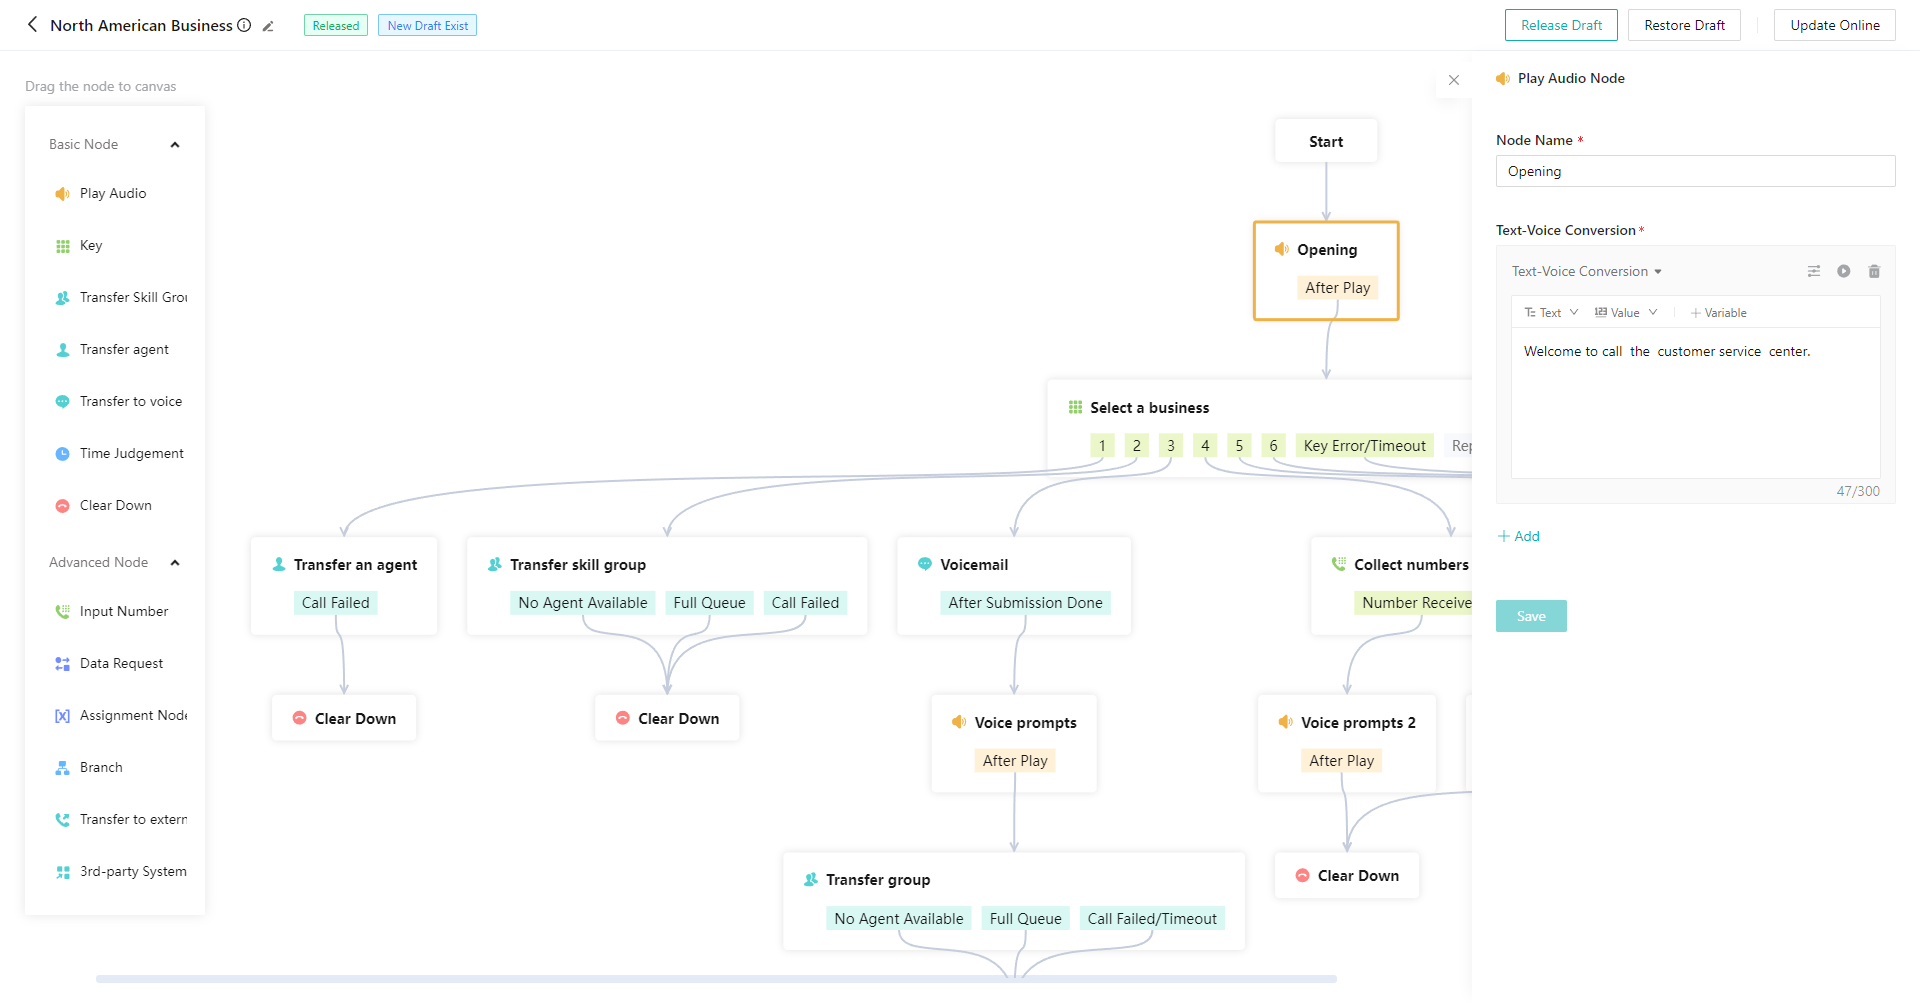
# ● Play Audio Node
- Drag the「Play Audio」node from the list on the left side
- Select the node, edit the play content in the pop-up window on the right side, and click【Save】after editing (Figure 5).
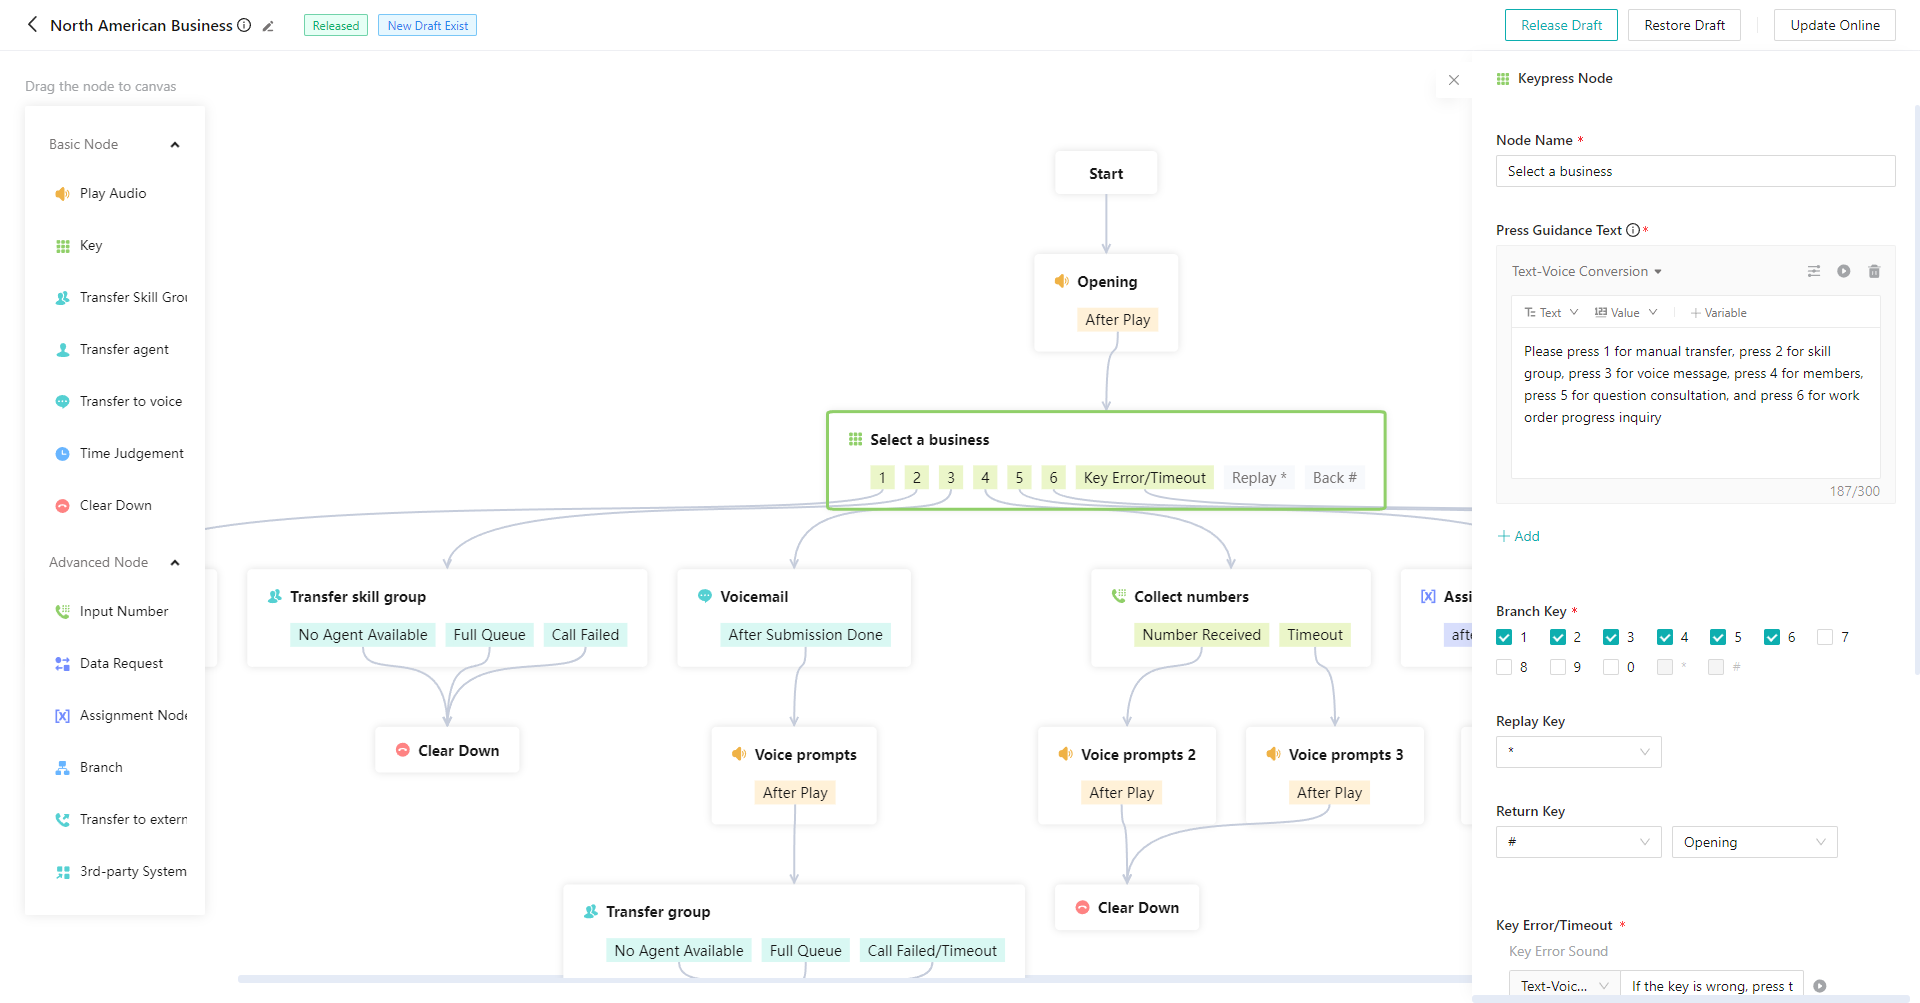
# ● Key Node
- Drag the「Key」node from the list on the left side
- Select the node, edit the content of the node in the pop-up window on the right side, and click【Save】after editing (Figure 6) (see the table below Figure 6 for details of each function).
| Function | Description |
|---|---|
| Press Guidance Text | Voice guiding customer to press key, e.g. "Press 1 for pre-sales service, 2 for after-sales service, hashtag for replay and asterisk for returning to the previous". |
| Branch Key | Select which branch keys to use |
| Replay Key | Replay the「Press Guidance Text」after pressing the key |
| Return Key | Return to the previous connected node after pressing the key |
| Key Error/Timeout | Set key error prompt tone and time and prompt tone of timeout; in the event of customer key error/timeout, the system will play key error/timeout prompt tone first, and then re-play「Node Guidance Text」; after 3 consecutive times, the system immediately enters「Key Error/Timeout」branch connected node after playing key error/timeout prompt tone. |
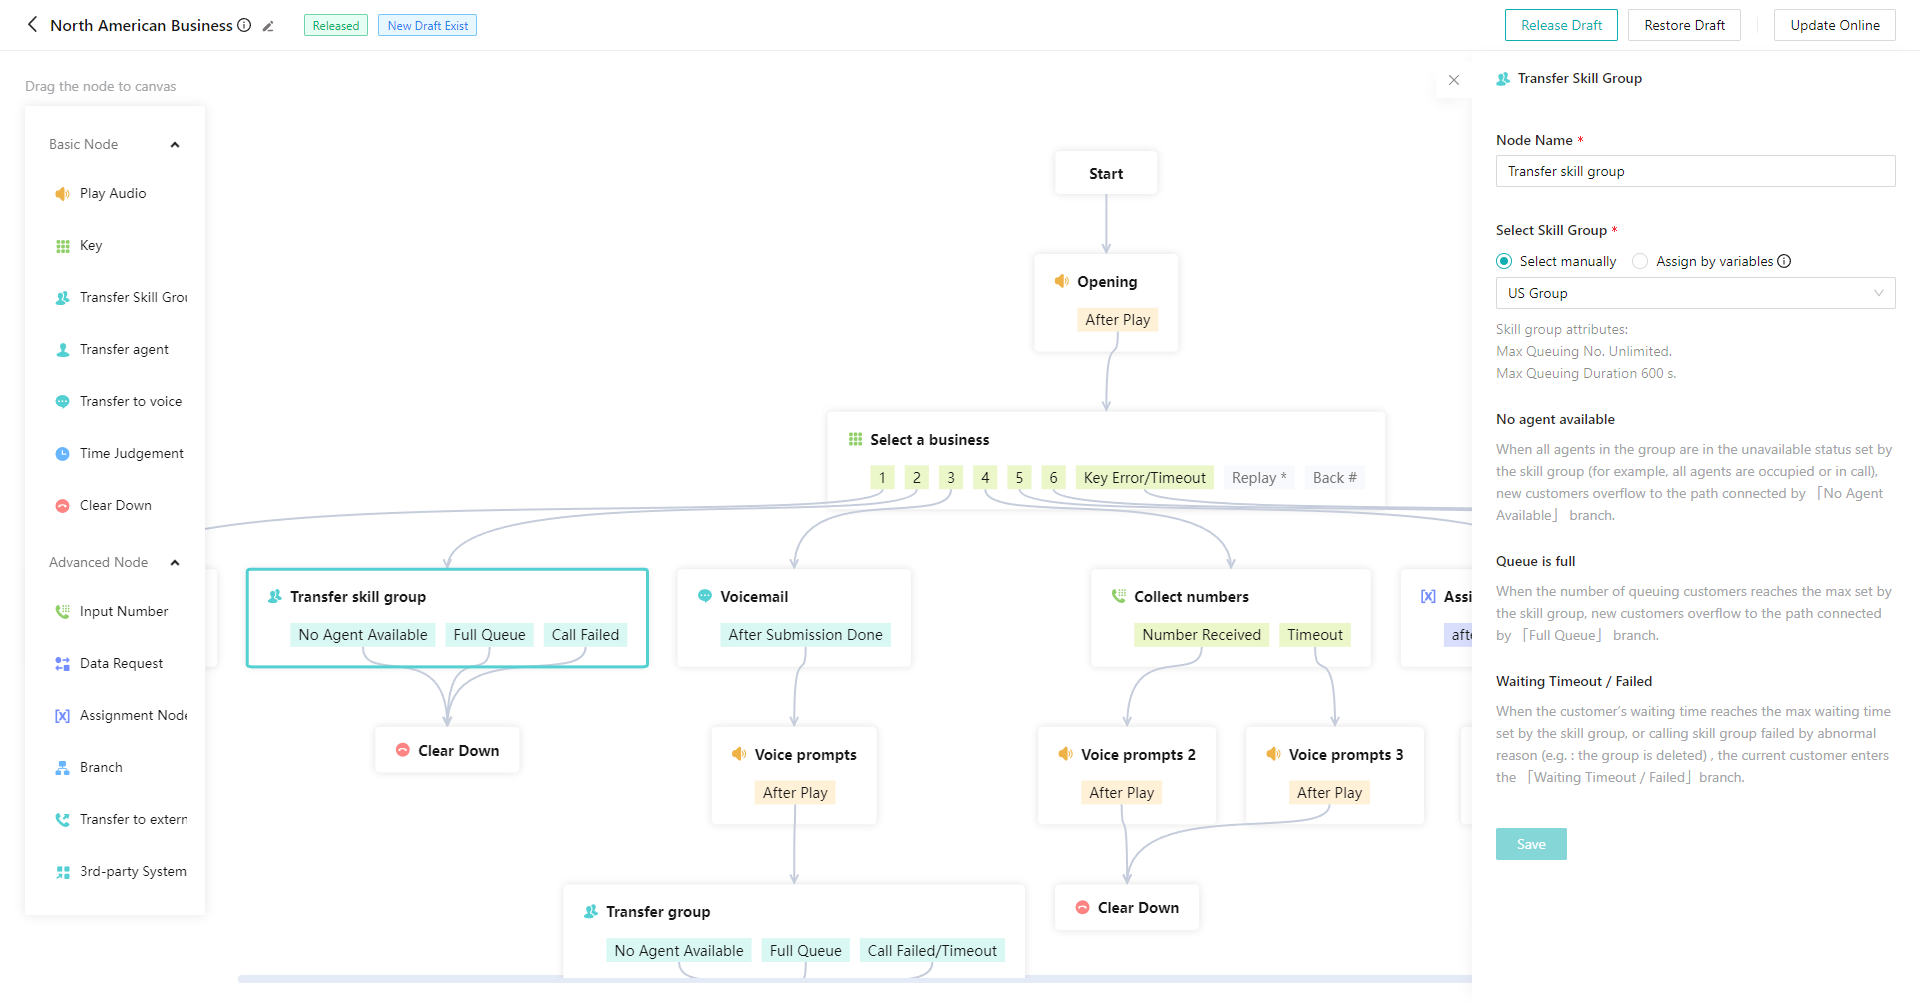
# ● Trans-to-Skill Group Node
- Drag the「Trans-to-Skill Group」node from the list on the left side
- Select the node, select the skill group in the pop-up window on the right side, and click【Save】after editing (Figure 7).
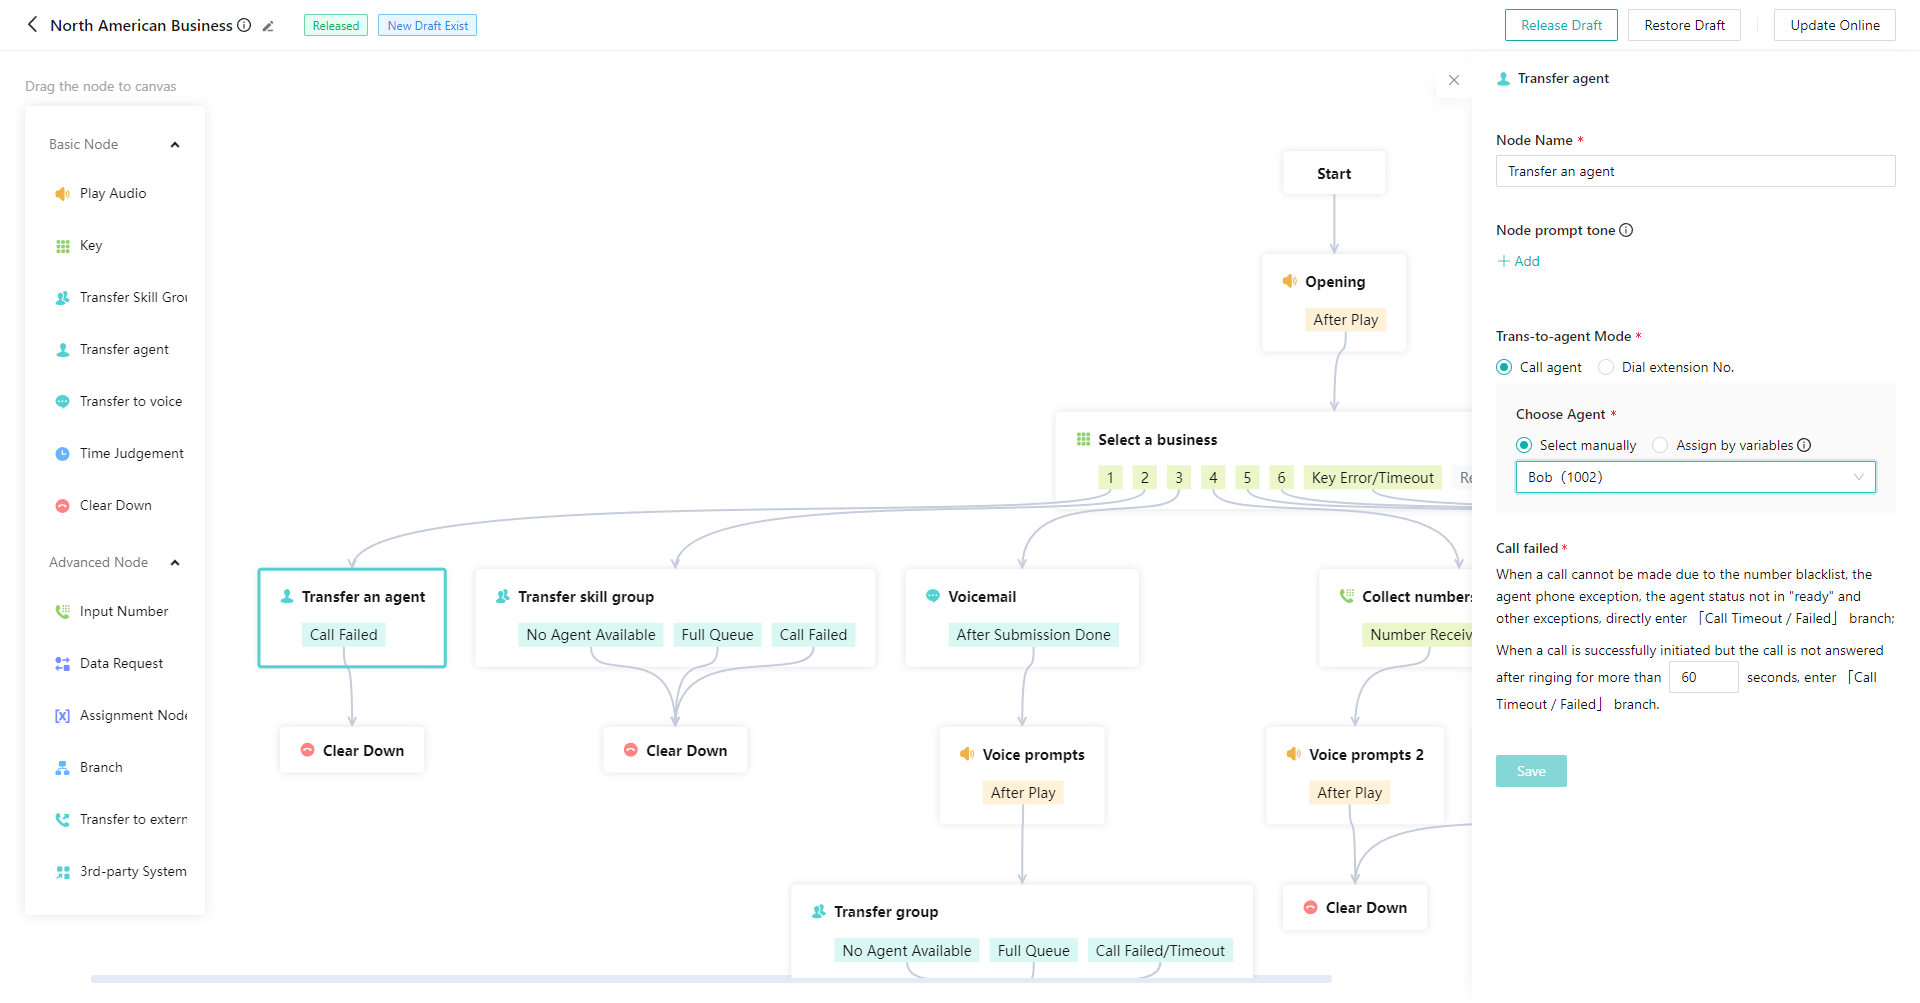
# ● Trans-to-Agent Node
- Drag the「Trans-to-Agent」node from the list on the left side
- Select the node, select the agent in the pop-up window on the right side, and click【Save】after editing (Figure 8).
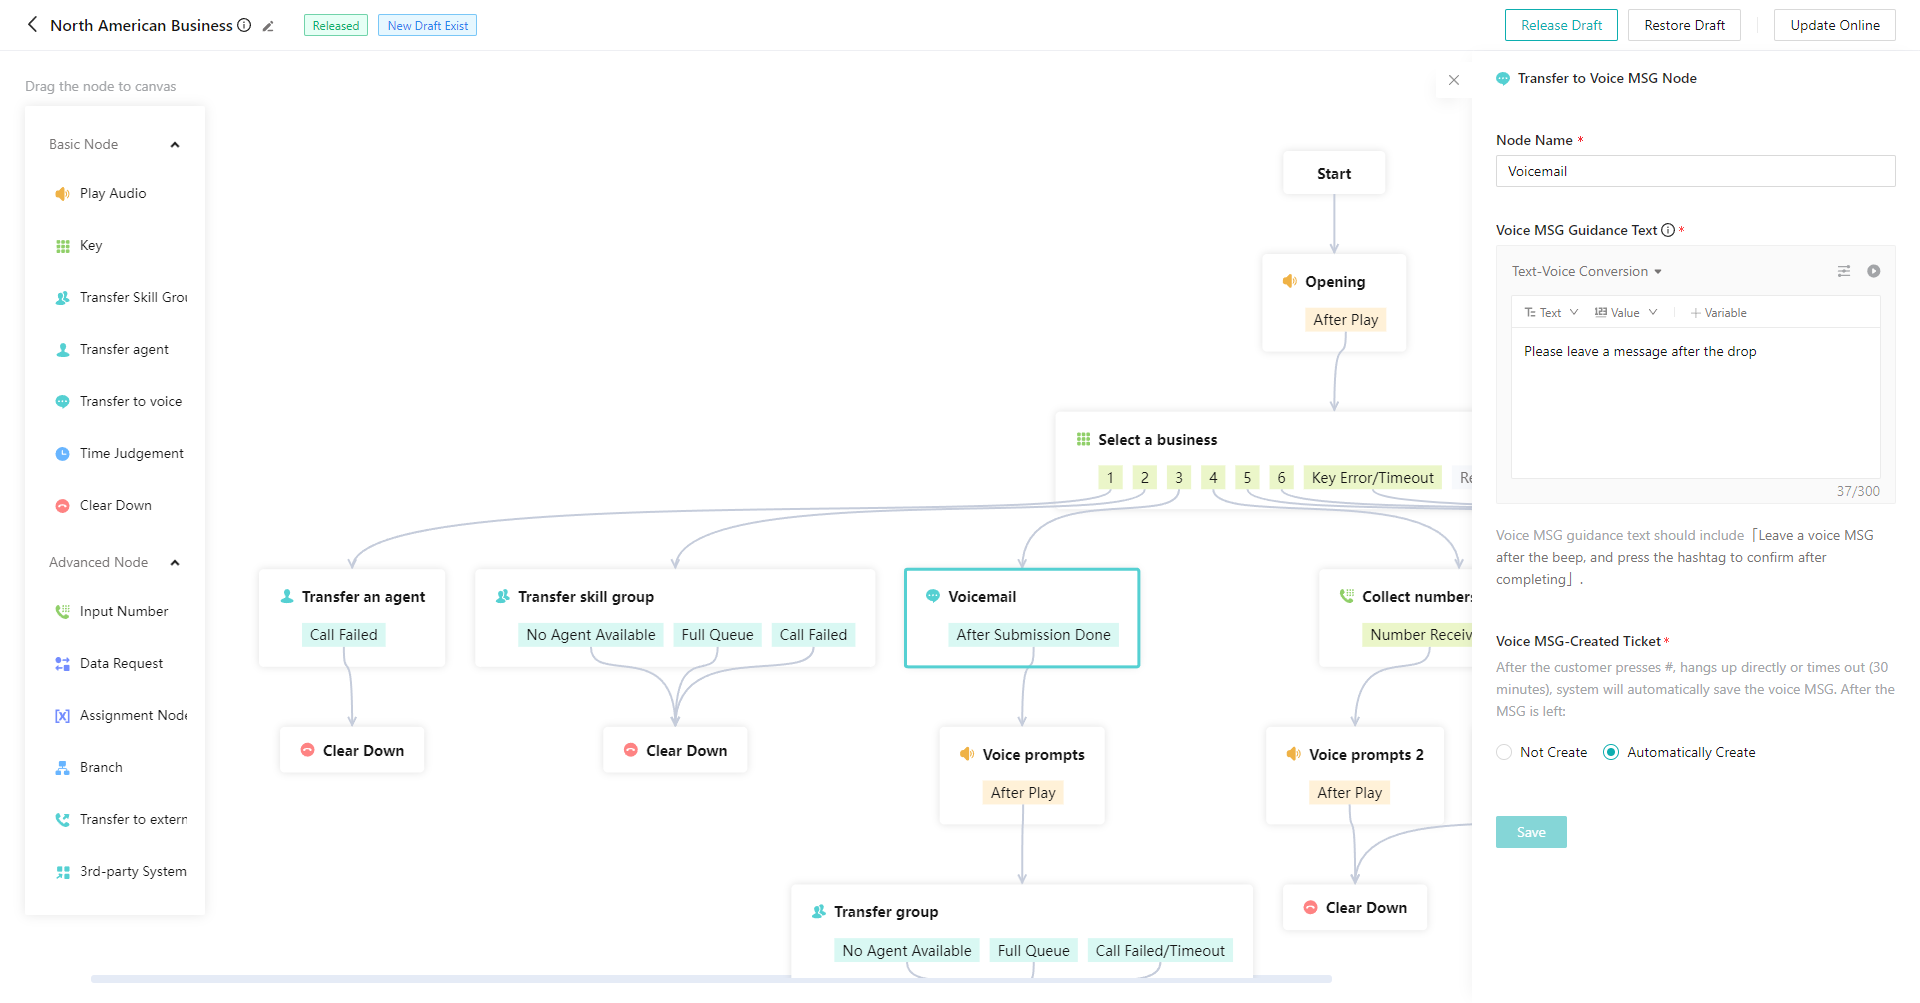
# ● Trans-to-Submission Node
- Drag the「Trans-to-Submission」node from the list on the left side
- Select the node and configure submission guidance text in the right pop-up window. The guidance text must contain「Leave a voice MSG after the beep, and press the hashtag to confirm after completing」. Click【Save】after editing (Figure 9).
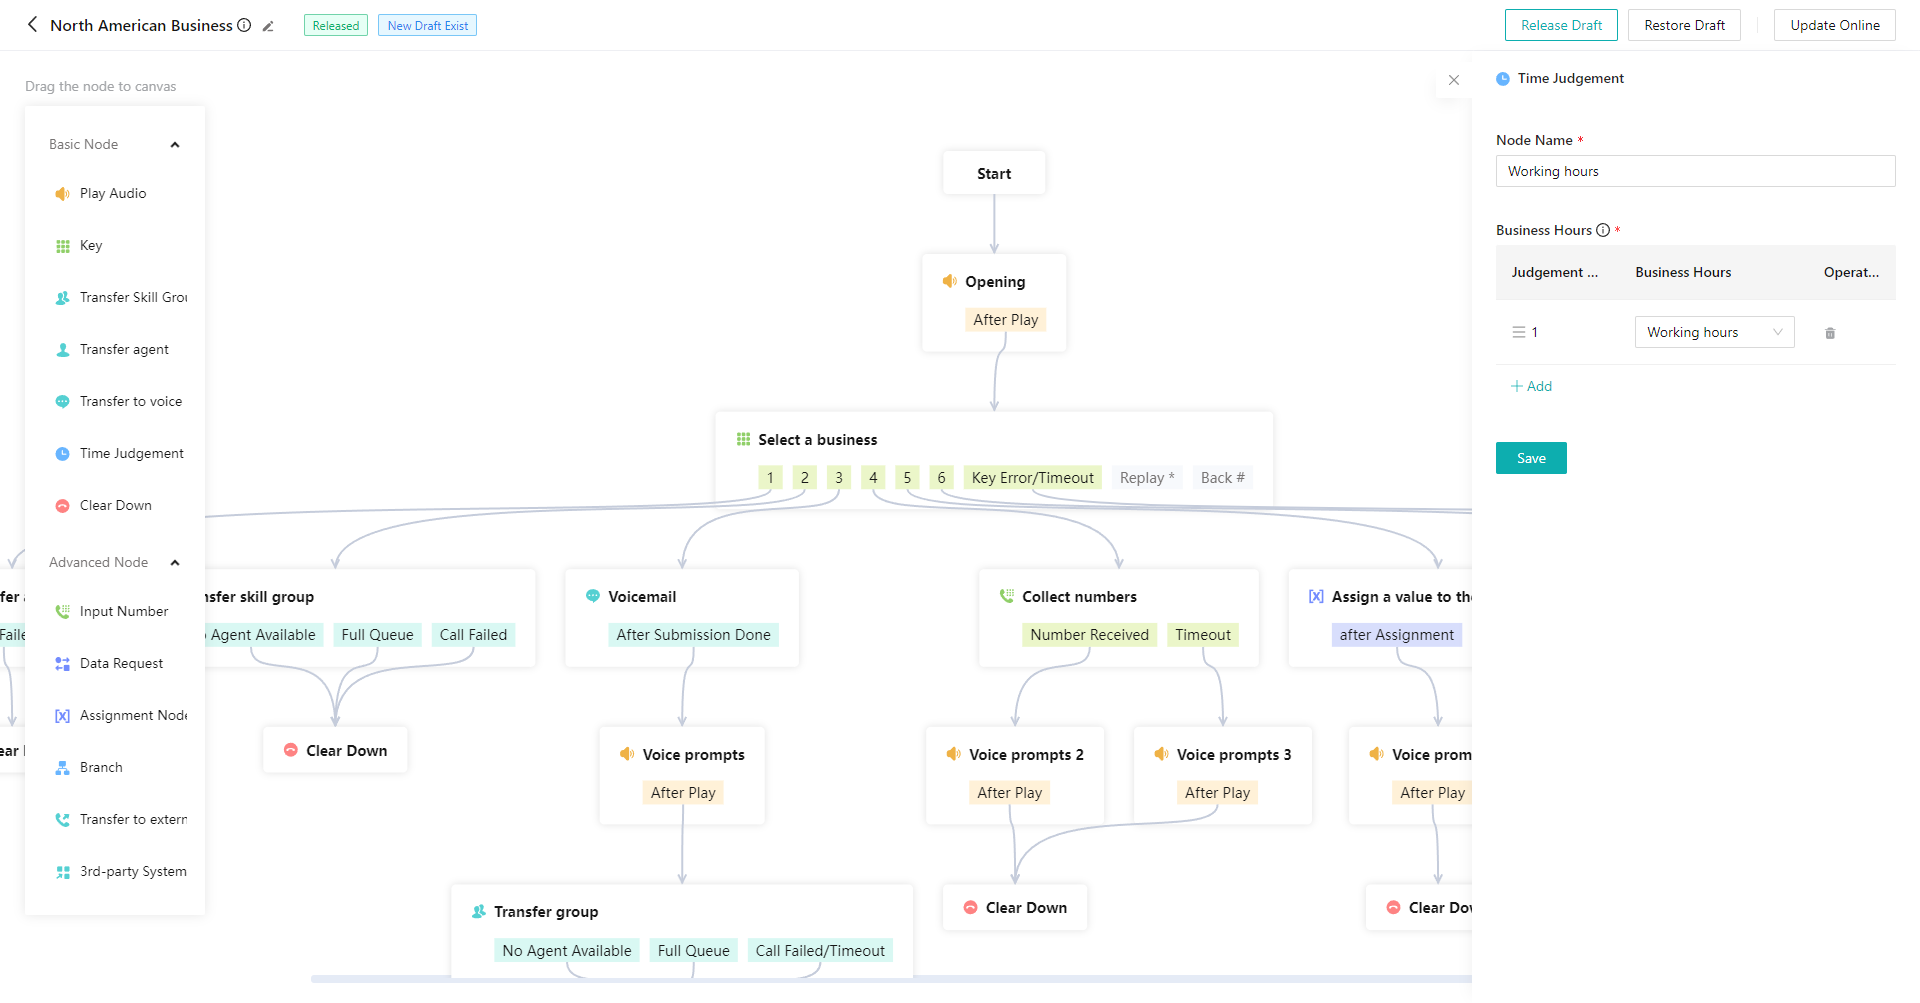
# ● Time Judgement Node
It can realize the scenario of entering different IVR nodes according to the time, e.g., entering the key node in the daytime on weekdays, entering the trans-to-outsourced skill group node in the daytime on weekends, and playing the out-of-service prompt tone at other times.
- Drag the「Time Judgement」node from the list on the left side
- Select the node, select the required time scheme in the right pop-up window (the time scheme is created in「Admin Console > Settings > Common Data > Time Scheme」 ), and click【Save】after editing (Figure 10).
# ● Hang-up Node
The system will automatically hang up after entering the node. If it is required to play prompt tone before hanging up, it can be used with「Play Audio」node (Figure 11).
# ● Number Receiving Node
Collect numbers entered by customers with key. It is often used in combination with the「Data Request」node to realize the scenario of "collecting the customer's membership number, judging the customer's identity through the membership number, and transferring to different agents according to different identities".
- Drag the「Number Receiving」node from the list on the left side
- Select the node and configure the node attribute in the right pop-up window. The number receiving result needs to be stored in a custom variable, which can then be used for the API parameter passing of the「Data Transmission」node. Click【Save】after editing (Figure 12).

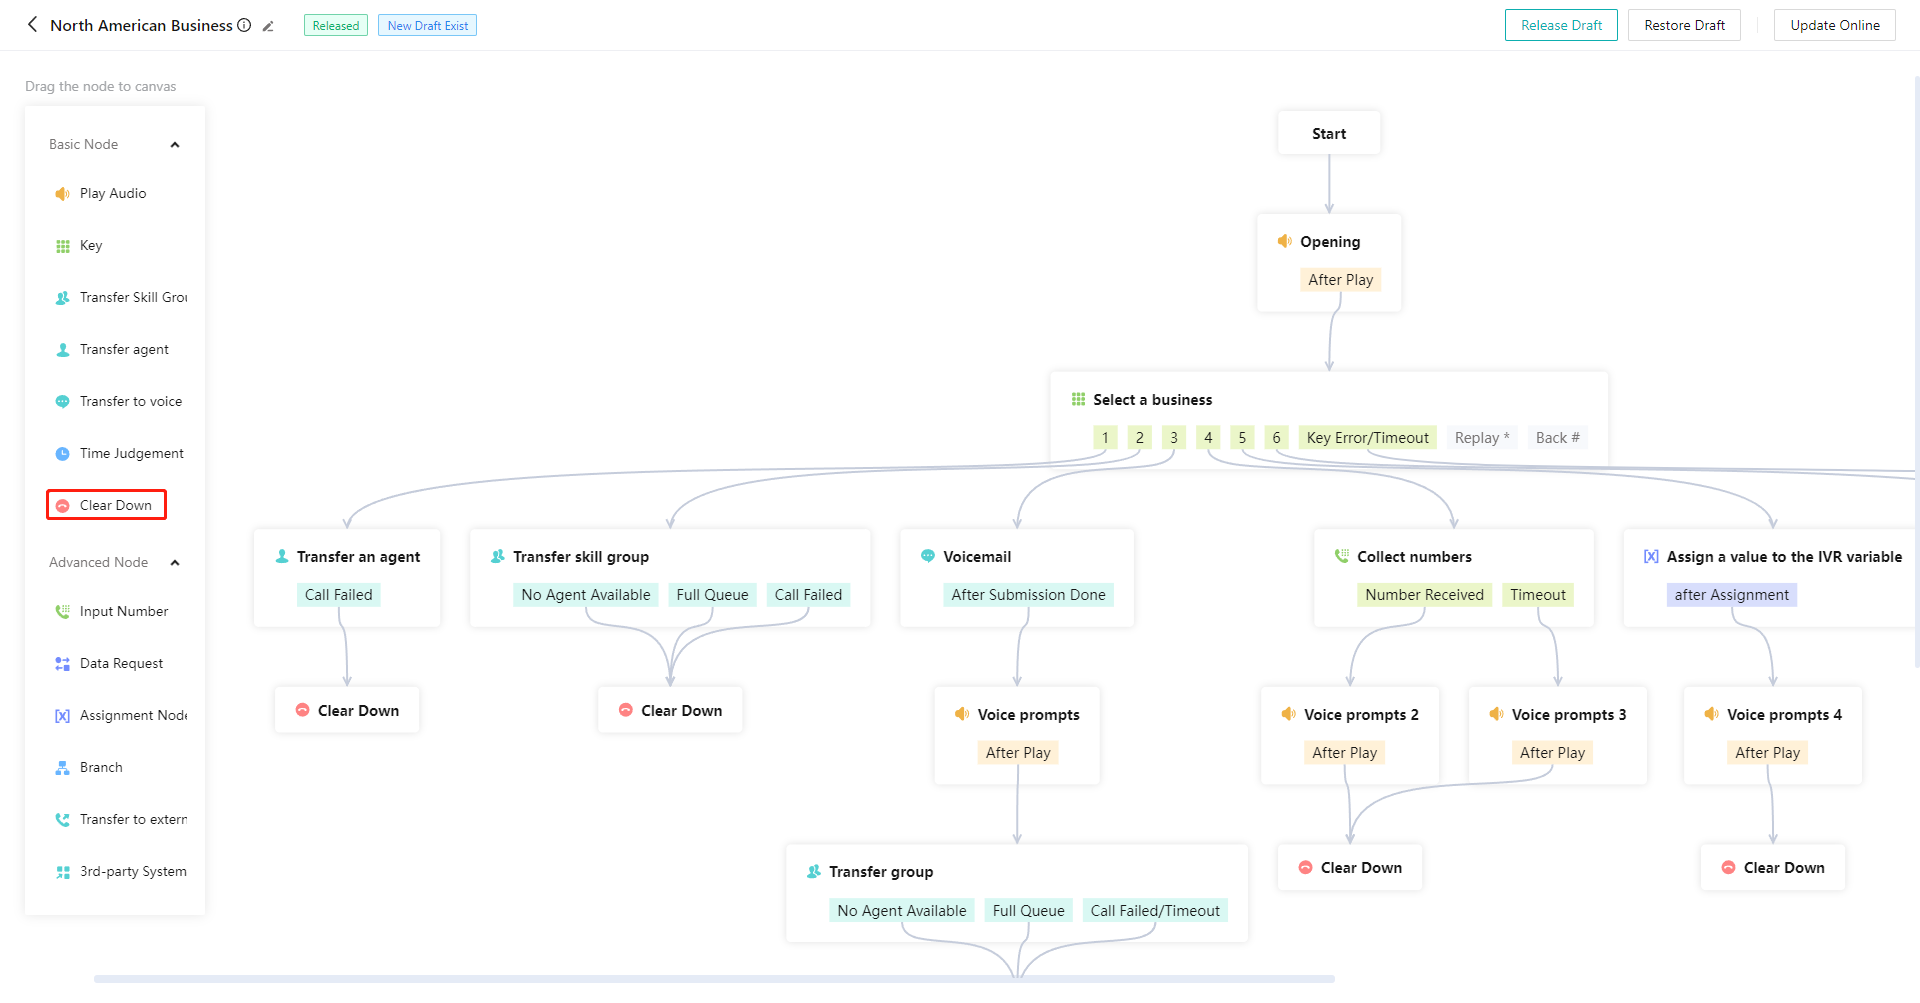
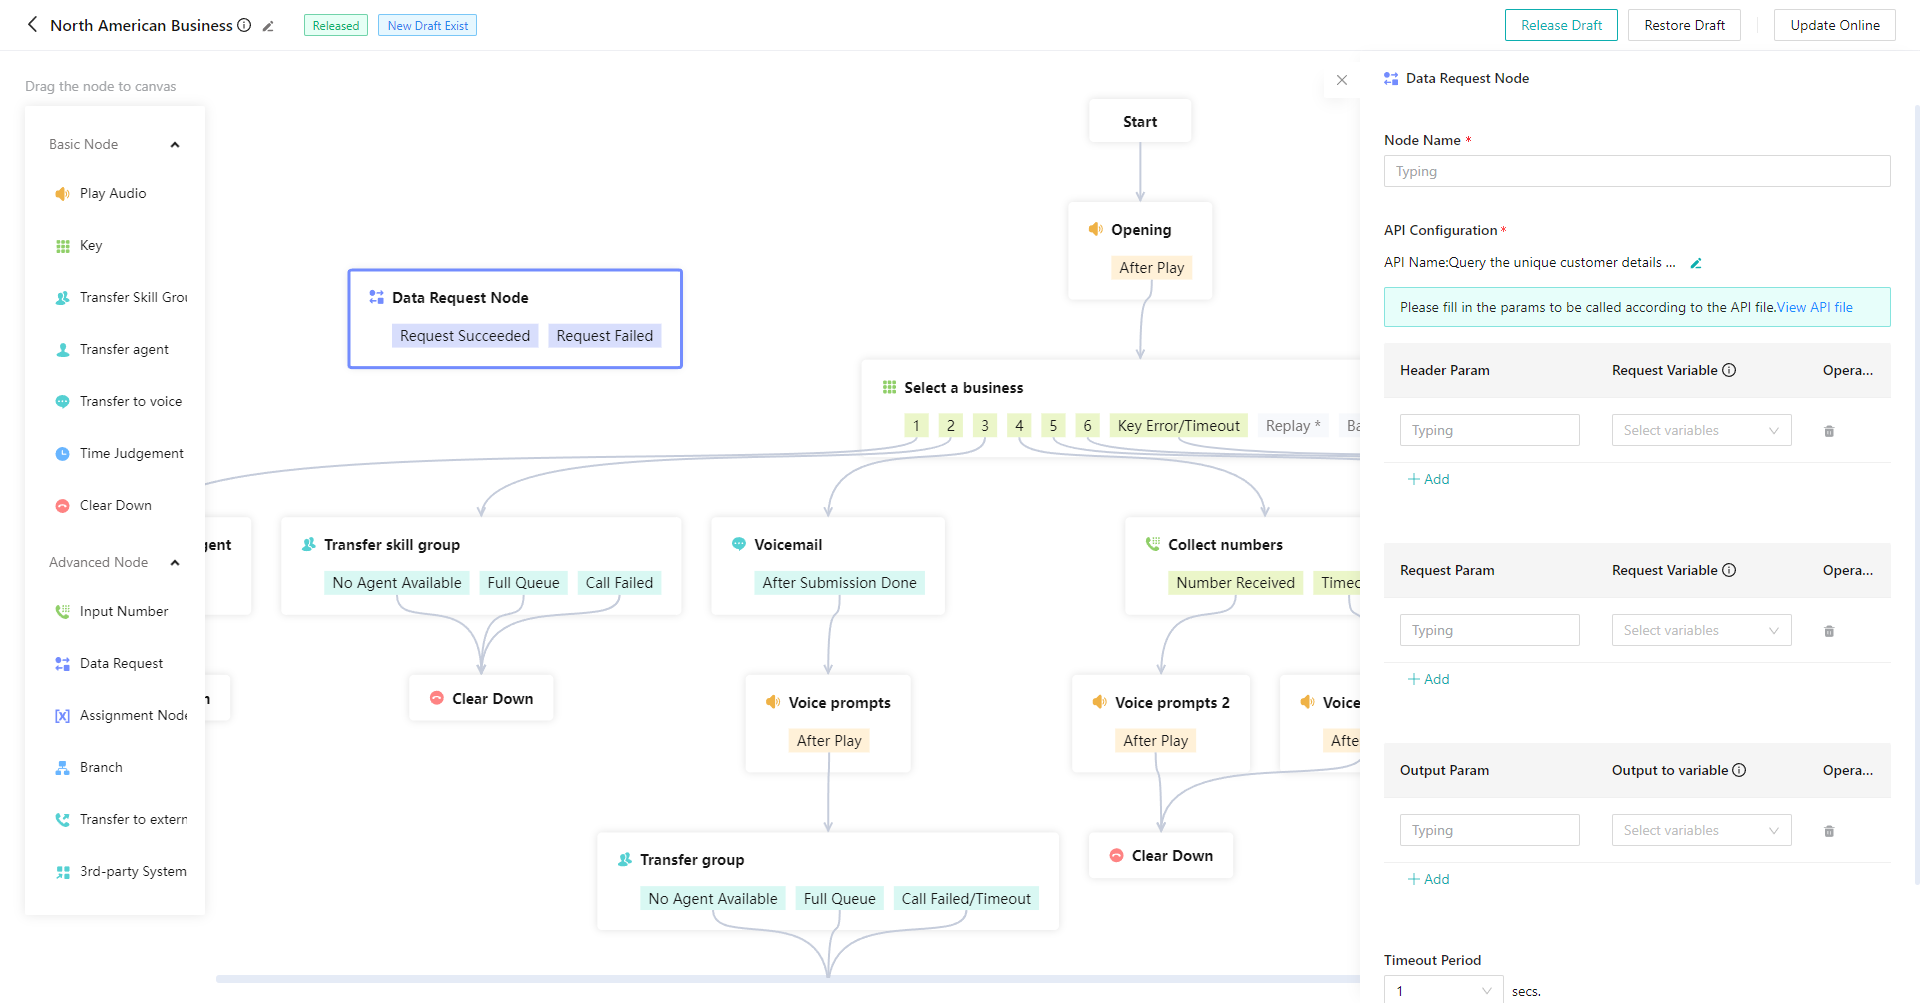
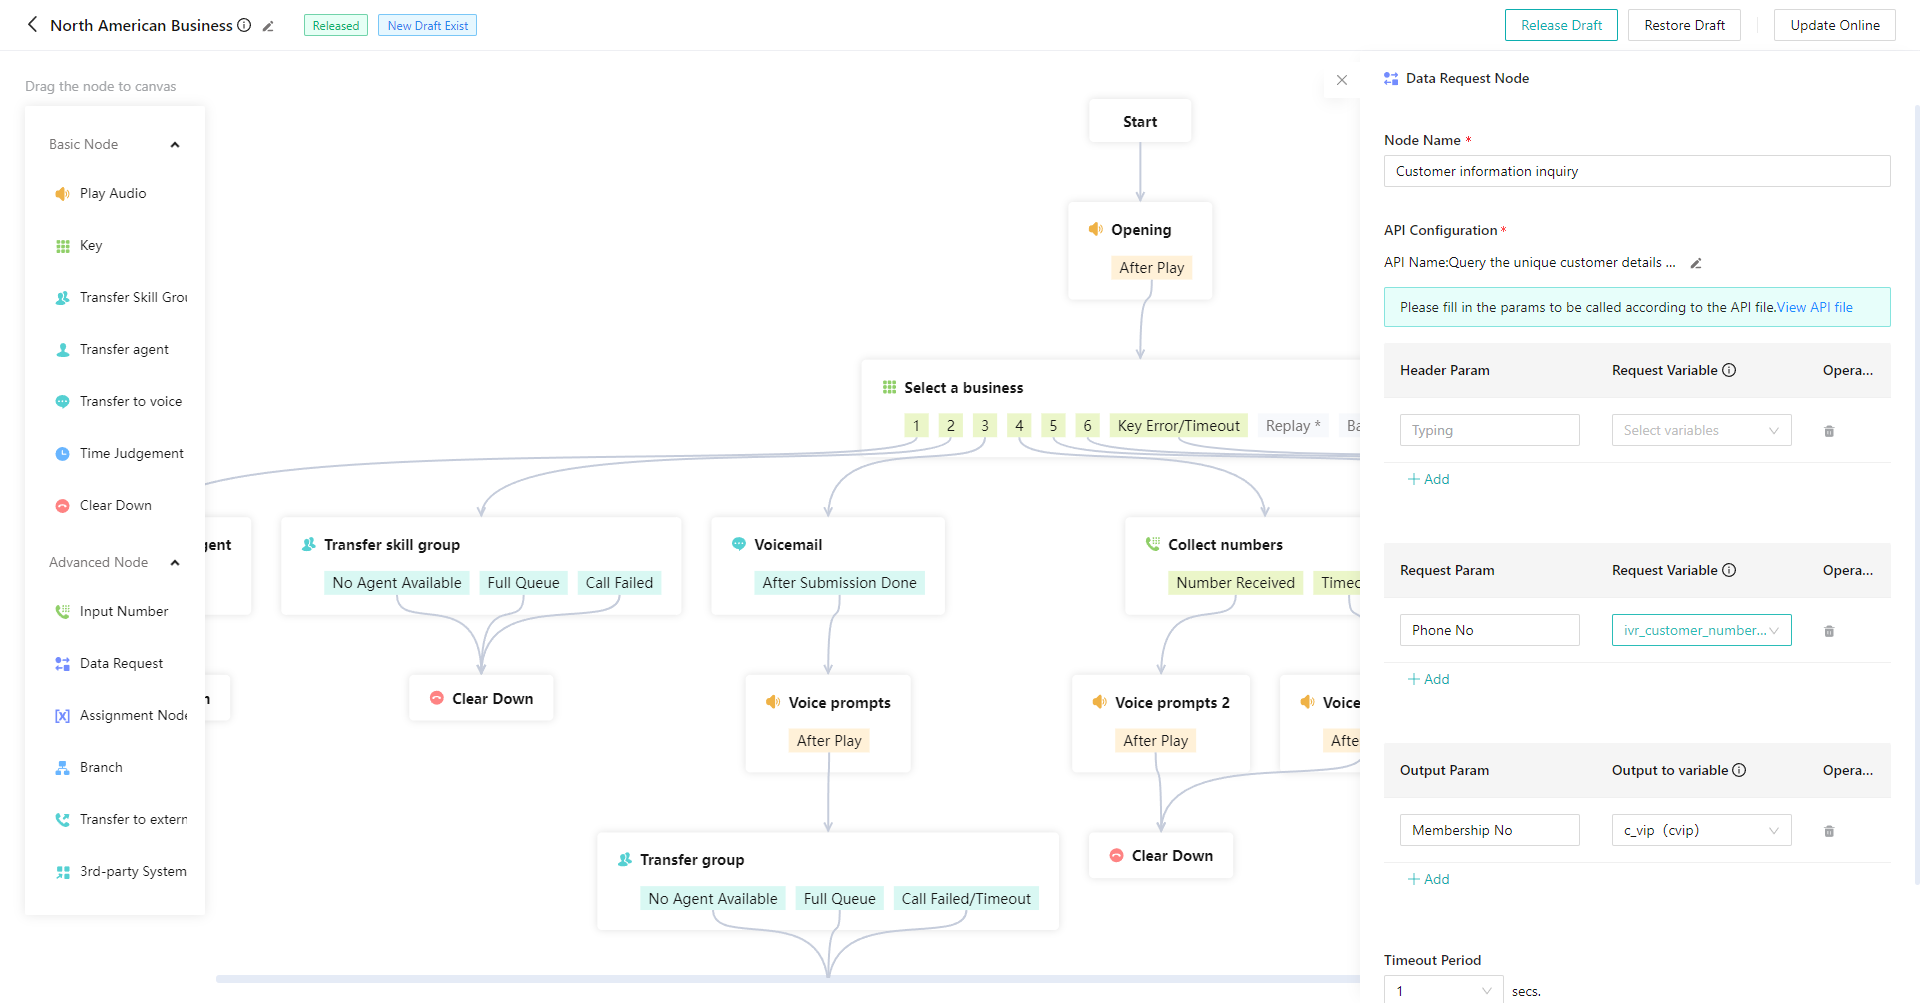
# ● Data Request Node
It can realize the scenario of calling API in IVR. For example, judge the customer's identity information through the API, and dynamically assign skill groups according to the identity information; call the enterprise's own SMS API according to the key selected by the user to send different notification SMS.
- The customized API is provided by the R&D personnel. Please configure it with the assistance of your R&D personnel (Figure 13).
- The system API is a preset API in the system, which can query the data in the system. For example, query the customer VIP level information stored in the CRM through the phone no., select the variable for assignment, and then judge the value of the variable in the branch node to flow different branch nodes. (Figure 14) (Figure 15) (Figure 16) (Figure 17)
- The request params and output params of the system API should be filled in according to the param description provided in the API document. See API Parameter Description Document (opens new window) for API parameter description of "Query Unique Customer Details by Customer Number"

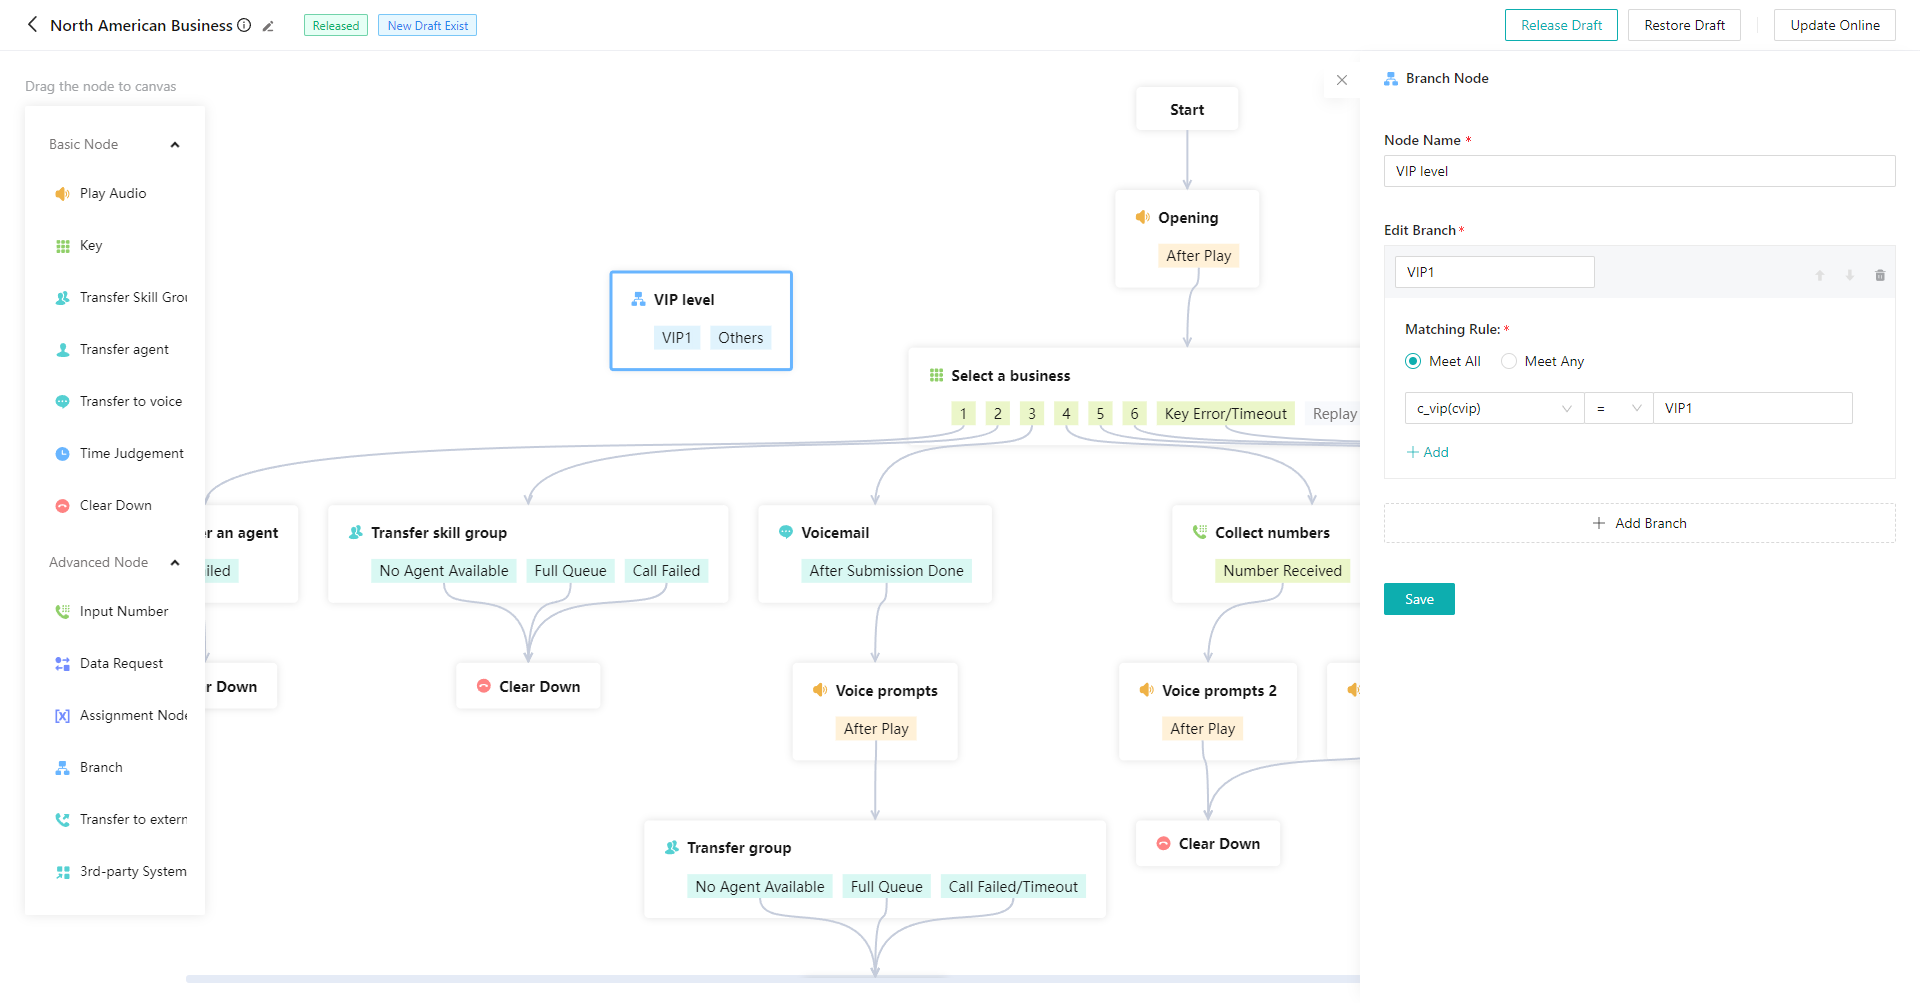

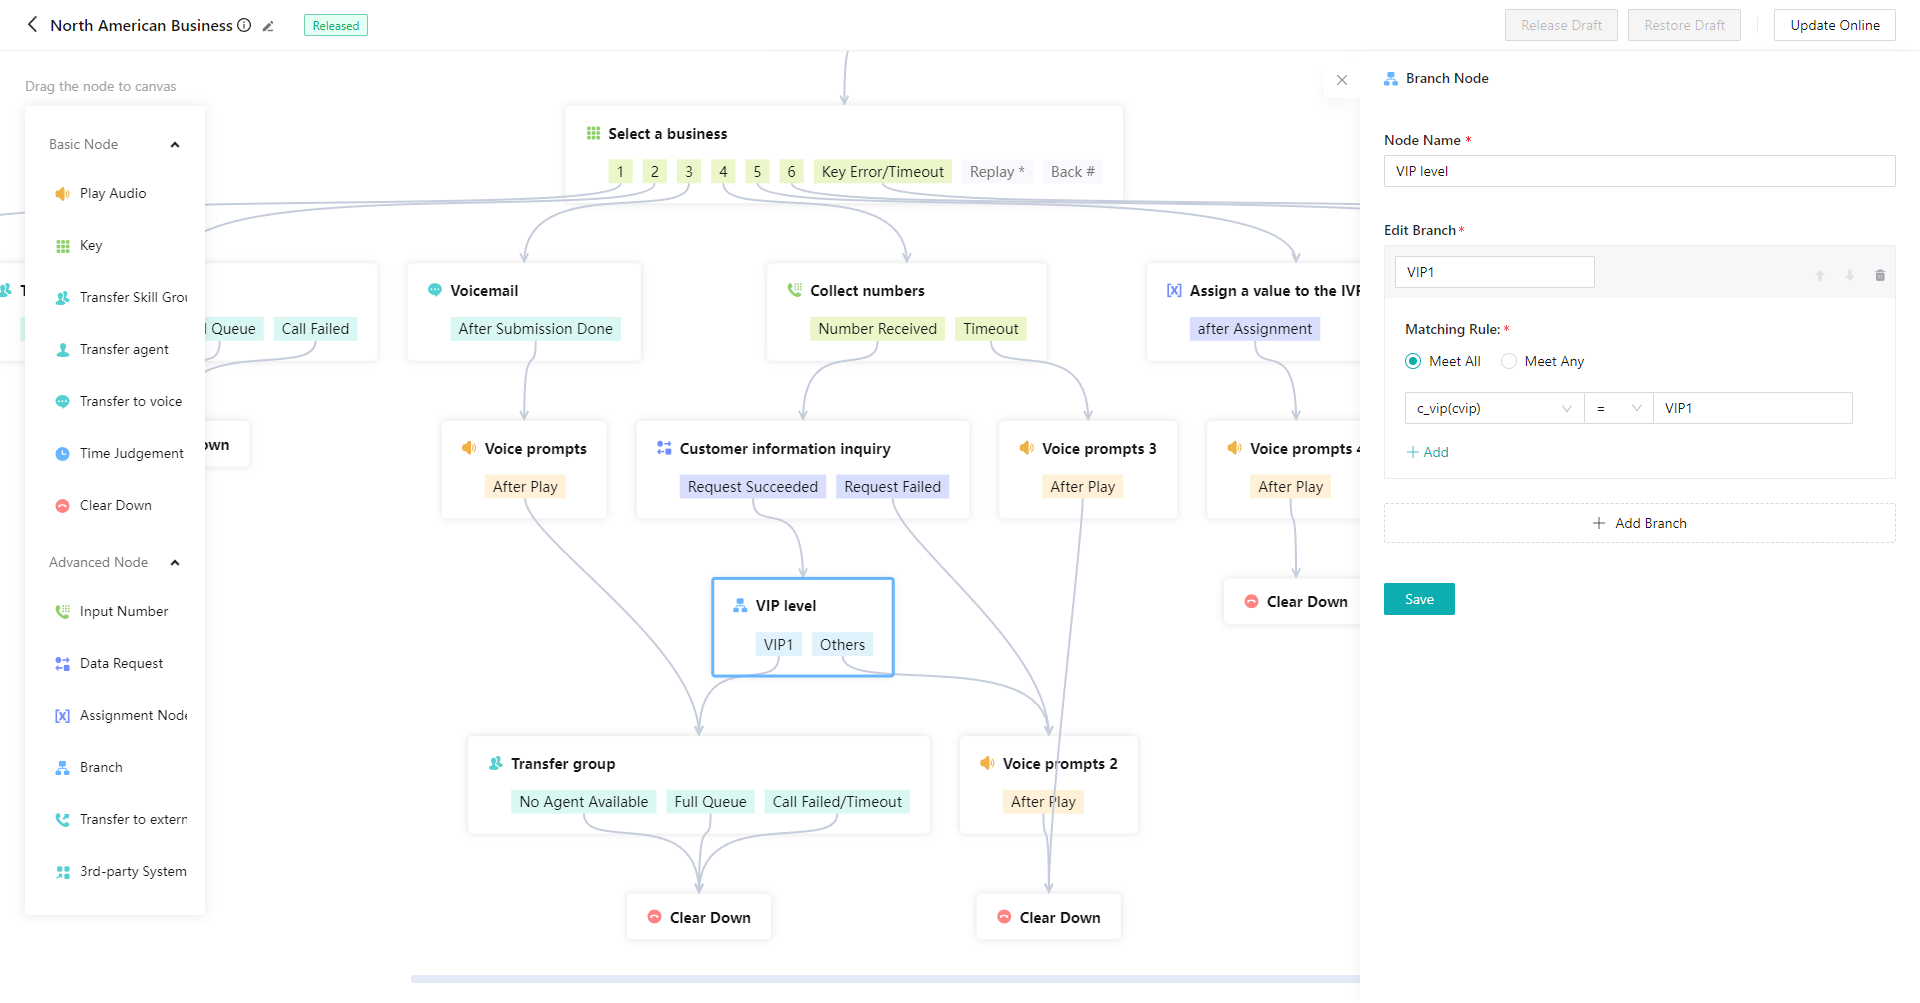
# ● Branch Node
Enter different IVR branch flows according to different variable values. It's often used in combination with the「Data Transmission」node to realize complex business scenarios. For example, judge the customer's VIP level and assign calls to different IVR branch flows according to different levels. The configuration of the branch node is relatively complex. Please configure it with the assistance of your R&D personnel (Figure 18).
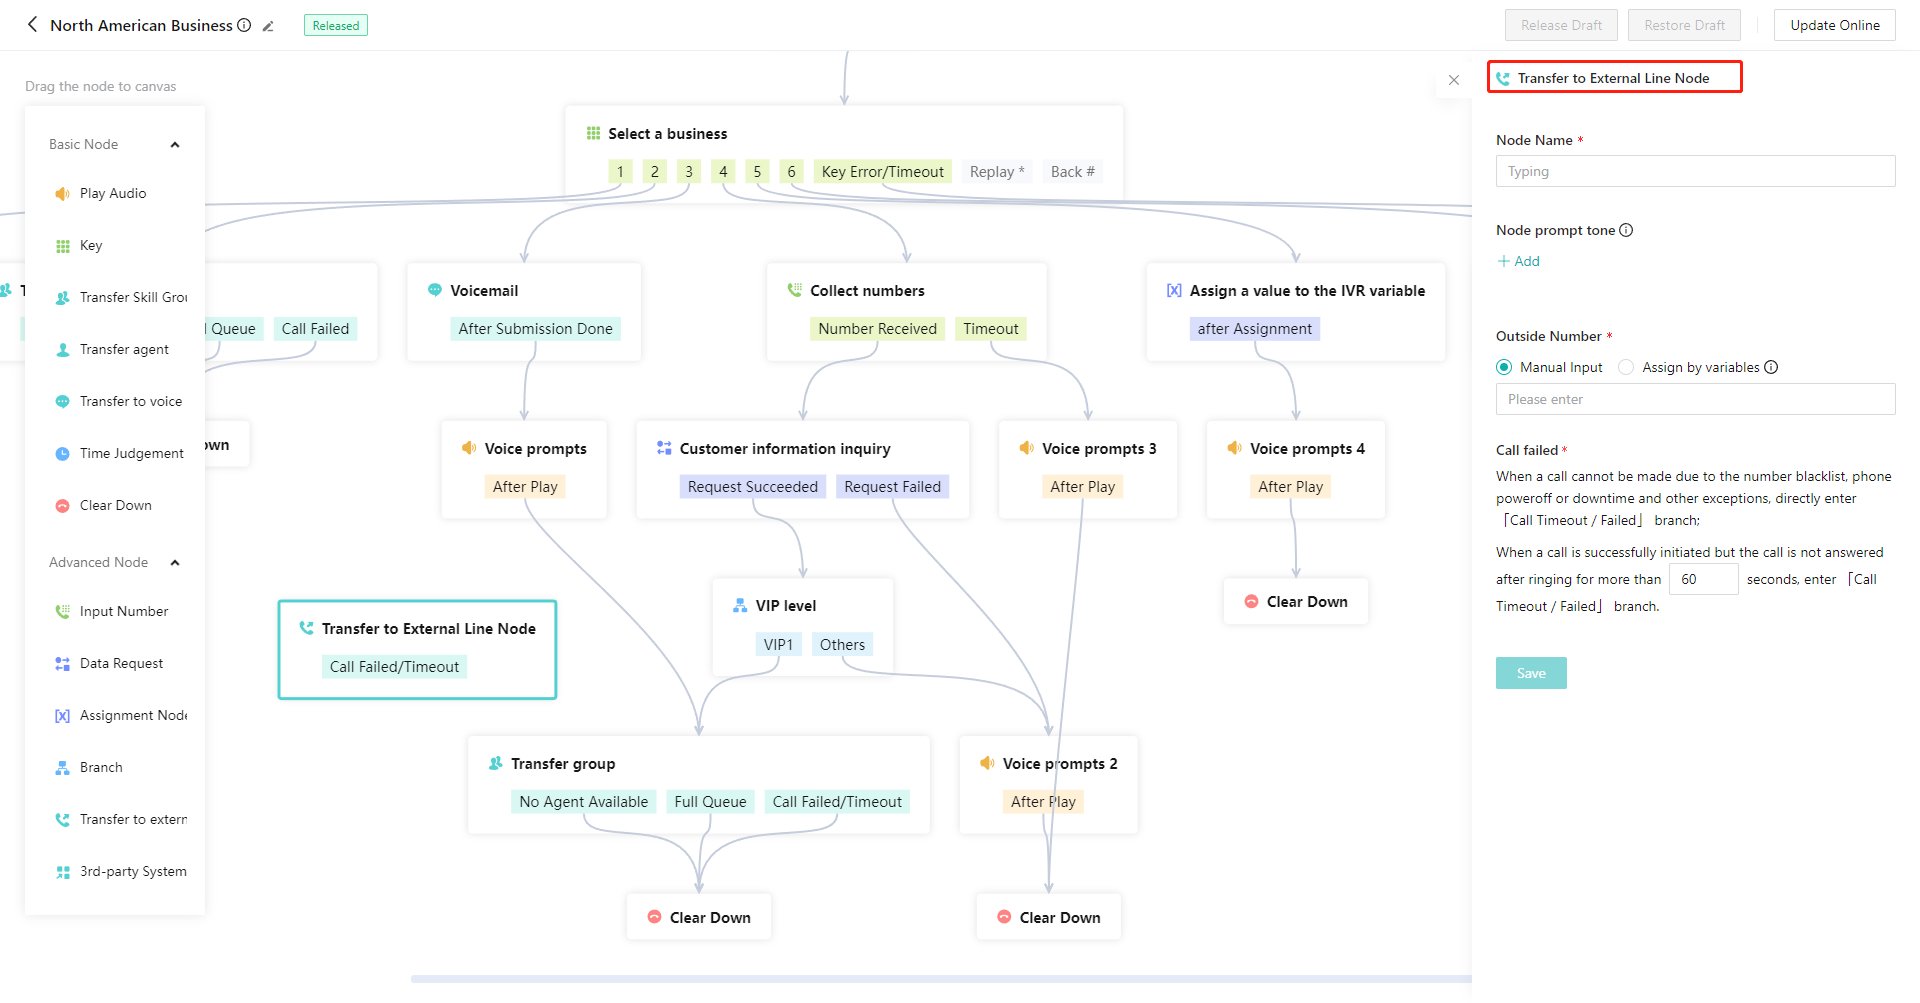
# ● Trans-to-External Line Node
You can transfer the call to a designated external line number (Figure 19).
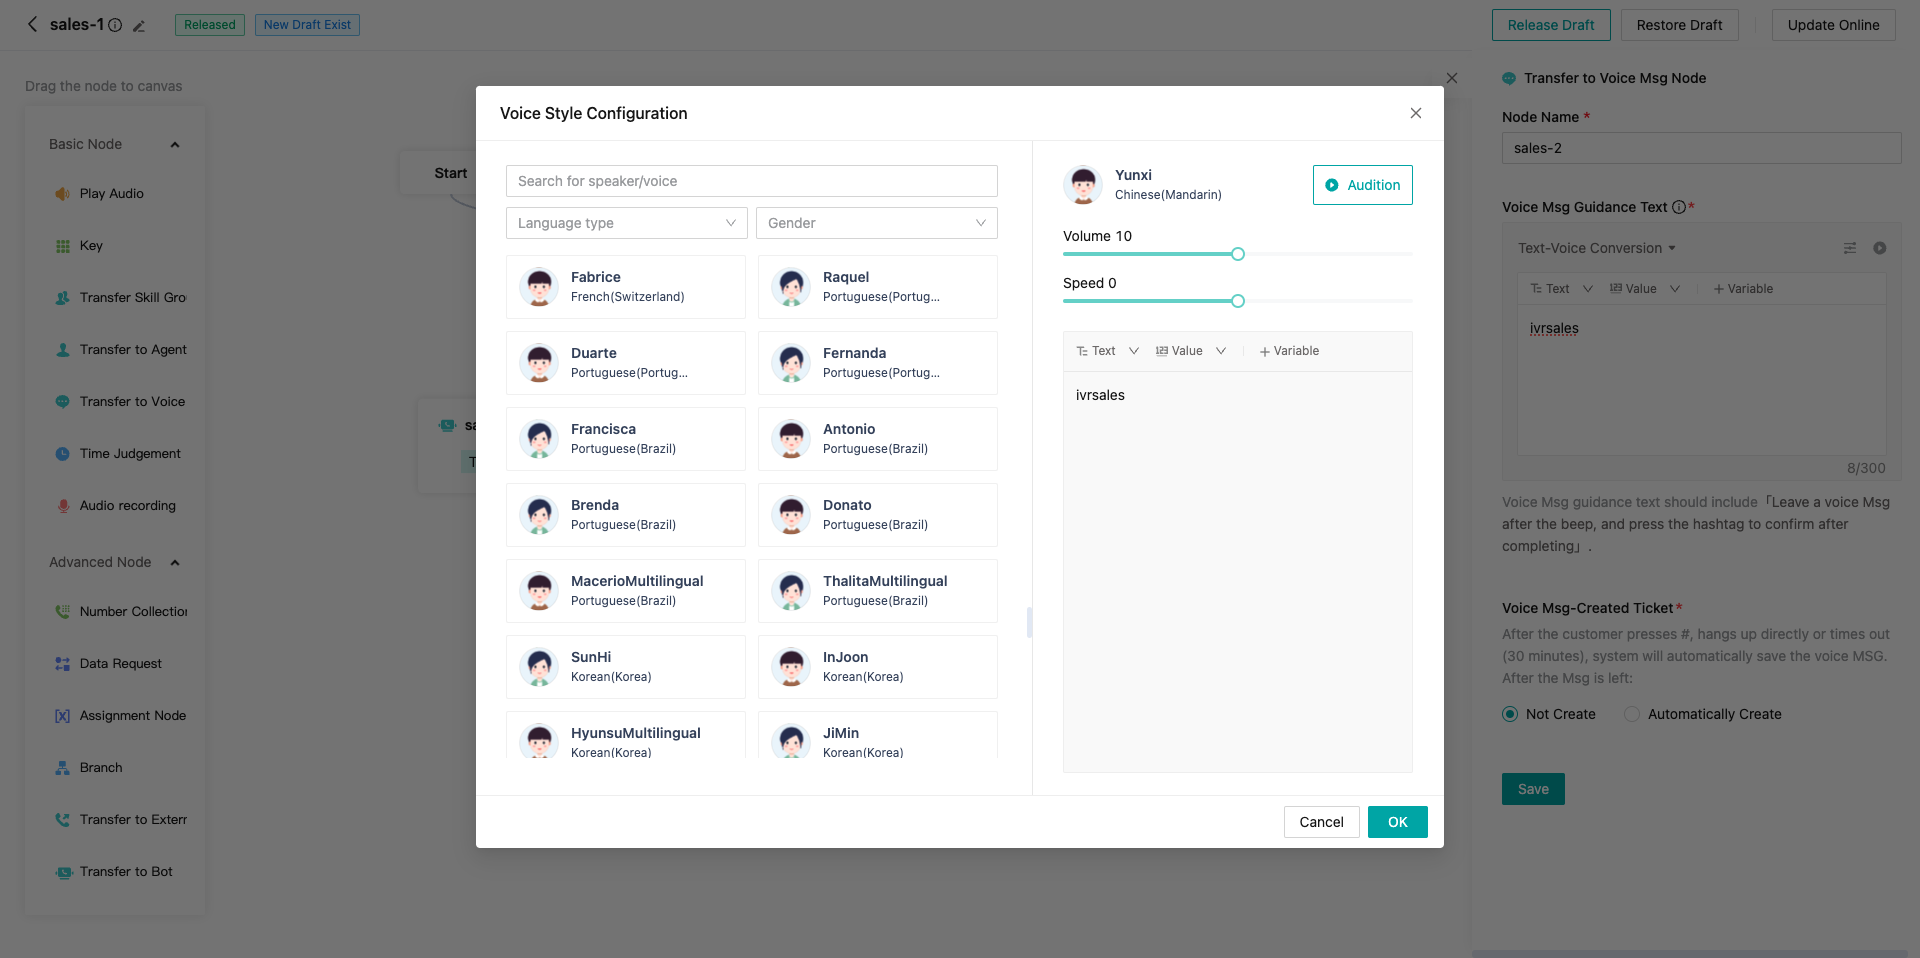
# ● Voice Style Set
You can transfer the call to a designated external line number (Figure 20). In the IVR flow, the original voice style setting for specific nodes is optimized and upgraded to support more languages and styles.(Includes: Play Audio Node, Keypress Node, Transfer to Agent, Transfer to Voice Msg Node, Number Collection Node, Transfer to External Line Node, Transfer to Bot)
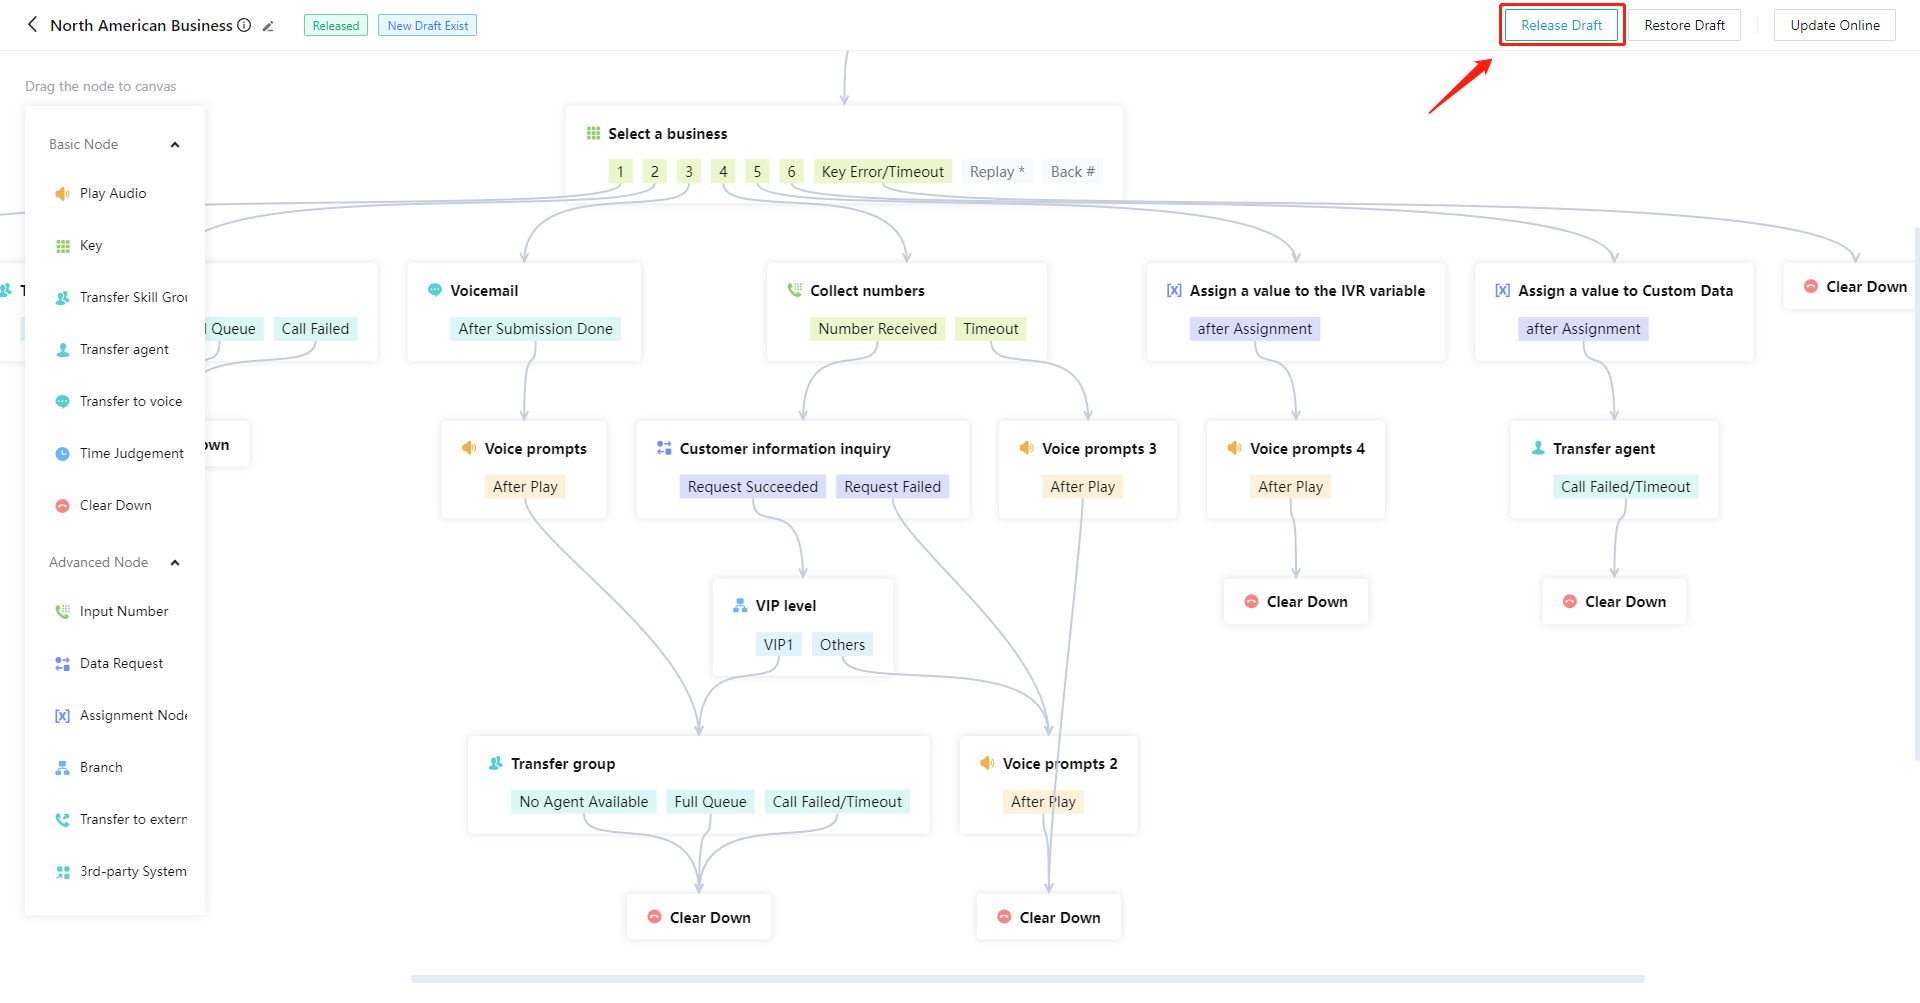
# ● Post
The IVR flow can take effect only after clicking【Post】in the upper right corner (Figure 21).
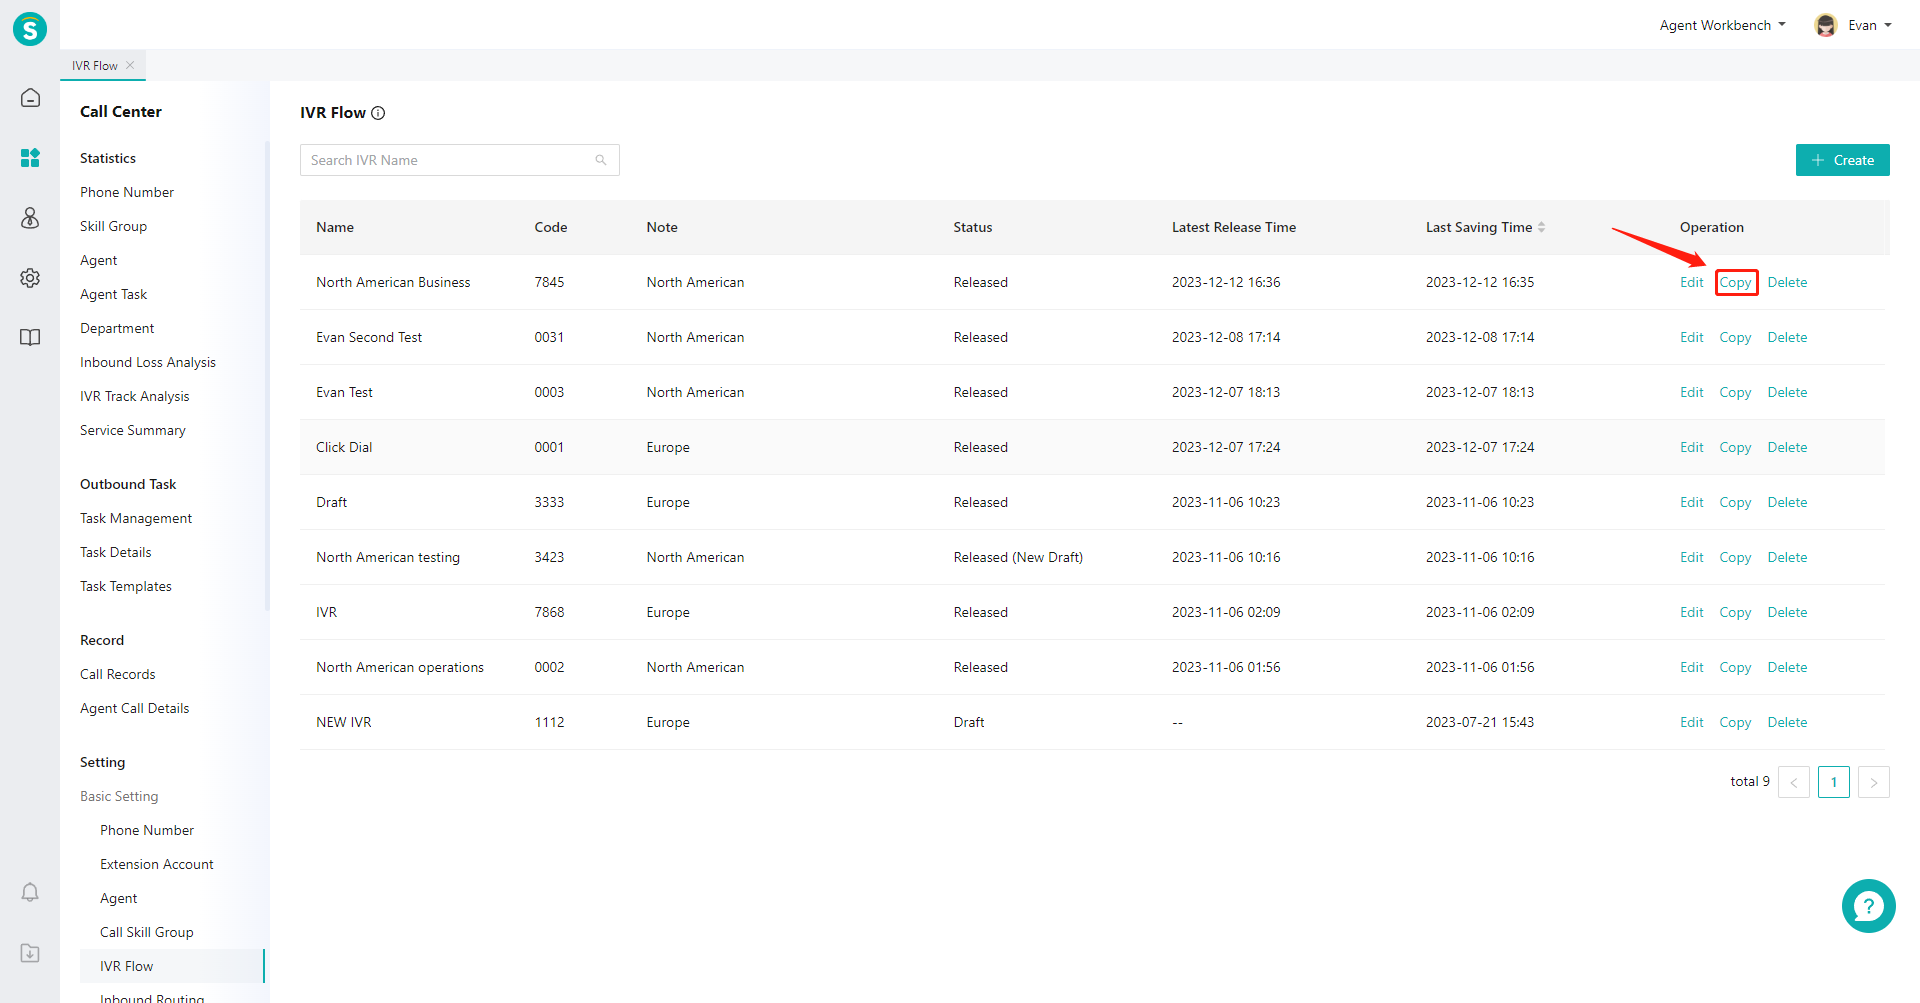
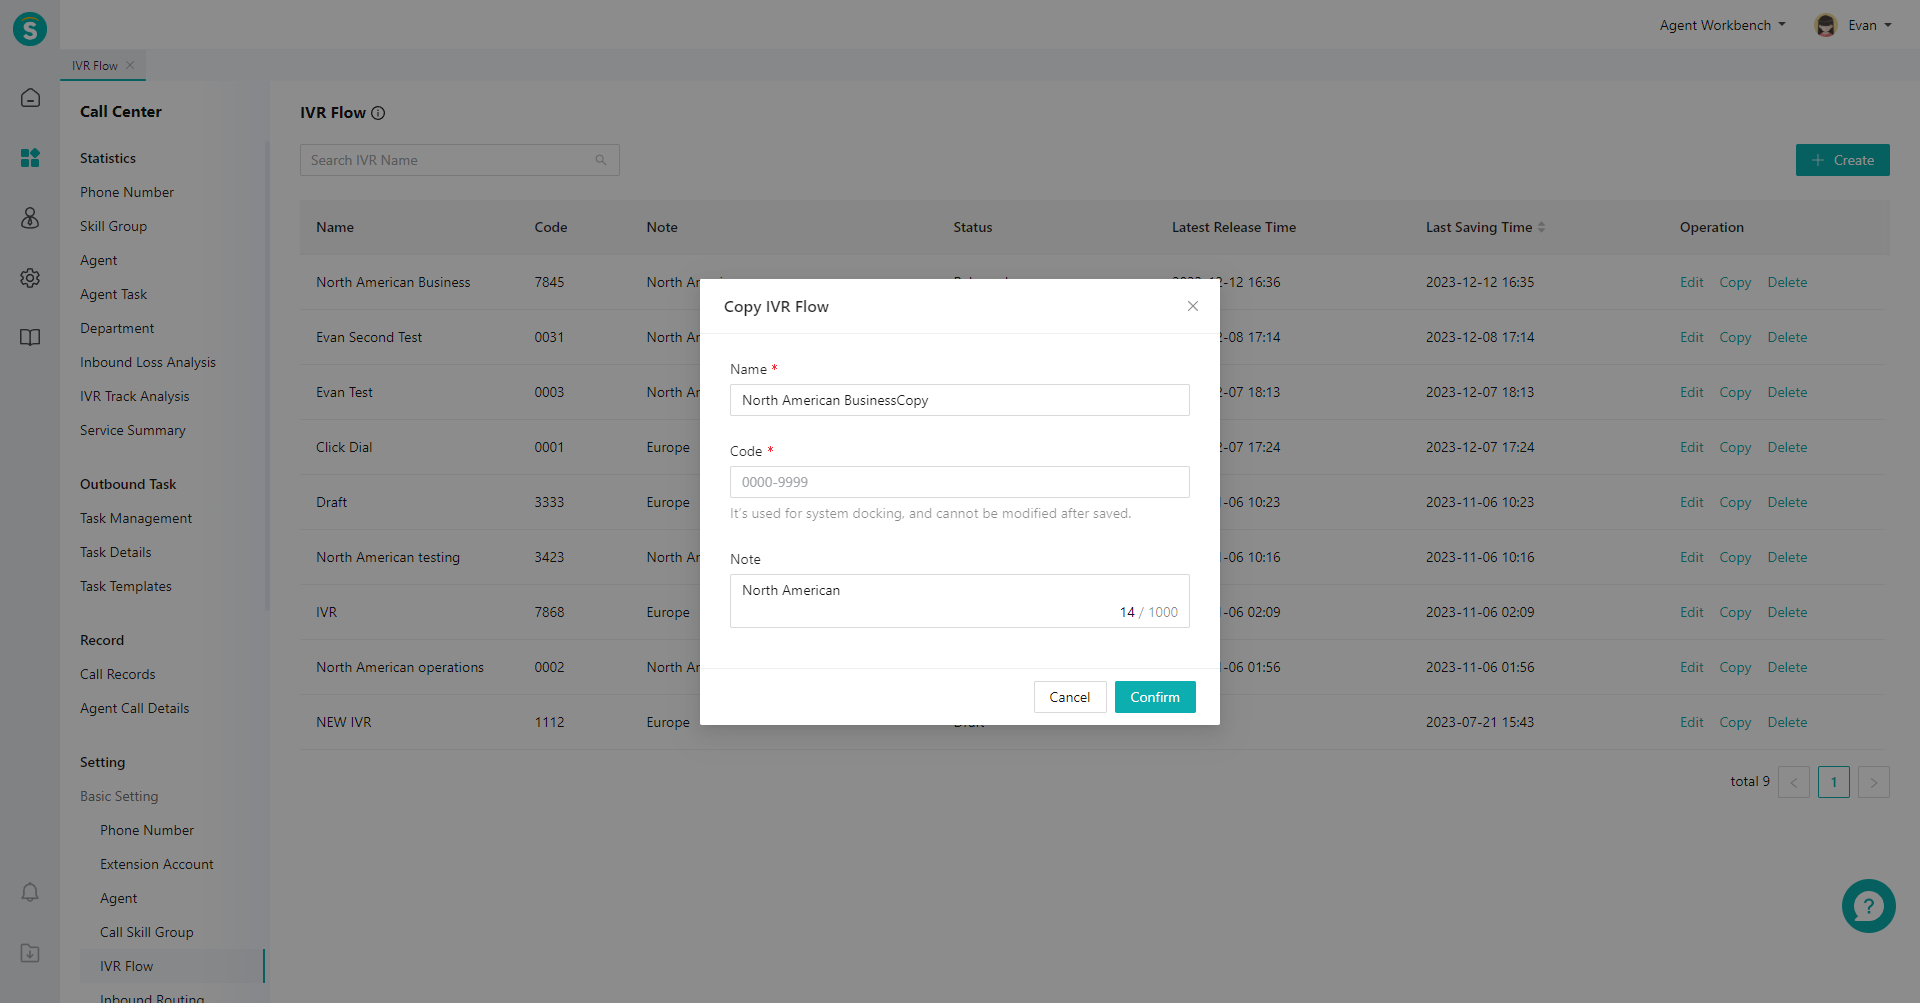
# ● Copy IVR
To create a new IVR similar to the existing IVR, you can use the「Copy」function. The copied IVR takes effect after clicking「Post」. Click【Copy】in the action bar on the right side of the list (Figure 22), edit the name and notes of the copied IVR in the pop-up window, and then click【OK】(Figure 23).