Beginner's Guide
# Beginner's Guide
——This article helps you learn how to quickly build an AI Agent.
# The Role of AI Agent
We hope that before you learn about the configuration features of the AI Agent, you will understand its scenarios and uses:
● Usage scenario: When a customer asks a question, the robot replies first. This includes 3 channels: live chat, call centers, and ticketing.
● Purpose: Compared to traditional robots, AI Agent will be able to provide higher answer quality while requiring lower maintenance costs.
# How to Configure AI Agent
Before we dive into the detailed steps for configuring AI Agent, let's first understand its basic process:
Configure knowledge base, task workflow.
Configure AI Agent.
Deploy AI Agent to live chat, call centers, and ticketing.
# ● Configure Knowledge Base
- Create a new knowledge base in [Knowledge Center - Knowledge Base - Knowledge Base Management]. You can see the detail of knowledge management in knowledge management.
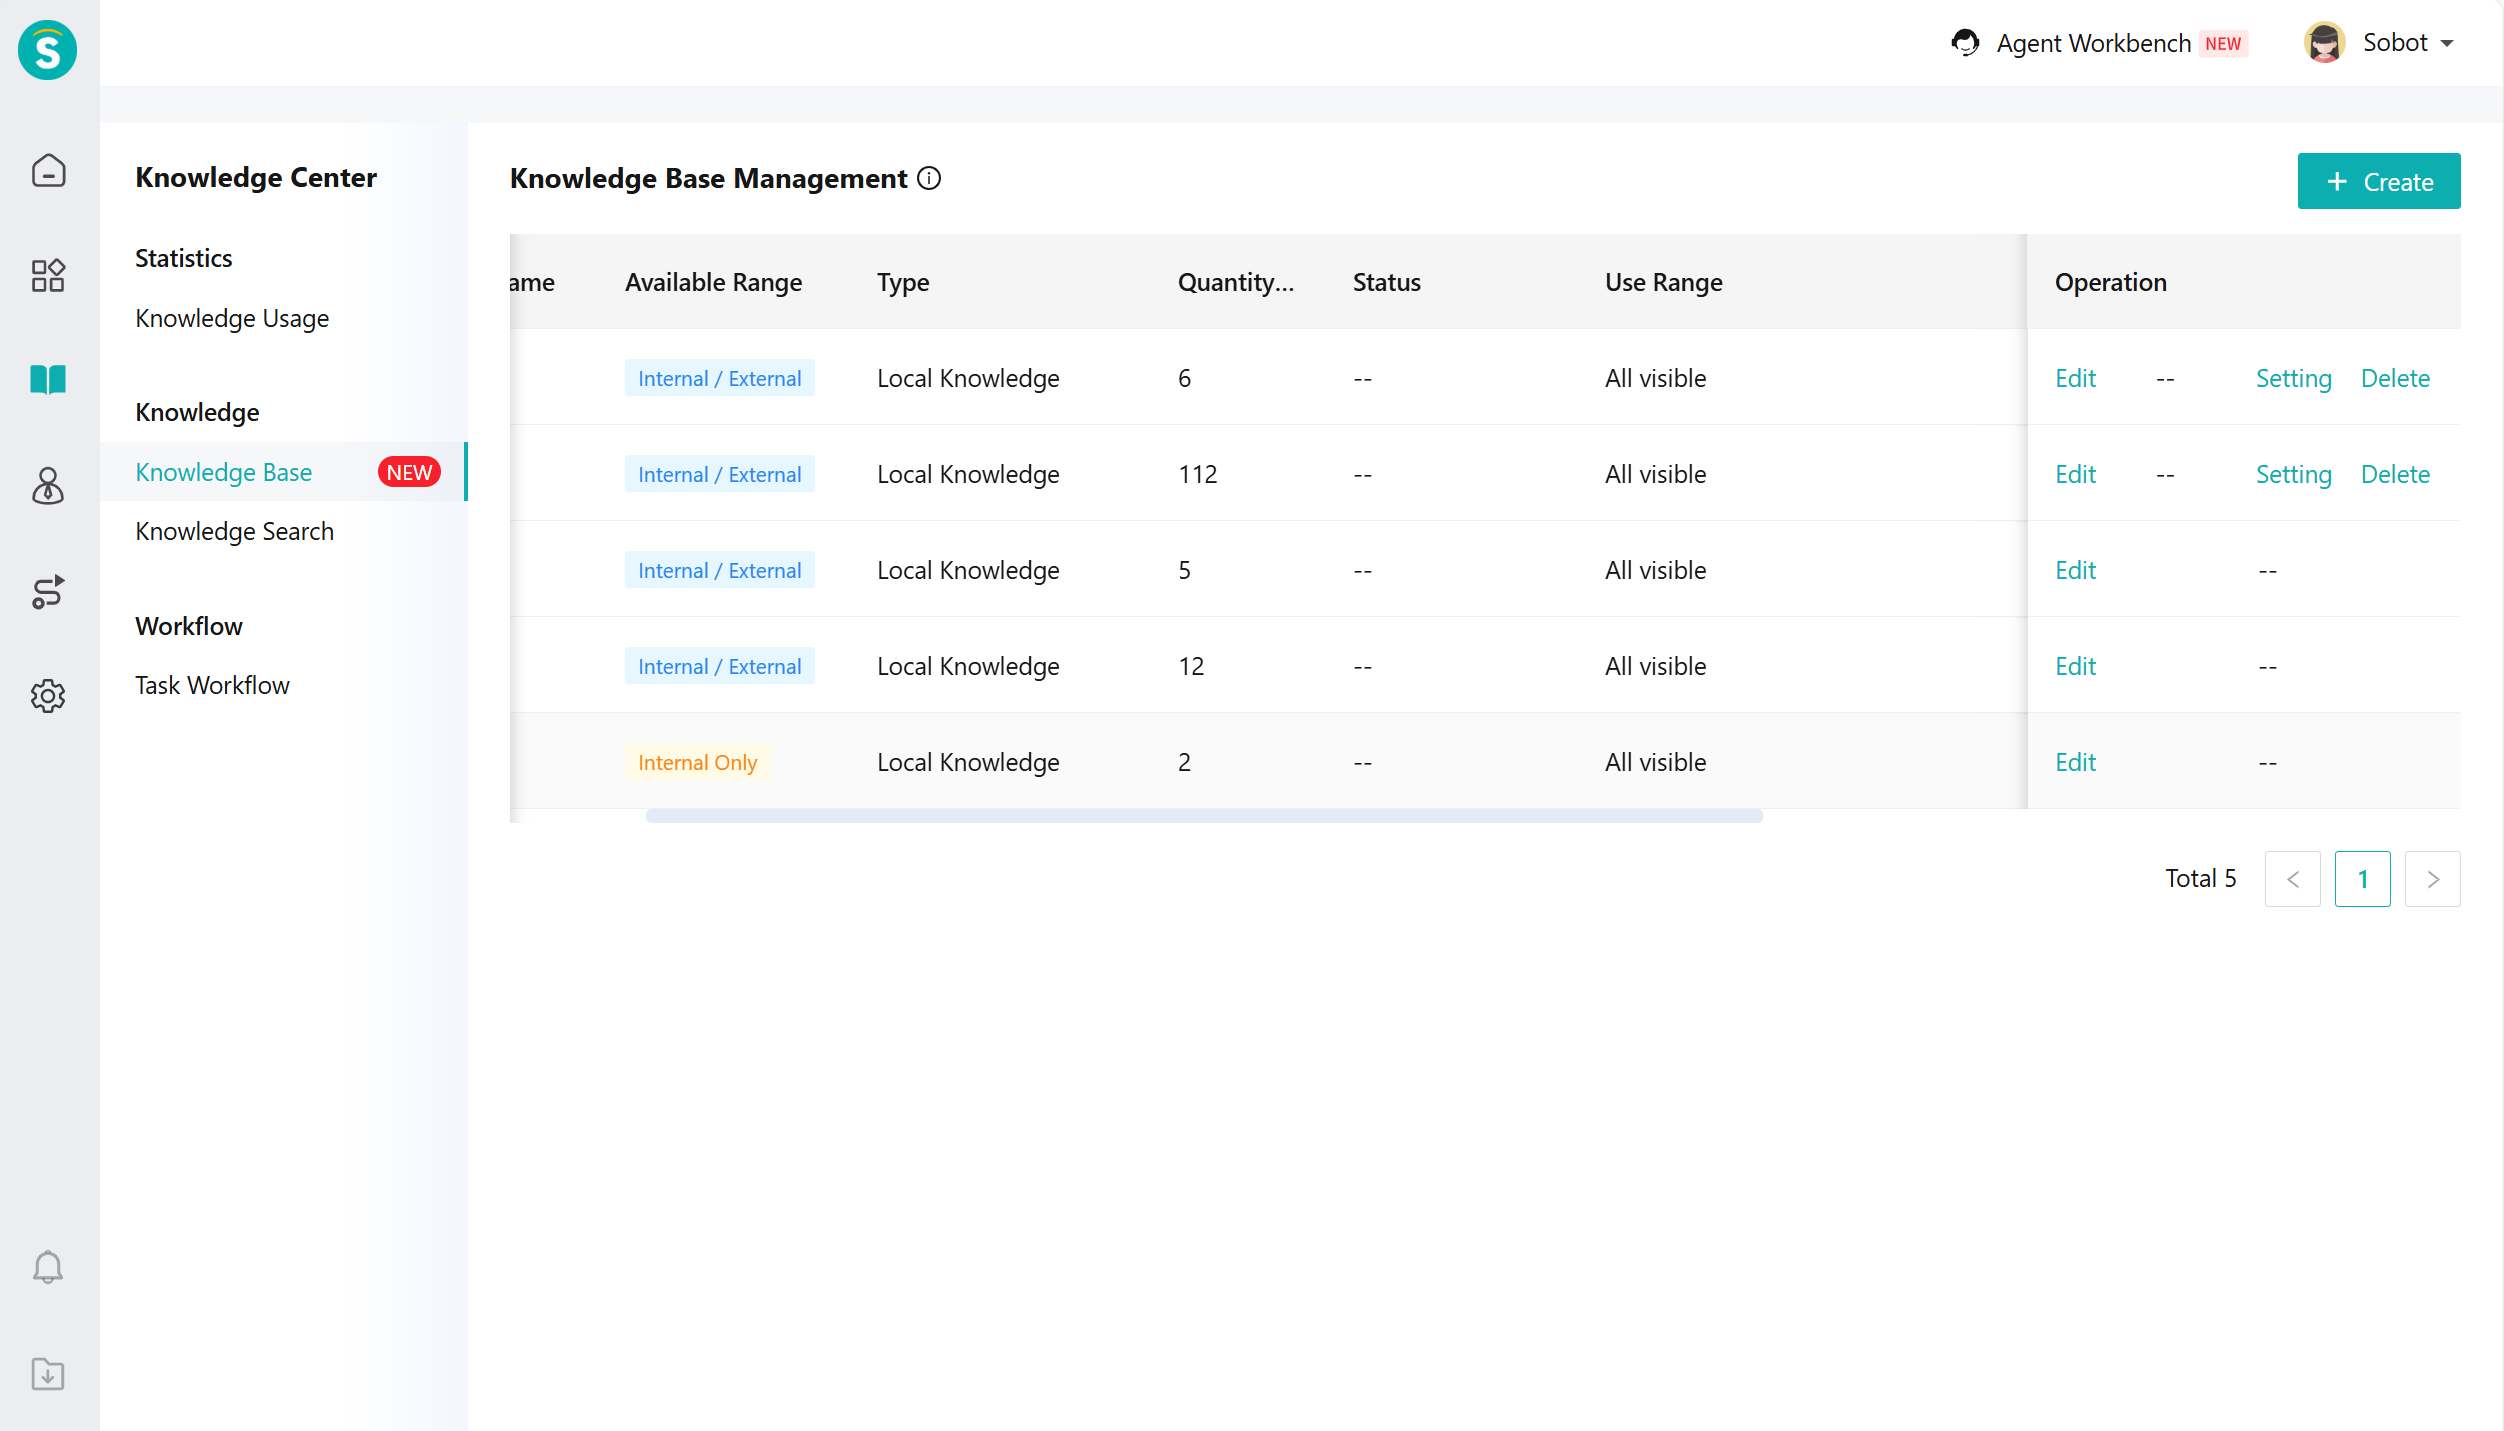
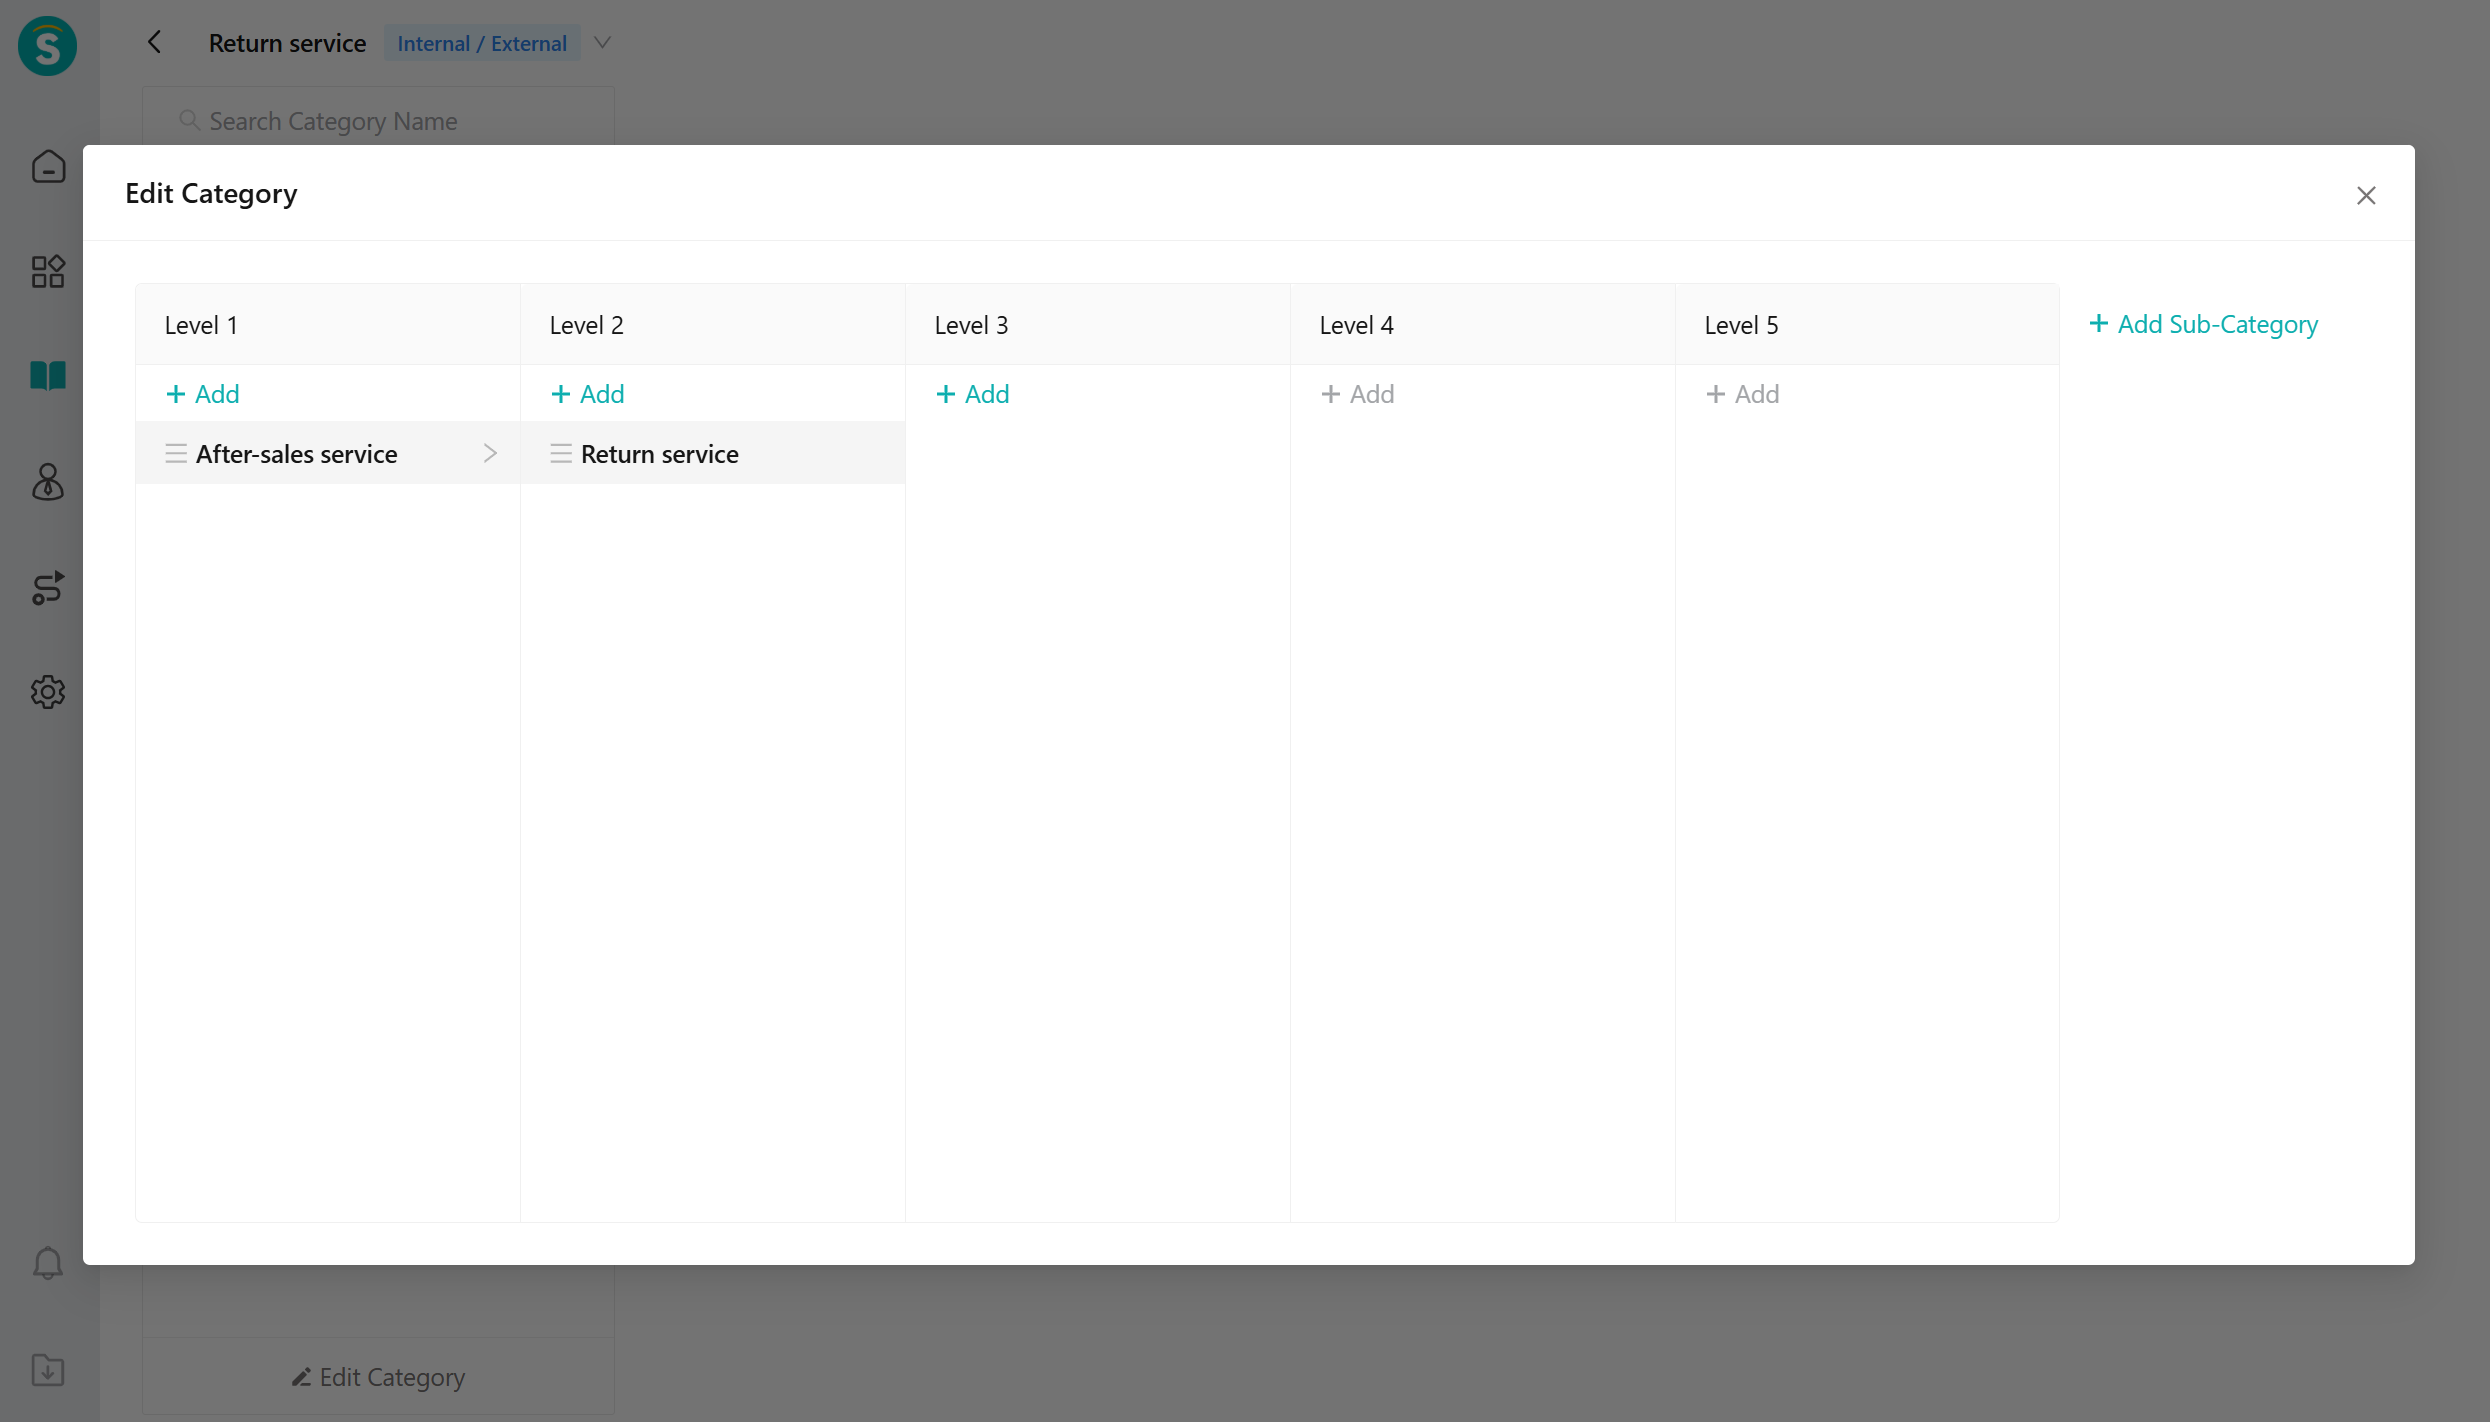
- Edit category services to the established knowledge base, and add the knowledge base.
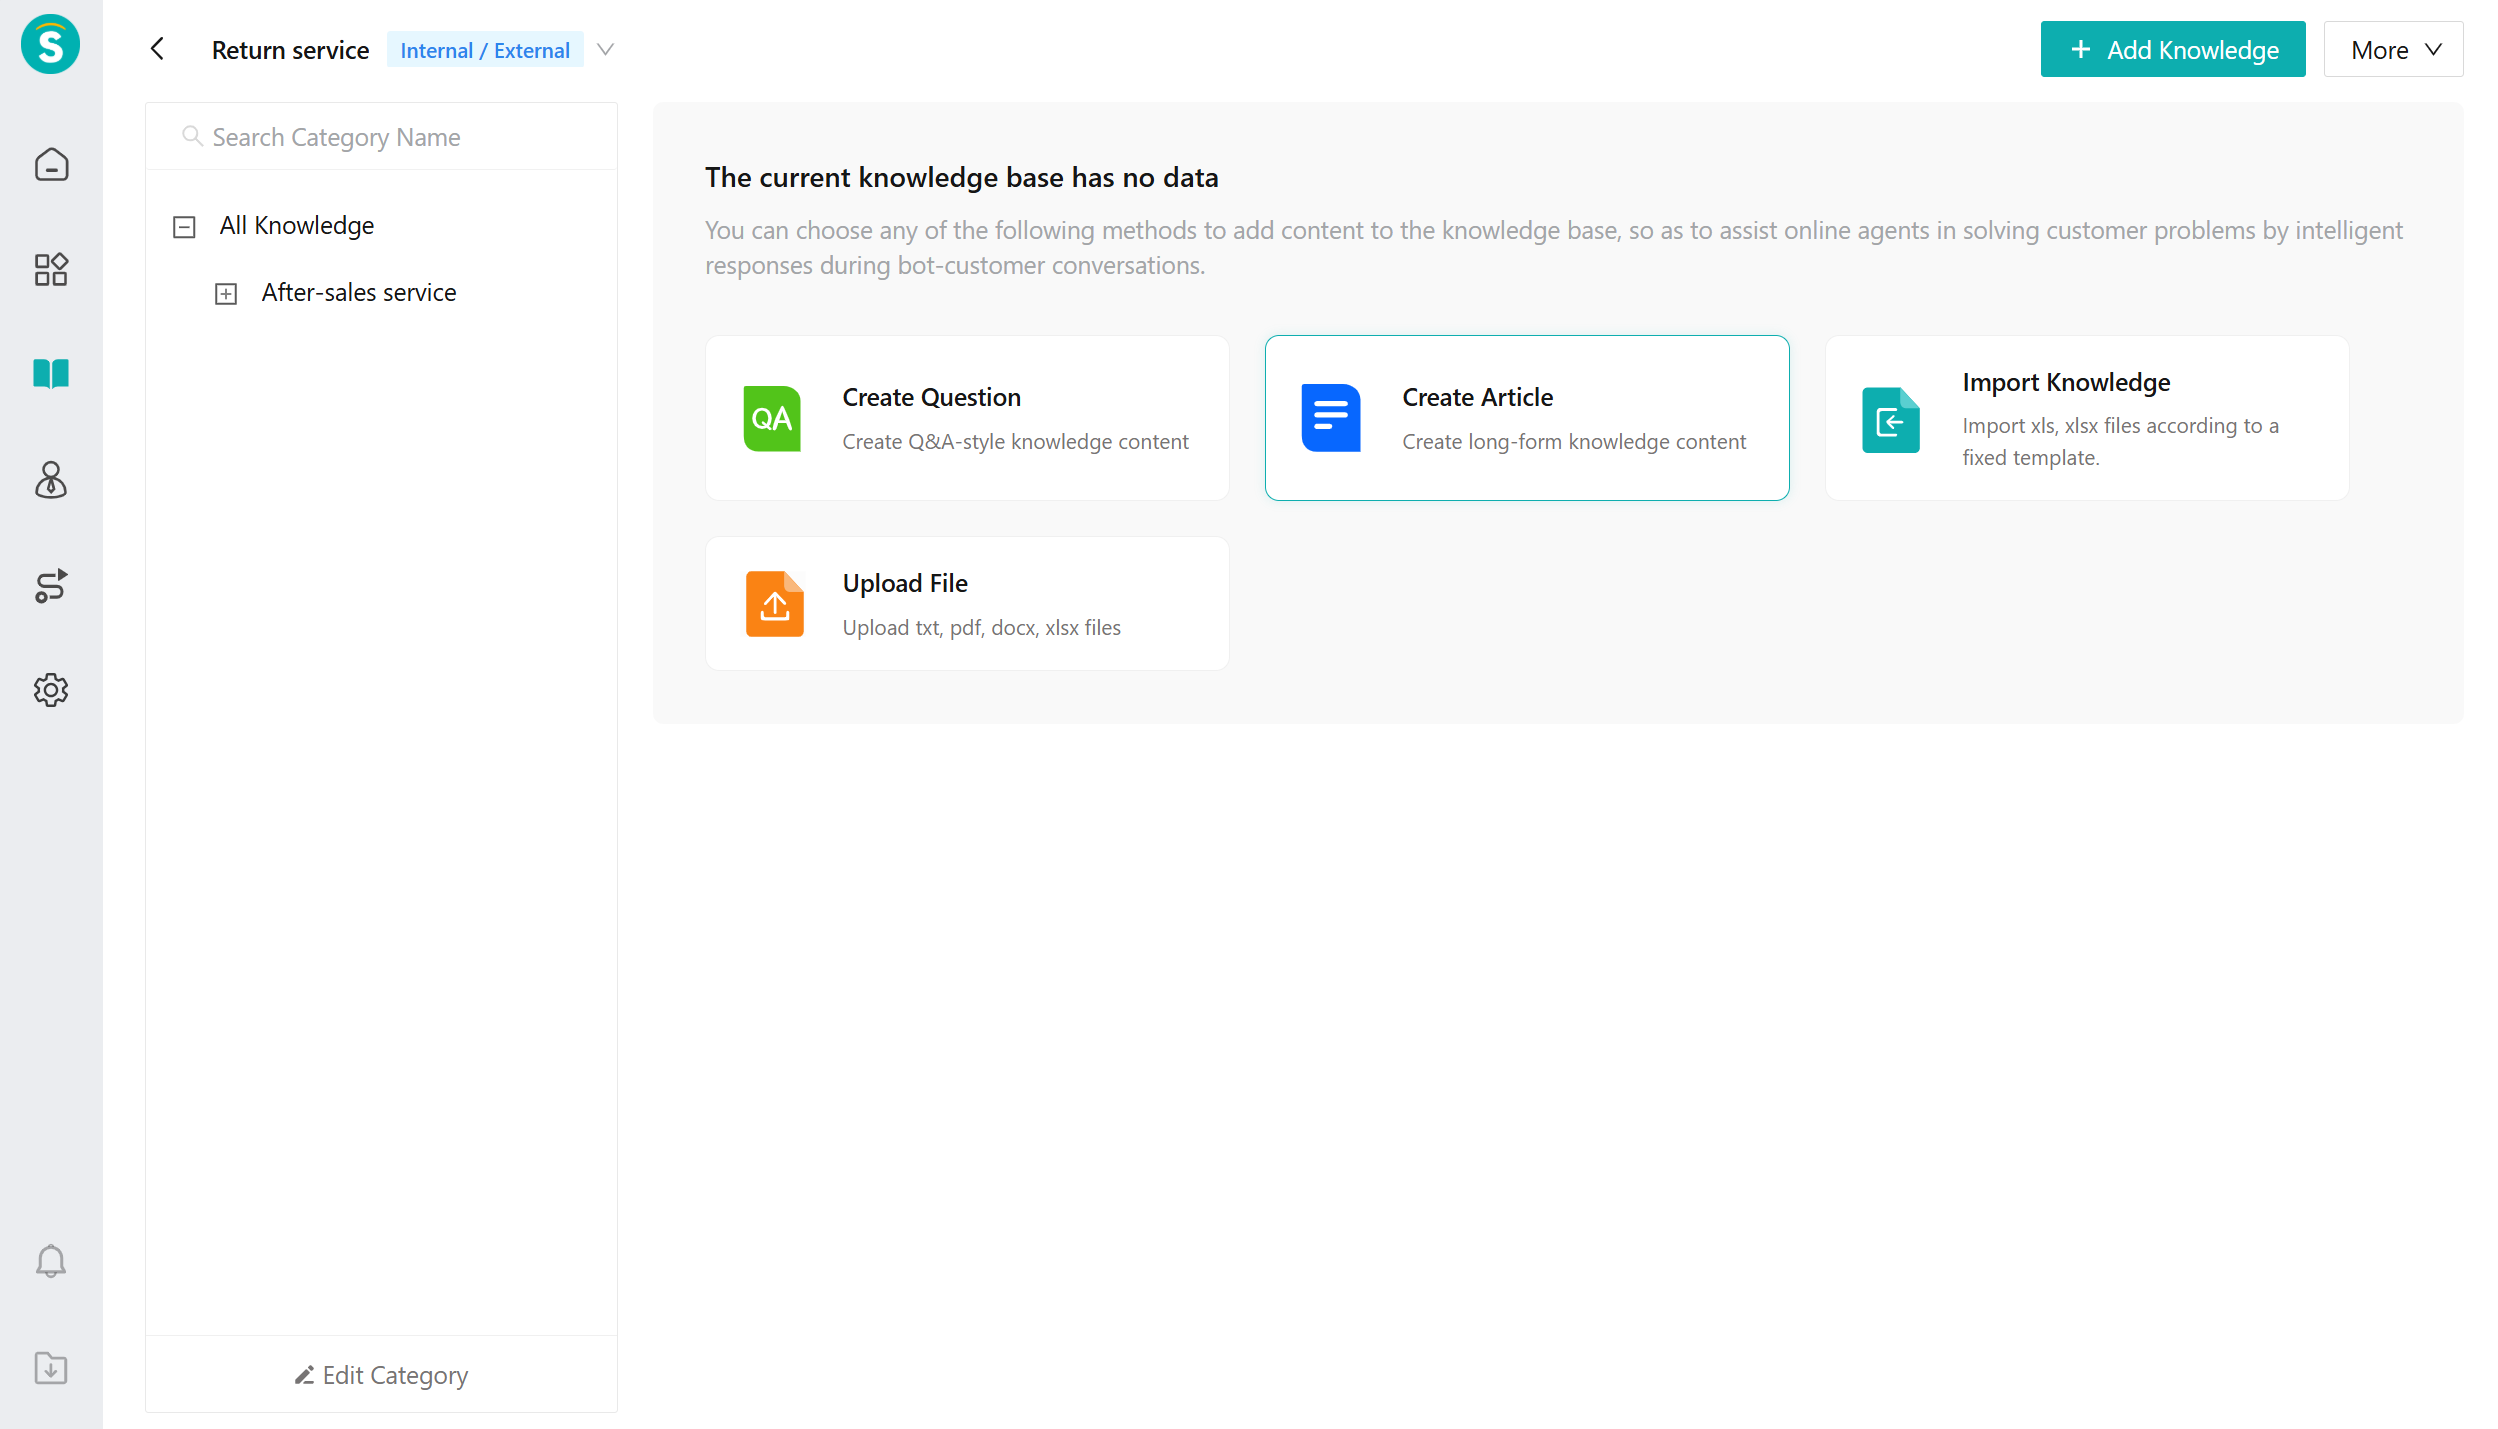
- After adding a knowledge base, you can continue to add knowledge bases for classified businesses. You can also enable, disable, set valid date, and export knowledge.

# ● Configure Task Workflow
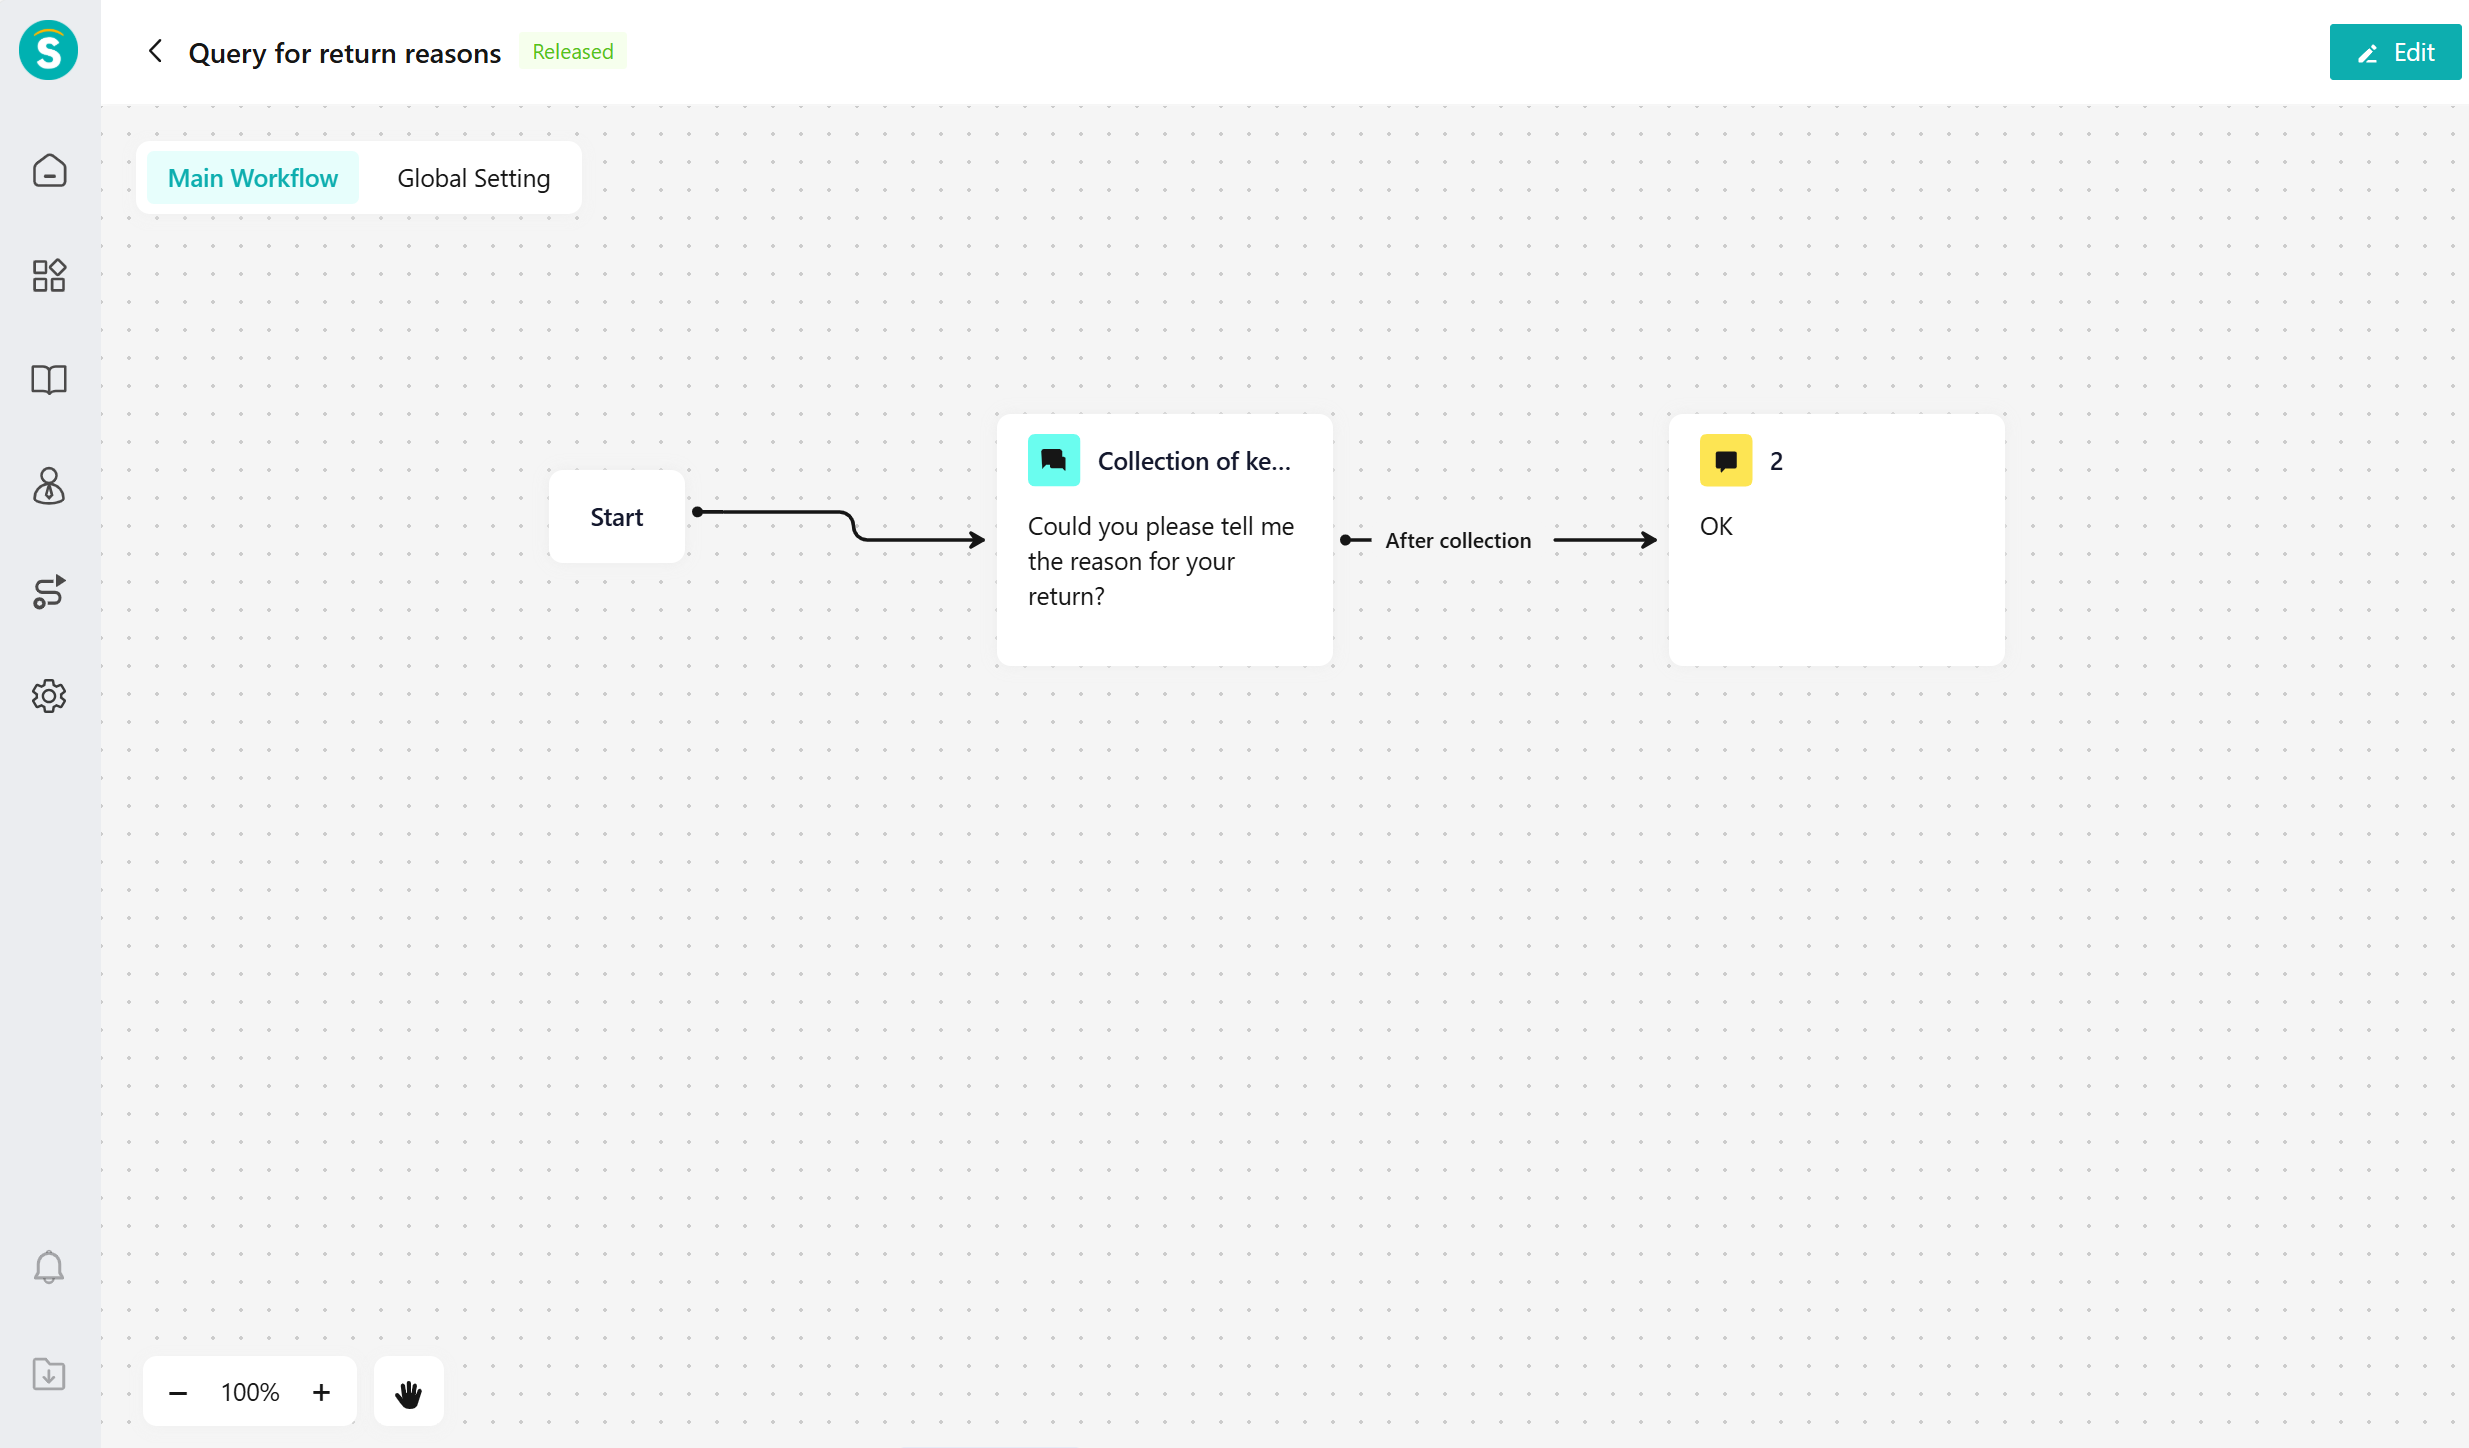
- Create a new task workflow in [Knowledge Center - Workflow - Task Workflow].
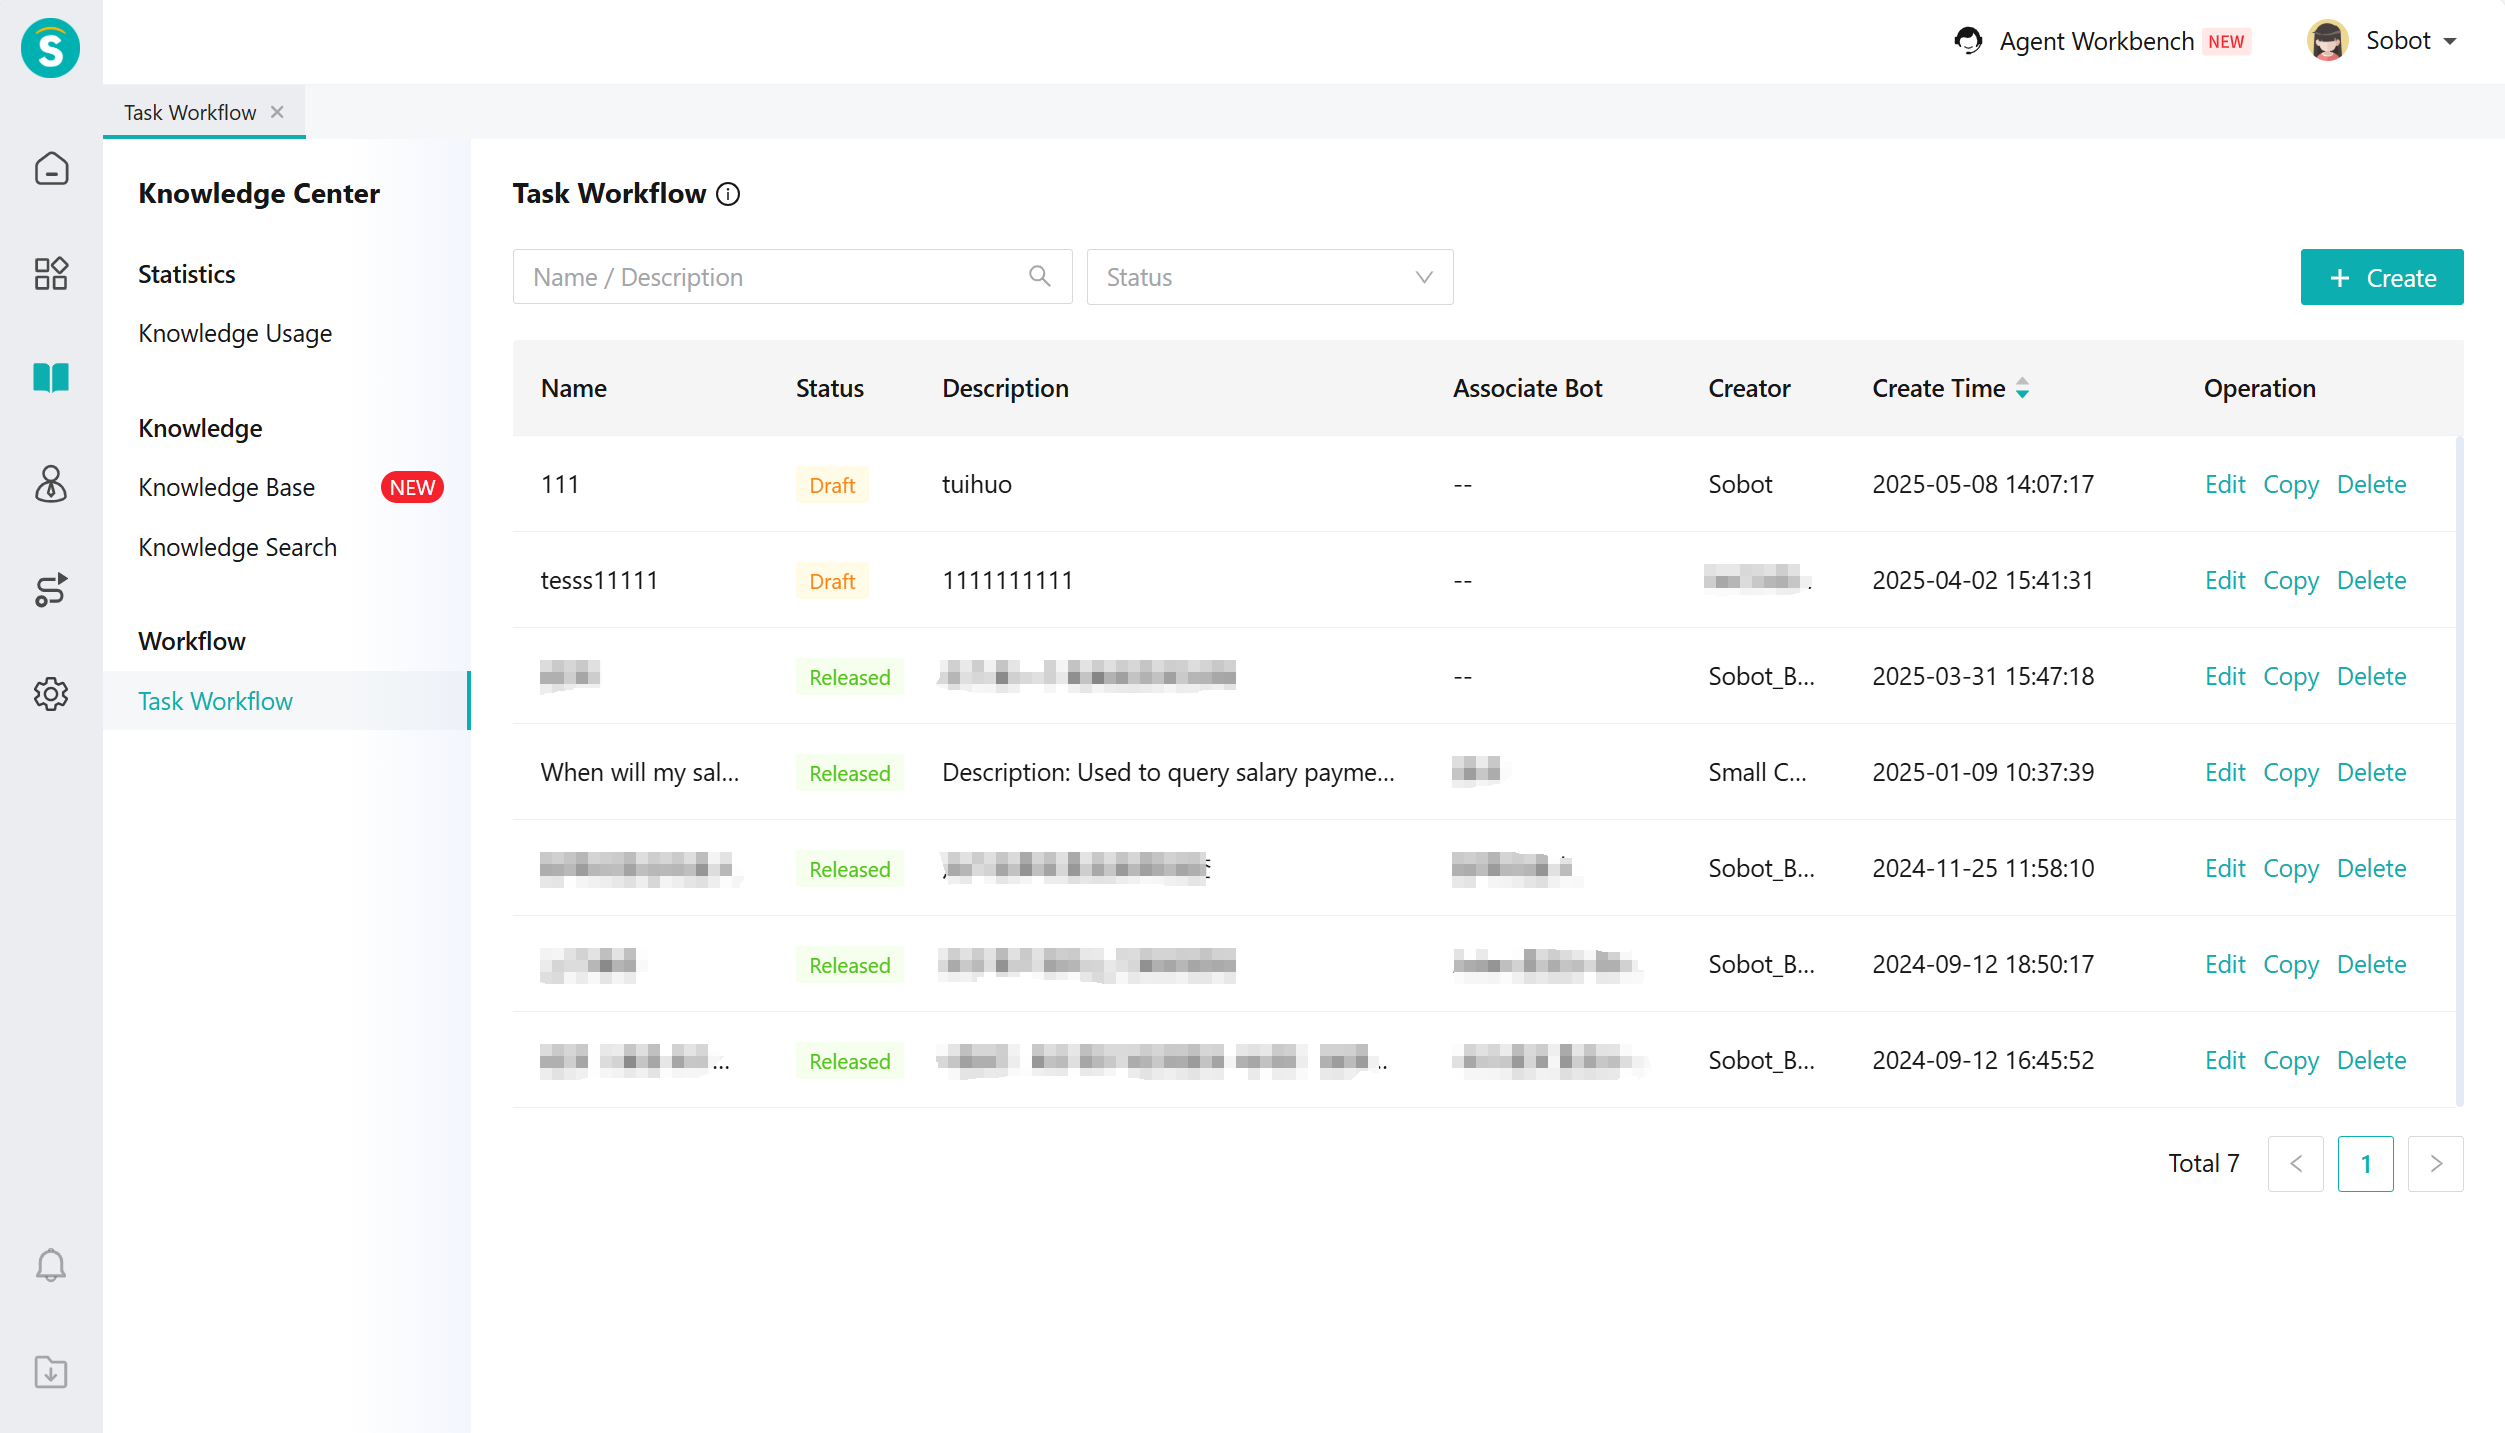
- Configure the main process for the task workflow.
# ● Configure AI Agent (Bind Knowledge Base and Task Workflow for AI Agent)
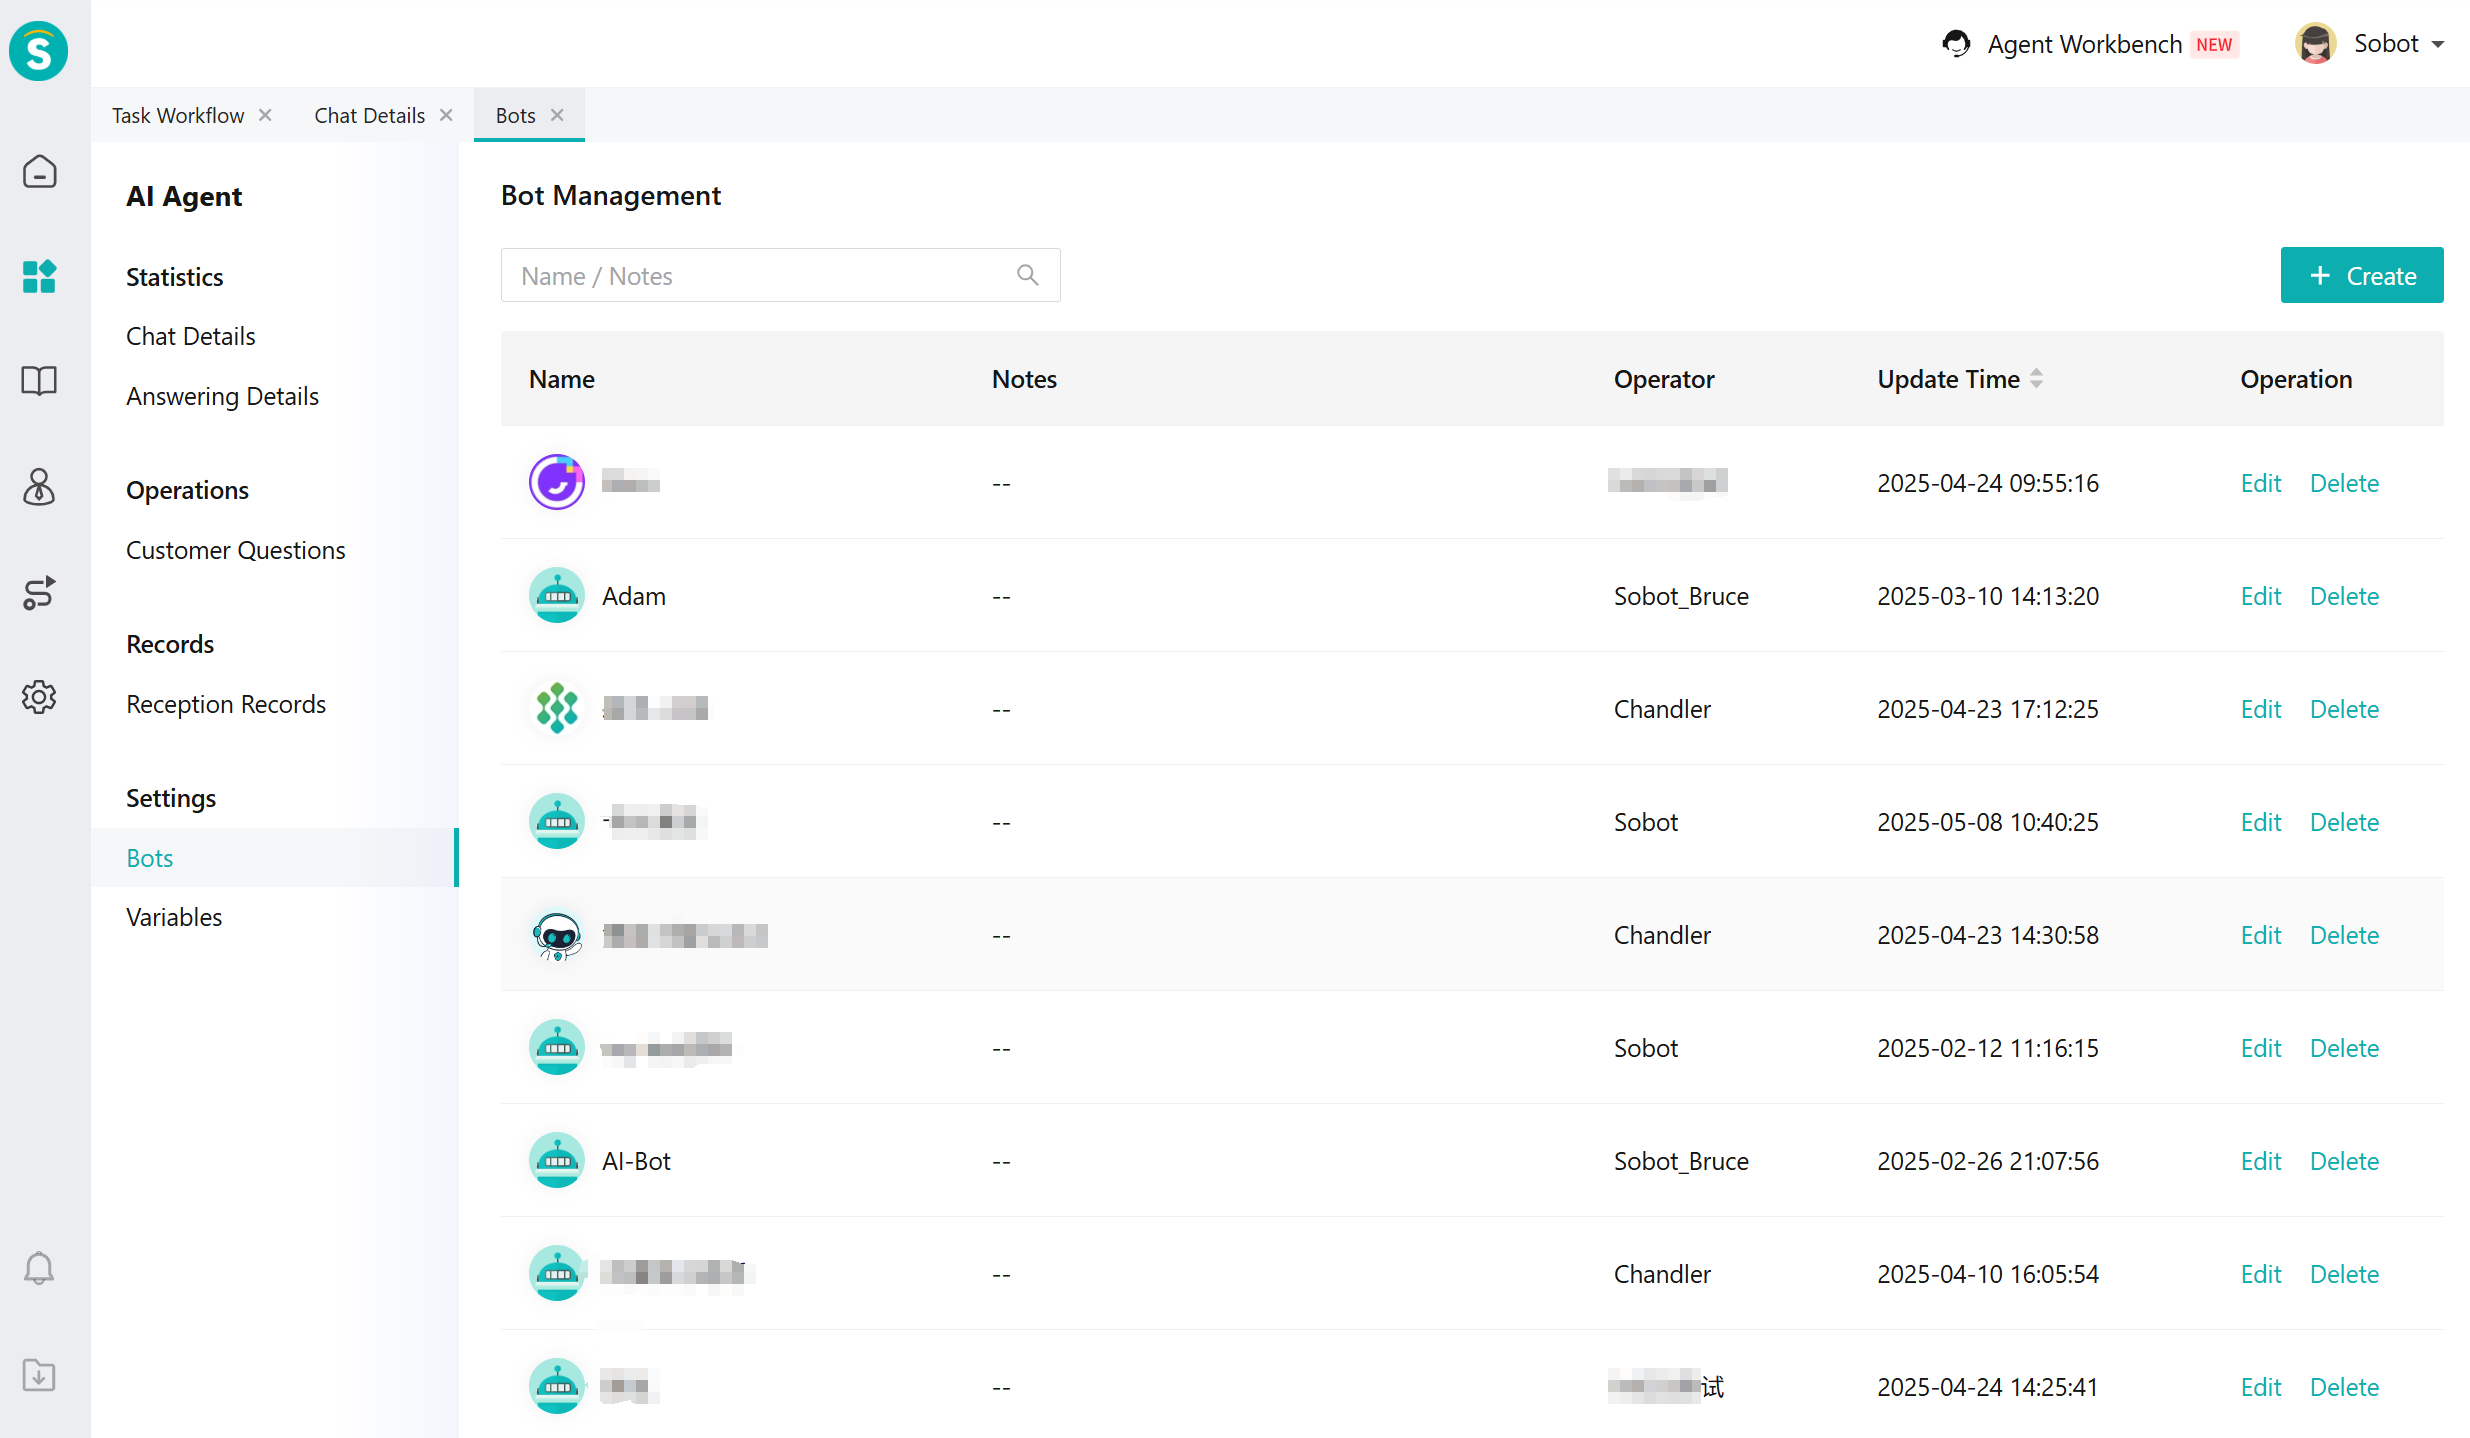
- Create an AI Agent in [AI Agent - Settings - Bot Management].
- In [AI Agent - Bot Management - Knowledge Management], bind the robot to the knowledge base.

- In the process of binding tasks for the robot in [AI Agent - Bot Management - Knowledge Management].

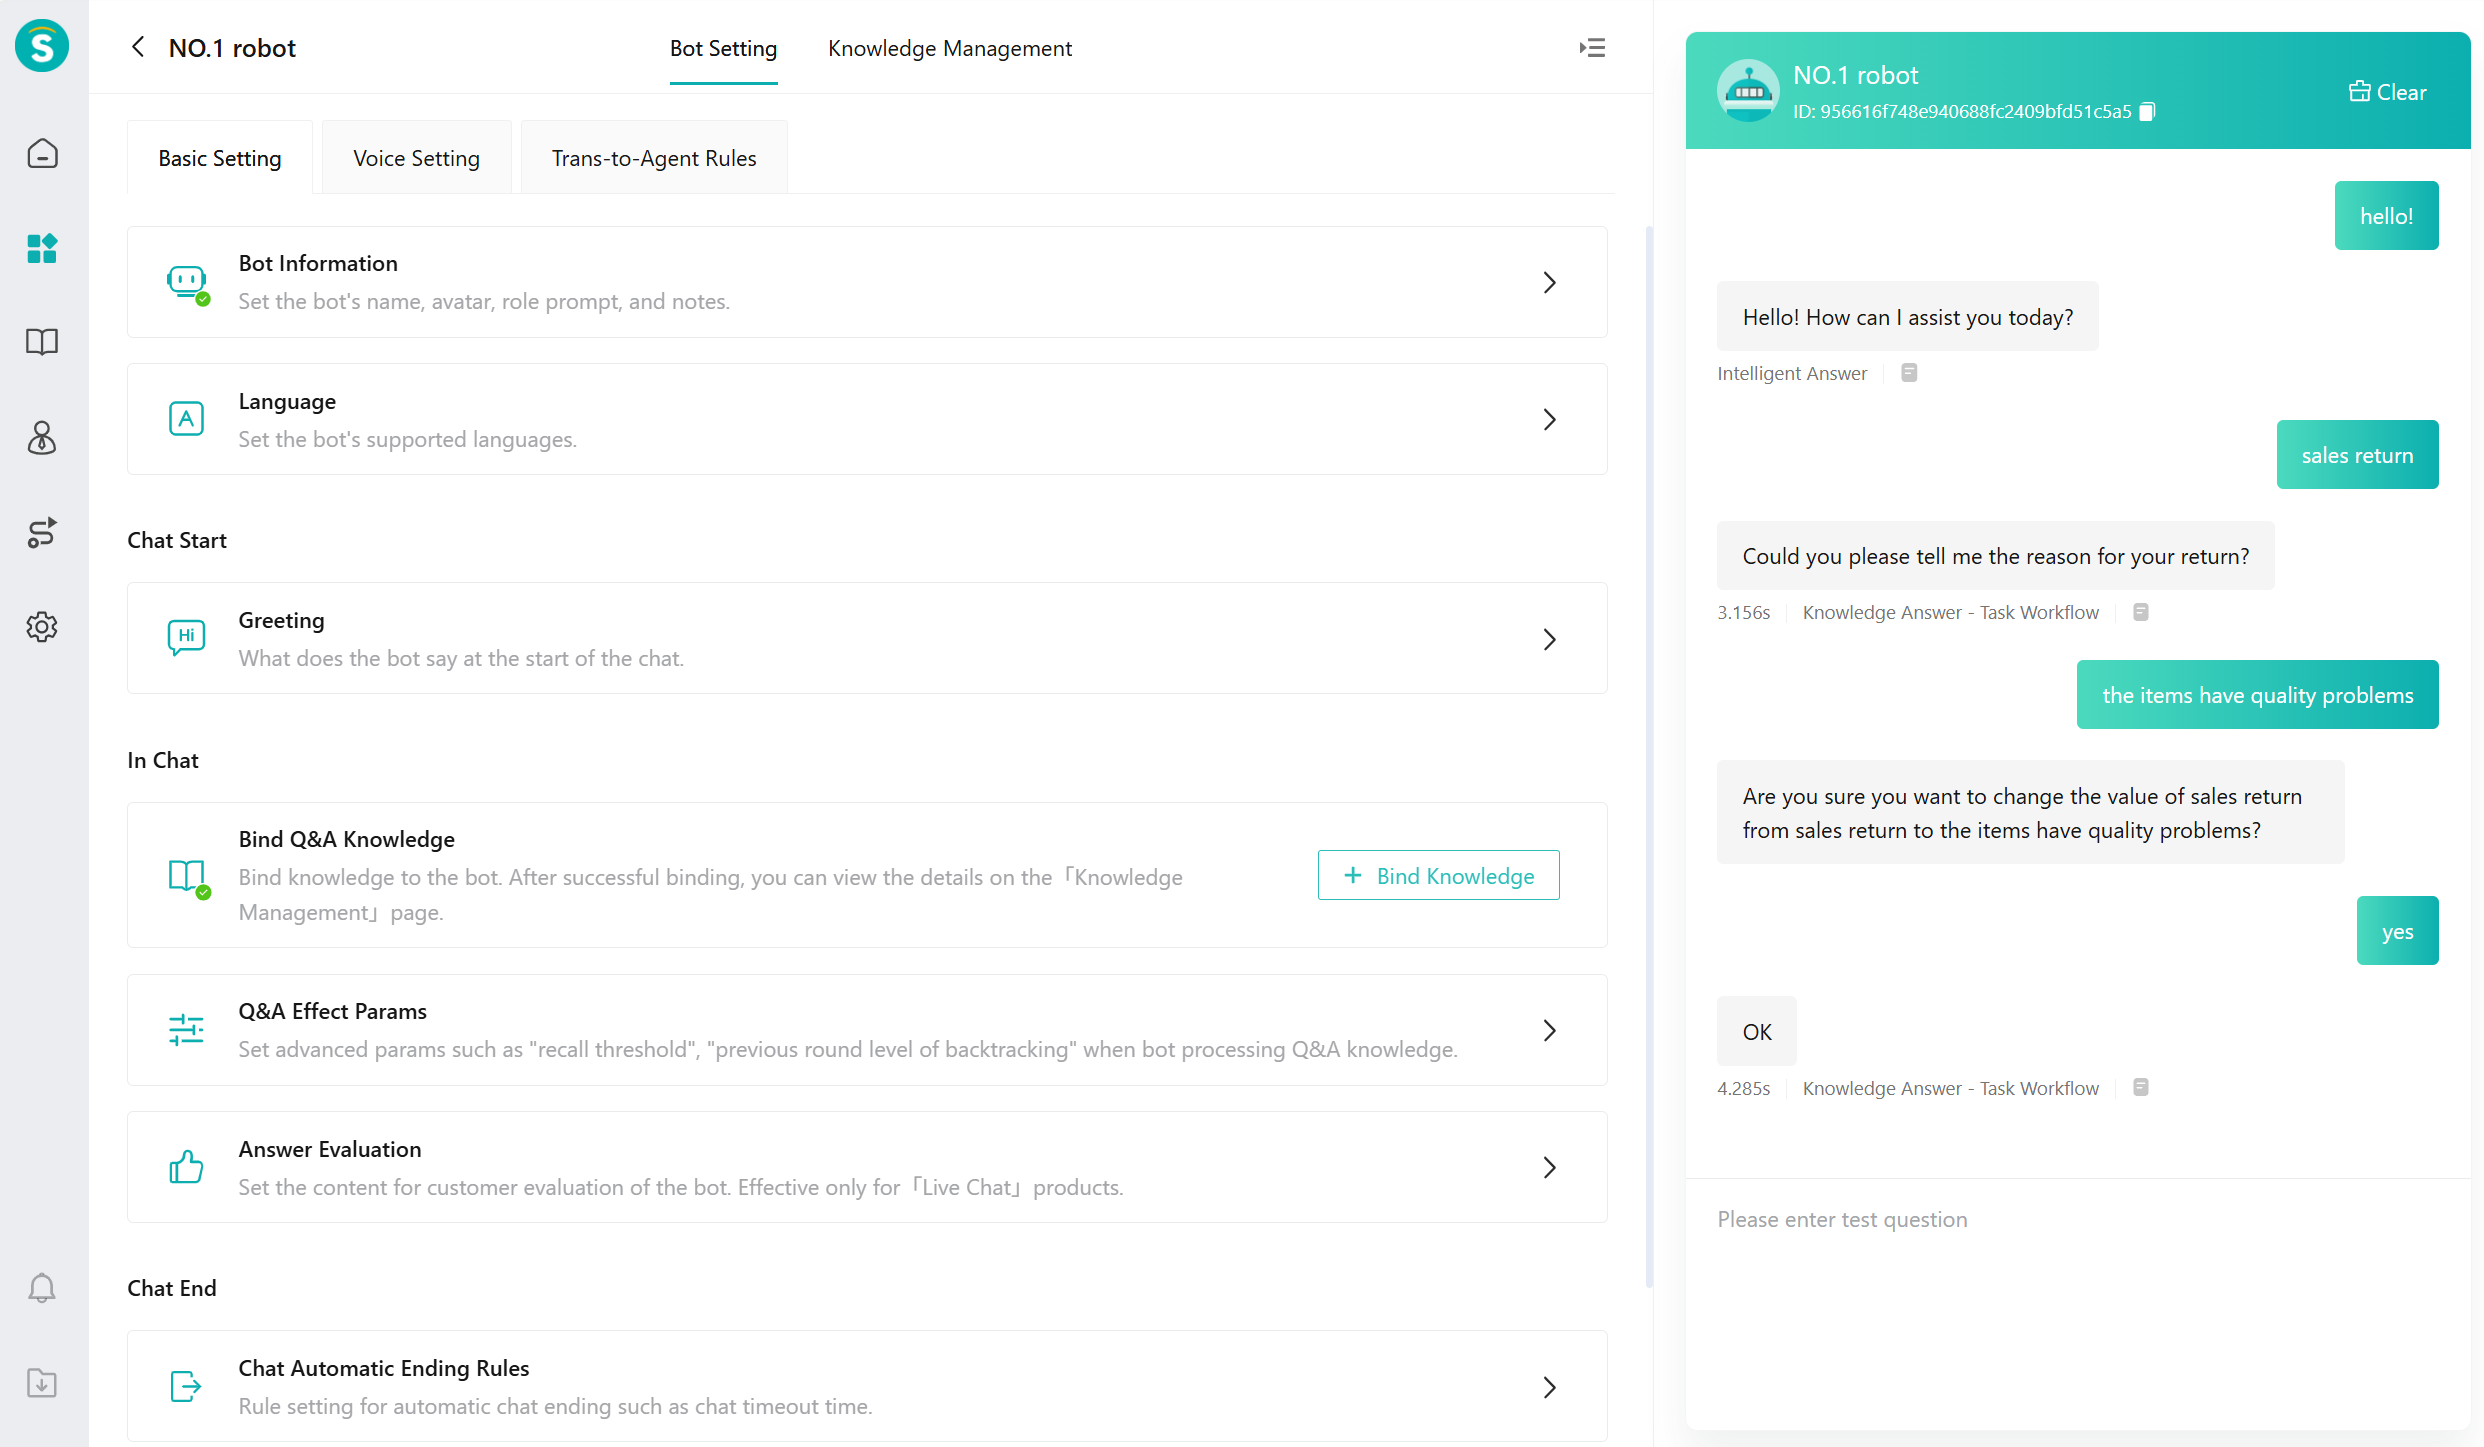
- Set up the robot in [AI Agent - Bot Management - Bot Setting]. This includes role prompt, welcome messages, Q&A effect parameters, conversation evaluation, voice settings, and rules for transferring to human agents.

# ● Deploy AI Agent to Live Chat, Call Center, and Ticketing.
- Deploy AI Agent to live chat
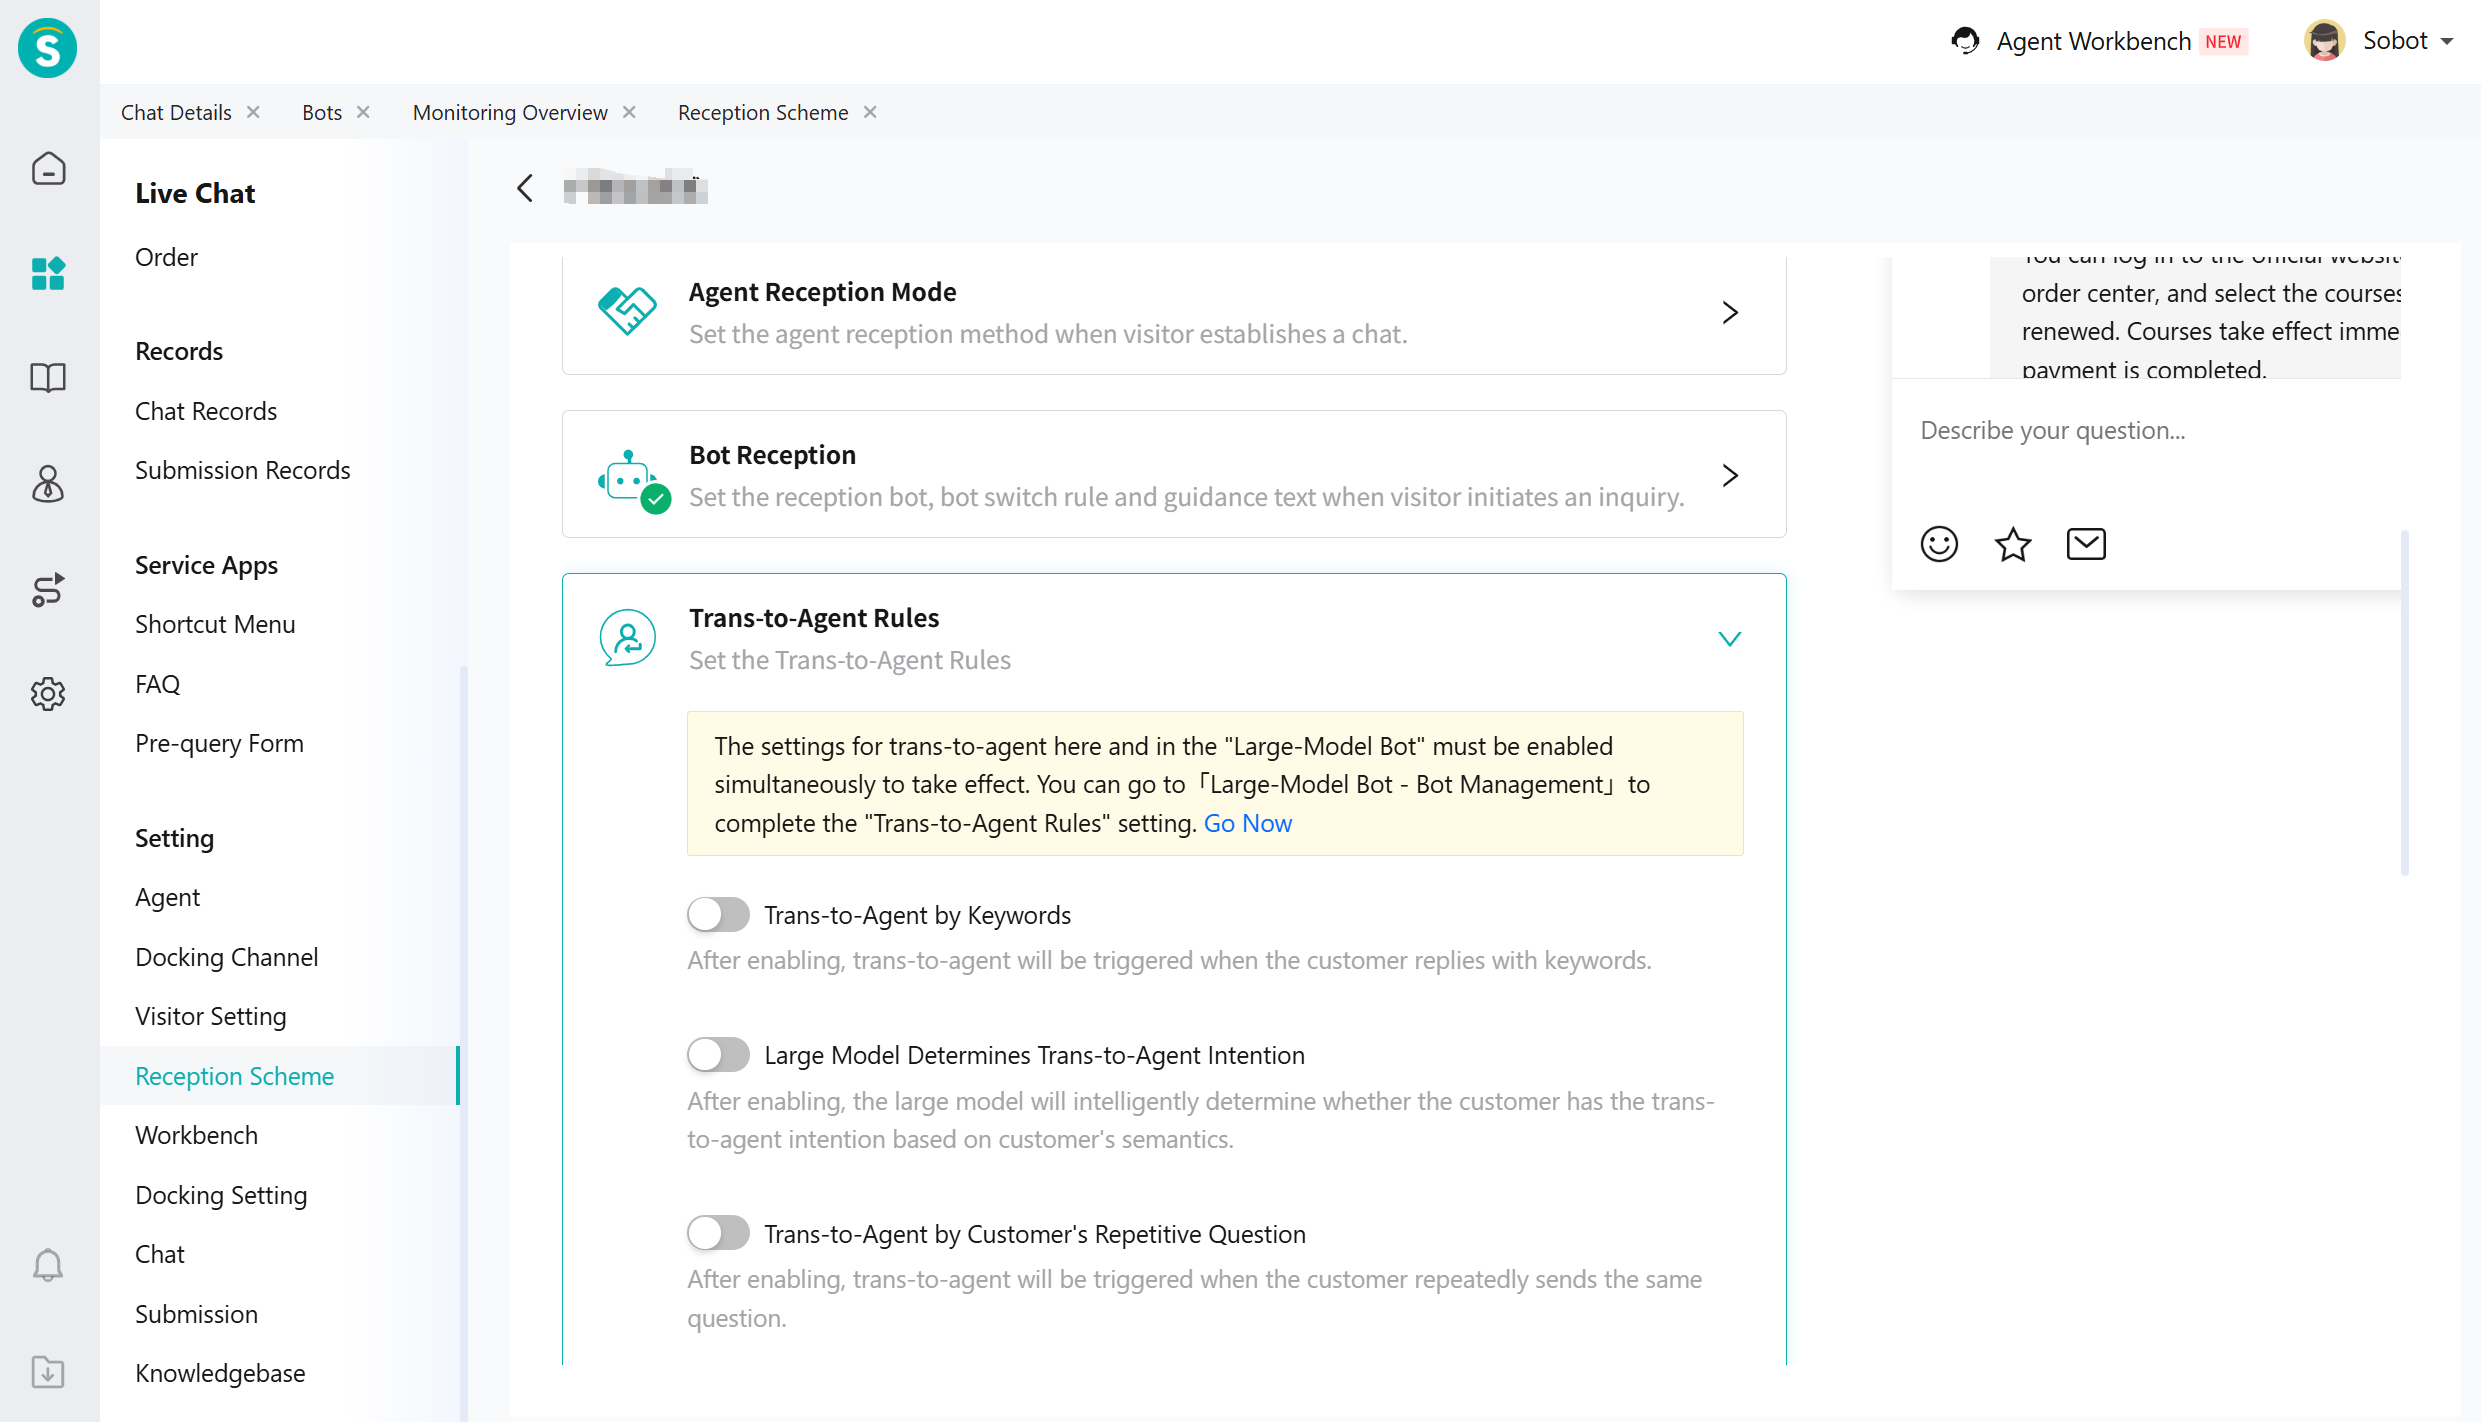
a.Set the AI Agent to use in [Live Chat - Setting - Reception Scheme - Bot Reception].

b.Set up the Trans-to-Agent Rules in [Live Chat - Setting - Reception Scheme - Trans-to-Agent Rules].
c.In [Live Chat - Setting - Chat - Customer Assignment Strategy], set up the routing for customer service. When a customer initiates a consultation and meets the preset trigger conditions, the customer will be allocated to the designated customer service representative or skill group according to the set allocation rules.

d.In [Live Chat - Service Apps - FAQ], provide personalized FAQs for different users: Based on the customer's identity and the conversation stage they are in, offer dedicated FAQ guidance so that the AI Agent can use the FAQs during the reception phase.

- Deploy AI agent to call center
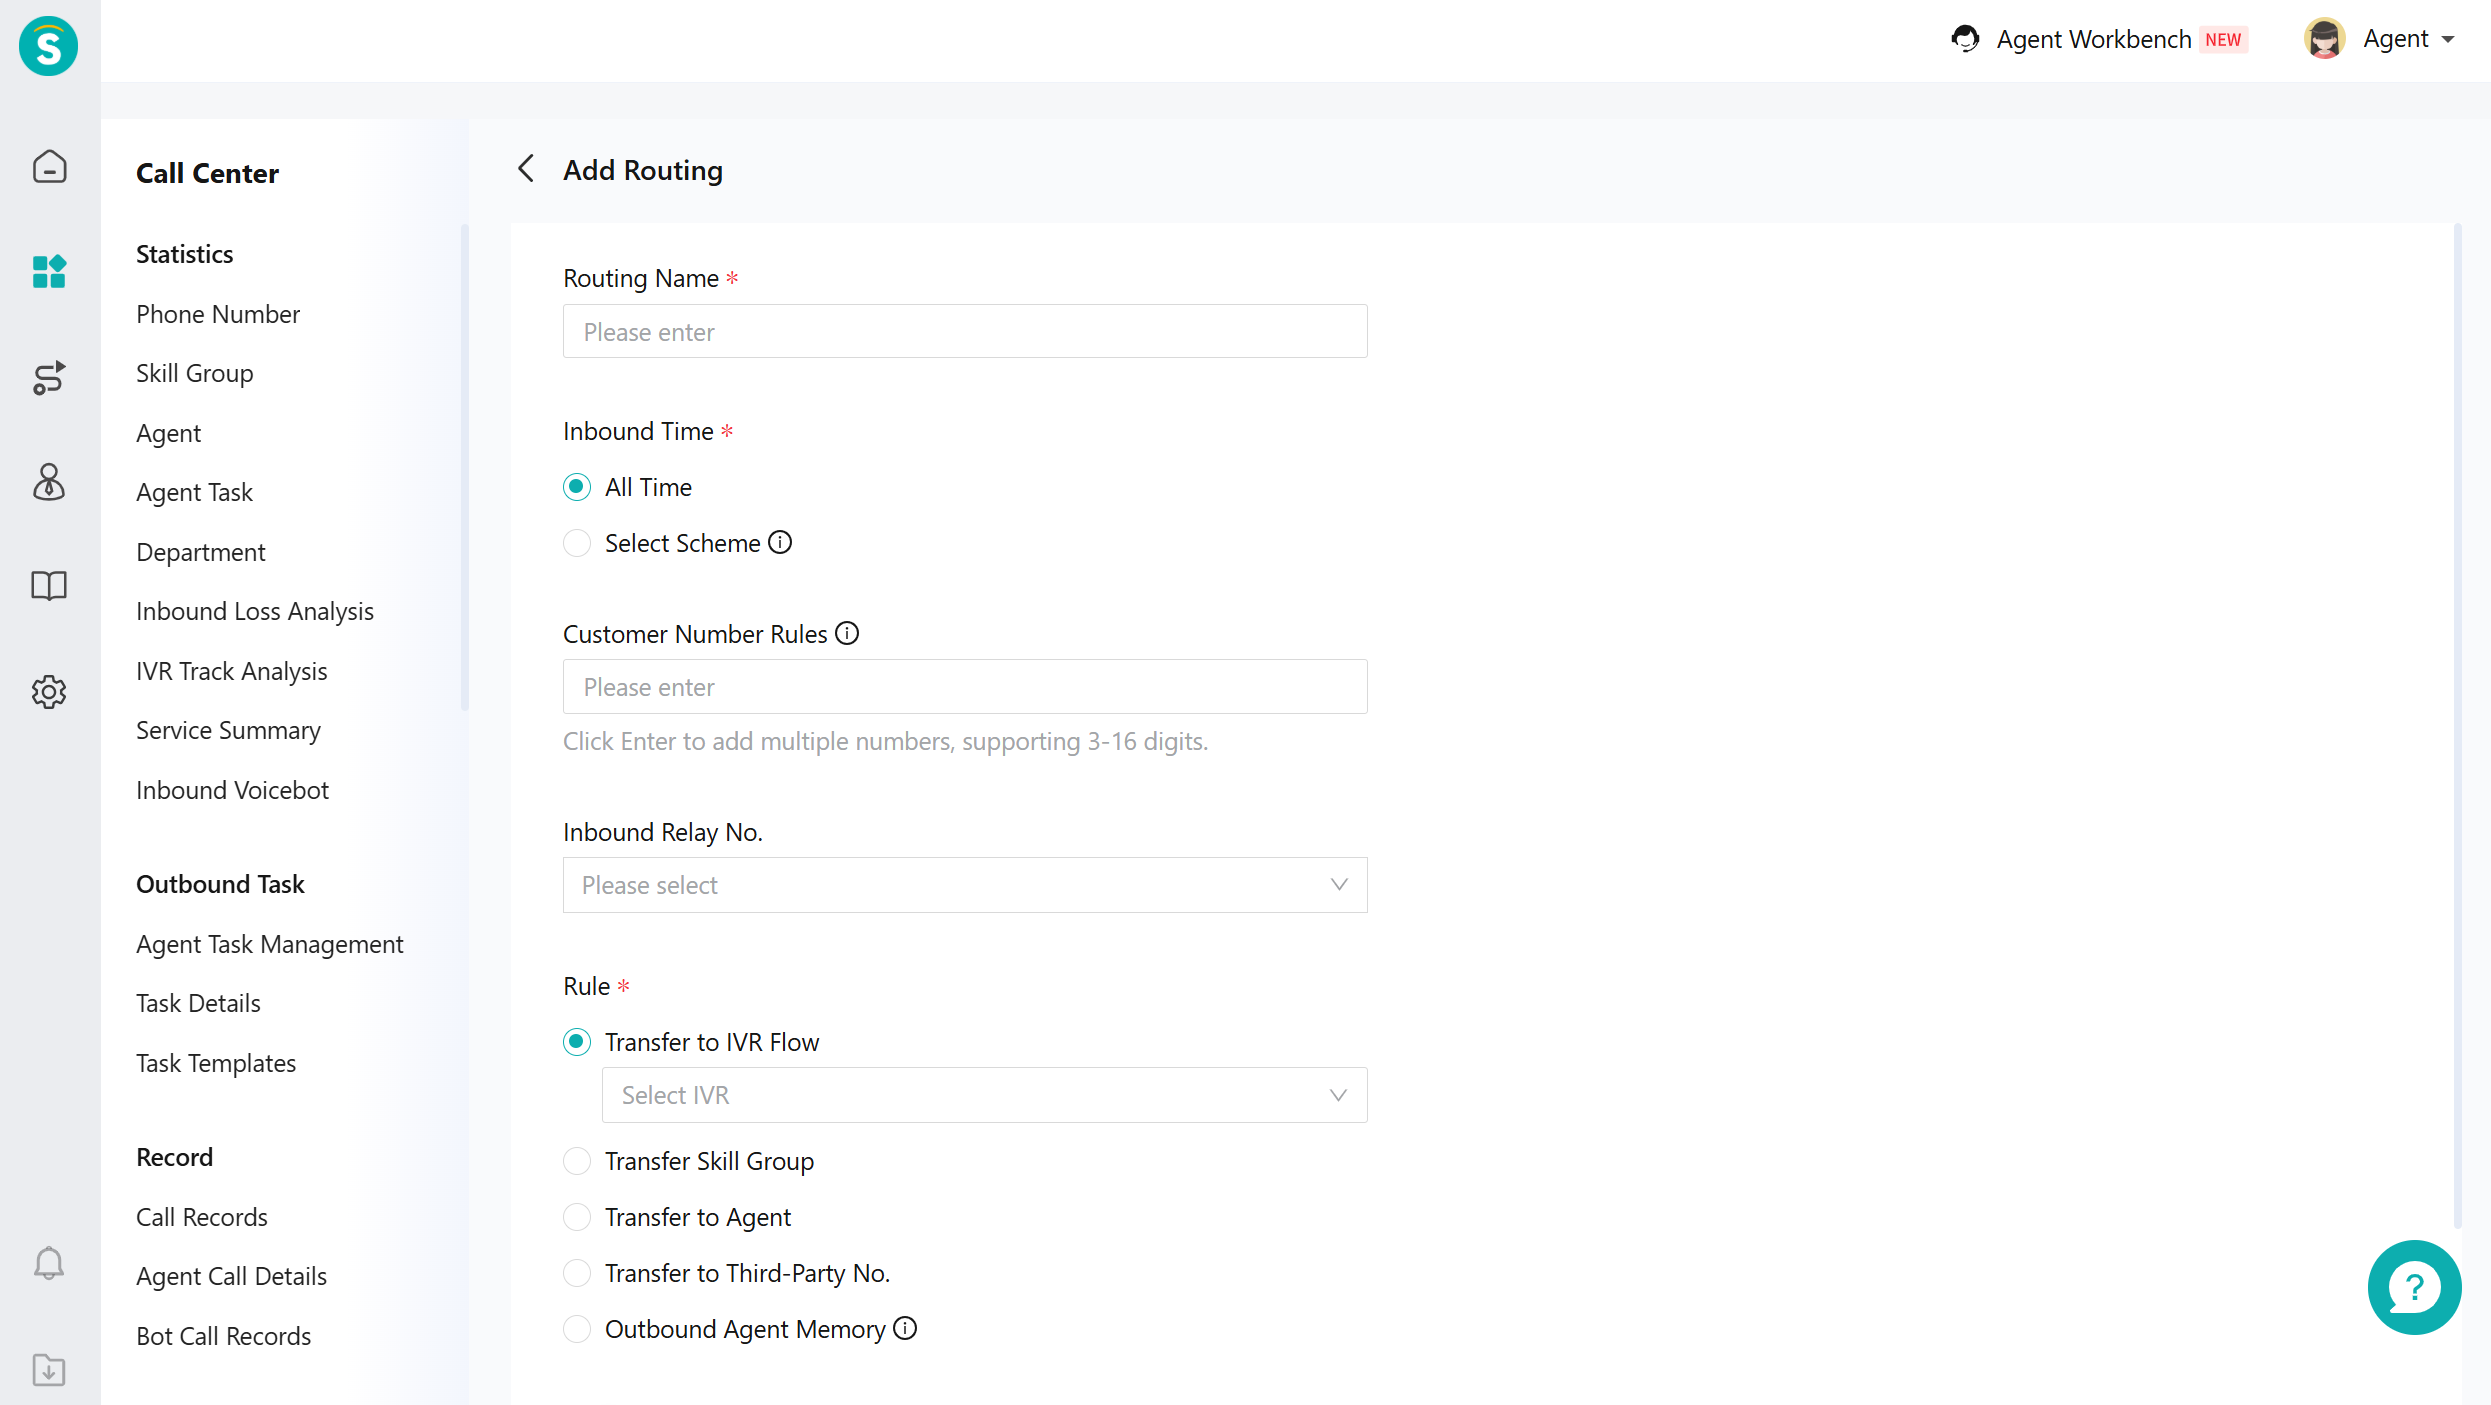
a.In [Call Center - Setting - Inbound Routing], configure routing for the customer: The customer can call the number normally only after the routing is configured.When it is necessary to specify the relay number, assign the customer to the IVR process (robotic reception can only be achieved within the IVR process).
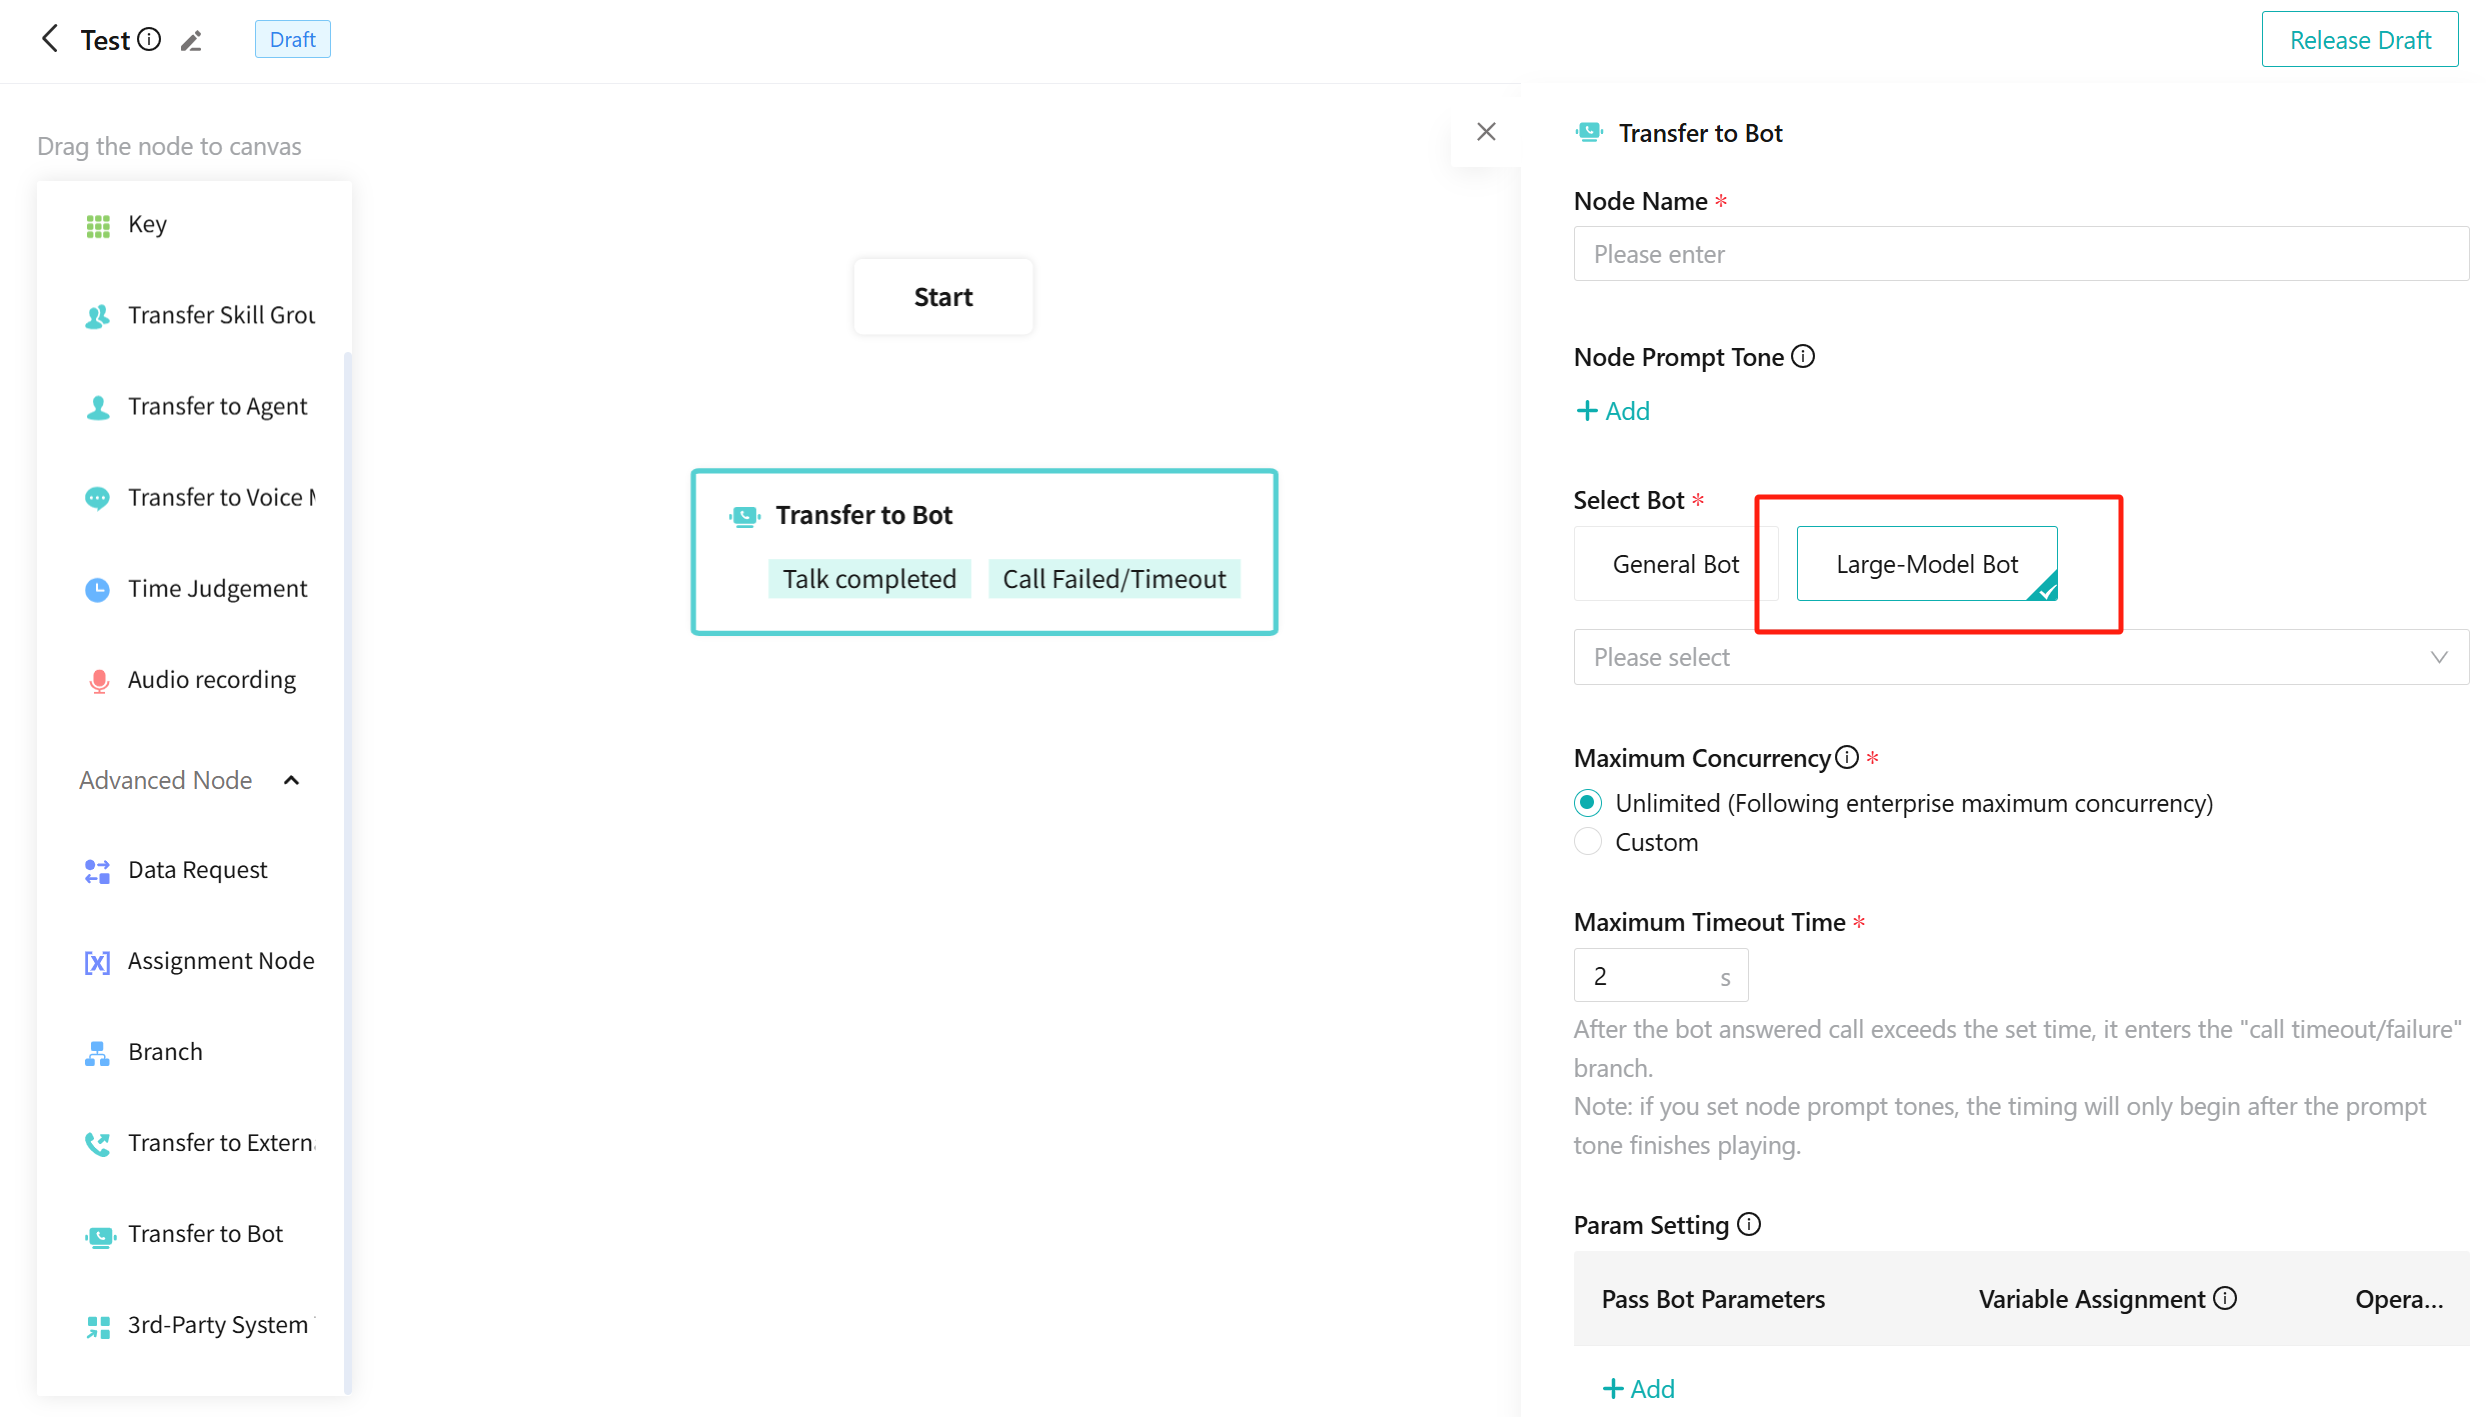
b.In the [Call Center - IVR Process], select the large-model bot used in the robot node.
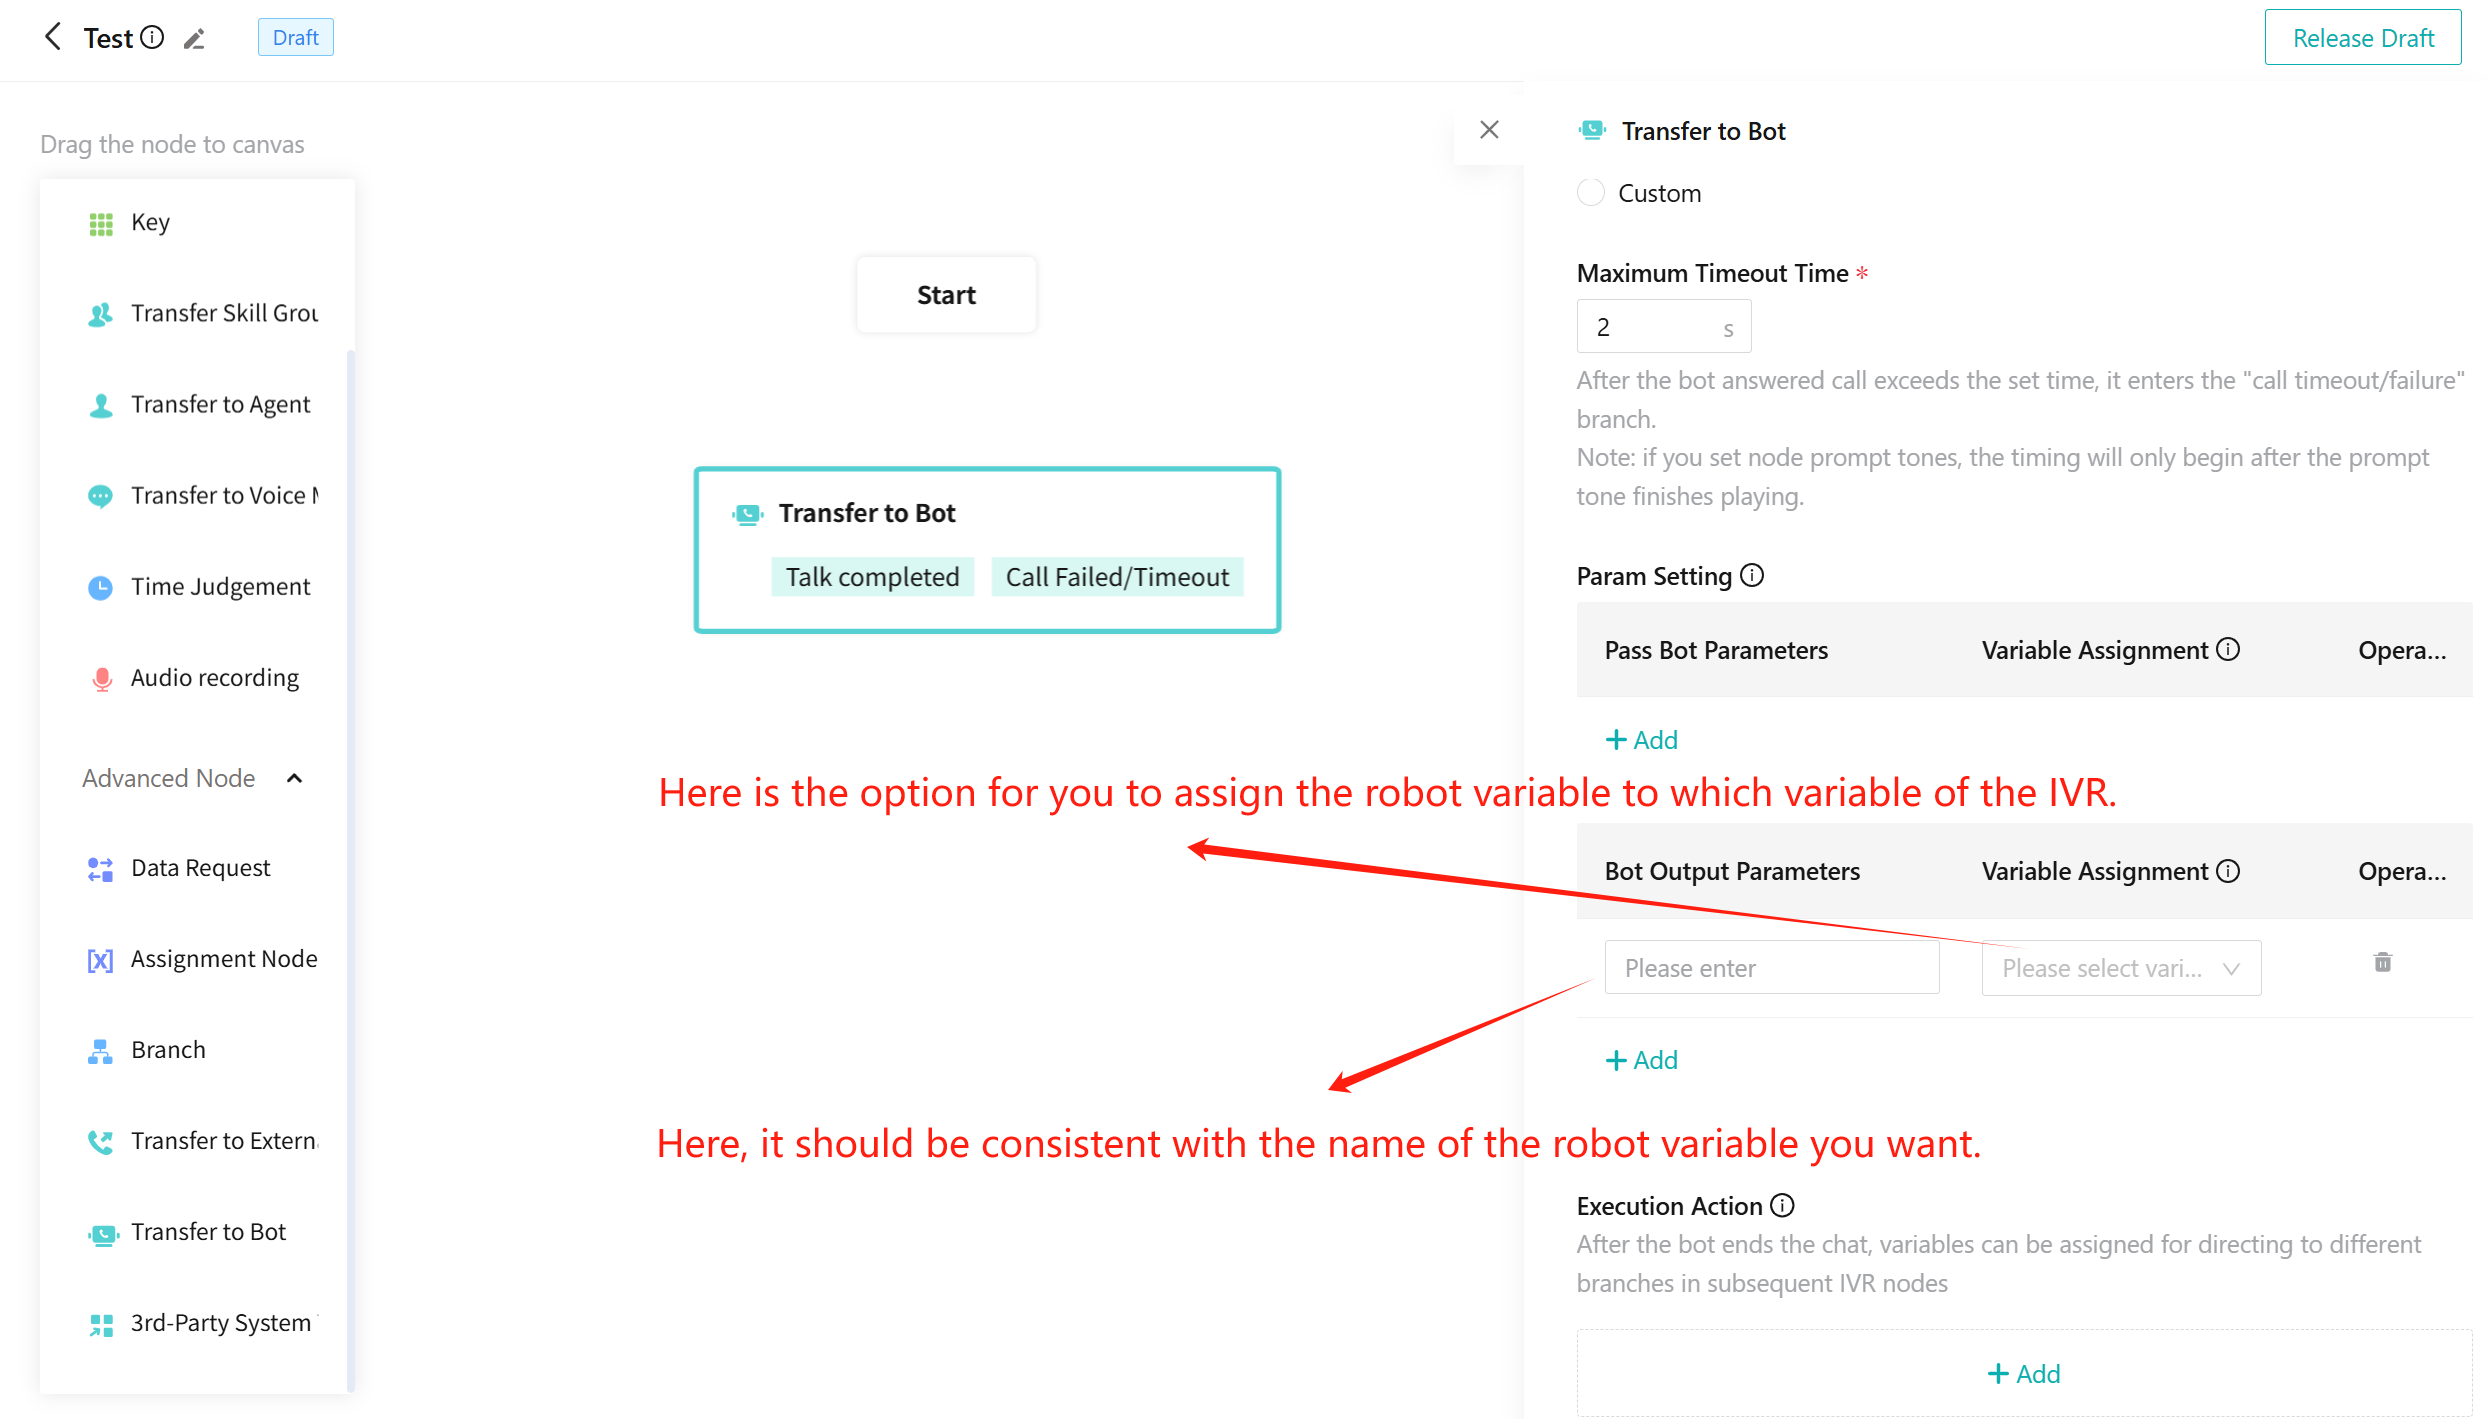
c.After the AI Agent conversation ends, fill in the robot variable name (not the code) in the robot output parameters. This can assign the AI Agent variable to the IVR variable.
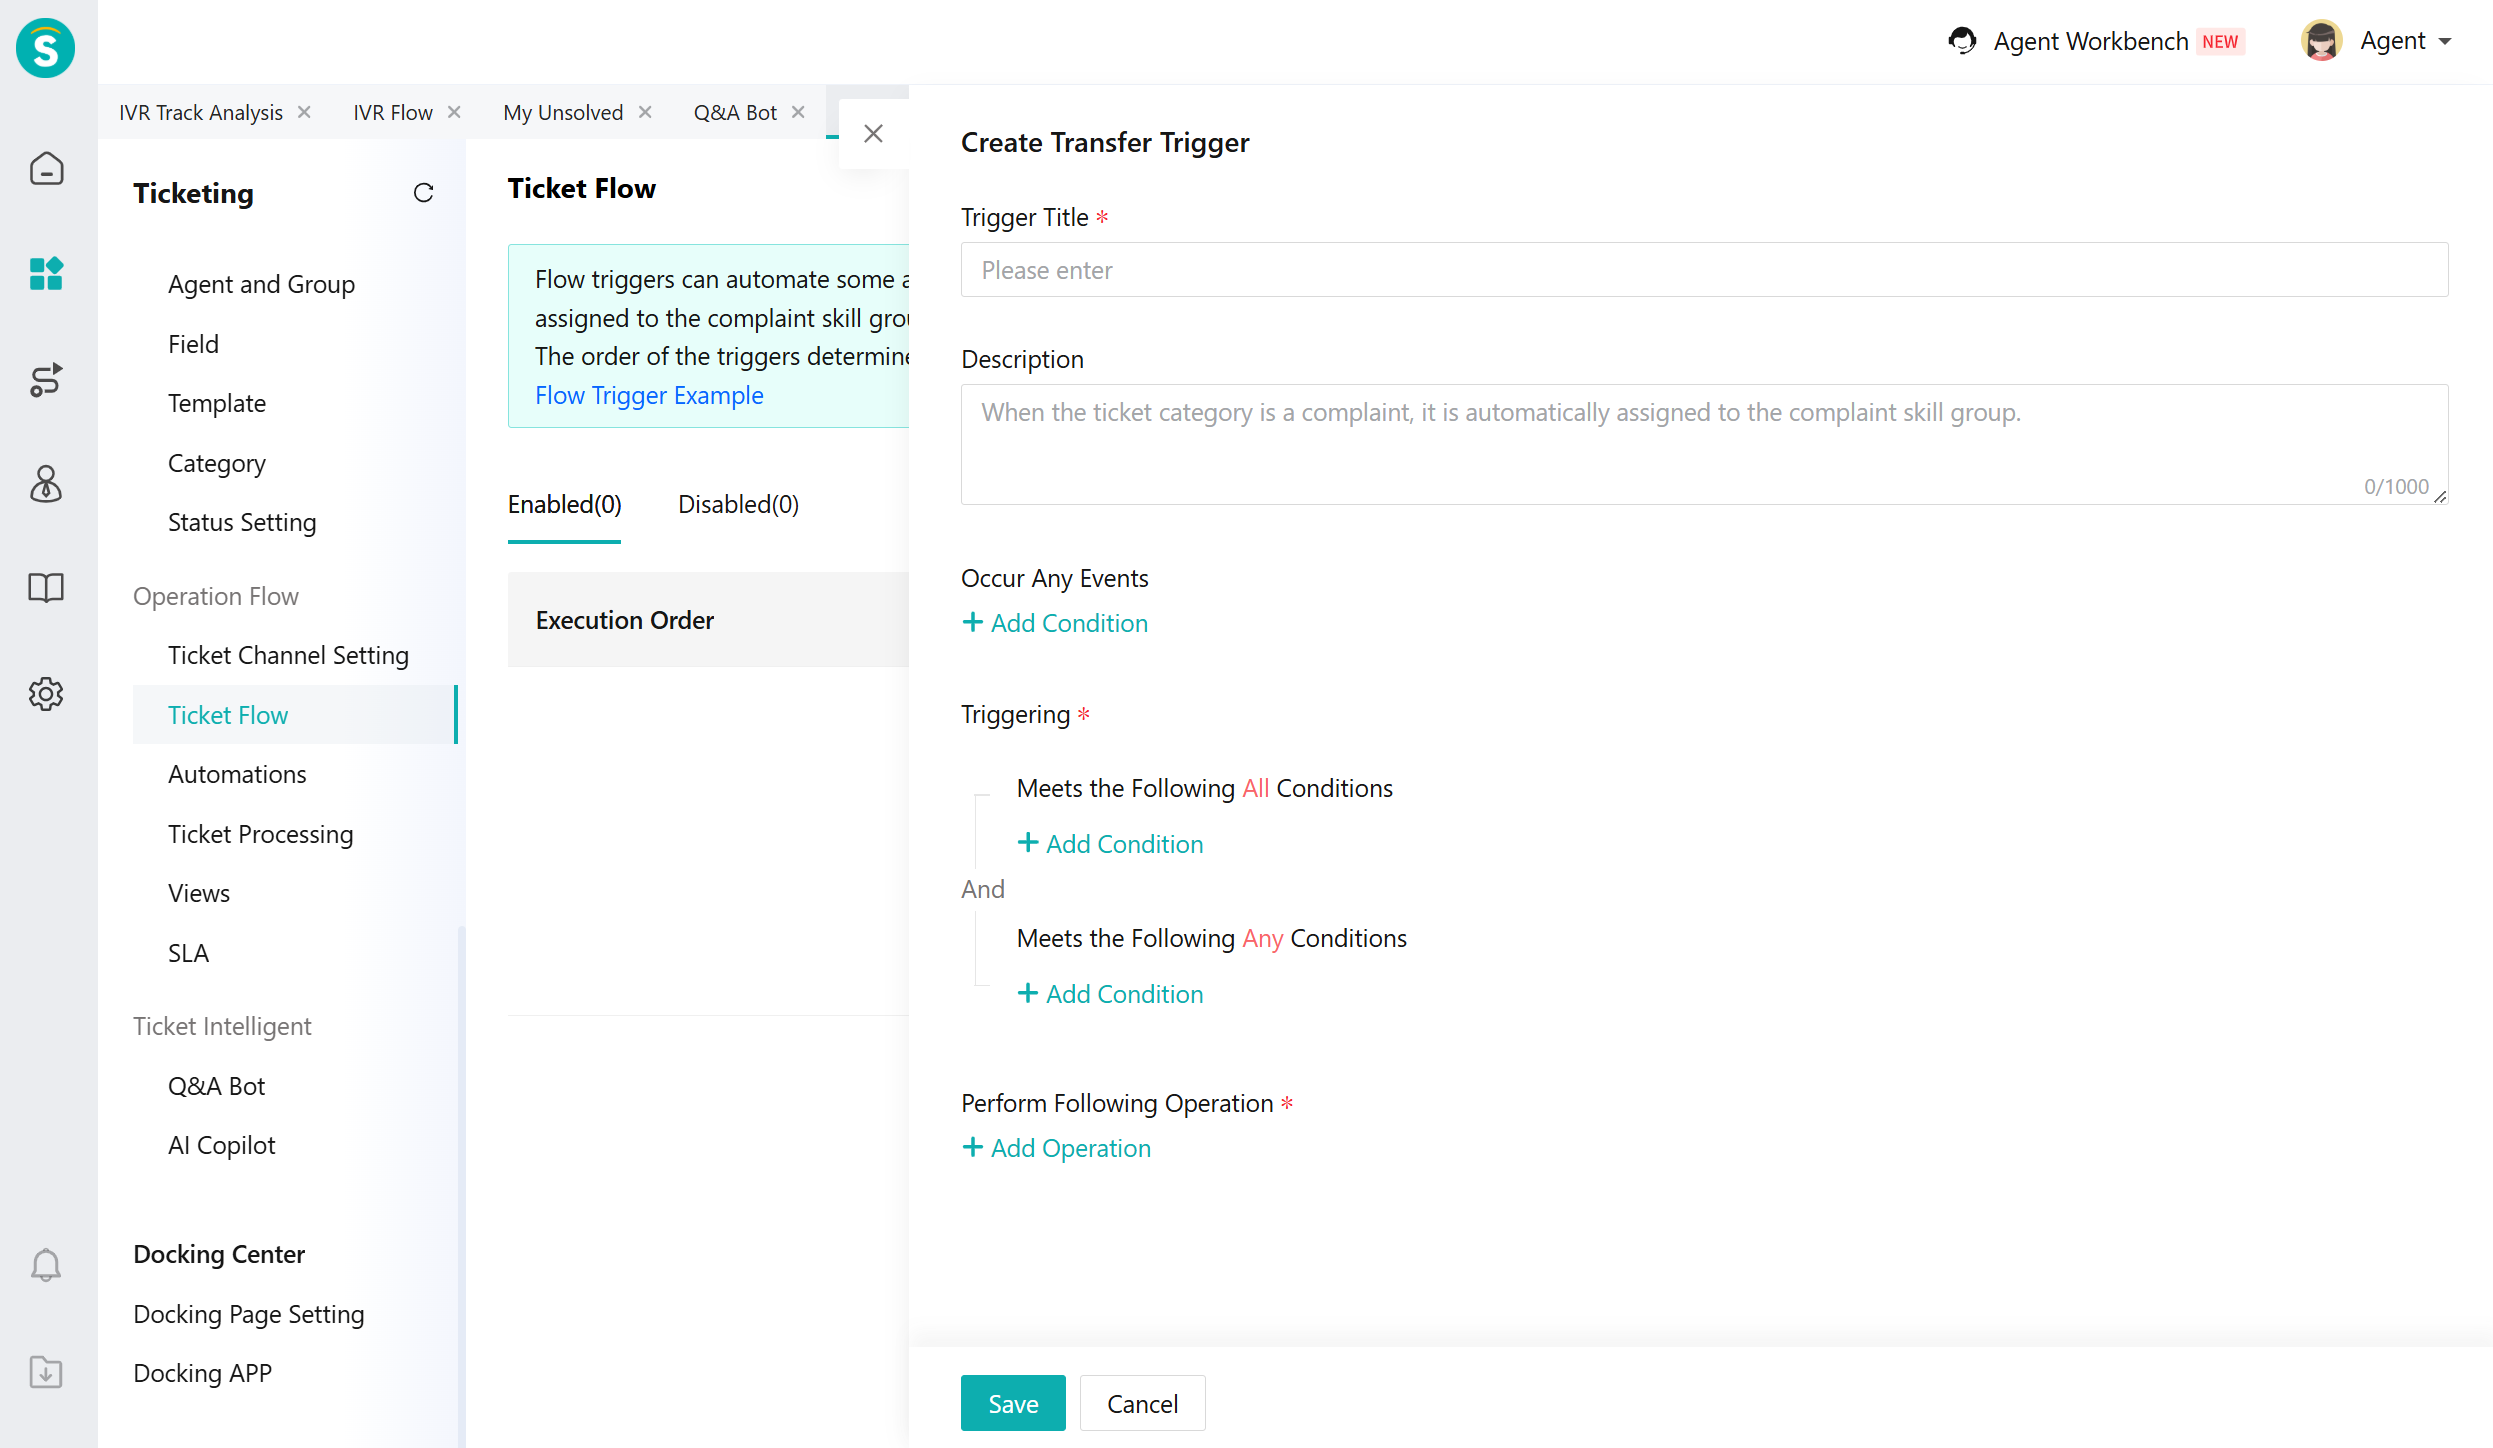
- Deploy AI Agent to the ticketing
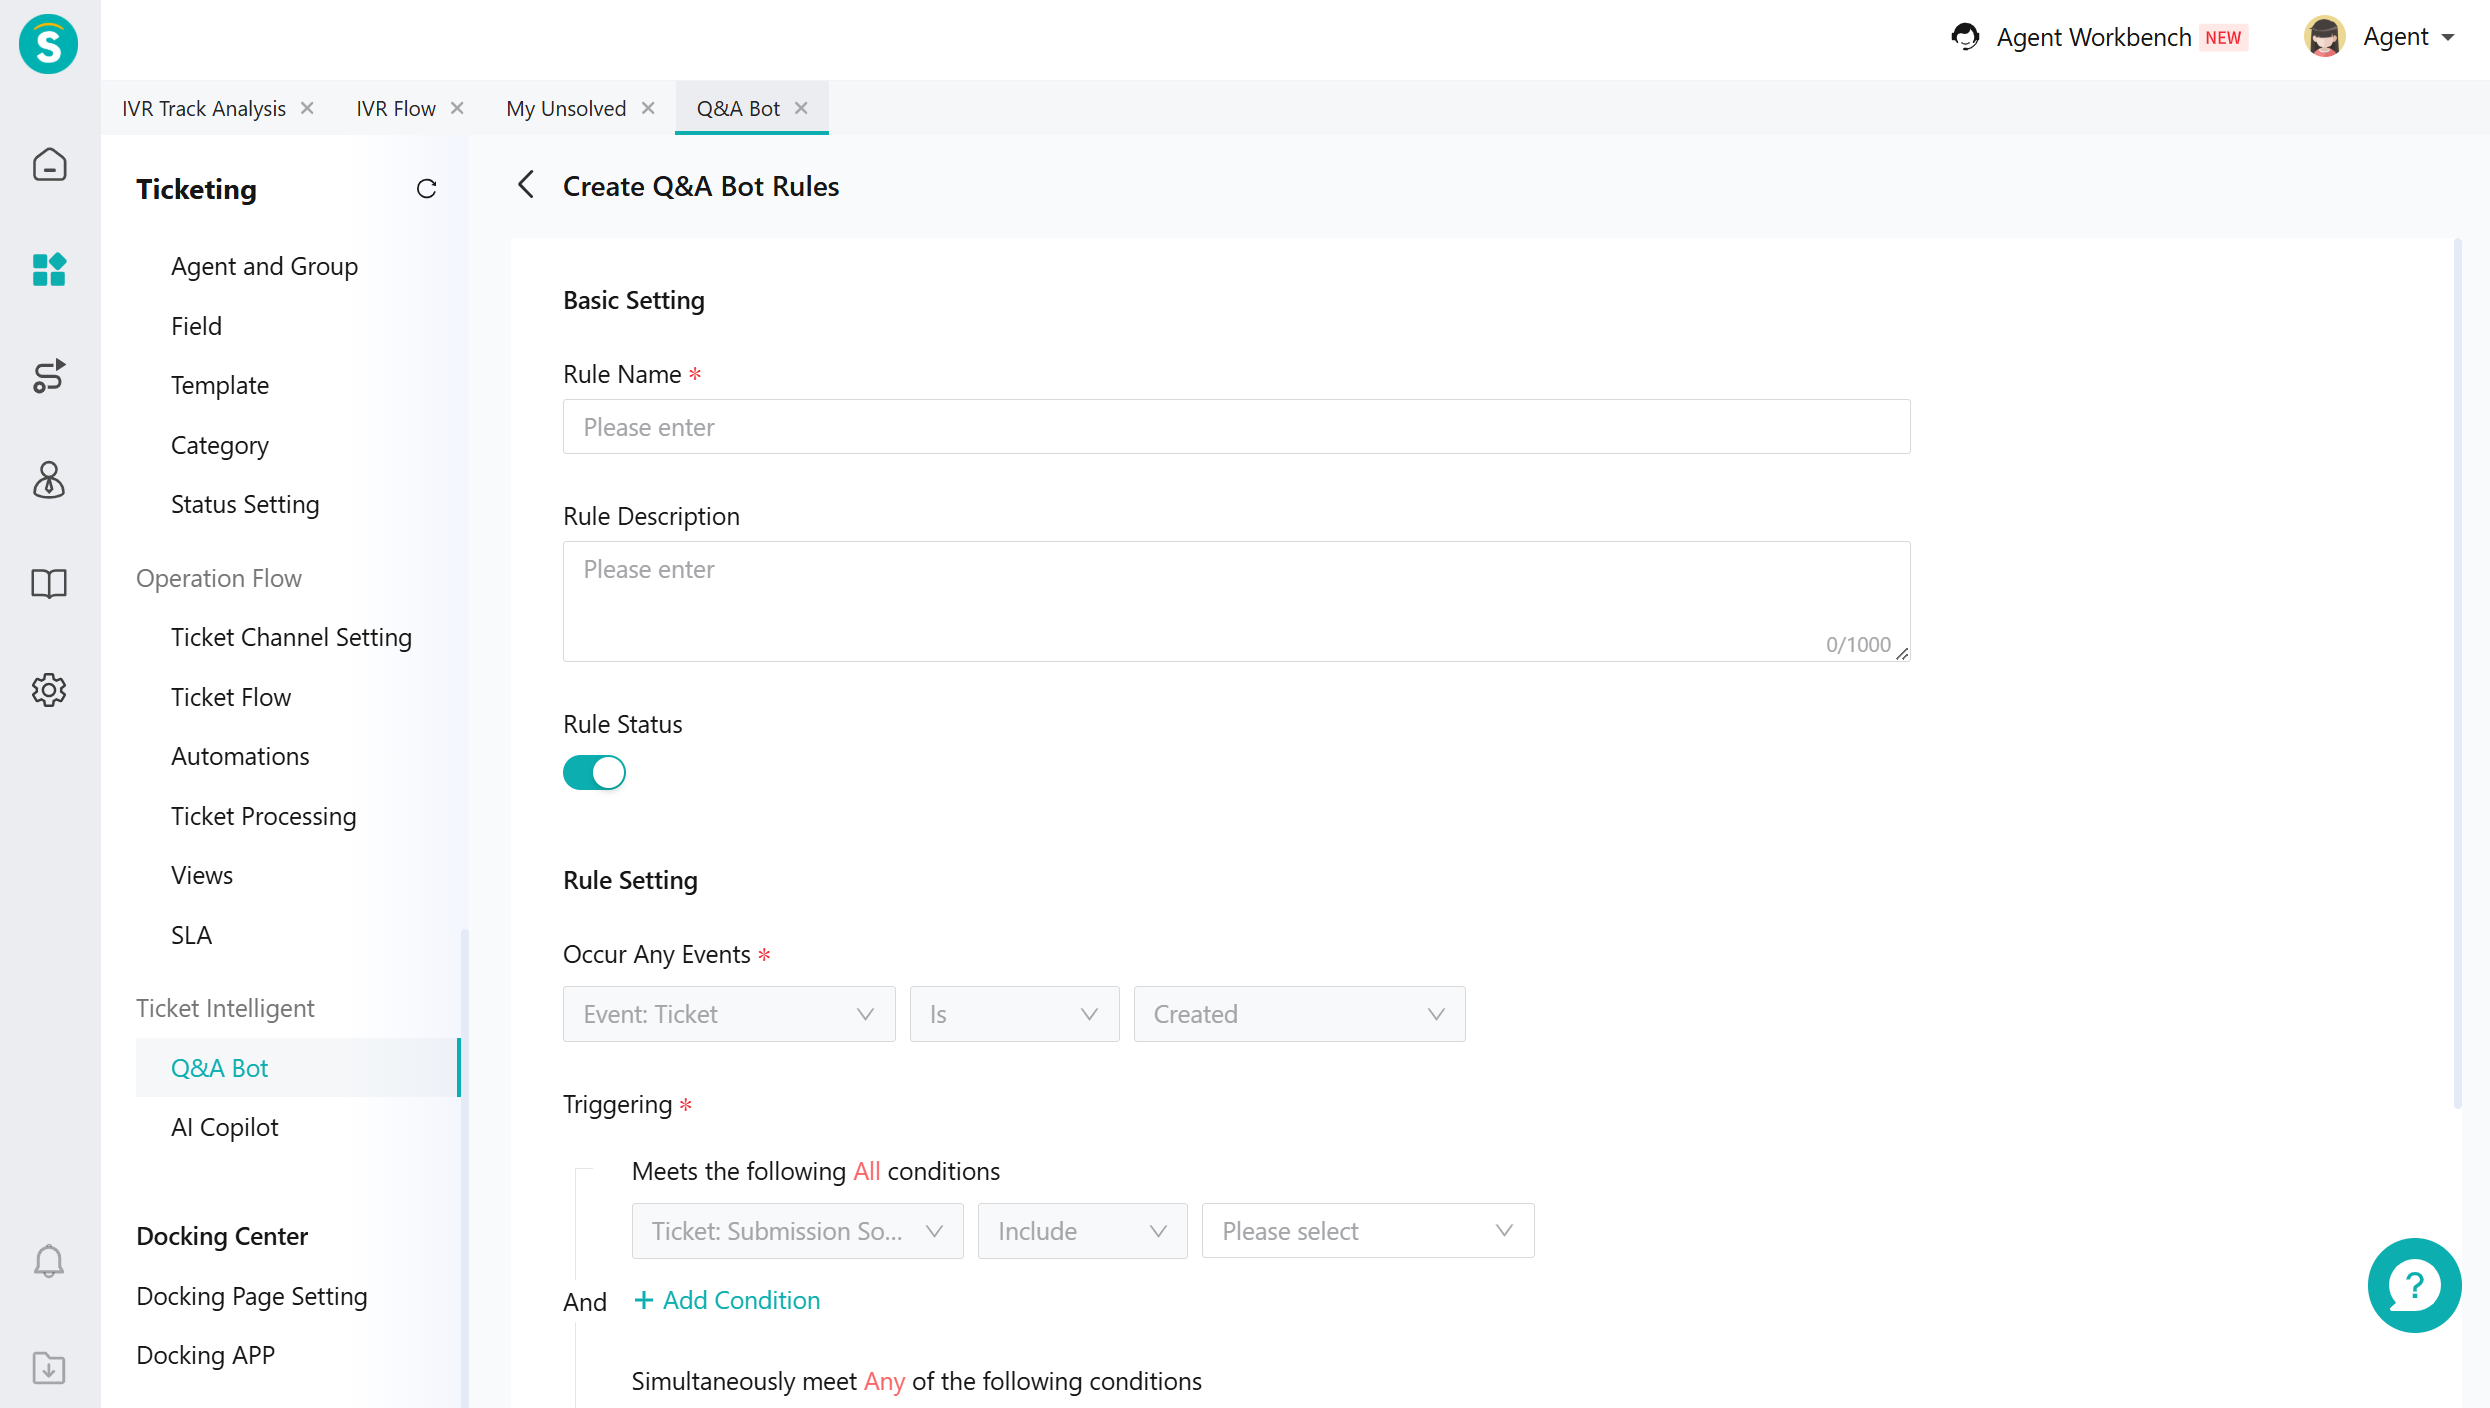
a.In [Ticketing - Ticket Intelligent - Q&A Bot - Creat Q&A Bot Rules], you can configure tickets that can be handled by AI Agent.
b.In [Ticketing - Operation Flow - Ticket Flow], set the skill group or agent to handle the transfer from the AI Agent to human support.
# ● AI Agent Chat Example in Live Chat
The AI Agent will chat based on the knowledge base and task workflow you have configured.