Ticket Filter Setting Guide
# Ticket Filter Setting Guide
——Customize the ticket list menu exclusive to enterprises or individuals
# Role of Ticket Filter Setting
The ticket filter can automatically filter tickets according to the filter conditions and the user's data permissions. The Admin can configure a public filter, and the user can configure a personal filter. Through the combination of the two kinds of filters, the personalized ticket list menu on the left side for each agent can be realized.
# Preparation
● Create a ticket agent account and a ticket skill group. The public filters can be set by group or for specific agent. Please set agent and group in advance to facilitate the available range setting of filters.
Related article: Agent and Group Guide
● Create custom fields, ticket categories, ticket templates, submission templates or other ticket related attribute contents to help you understand the filter conditions of ticket filters.
● Create and process several tickets as test objects of ticket filters.
# Public Filter Management
The public filter is a filter added by the admin, and the filter added by the admin is public filter. It can be available to all agents or only to specific skill groups or agents. Each enterprise can add up to 100 public filters.
# ● Create and Edit Filter
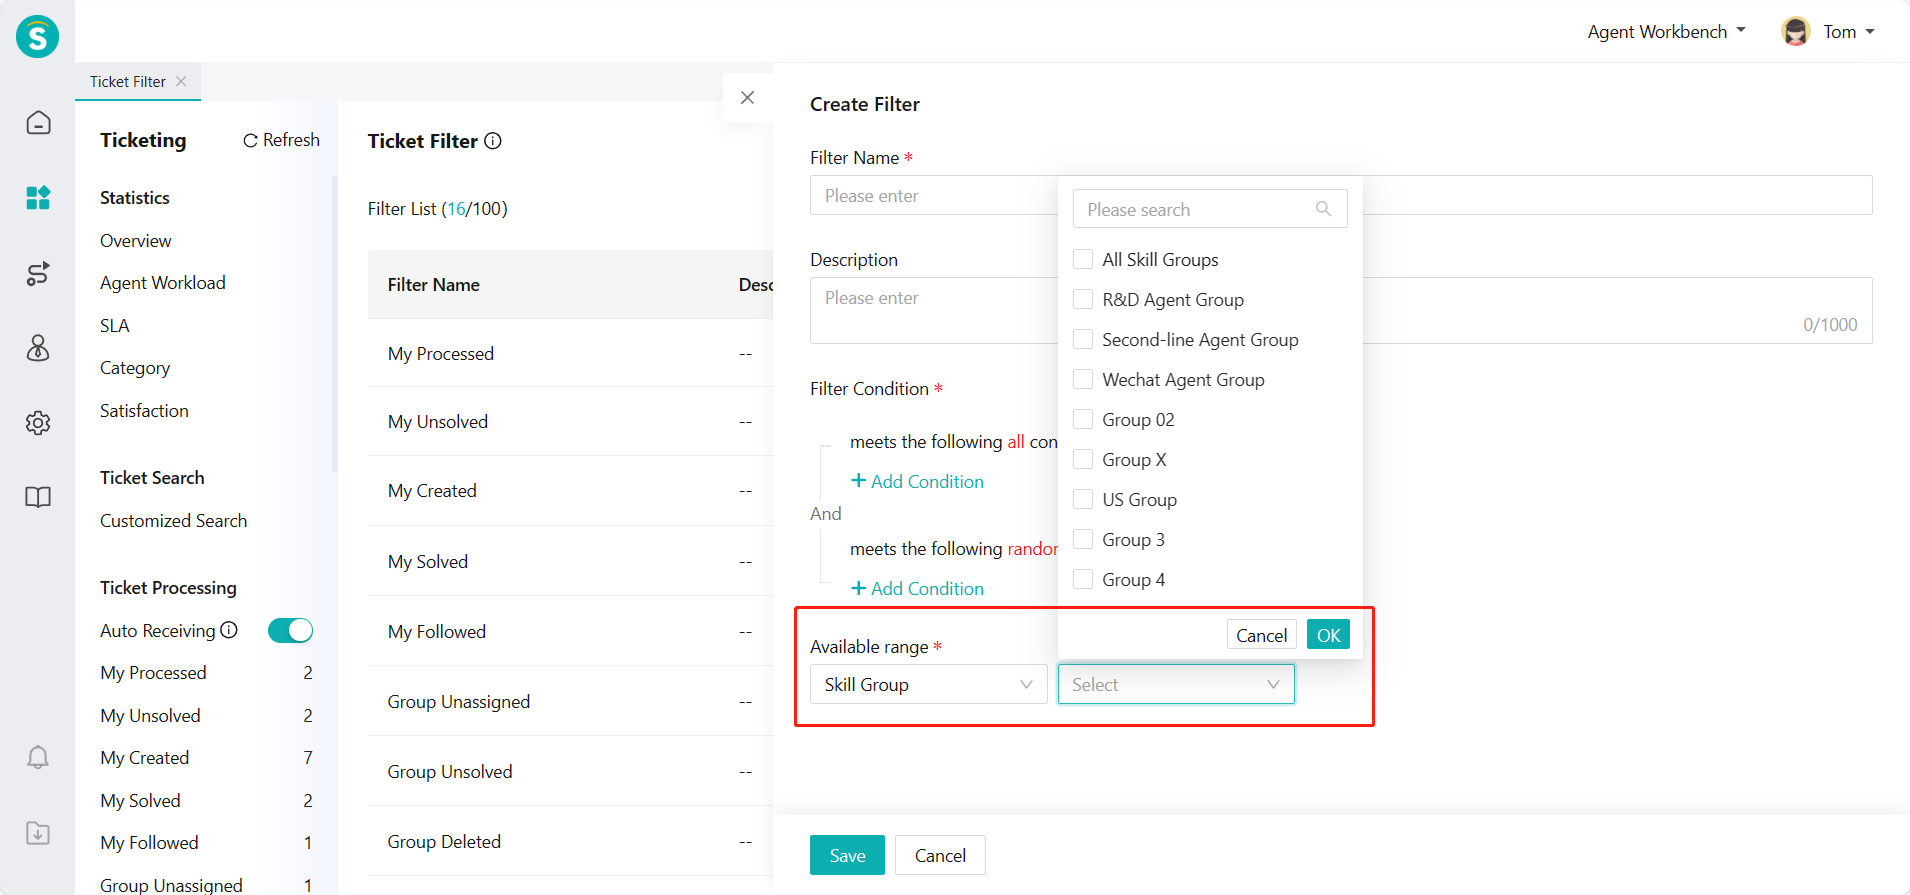
Click【+Create】, fill in the title and description, add one or more filter conditions, and set the available range on the Ticket Center > Setting > Ticket Filter Setting page to complete the setting of a filter.
# ● Available Range
The available range of the public filter refers to which agents can see and use the filter. Admin can set the available range of the filter according to the skill group or the designated agent.
# ● Enable/Disable Filter
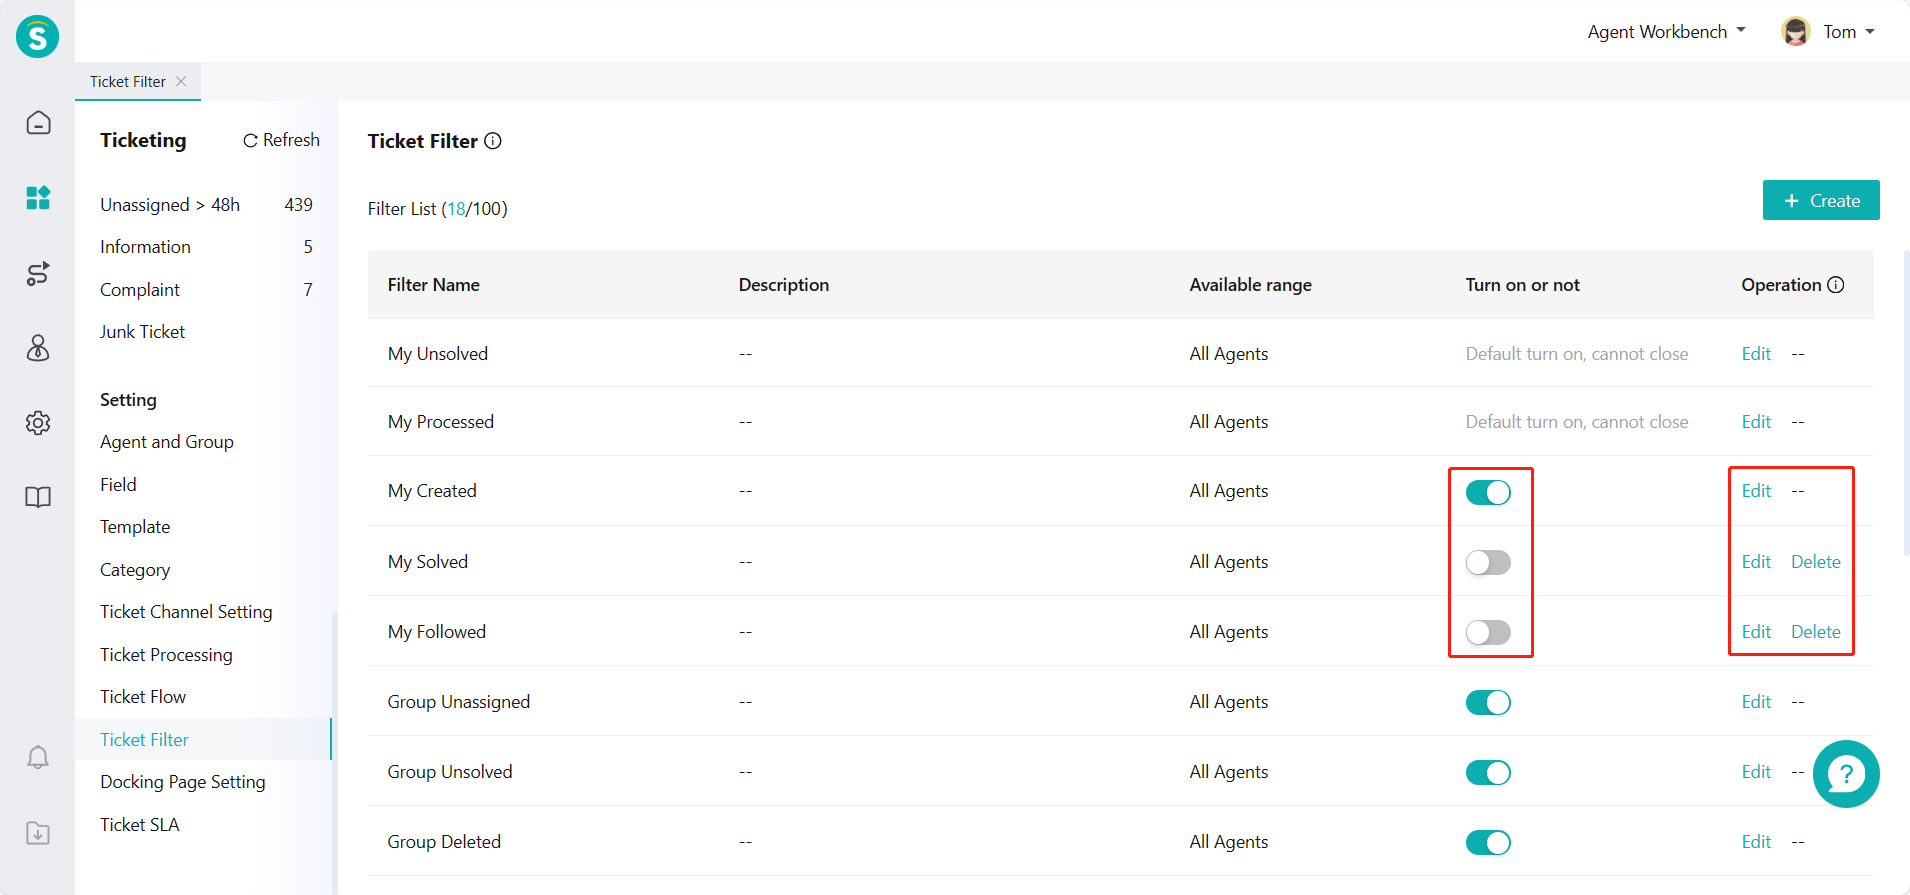
The filter is enabled by default after being added. If you disable the filter, the agents within the available range will not be able to view and use the filter. The filter can be deleted after being disabled, but the deleted filter cannot be recovered. Please be careful.
# ● Relation of Filter Conditions
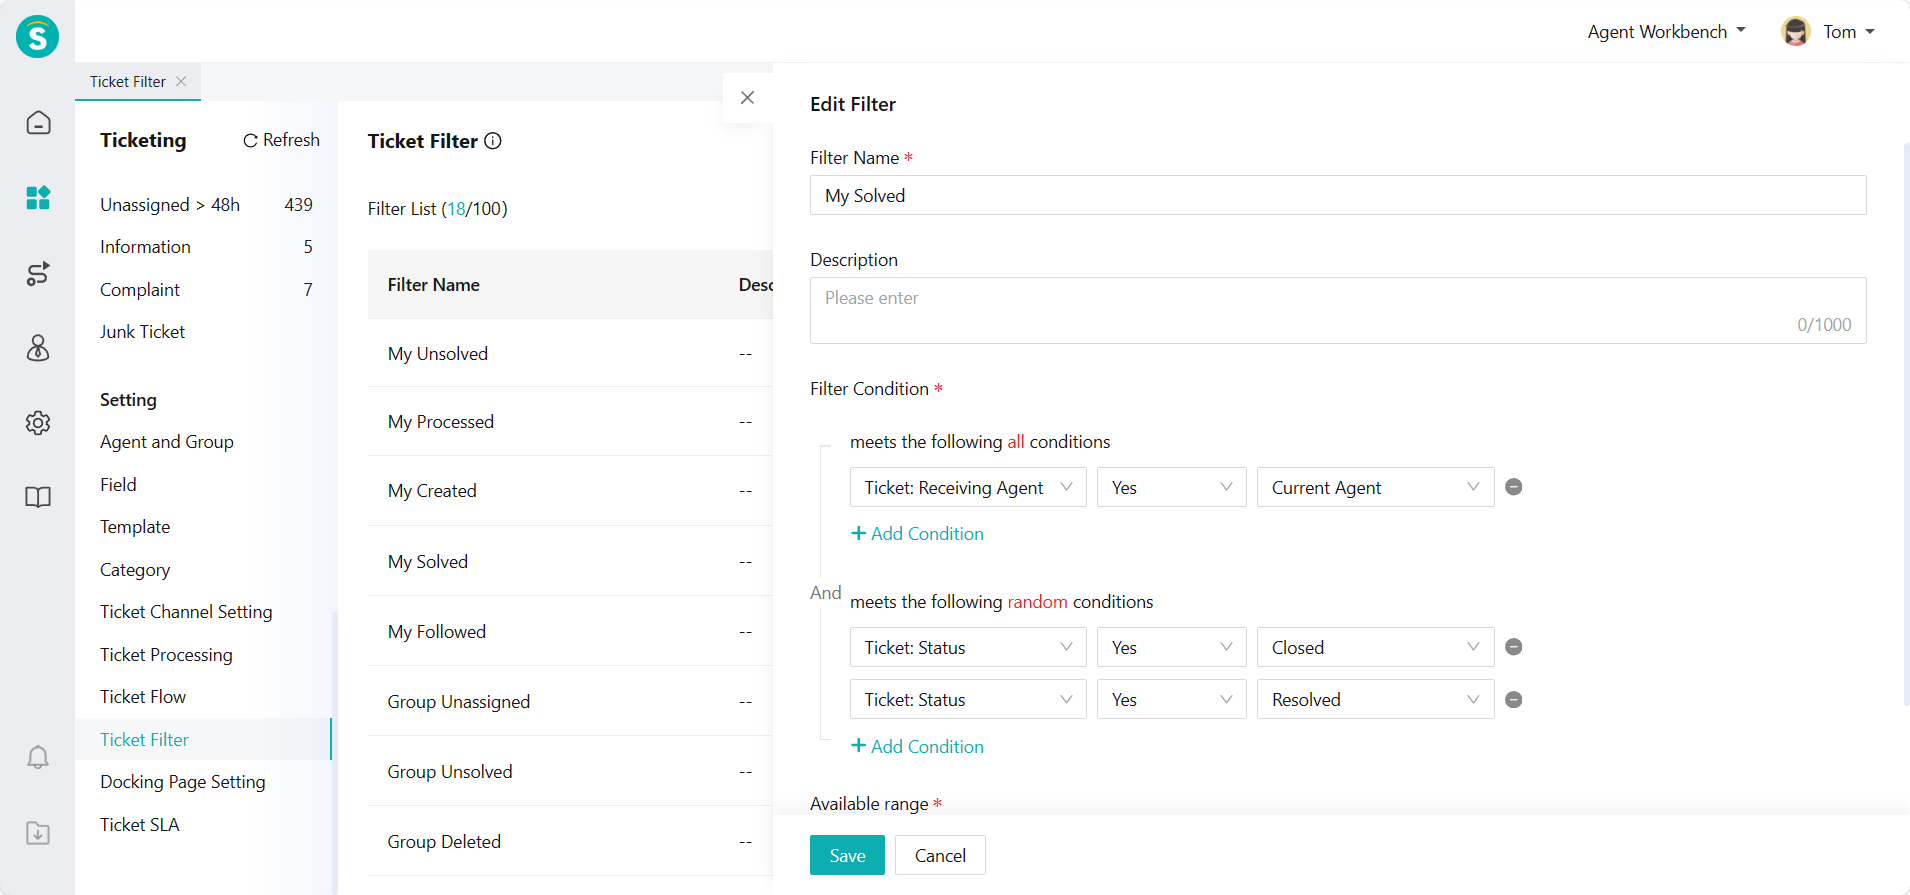
When you add multiple filter conditions, the ticket can be displayed by the filter only if it meets each of the【All Conditions】 you add and at least one of the【Any Conditions】 you add. In addition to the filter conditions set by the filter, the data permission of each agent to view the ticket will also affect the results filtered. The agent cannot view the ticket beyond the data permission through the filter.
# Personal Filter Management
Personal filters are filters added by users on the ticket list page. They are only available to users and can be added at most 50 for each user.
# ● Create and Edit Filter
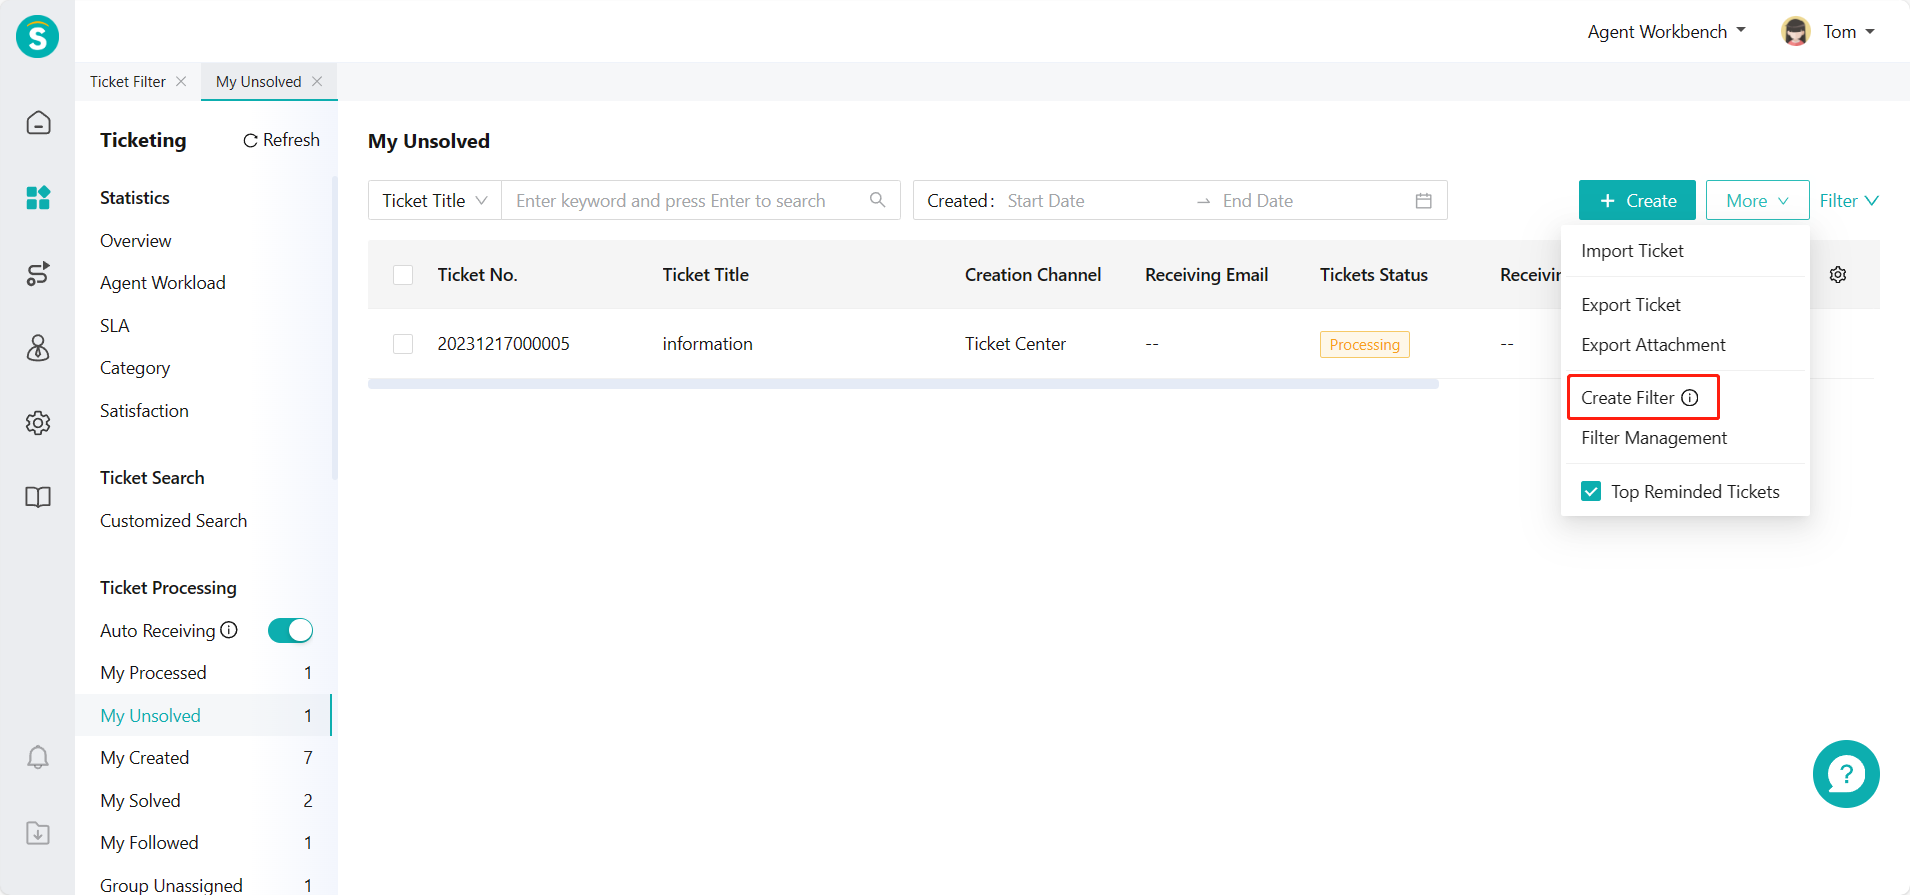
Click【More】and【Create Filter】, fill in the title and description, add one or more filter conditions, and set the available range on the Ticket Center > Ticket Processing > Any Ticket List page to complete the setting of a personal trigger. You can also edit the personal filters you have added through filter management. The filter conditions of personal filters are the same as those of public filters. Please refer to the public filter section. The available range of personal filters is the operator by default.
# ● Filter Sorting and Hiding
Click【More】and【Filter Management】 on the Ticket Center > Ticket Processing > Any Ticket List page to manage the public filters available to current agent and personal filters added and sort the filters. After the sorting is saved, you can refresh the page, and the filter list of ticket processing on the left side will be updated to the latest sequence.
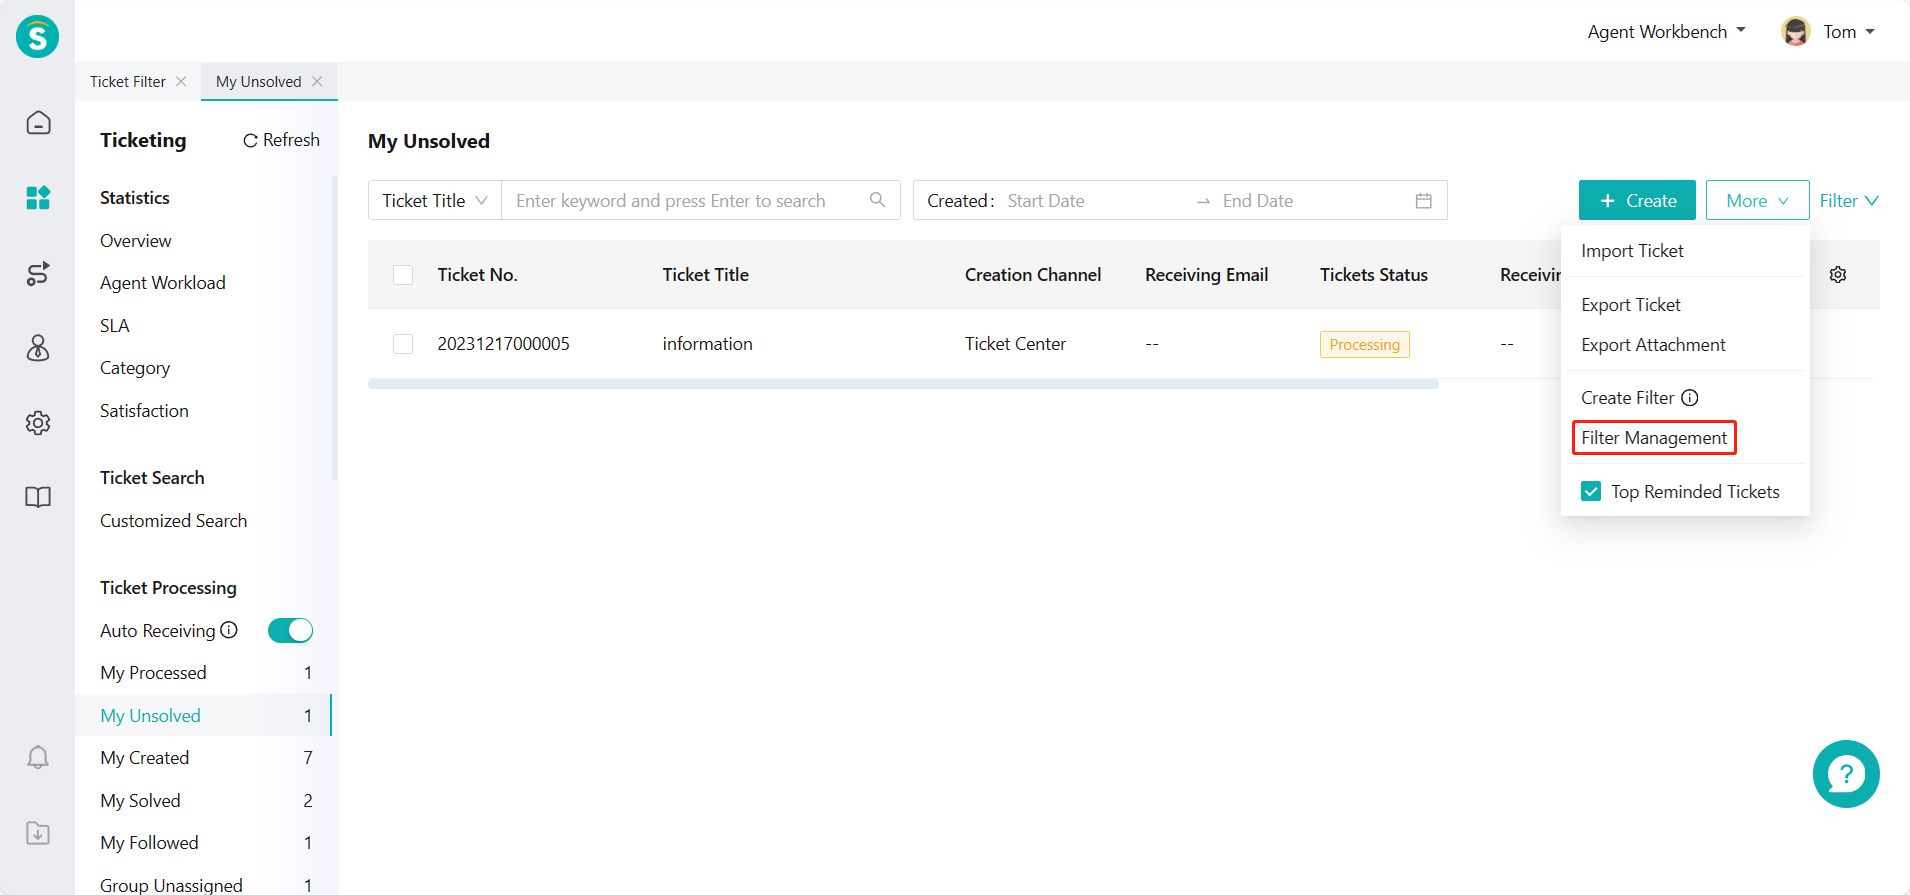
In the filter management, you can hide the available filter and then refresh the page, and the filter list of ticket processing on the left side will be updated to the latest available filter. The personal filter can also be deleted in filter management, and cannot be retrieved after deletion. Please be careful.
